A Microsoft Guy does Linux And Drupal - Part 2
High Level Goals For This Post
| Purpose | To install Drupal and all related supporting technologies |
| Part 1 Post - Microsoft Guy does Linux and Drupal | https://blogs.msdn.com/b/brunoterkaly/archive/2012/06/19/linux-on-azure-up-and-running-in-a-few-minutes.aspx |
Table of Contents
Exercise 1: Installing Drupal Requirements With Yast
Exercise 2: Installing Web and LAMP Server
Exercise 3: Installing PHP/Drupal Graphics Modules
Exercise 4: Installing Apache and MySQL
Exercise 5: Completing the MySQL Installation
Exercise 6: Downloading and Installing Drupal
Exercise 7: Configuring MySQL
Exercise 8: Finishing the Drupal Installation
Exercise 9: Configuring Drupal Email, Database Username, Passwords
Exercise 10: Drupal – Up and Running
|
|
Exercise 1: Installing Drupal Requirements With Yast
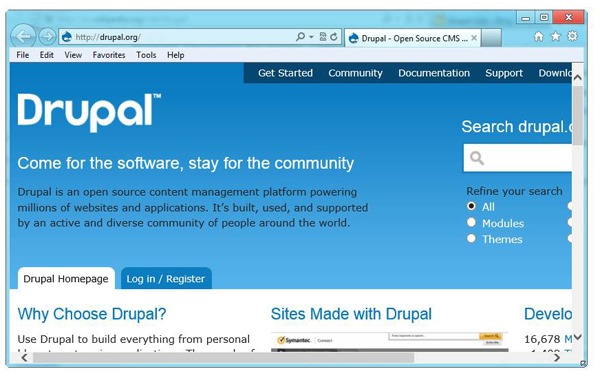
Part 1: What is Drupal and how is it used?
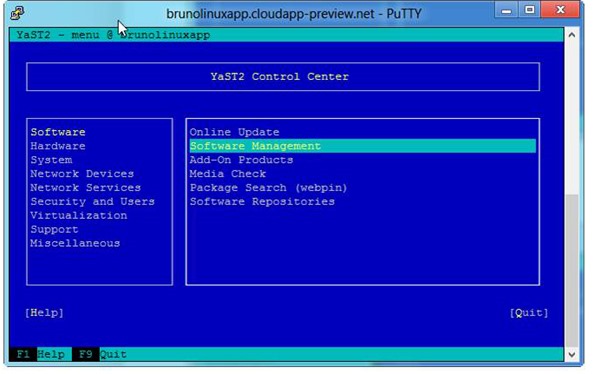
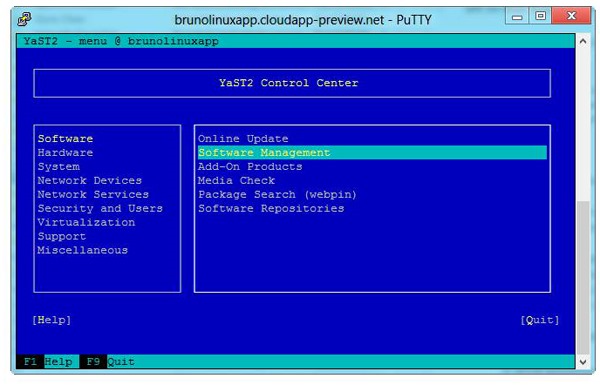
Part 2: Starting YAST2 – The Swiss Army Knife of Installers
Part 3: Using Software Management
What is Drupal and how is it used?
- Drupal is a free and open-source content management system (CMS) and content management framework (CMF) written in PHP. It is used as a back-end system for at least 1.5% percent of all websites worldwide
- It is used for personal blogs to corporate, political, and government sites including whitehouse.gov and data.gov.uk.
- It is also used for knowledge management and business collaboration.
Starting YAST2 – The Swiss Army Knife of Installers
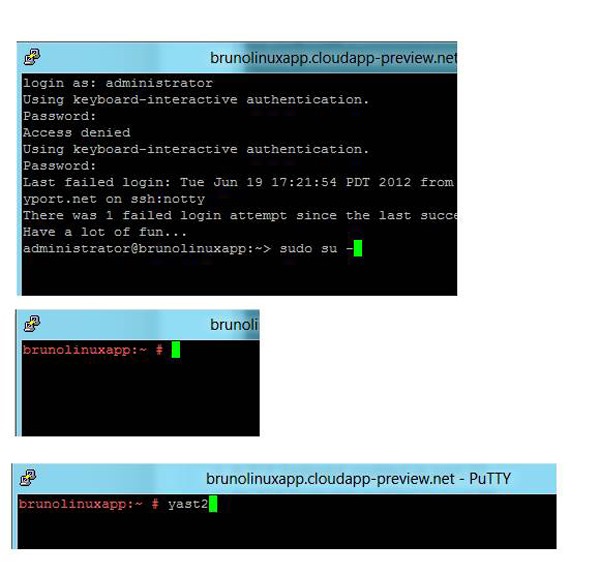
Type in this command
| Type this into Putty | |
| 1 2 | yast2 |
- The next screen will install Drupal on top of the openSUSE VM we setup in an earlier blog post.
- The needed post you should consult is:
- This is an OpenSUSE / Linux OS running in Windows Azure (MS Cloud)
- It took very little time to accomplish this
- The next step is to use YAST2
- YaST (Yet another Setup Tool) is a setup and configuration tool that is featured in the openSUSE Linux distribution
- It features tools that can configure many aspects of the system
- We are going to use it prepare our openSUSE to run Drupal
- We will need to install
- A web server
- Apache & LAMP
- PHP 5
- HTTP Server
- Firewall Settings
- MySQL
- A web server
Starting Software Management
- YAST is very tedious. And in my opinion it is confusing.
- I recommend the Online update you see above before doing anything.
- Using the arrow keys from your keyboard, select Software, press the right arrow and select Software Management and hit ENTER.
Exercise 2: Installing Web and LAMP Server
Part 1: Startup Screen for Software Manager
Part 2: The Patterns Menu – A key part of Yast
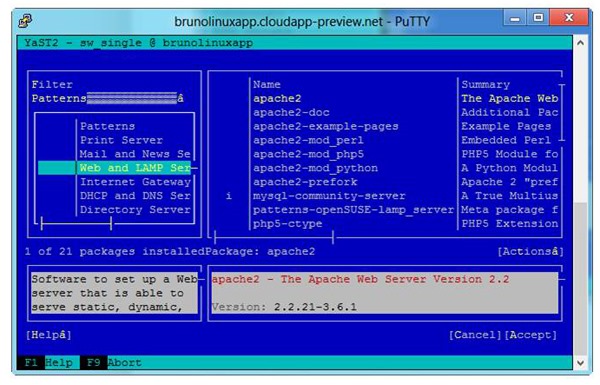
Part 3: Installing Web and Lamp Server
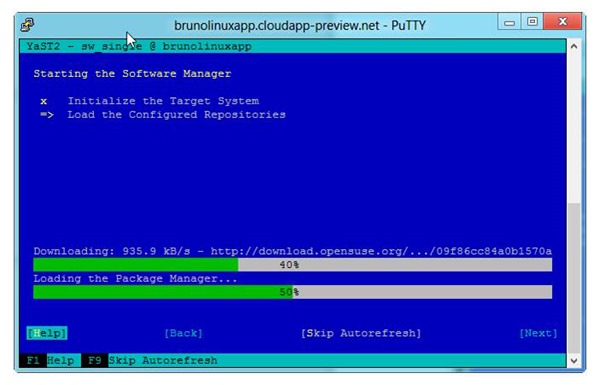
Startup screen for Software Manager
- The system is preparing to change configuration of the openSUSE VM.
- To get the screen above, select Software Management. You may get some warnings about missing components. Simply ALT-A to accept recommended installations.
- You will end up choosing Software Management a second time.
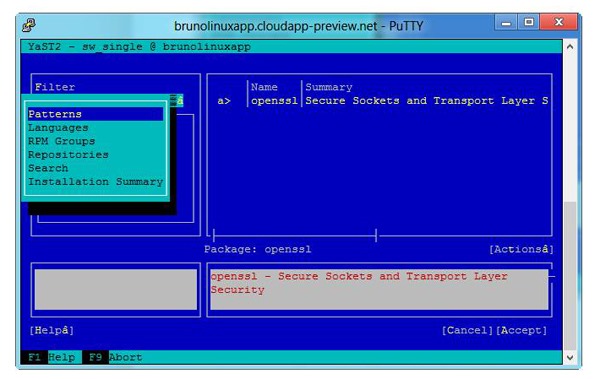
The Patterns Menu – A key part of Yast
- Select Software Management
- Press ALT+F to select Filter. A text menu will appear. Select Patterns.
- Prepare to search for Web and Lamp Server
- Scroll down until you see Web and Lamp Server.
- You will just hit ENTER.
- Then you will hit ALT-A to accept.
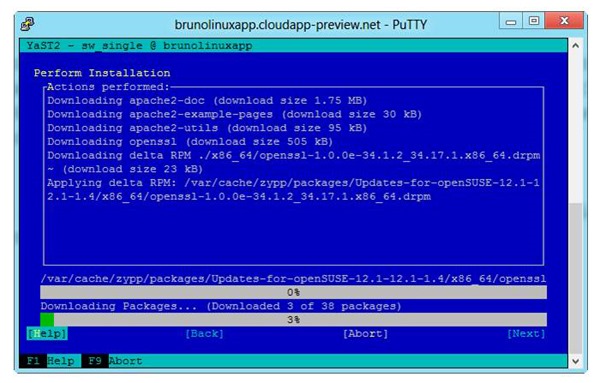
- It will take 3 – 4 minutes to install the components after a brief download process.
Installing Web and LAMP Server
- As stated previously, you will scroll down the options until you find Web and LAMP Server. Press ENTER to select it and press ALT+A to start the installation. Press ENTER when prompted for confirmation.
The Wait Screen for the Web and LAMP Server
- This will take a few moments.
Exercise 3: Installing PHP/Drupal Graphics Modules
Part 1: Re-entering the Software Management Menu
Part 2: Understanding the PHP5-MD module
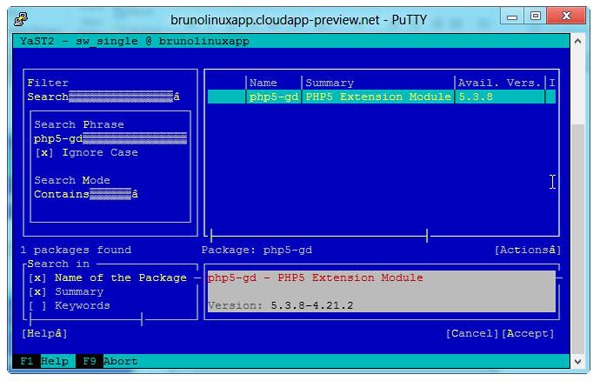
Part 3: Initiating the install for php5-gd
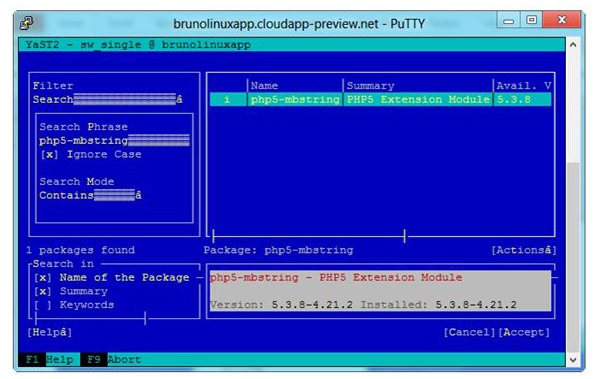
Part 4: Installing php5-mbstring
Re-entering the Software Management Menu
- Return back to Software Management
- Hit ENTER
- We will install support for graphics.
Understanding the PHP5-MD module
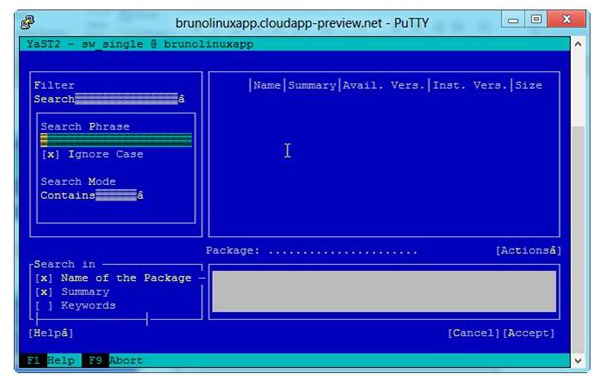
- Php5-md needs to be installed to support graphics.
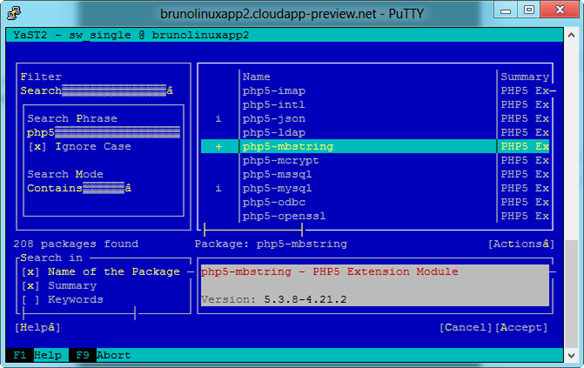
- You can see that the sub-window on the right will allow you to choose php5-mbstring and php5-gd and then hit ACCEPT.
- This module offers several new capabilities:
- You can create and manipulate image files in a variety of different image formats, including GIF, PNG, JPEG, WBMP, and XPM.
- PHP can output image streams directly to a browser.
- You can use the image functions in PHP to get the size of JPEG, GIF, PNG, SWF, TIFF and JPEG2000 images.
Initiating the install for php5-gd
- Repeat this process for php5-mbstring. That means you will hit ALT-F and scroll and ENTER and ALT-A as explained above.
- mbstring provides multibyte specific string functions that help you deal with multibyte encodings in PHP.
- In addition to that, mbstring handles character encoding conversion between the possible encoding pairs.
- mbstring is designed to handle Unicode-based encodings such as UTF-8 and UCS-2 and many single-byte encodings for convenience
Installing php5-mbstring
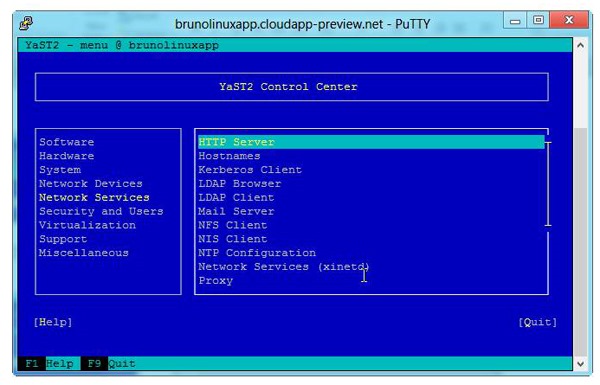
- In the main menu, press the left arrow key and select Network Services. Press the right arrow key, select HTTP Server and press ENTER.
- Http server relates to the Apache HTTP Server
Exercise 4: Installing Apache and MySQL
Part 1: Enabling the Apache HTTP Server
Part 2: ”Enabling” the HTTP Service
Part 3: Installing MySQL
Enabling the Apache HTTP Server
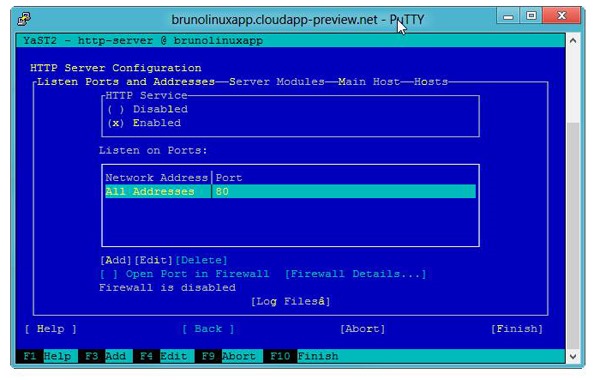
- Notice we are enabling the http server. Make sure to select Alt-E to enable http server.
”Enabling” the HTTP Service
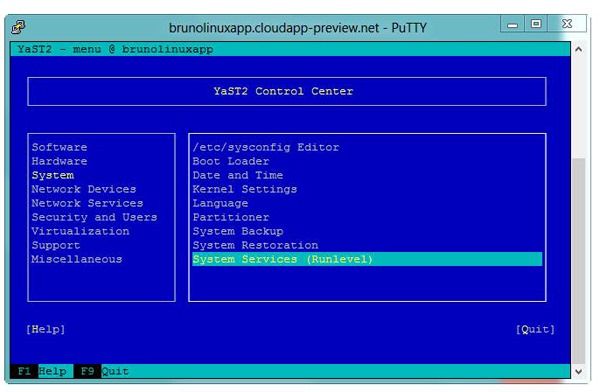
- Back to the main menu, press the left arrow key and select System from the menu options. Press the right arrow and select System Services (Runlevel) and press ENTER.
- Runlevel defines the state of the machine after boot.
- For example, runlevel 4 might be multi-user, GUI, no-server on one distribution, and nothing on another.
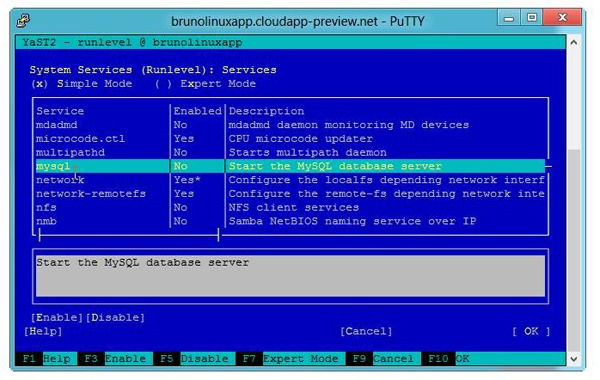
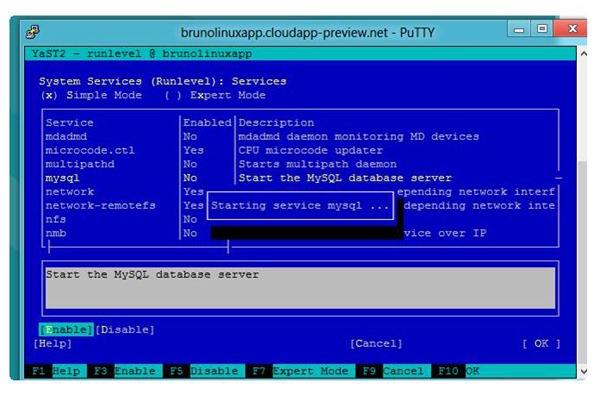
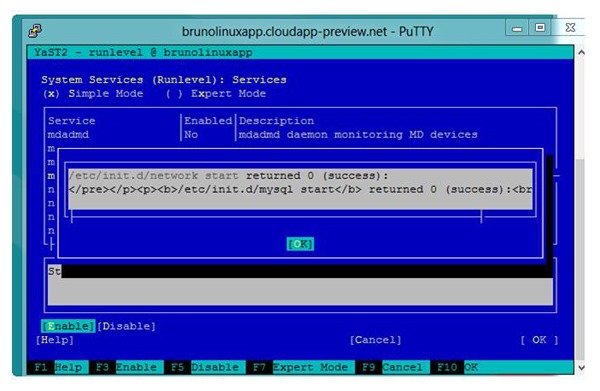
- After hitting ENTER, scroll down until you find mysql and press ALT+E to enable the service. Wait until the service is running. Press F10 to save the settings.
- Almost everyone knows that MySQL is an open source relational database management system (RDBMS) that runs as a server providing multi-user access to a number of databases.
Exercise 5: Installing MySQL
Part 1: Starting the MySQL Installation
Part 2: Viewing Install Screen 1
Part 3: Viewing Install Screen 2
Viewing the first installation screen - MySQL
- It may take a few minutes.
Viewing the second installation screen - MySQL
- We are done with YAST. Thank goodness.
- Press ALT+Q to exit YaST2.
Viewing the third installation screen - MySQL
Exercise 6: Downloading and Installing Drupal
Part 1: Creating a Drupal Folder
Part 2: Unzipping/Untaring the Drupal Code
Part 3: Viewing the Drupal Files
Creating A Drupal Folder
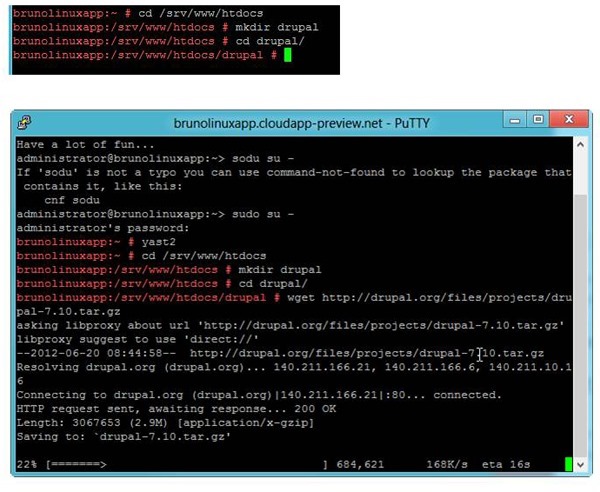
Issue the following commands to make a folder called drupal
Type in these commandsType these commands into Putty 1
2
3cd /srv/www/htdocs
mkdir drupal
cd drupal
Untaring the Drupal Code
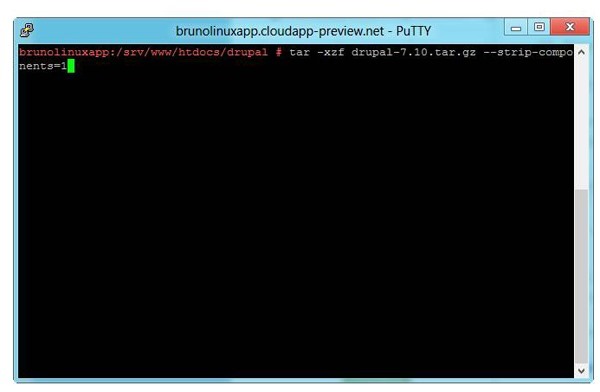
- Untar the compressed tar file with this command:
Type in this commandsThese commans will extract the tar file 1
2
3wget https://drupal.org/files/projects/drupal-7.10.tar.gz
tar -xzf drupal-7.10.tar.gz --strip-components=1
- Untar the compressed tar file with this command:
![lahxjo2d[3] lahxjo2d[3]](https://msdntnarchive.blob.core.windows.net/media/MSDNBlogsFS/prod.evol.blogs.msdn.com/CommunityServer.Blogs.Components.WeblogFiles/00/00/01/13/13/metablogapi/2541.lahxjo2d[3]_d390aafa-99b8-4e4b-8be2-6ea2ca15eeeb.jpg)
