Supporting Billions of entities/rows for Mobile – Android Series - Part 7–Migrating your Azure (Cloud RESTful Service) to be Hosted in a Microsoft Data Center
Past Posts in this series |
What this post is about |
We are getting closer to getting our Android client to connect up and read Azure Table data from a Microsoft data center. This post will take two parts:
|
Part 1 – Prepare our RESTful Service for Deployment – Getting the Access Keys |
The current Visual Studio project does not utilize storage in the cloud. It uses the local storage emulator instead. The reason is simple – it allows the developer to do all their development and testing locally, without being forced to deploy their application to the cloud while it is still being developed. The first thing we will need is our storage access keys. 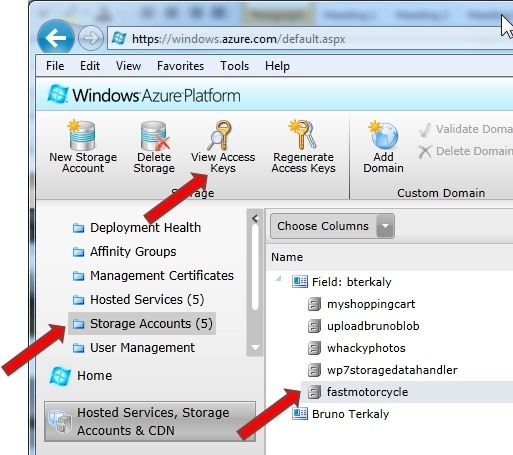 This access key will be placed into our project. Copy this key to the clipboard and prepare to import into our Visual Studio Project. This access key will be placed into our project. Copy this key to the clipboard and prepare to import into our Visual Studio Project. 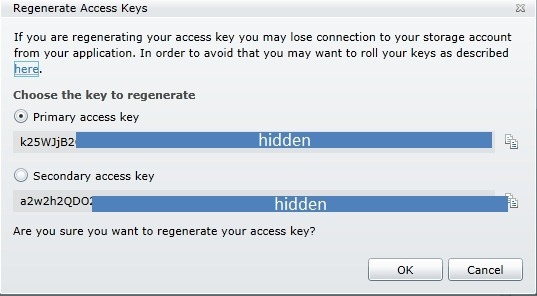 |
Part 1 – Prepare our RESTful Service for Deployment – Adding the Access Keys to Visual Studio |
This step is about notifying our FastMotorcycleService to 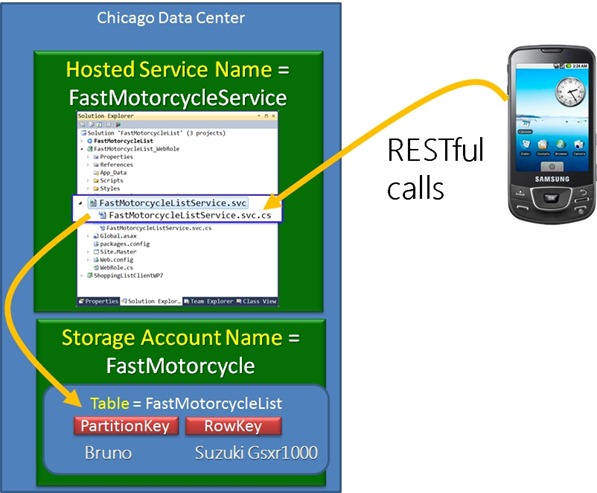 Highlight the web role and then right-mouse click. Click Properties. Highlight the web role and then right-mouse click. Click Properties. 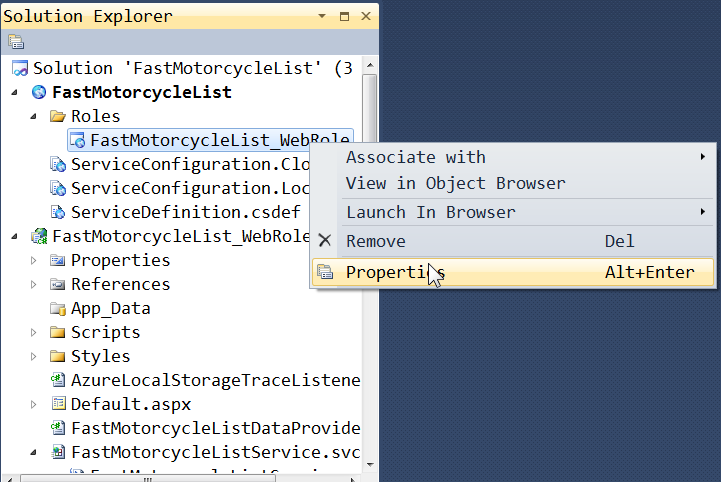 Click Settings, followed by the ellipsis (“…”). Click Settings, followed by the ellipsis (“…”). 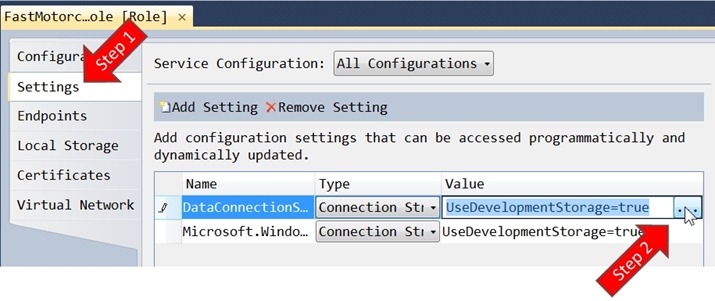 Enter in the Account name and Account key. Enter in the Account name and Account key. 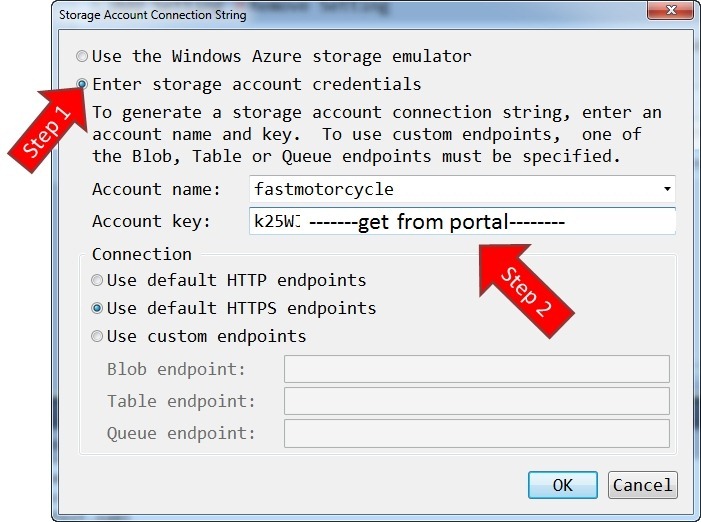 Do the same for the diagnostics connection string. Do the same for the diagnostics connection string.  We are now ready for deployment. We are now ready for deployment. |
Part 2 - We will deploy our RESTful service to the Hosted Service created in the last post. |
We will start by creating a deployment package from Visual Studio. Right mouse click and select Package. 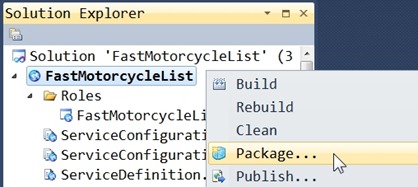 Verify the following dialog box as follows. Click Package. Verify the following dialog box as follows. Click Package. 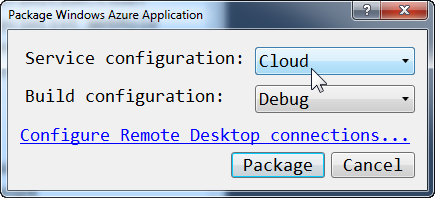 The following window will pop up. Notice that we have both a configuration file and a package file. Both of these will now be uploaded to the portal. The following window will pop up. Notice that we have both a configuration file and a package file. Both of these will now be uploaded to the portal.  Return back to the Windows Azure Portal. Select Hosted services, followed by FastMotorcycleService, followed by New Production Deployment. Return back to the Windows Azure Portal. Select Hosted services, followed by FastMotorcycleService, followed by New Production Deployment. 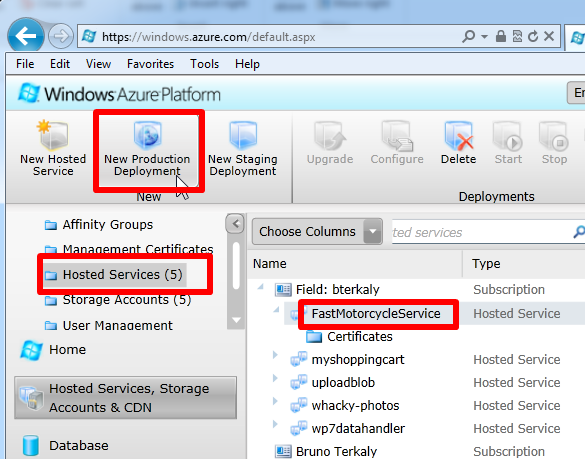 At this point we will provide a Deployment name, a package location (created in a previous step), and a configuration file (created in a previous step). At this point we will provide a Deployment name, a package location (created in a previous step), and a configuration file (created in a previous step). 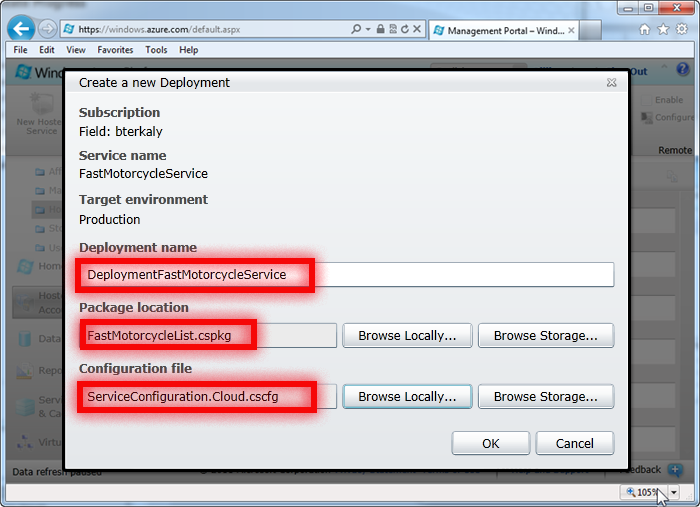 You may get a warning about having only 1 deployment instance. We can scale to more instances later. It is very easy to have 2, 3 and more instances. We can just go back to the web role properties and change the Instance Count. You may get a warning about having only 1 deployment instance. We can scale to more instances later. It is very easy to have 2, 3 and more instances. We can just go back to the web role properties and change the Instance Count. 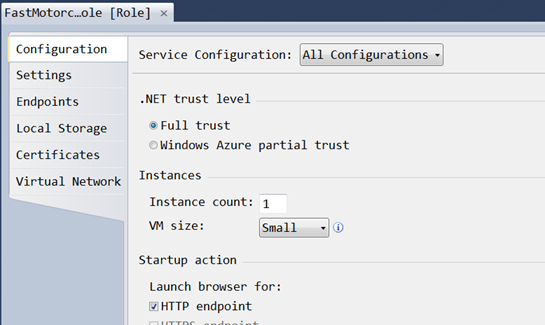 It may take a few minutes for the deployment to complete. You may see various status messages at the portal. It may take a few minutes for the deployment to complete. You may see various status messages at the portal. 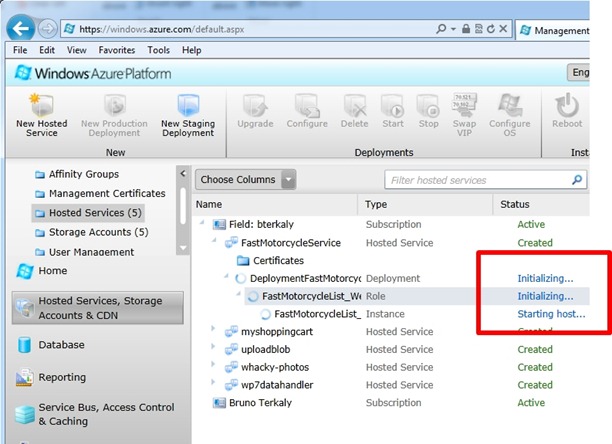 |
Part 3 - We will test our deployment before actually connecting to it from a client application |
After a few minutes of waiting you can see that the portal indicates our Azure Instance is up and running. You can see the Ready status. You can also notice the DNS Name where our RESTful service resides. 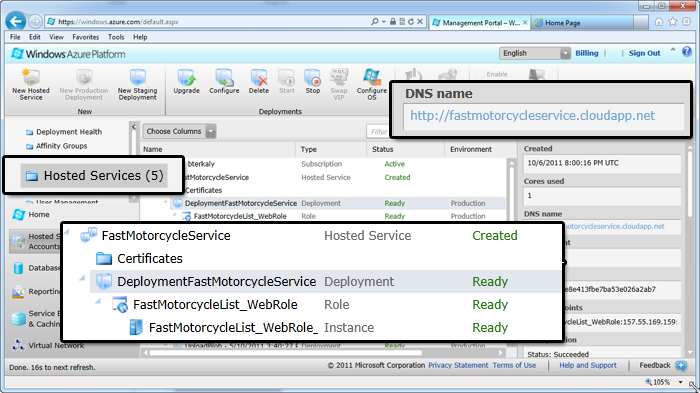 If we navigate there, we can see that service is up and running. If we navigate there, we can see that service is up and running. 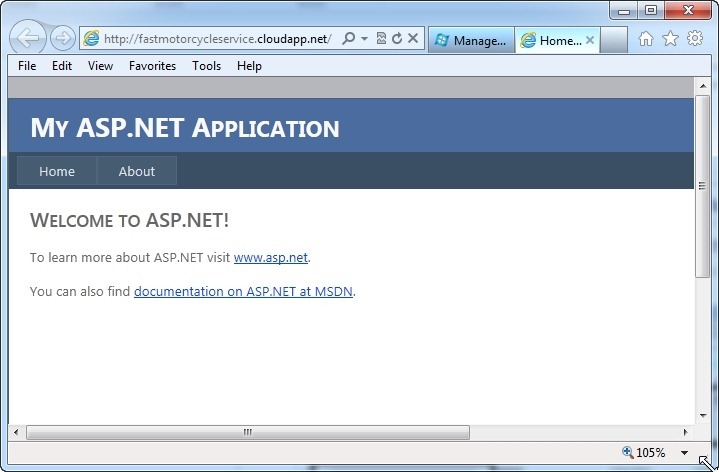 But the above screen shows default.aspx. What we really want to see is the RESTful service. The RESTful service is covered in my next post. But the above screen shows default.aspx. What we really want to see is the RESTful service. The RESTful service is covered in my next post.  |