Kinect as a Baby Monitor–I set it up in an hour
| It has taken far longer to write this post than it was to actually install Kinect as a baby monitor. In less than an hour I was watching my little boy in infrared while he slept in his bedroom. It wasn’t that hard to setup as I relied on one Kinect device and two generic laptops, capable of 40 FPS. In this post I will take about the architecture and how you can setup Kinect quickly and easily. Even in complete darkness you can see the outline of your child asleep in bed. And if anyone walks in the room they are immediately visible, thanks to the depth sensor which consists of an infrared laser projector combined with a monochrome CMOS sensor, which captures video data in 3D under any ambient light conditions. |
What I built 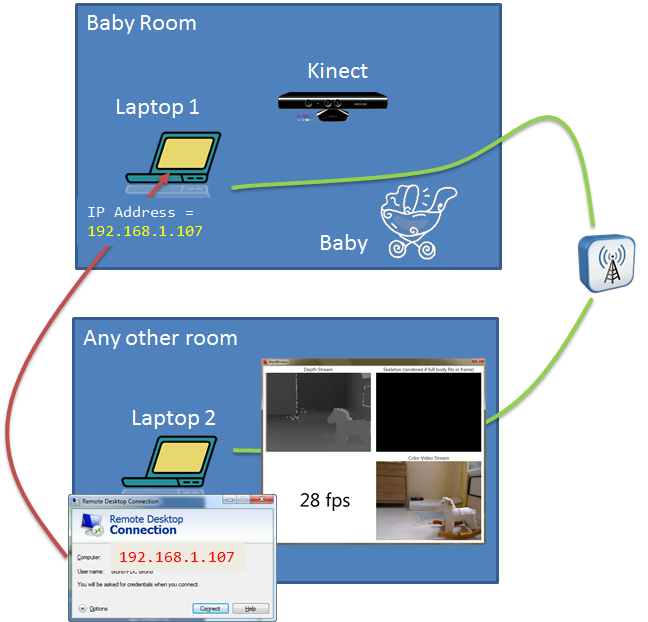 |
| Simple Design |
The first room is the baby’s room where I have one laptop and one Kinect device. It took me about an hour to get all this done. But it was mostly making sure the “Free” software was installed. The laptops already had Windows Installed and my Kinect device was like $130. I need to baby proof this setup, obviously. He’s still crawling but as you read this I will find a safer location. 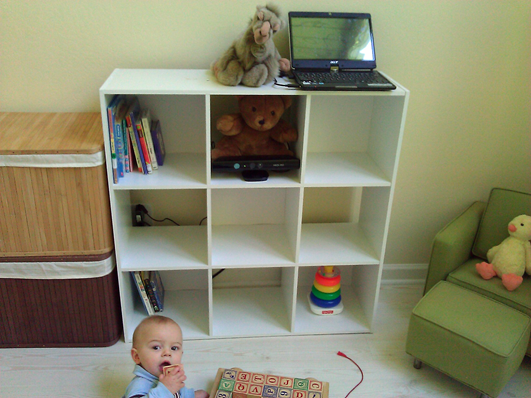 As you can see from the diagram above the Kinect device is obviously in the baby room connected to a laptop. Preparing the laptop and the Kinect in the baby room was easy. As you can see from the diagram above the Kinect device is obviously in the baby room connected to a laptop. Preparing the laptop and the Kinect in the baby room was easy.
Before doing any of these eight steps, make sure that you have two laptops with a proper version of Windows installed, and make sure you have connectivity to a Wireless Network . Also make sure, from a hardware point of view, that you have your Kinect device. My Kinect device came with one wire that allowed me to connect both to the electrical outlet and to the USB port to laptop 1 in the baby’s room. The steps I took are:
What you need in the baby’s room You only need to put a couple things into the baby room. The first thing is a generic laptop and the second thing is a Kinect device. But before you put these two things in the baby’s room, you need to spend some time configuring them. This simply means downloading and installing some software. 3 connection points = 2 Outlets in baby’s room + 1 USB Port I used two electrical outlets in the baby's room, one for the Kinect and one for laptop 1 (see diagram). The other connection is from the Kinect device to your laptop via a USB connection. 8 Step Summary Basically, you have about five steps to do for the baby’s room equipment and three steps to execute on laptop 2. Laptop 2 is the laptop from which you will view the output from your Kinect device . Here is the item list that I started with Two generic laptops with Windows 7. I happen to be using Windows 7 Ultimate. Both laptops were able to connect wirelessly to my home network. Besides the two generic laptops , as far as hardware is concerned, I had the Kinect device itself. I am assuming everyone will have a wireless network that will allow your laptops to communicate over . Laptop 1 - In the baby's room A laptop in the baby’s room , laptop 1, only needs two downloads and installations after you attach the Kinect through USB. The first installation is just some basic programming frameworks that the Kinect SDK uses. Once you have those installed you can proceed directly to the Kinect SDK. The Kinect SDK even includes a viewer program that shows you the content outputted by Kinect. Details below The details about what to download and what to install is further in this post Safety Warning – Watch your wiring Let’s be clear about one thing , however. Be sure that any wires are NOT exposed to the curious pursuits of your baby. Anyone who has a baby knows that any wires within reach is a wire that can be grabbed and pulled. Do this here:
 This is awesome in itself – that you get a free C++ compiler. But let’s continue with the installation. Once you install the needed libraries in frameworks from the steps above, you can now prepare your Kinect device. You can start by plugging in your Kinect in two ways – one connection to your electrical outlet and one connection to your best USB port. Once everything is connected, you can start the download and installation process. This is awesome in itself – that you get a free C++ compiler. But let’s continue with the installation. Once you install the needed libraries in frameworks from the steps above, you can now prepare your Kinect device. You can start by plugging in your Kinect in two ways – one connection to your electrical outlet and one connection to your best USB port. Once everything is connected, you can start the download and installation process.
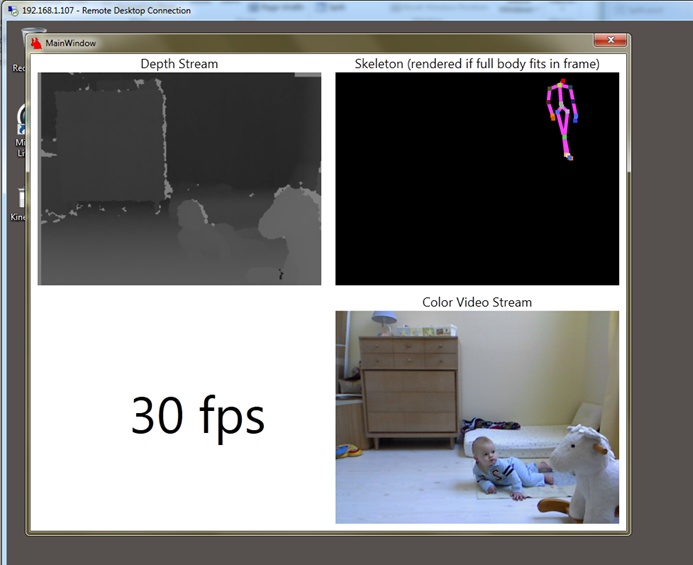
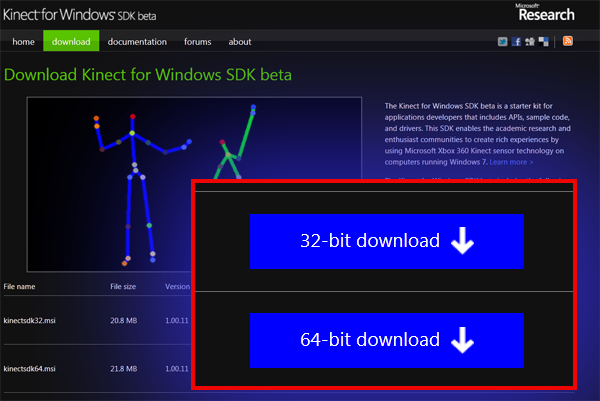 Make sure you run the Visual C++ installation first. You can use the “Start Menu” to run the program “Sample Skeletal Viewer,” as seen below. Make sure you run the Visual C++ installation first. You can use the “Start Menu” to run the program “Sample Skeletal Viewer,” as seen below. 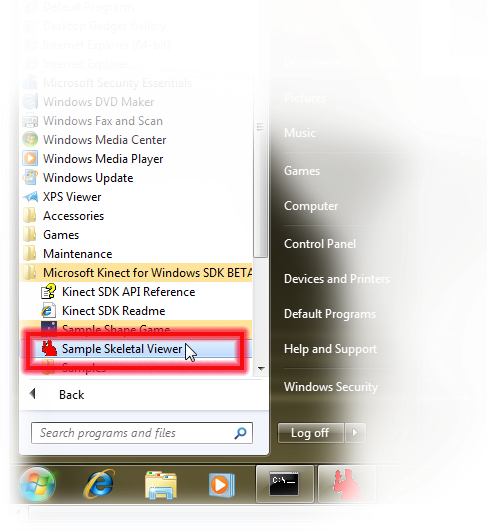 At this point you can start using the software to view your baby! Very, very cool! You can even see the infrared stuff where it says “Depth View.” That works great at night, even in very low light conditions. At this point you can start using the software to view your baby! Very, very cool! You can even see the infrared stuff where it says “Depth View.” That works great at night, even in very low light conditions. 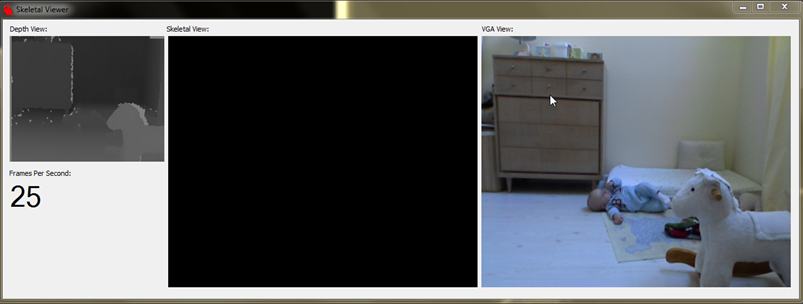 At this point you are all setup in the baby’s room. Your goal now is to “remote in” to view what is visible in Laptop 1. At this point you are all setup in the baby’s room. Your goal now is to “remote in” to view what is visible in Laptop 1.
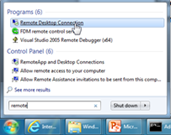
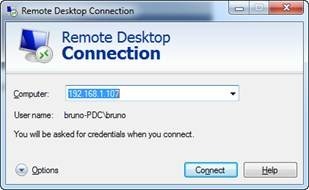
Connecting from laptop 2 There is practically no configuration on laptop 2. That is because it will simply use Remote Desktop to view the content visible on laptop 1 . The command to start Remote desktop is mstsc. Or you can choose it from the menu: Next , you will enter an IP address. The IP address that you want to enter here (in Remote Desktop Connection) comes from the IP address of laptop 1 in the baby’s room . Once you connect with “Remote Desktop” into laptop 1 in the baby’s room from laptop 2, which can be in any room that is within and wireless distance, you can see everything going on laptop 2. There you have it – a baby monitor built from existing hardware. There’s all kinds of interesting stuff possible from here. Works perfectly. |


