Creating PHP Websites with WebMatrix
Note: WebMatrix now supports PHP "out of the box". You no loger need to do any manual configuration (as detailed in this post) to get PHP support in WebMatrix. For more information, see https://www.microsoft.com/web/webmatrix/features.aspx .
Last week, Scott Guthrie (Corporate VP in Microsoft's Developer Division) announced on his blog the beta release of WebMatrix. His post describes what WebMatrix is and how to get started with it, but he focuses mainly on .NET developers. However, he does hint at PHP support, particularly support for PHP applications that are available in the Web Application Gallery. Ruslan Yakushev followed up with a blog post that delved a bit deeper into PHP support in WebMatrix: Install PHP Applications with WebMatrix. As I read those posts (and others), I was left wondering about the extent of PHP support in WebMatrix (which is what I'll look at in this post). As it turns out, PHP is fully supported, but it requires a little bit of work up front in this beta release of WebMatrix (a smoother experience for PHP developers is planned for the final release). If you want to work on any of the PHP applications that are available in the Web Application Gallery, the experience is very smooth – just follow Ruslan's blog post. However, if you just want to see how WebMatrix works as a PHP IDE for building your own sites (and you don’t want to install one of the PHP apps in the app gallery), then here’s what to do:
1. Download the Web Platform Installer 3 beta here: https://www.microsoft.com/web/webmatrix/
2. Run the Web PI and click Install Microsoft WebMatrix on the Getting Started tab. Or, if you want to also install other programs, select Microsoft WebMatrix Beta on the What’s New tab, then select other programs before proceeding.
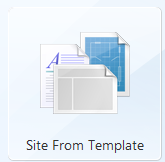
3. Launch WebMatrix and click on Site From Template:
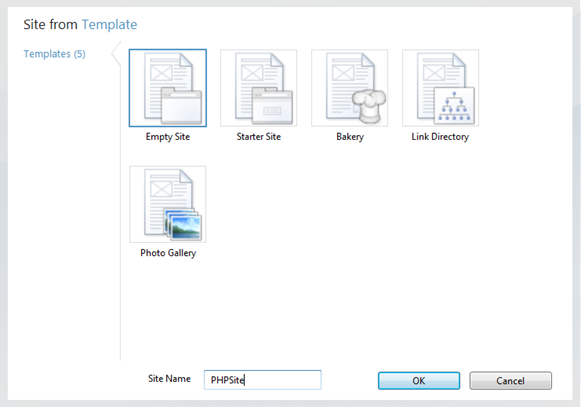
4. Select an Empty Site and provide a name for the site (I’m calling my “PHPSite”).
5. In a text editor, open the applicationhost.config file located in your Documents\IISExpress8\config directory. Replace the <fastcgi /> element with the following element:
<fastCgi>
<application fullPath="C:\PHP\php-cgi.exe"
activityTimeout="600"
requestTimeout="600"
instanceMaxRequests="10000">
<environmentVariables>
<environmentVariable name="PHP_FCGI_MAX_REQUESTS"
value="10000" />
<environmentVariable name="PHPRC"
value="C:\PHP" />
</environmentVariables>
</application>
</fastCgi>
Note: the fullpath attribute of the application element should point to the cgi executable of your PHP installation. The value attribute for the PHPRC environment variable should point to the location of your PHP installation.
6. Add the following location element as the last child of the configuration element:
<location path="PHPSite">
<system.webServer>
<handlers>
<add name="PHP via FastCGI"
path="*.php" verb="*"
modules="FastCgiModule"
scriptProcessor="C:\PHP\php-cgi.exe"
resourceType="Either" />
</handlers>
</system.webServer>
</location>
Note: The path attribute of the location element should be the name of your site and the value of the scriptProcessor attribute should point to the cgi executable of your PHP installation.
7. Save the applicationhost.config file.
8. Back in WebMatrix, click on Files, then on Add a file to your site:
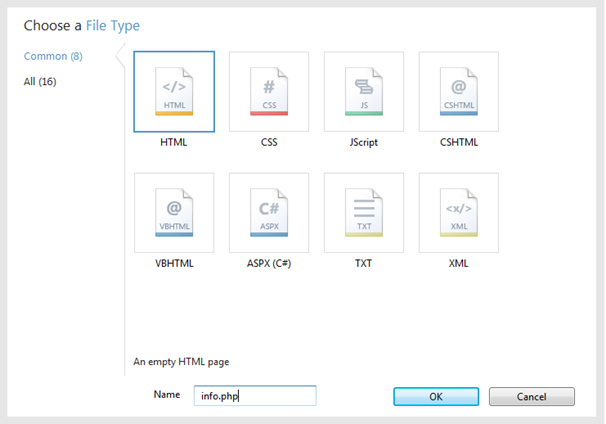
9. PHP will not be listed in the types of files you can add. Instead, choose an HTML file, but name it with a .php extension:
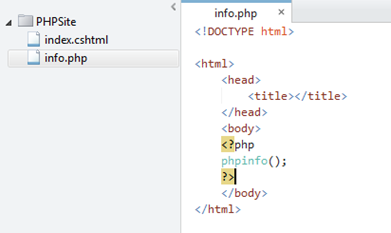
Now you are ready to write PHP code:
That’s it for now. I’ll continue to use WebMatrix and write more about what I find, but I’m hoping this will get you started with using WebMatrix and PHP so you can chime in with your feedback (which I will make sure makes it to the development team).
Thanks.
-Brian


