Now 3 Steps Tutorial: Simple Intelligent Bot by Azure Bot Service × LUIS (Language Understanding Intelligent Services)
[日本語版はこちら]
Introduction
Azure Bot Service is "bot-as-a-service" which we can publish bot app, deploying app on Azure Functions and registering Bot Directory at once in Azure Portal. This is 3-step tutorial to deply bot app using Azure Bot Service, add text-analytics flavor using and training pre-built LUIS (Language Understanding Intelligent Service).
Requirement
- Microsoft Account (or organization account)
Need for Azure Subscription. (-> Create new Microsoft Account) This accout will be used in Bot Directory and LUIS. - Azure Subscription
Use Azure Bot Service (internally use Azure Functions and Storage Servces). (->How to sign up Azure)
Now 3 Steps Tutorial
- Step1: Create new Azure Bot Service from Azure Portal
- Step2: Configure Bot Service
- Step3: Configure LUIS
Step1: Create new Azure Bot Service from Azure Portal
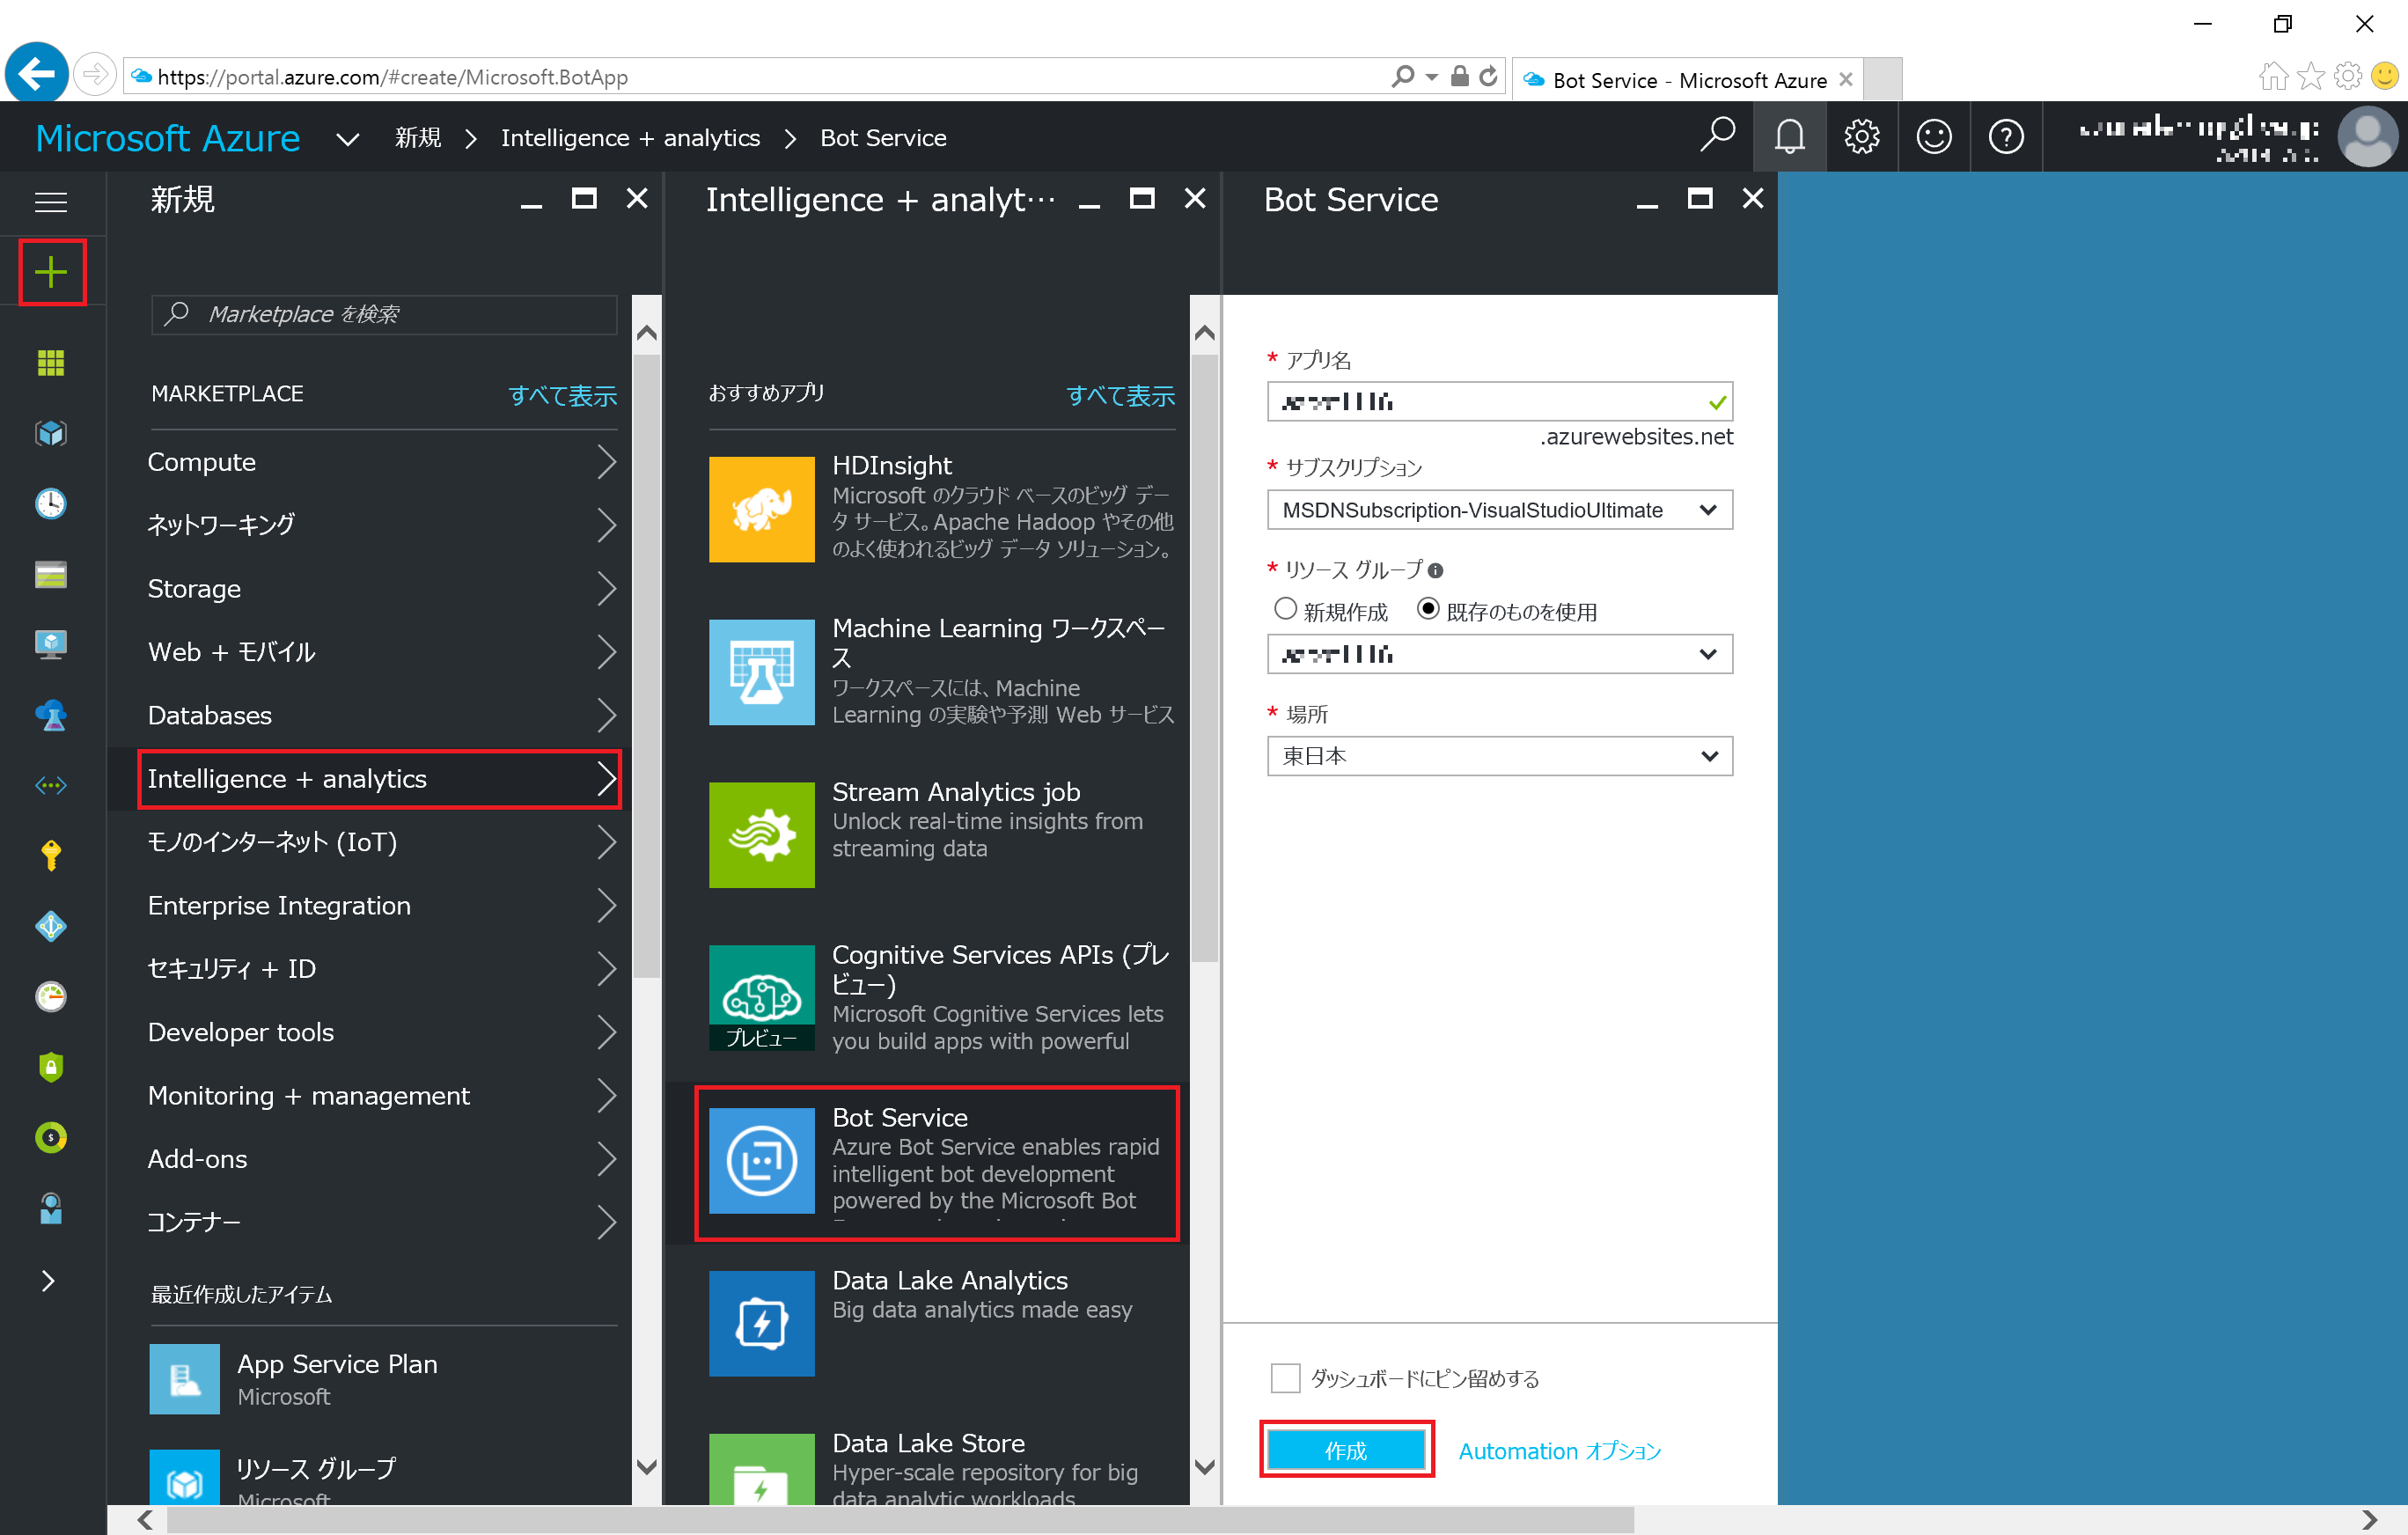
Open Azure Portal (https://portal.azure.com) and sign in with your account. Click [New+] and select [Intelligent + analytics] > [Bot Service]. At [Bot Service] blade type or select App Name, Resource Group, Datacenter Place, and click [Create].
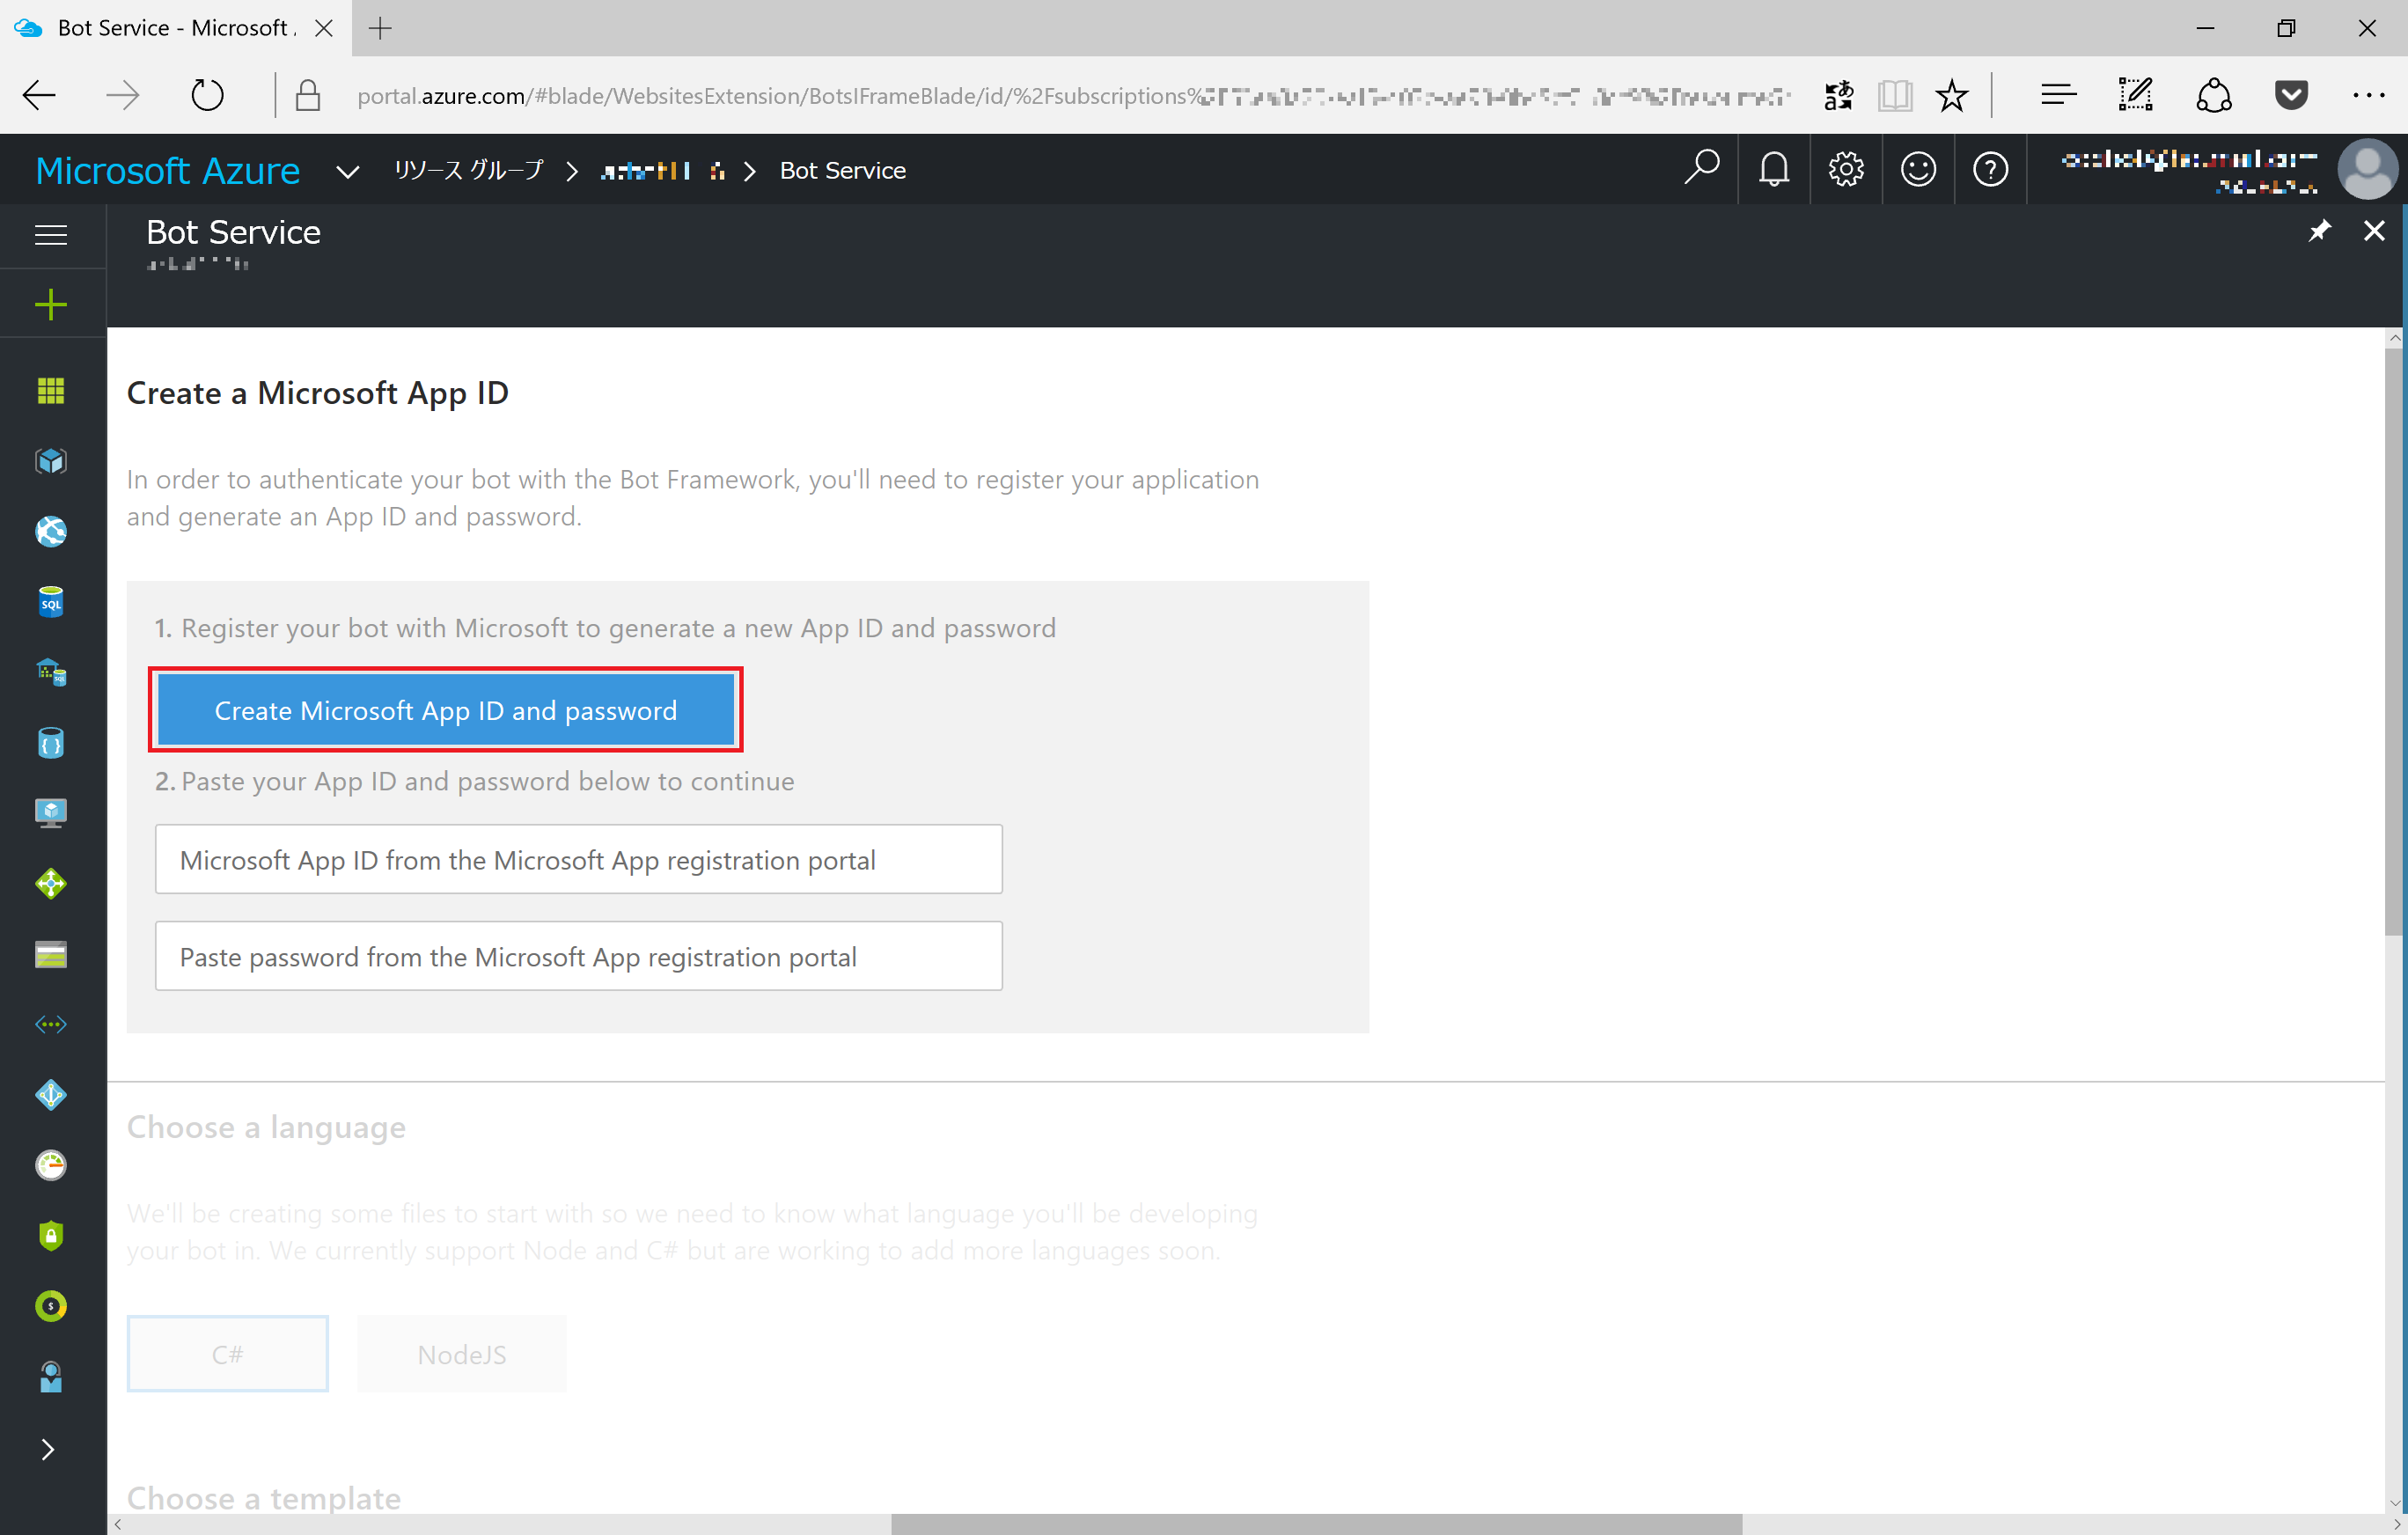
As "Finish deploy successful" message comes up, click and open Bot Service just created. At [Create a Microsoft App ID] section, click [Create Microsoft App ID and password].
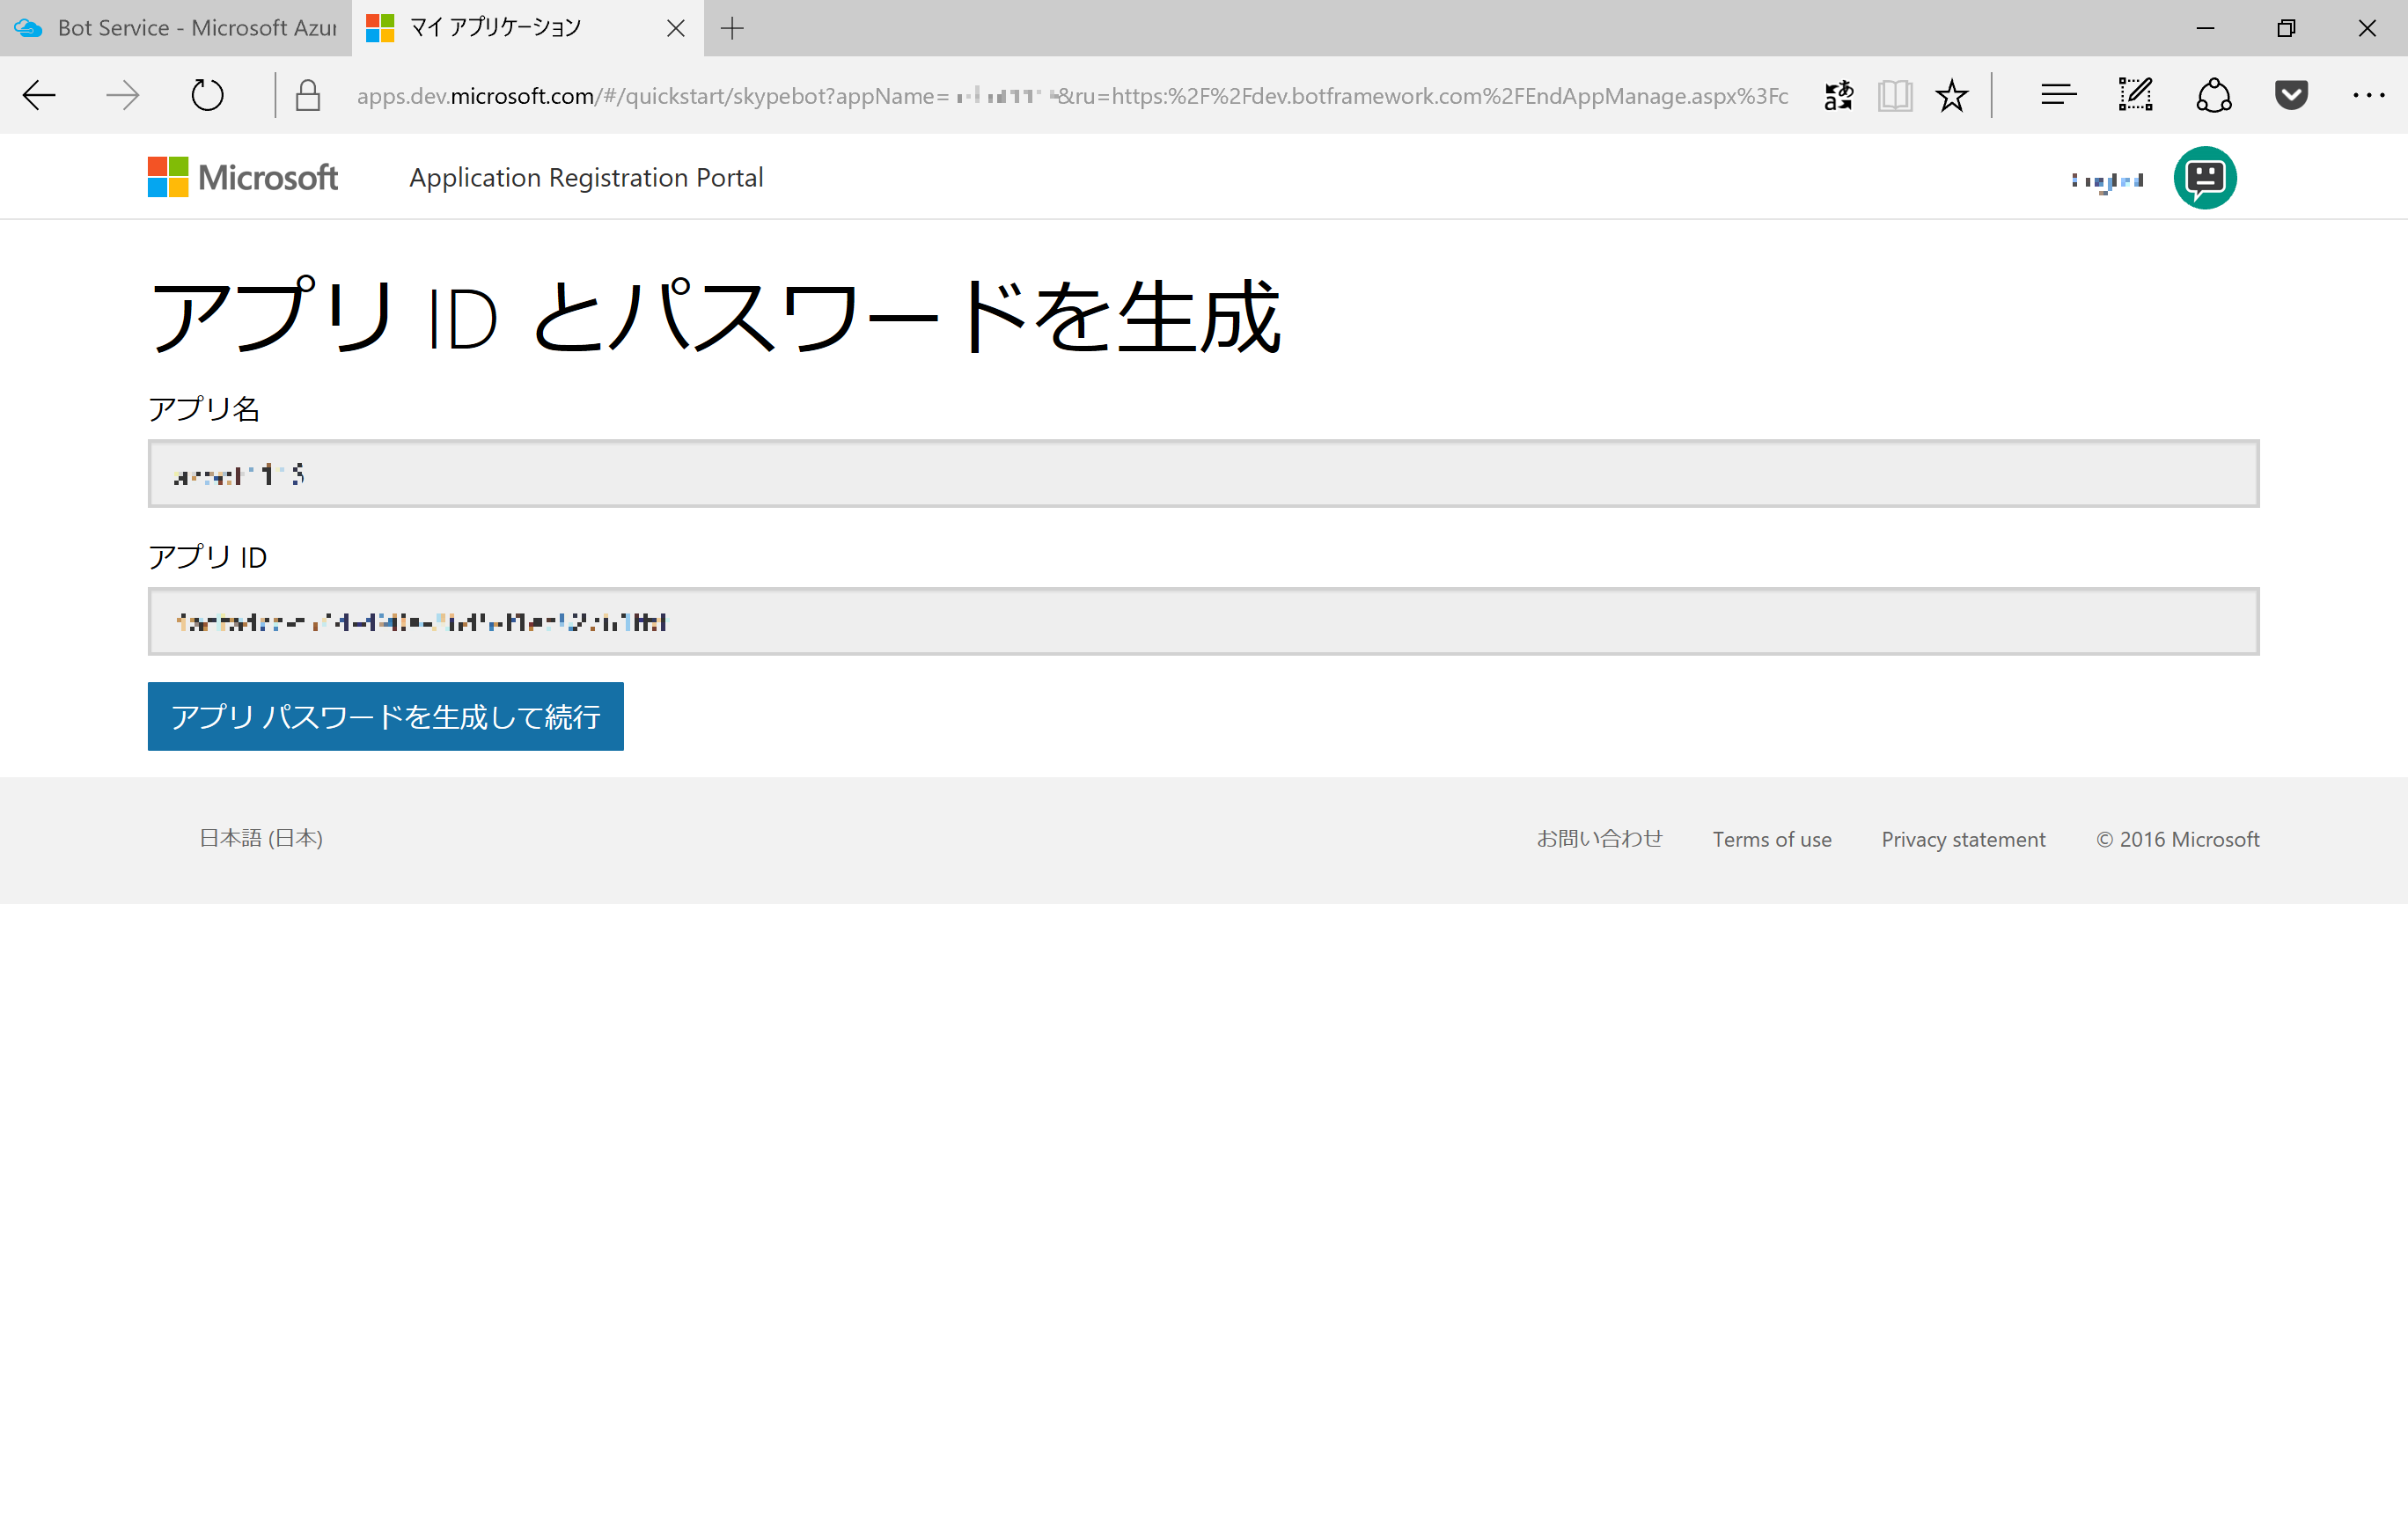
At [Create App ID and password] screen, click [Generate app password]. New password pops up, copy and save it locally.
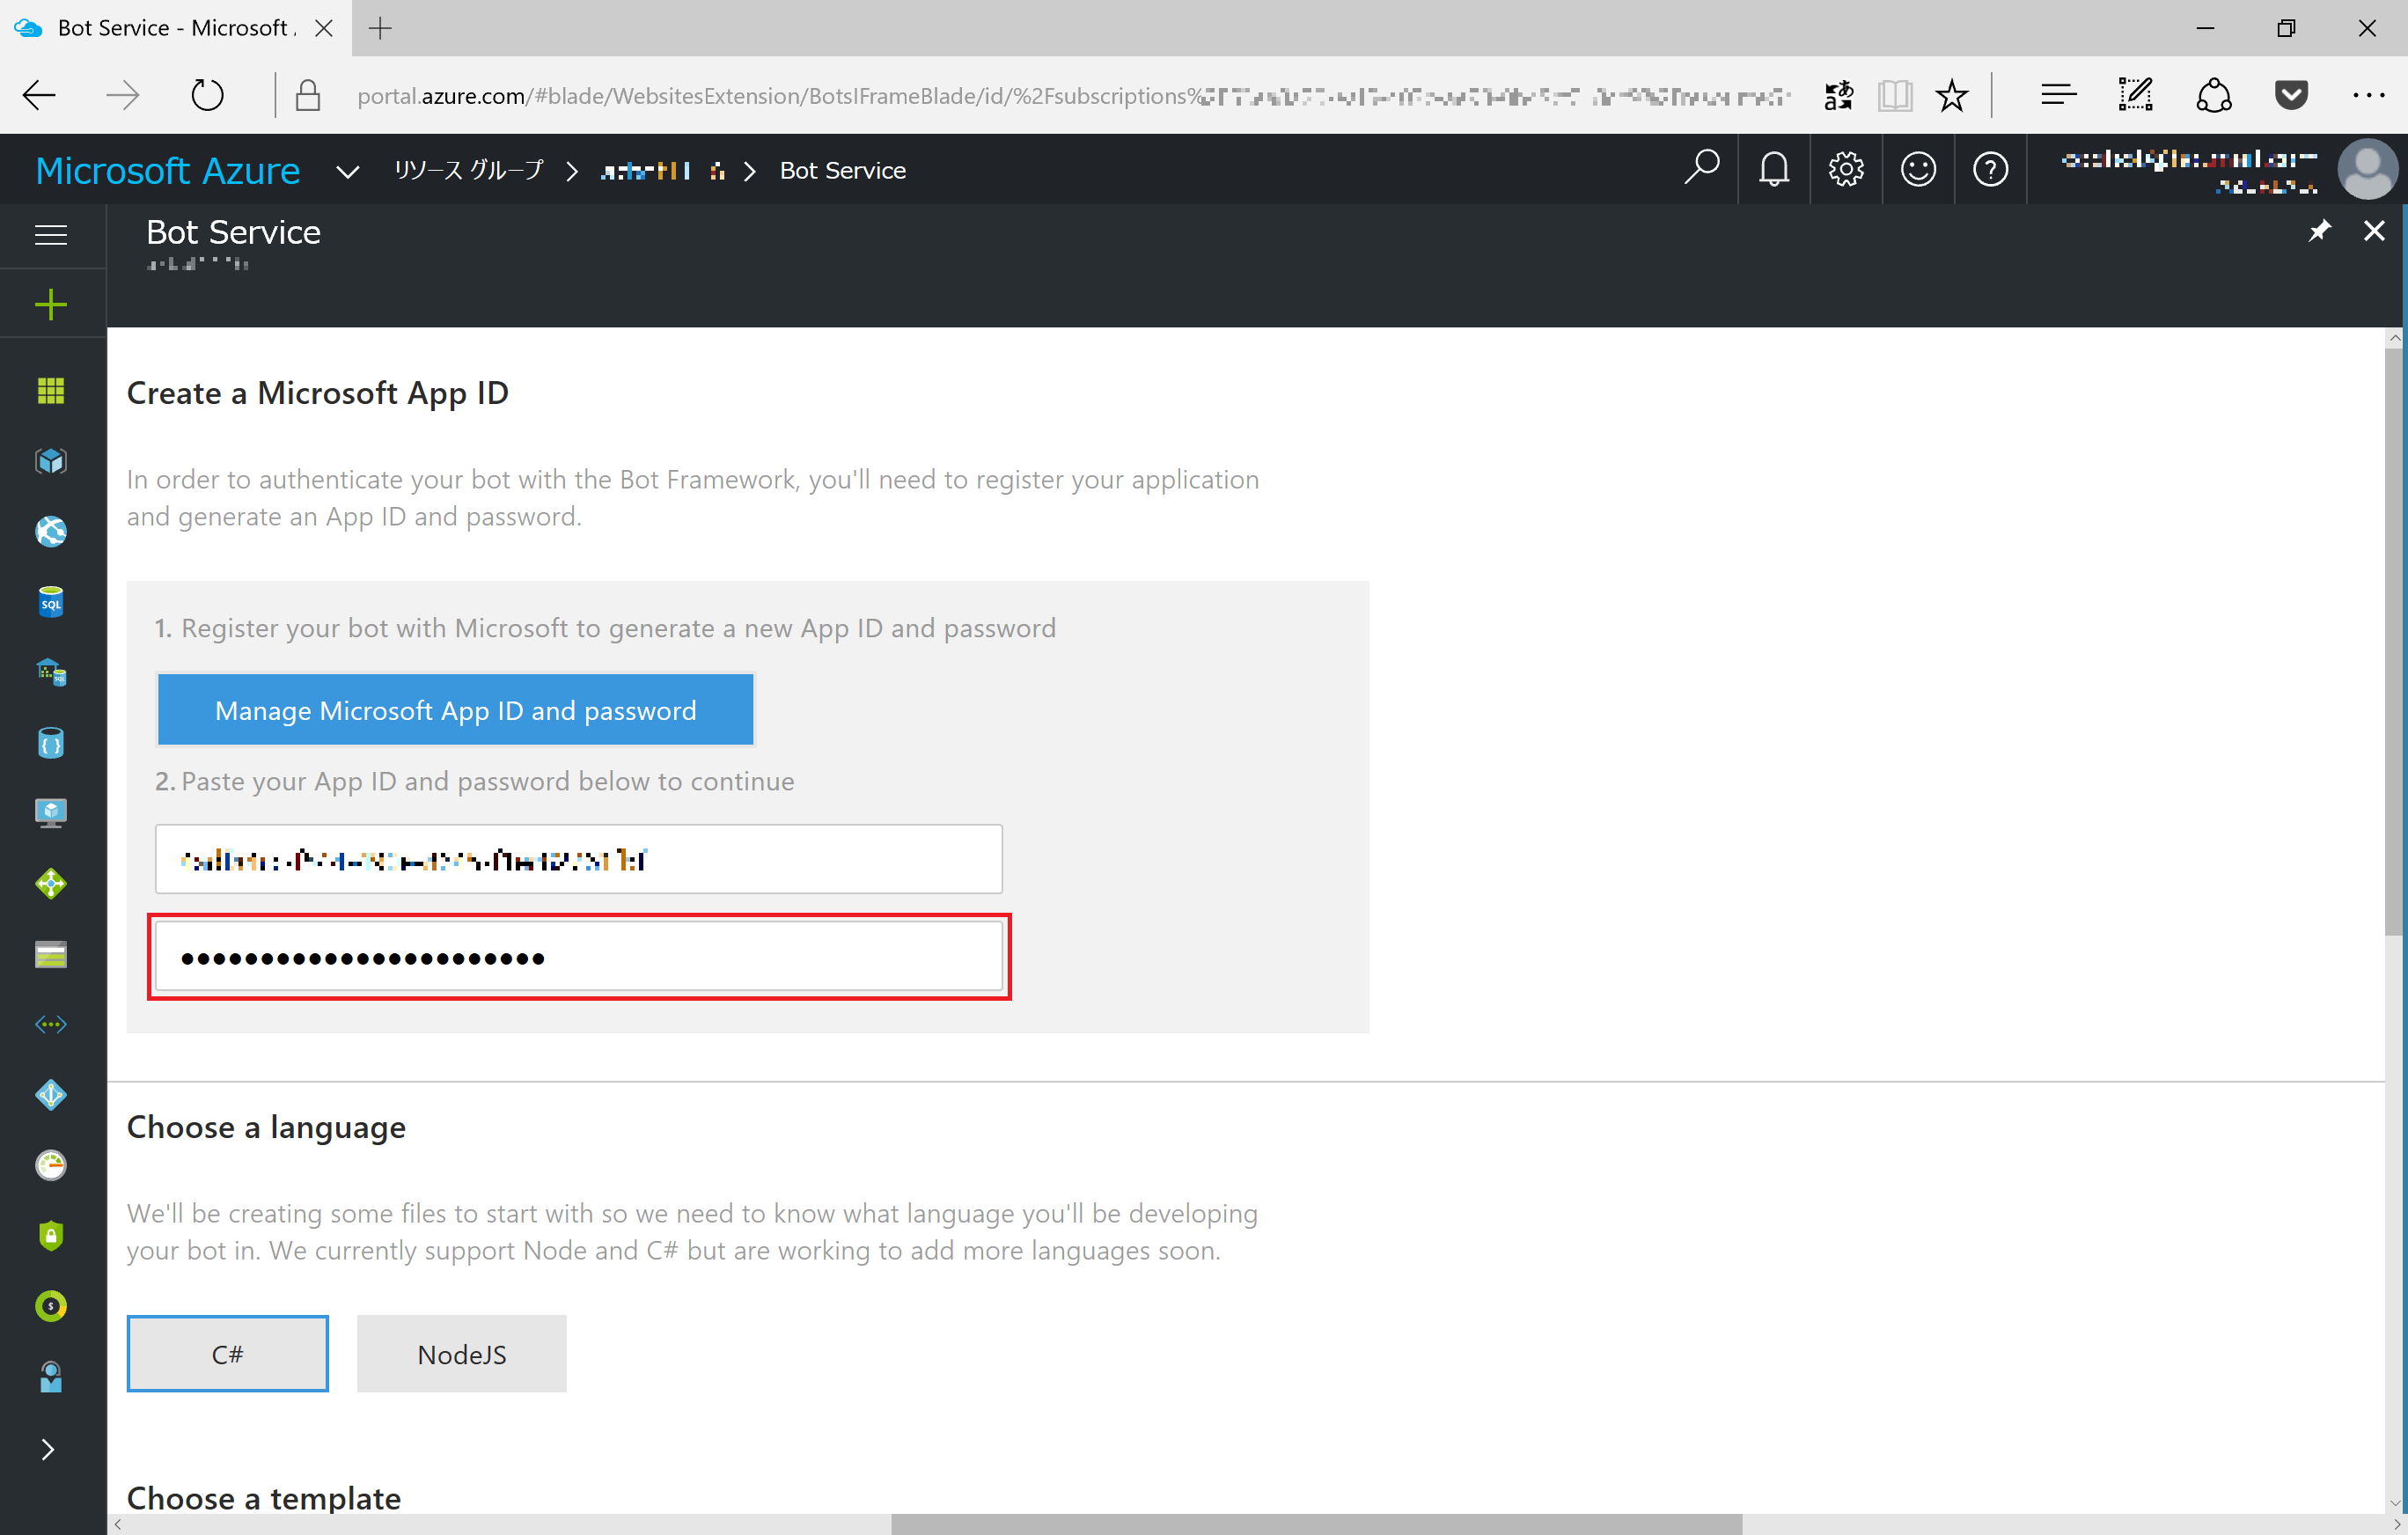
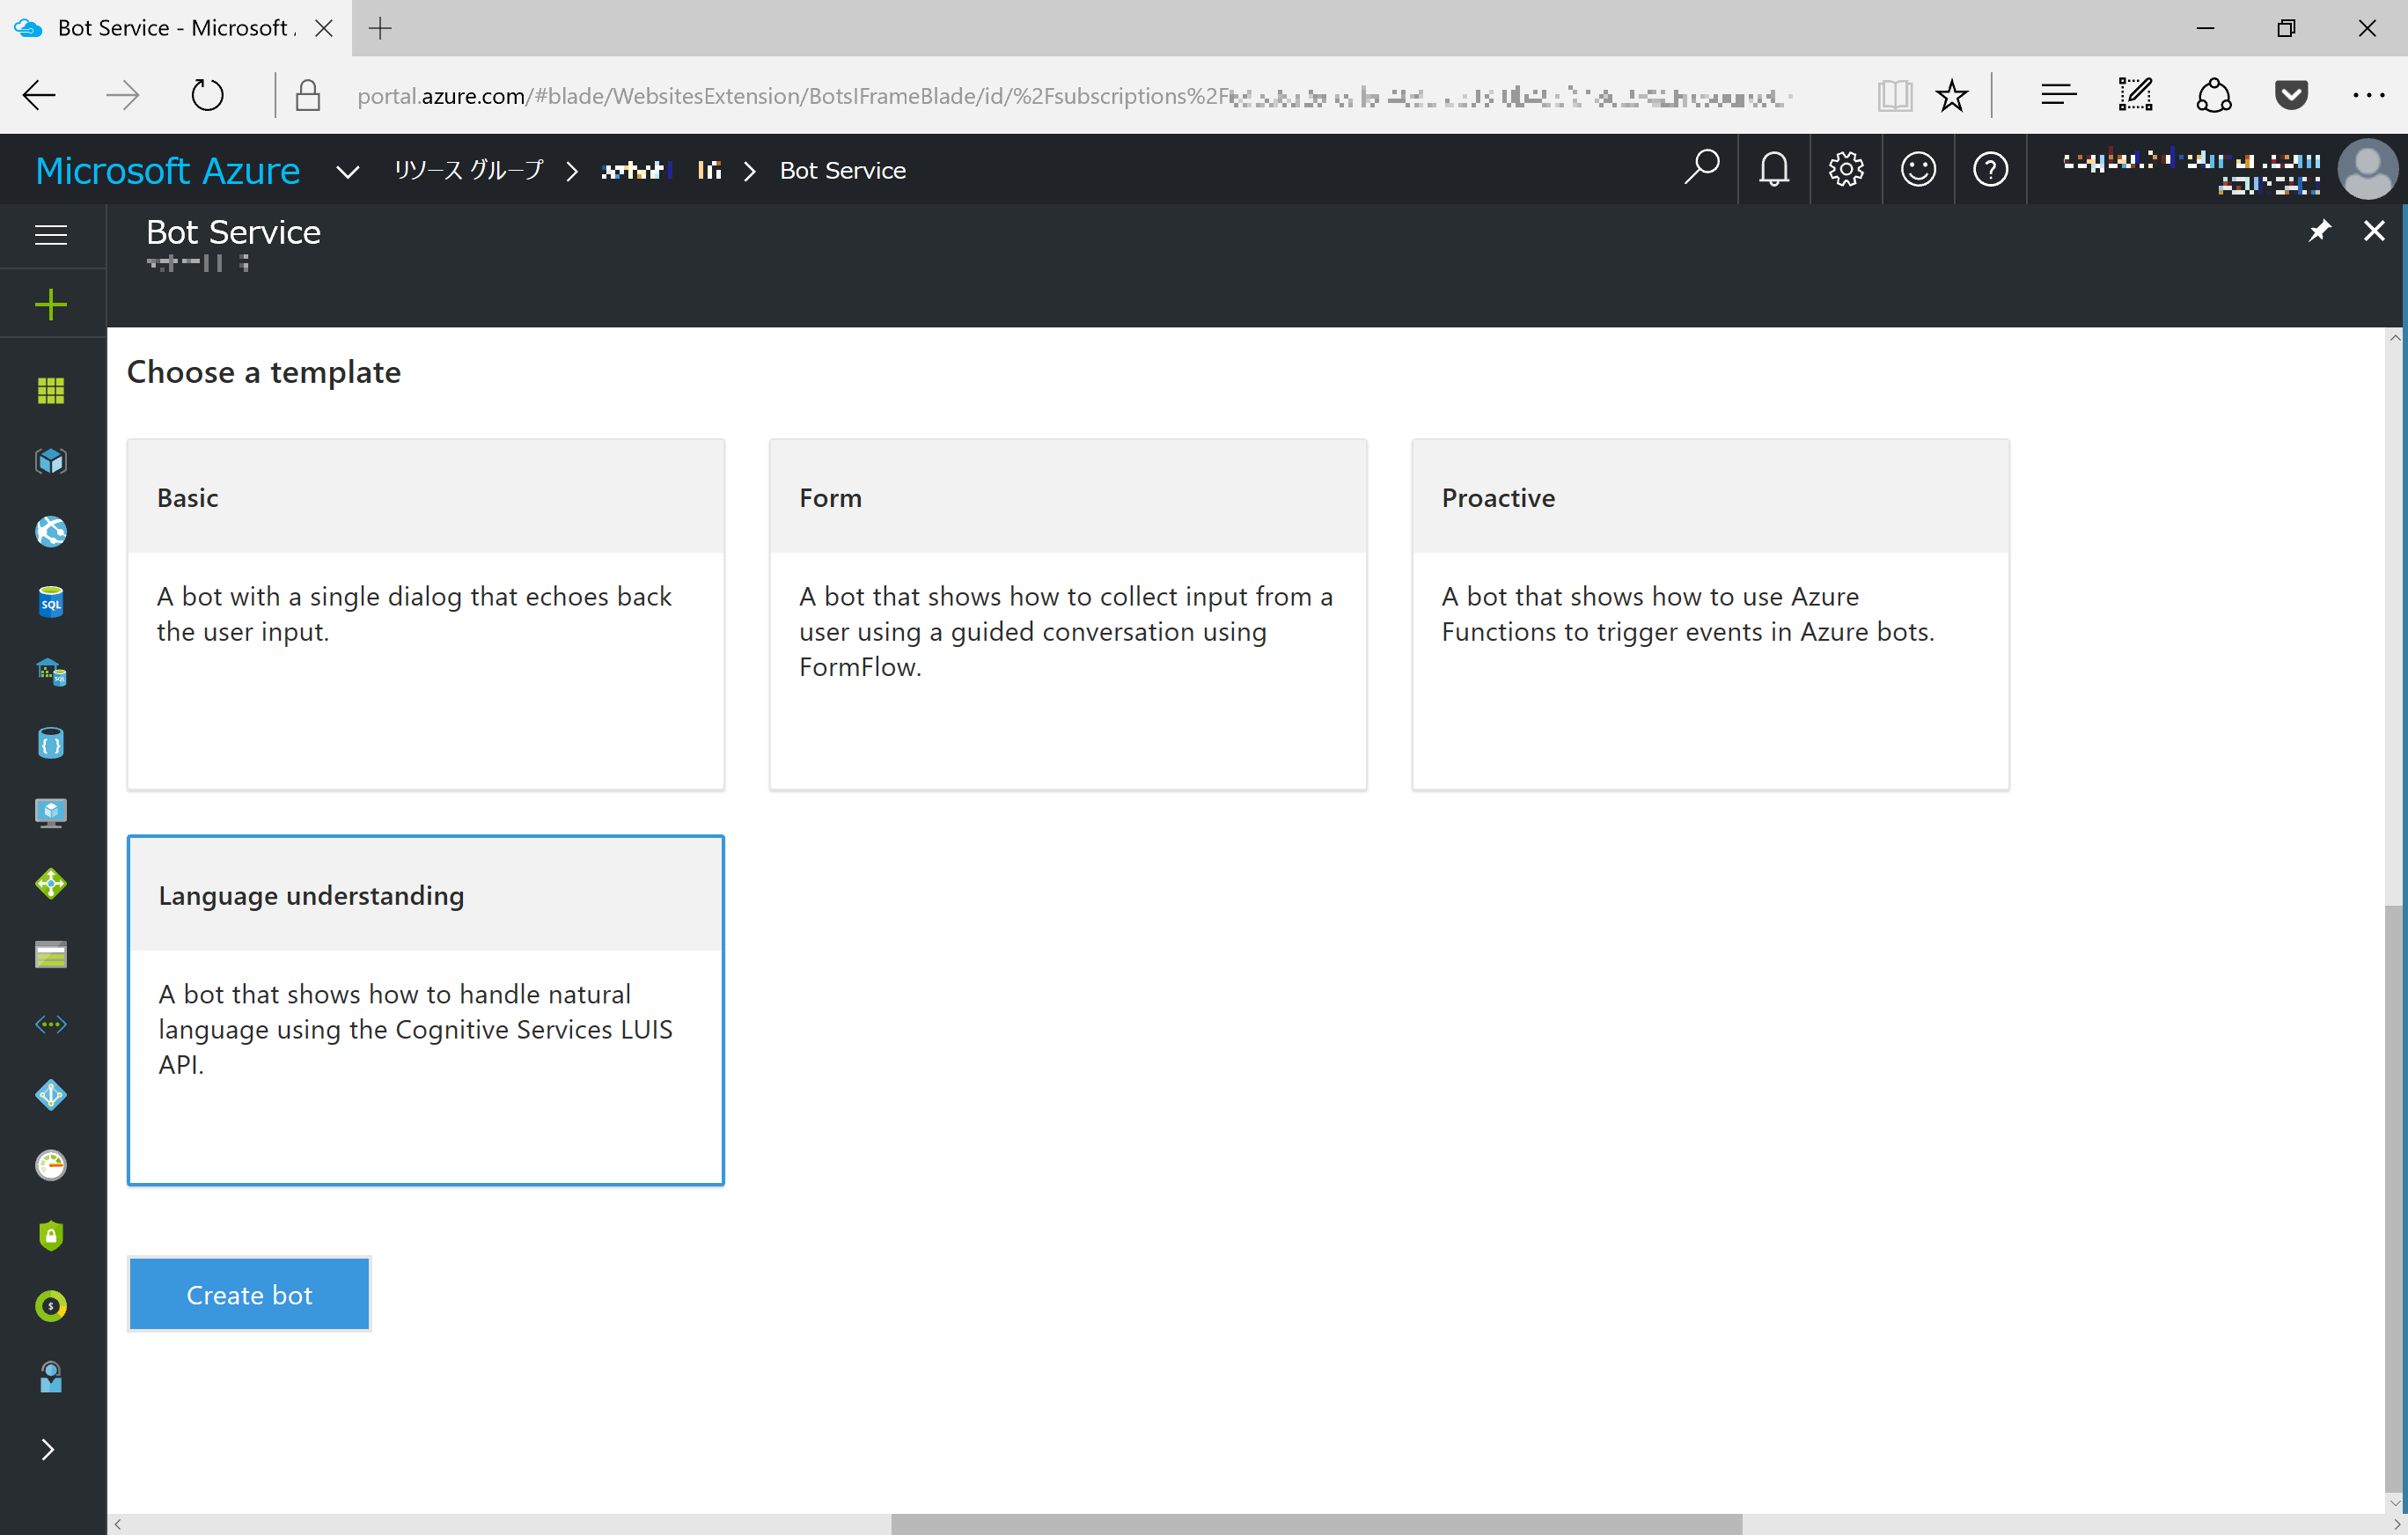
Back to original screen, paste password below app ID which is auto-filled. Now you can select bot app language (C# or Node.JS) and template.
Select [LUIS] and click [Create Bot] to deploy bot app using LUIS.
Step2: Configure Bot Service
Once bot created, you can see codes in left pane and web chat in right pane. Type something and check default returns.
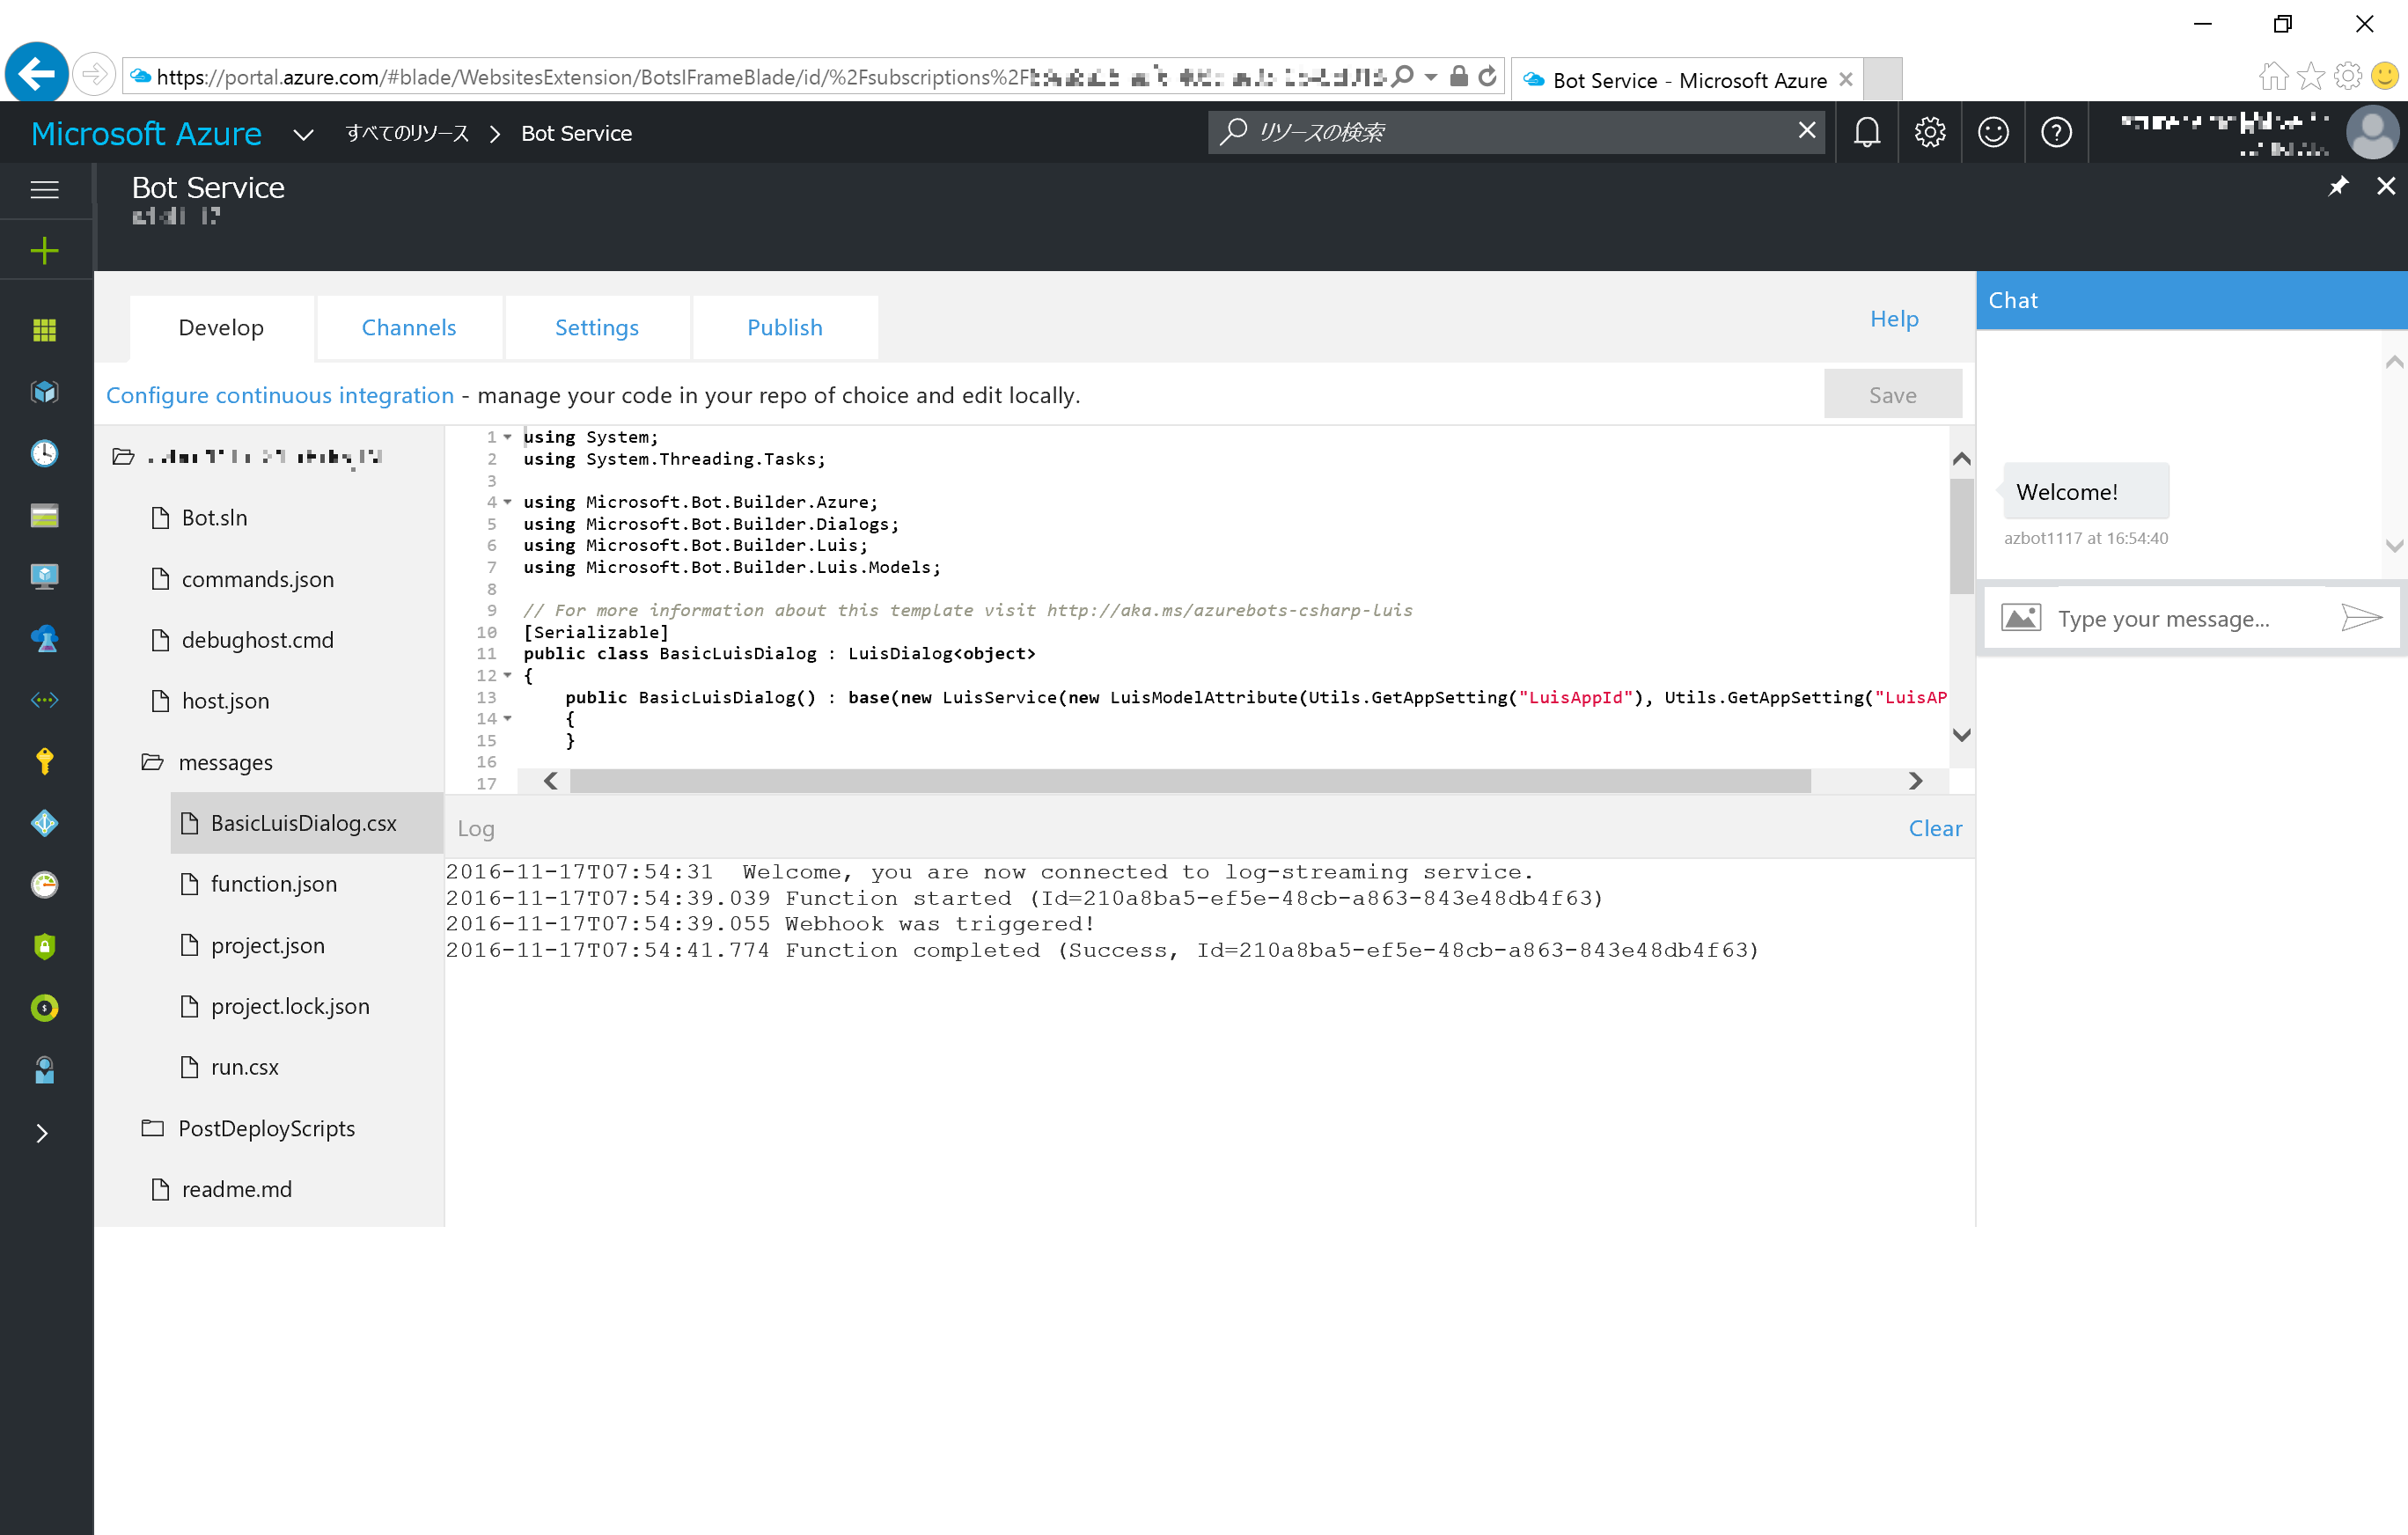
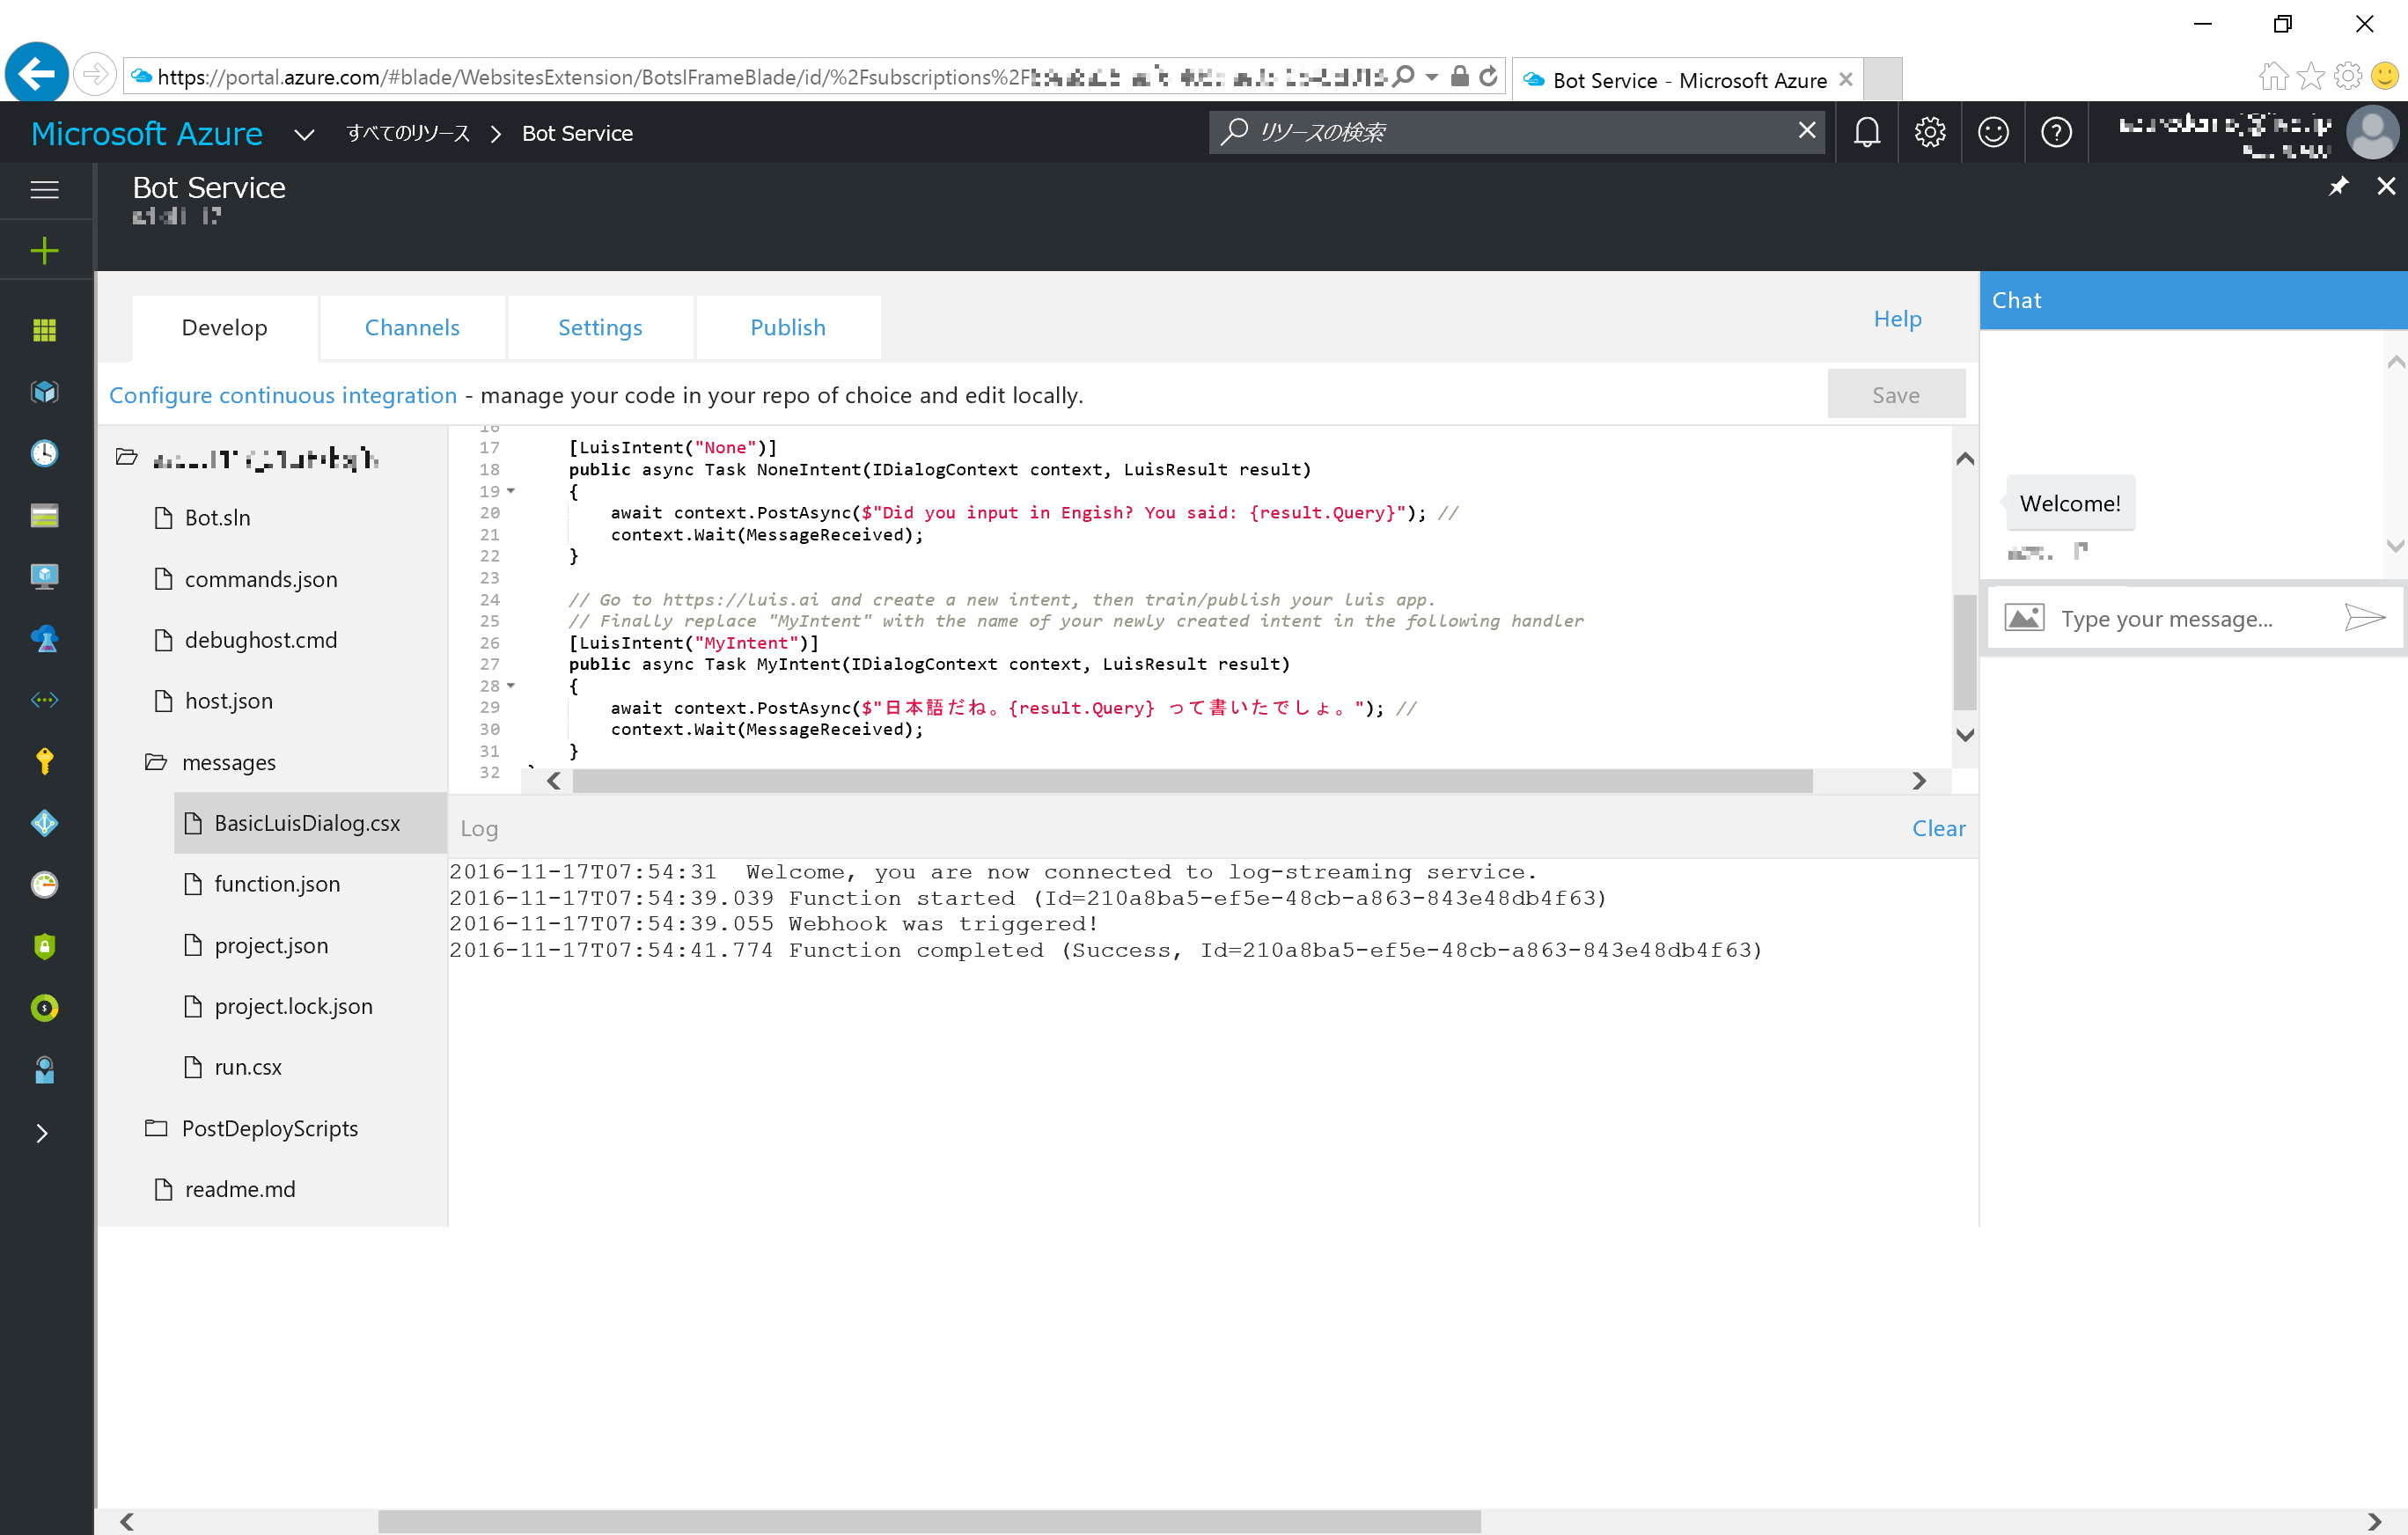
On [Develop] tab in left pane, you can manage bot behavior maily BasicLuisDialig.csx. Click and show its code. There are 2 intents, called "none" and "MyIntent" as analyzing result of message sent to bot. Edit code as below as bot returns LuisIntent("None") as English and LuisIntent("MyIntent") as Japanese this time.
Step3: Configure LUIS
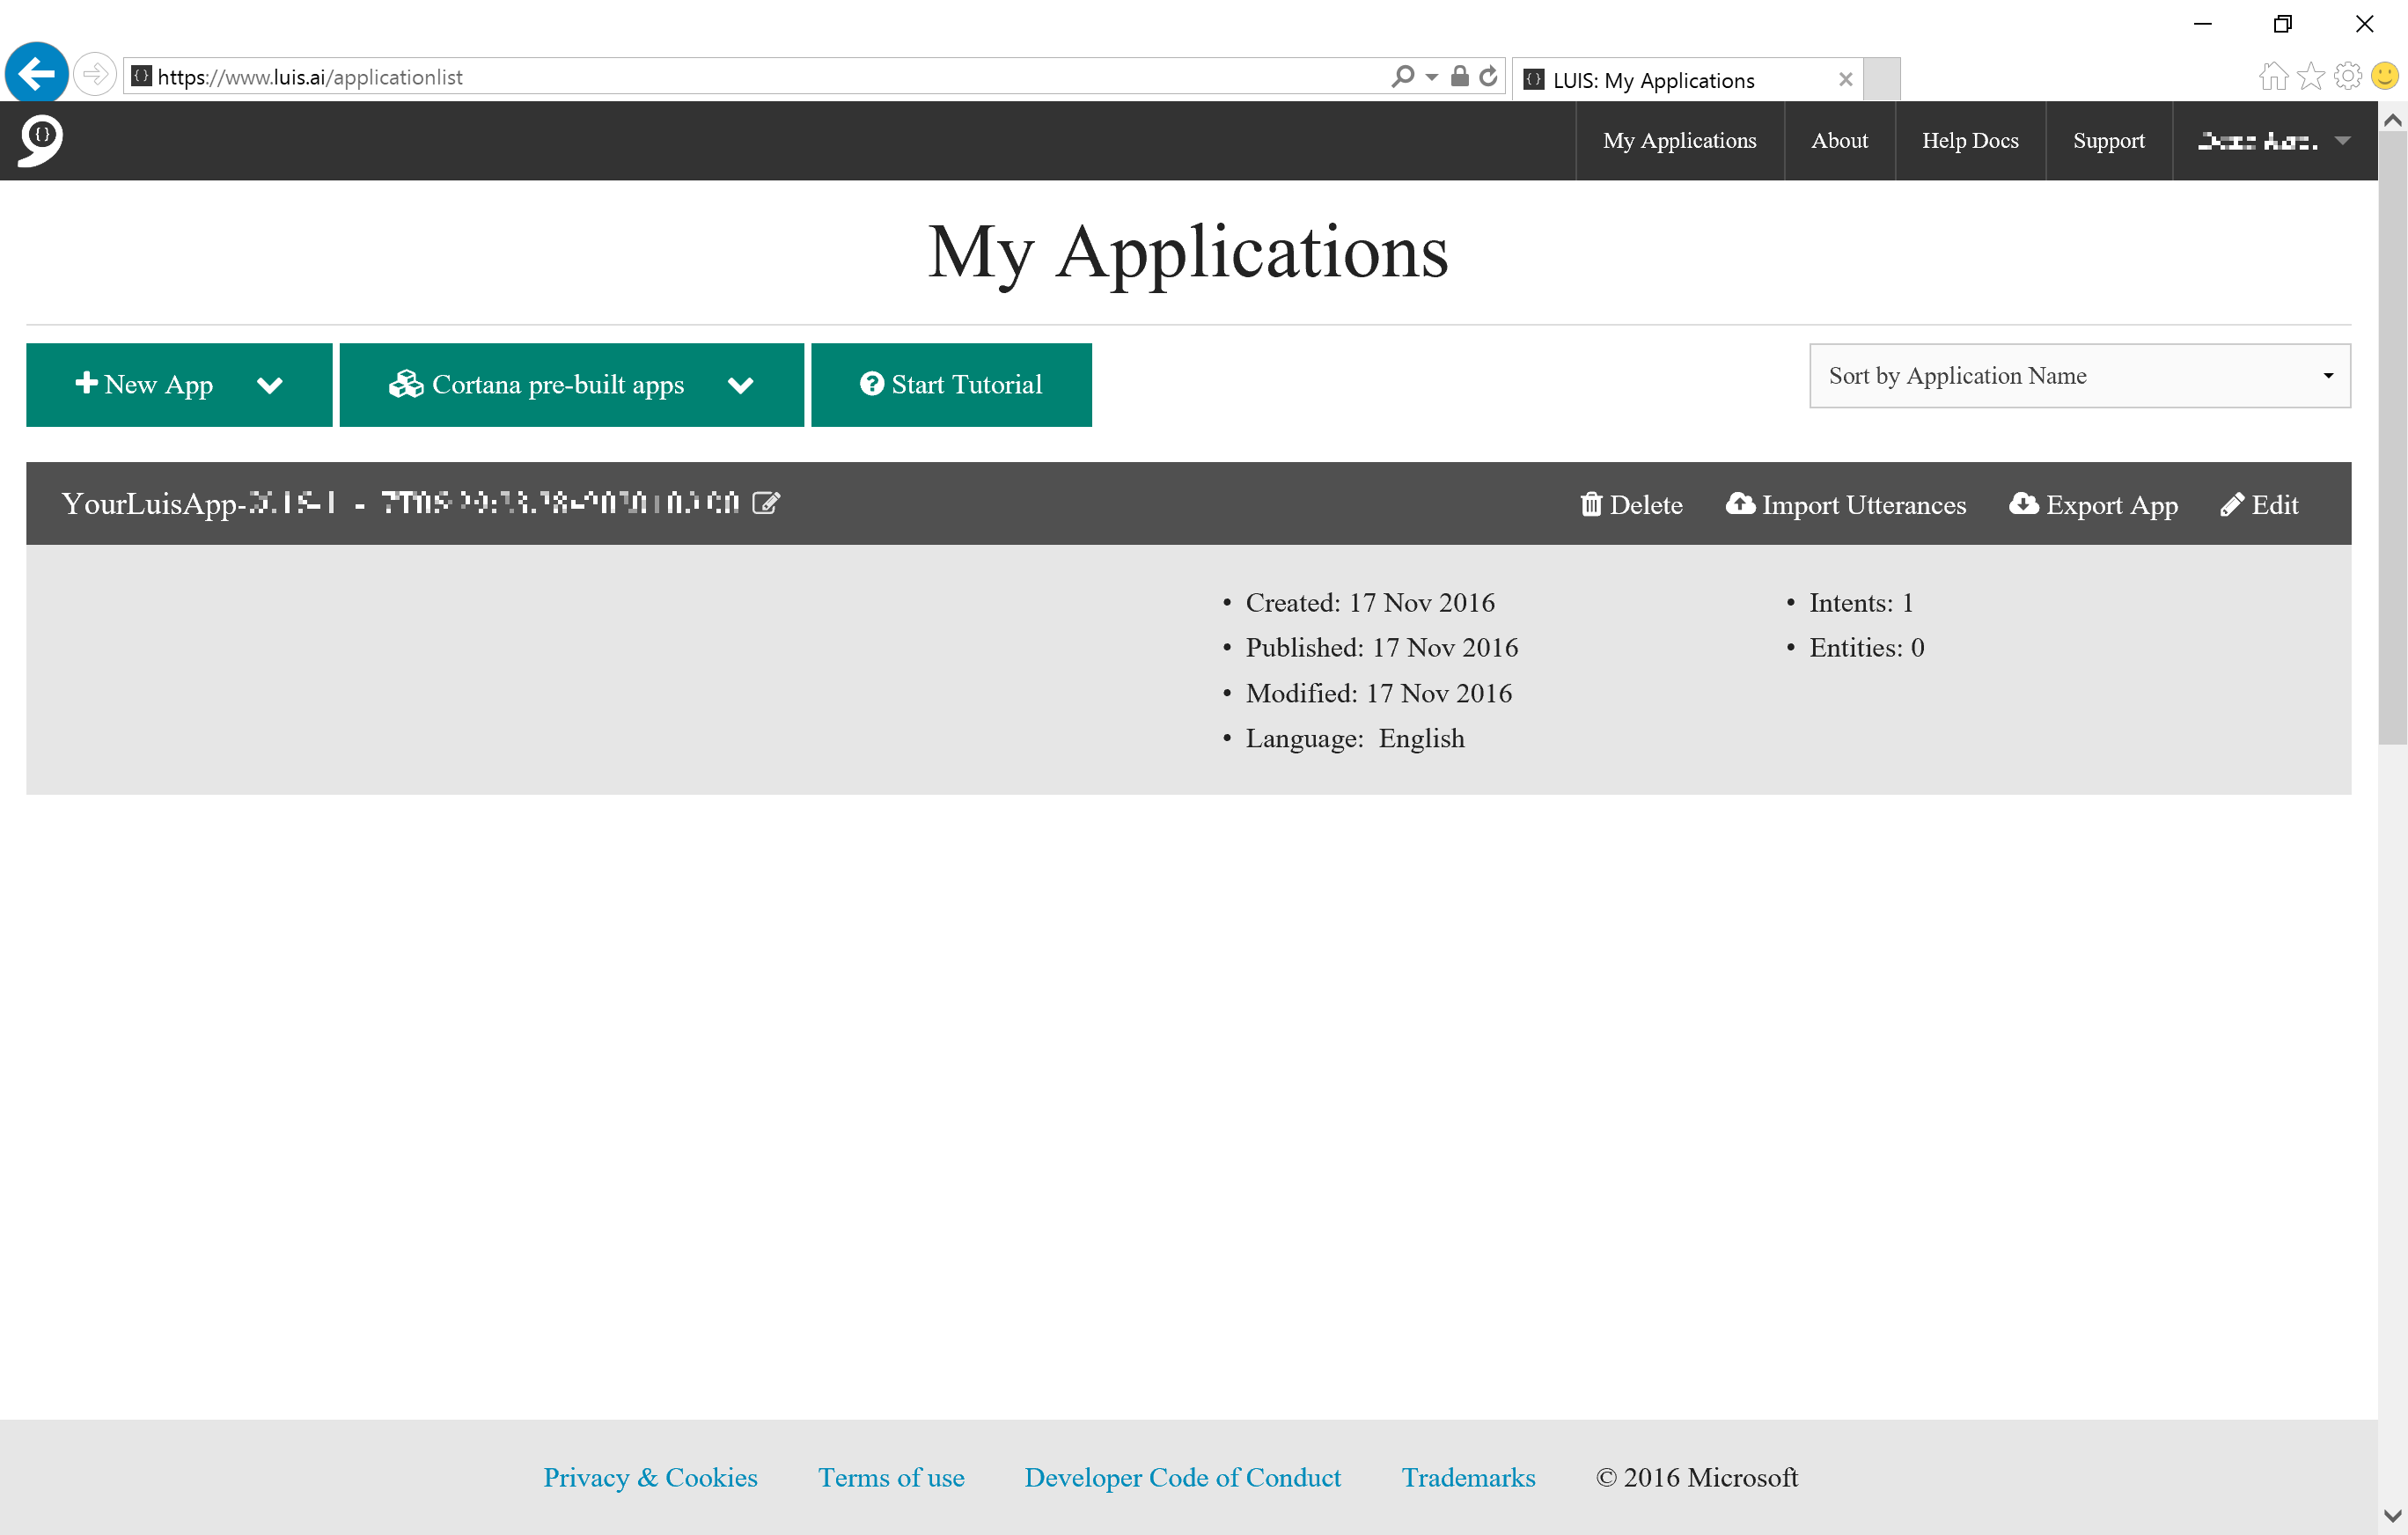
Open LUIS Website (https://www.luis.ai/) and sign in (if needed). At "My Application" screen, pick up one named "YourLuisAPP-..." . Click Edit in that section.
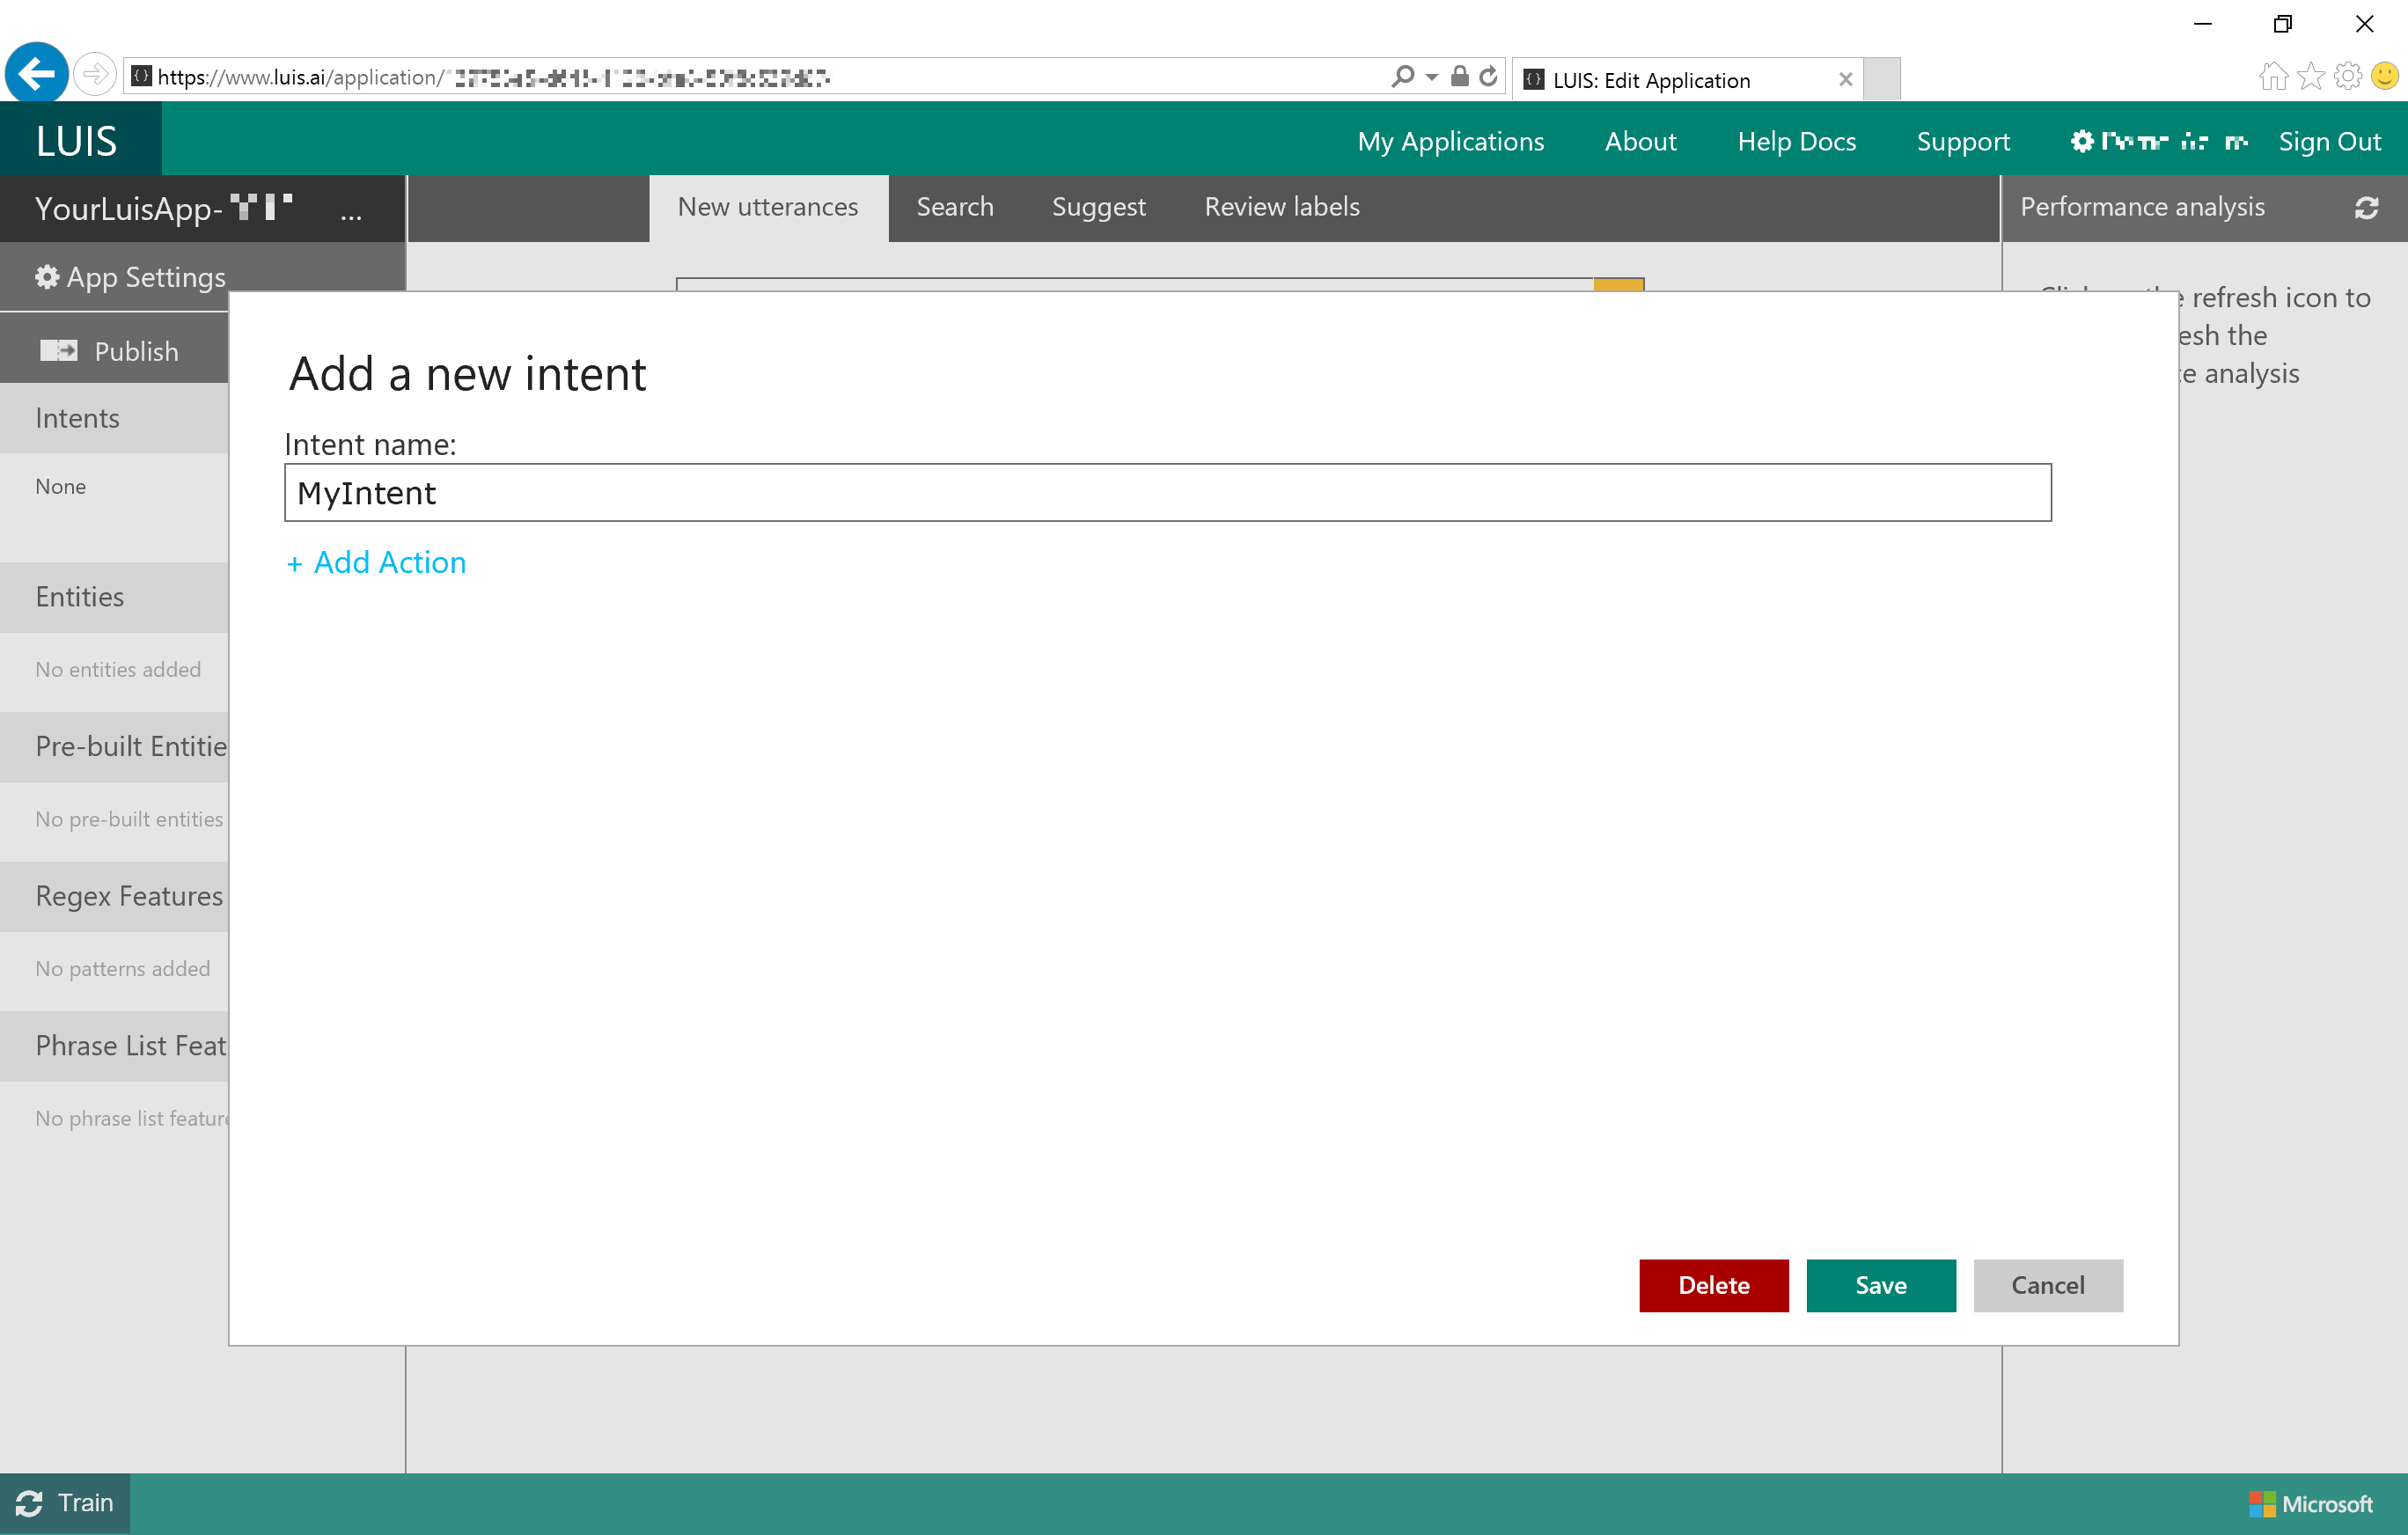
Click (+) at "Intents" Section and add intent named "MyIntent". Use "None" as created by default.
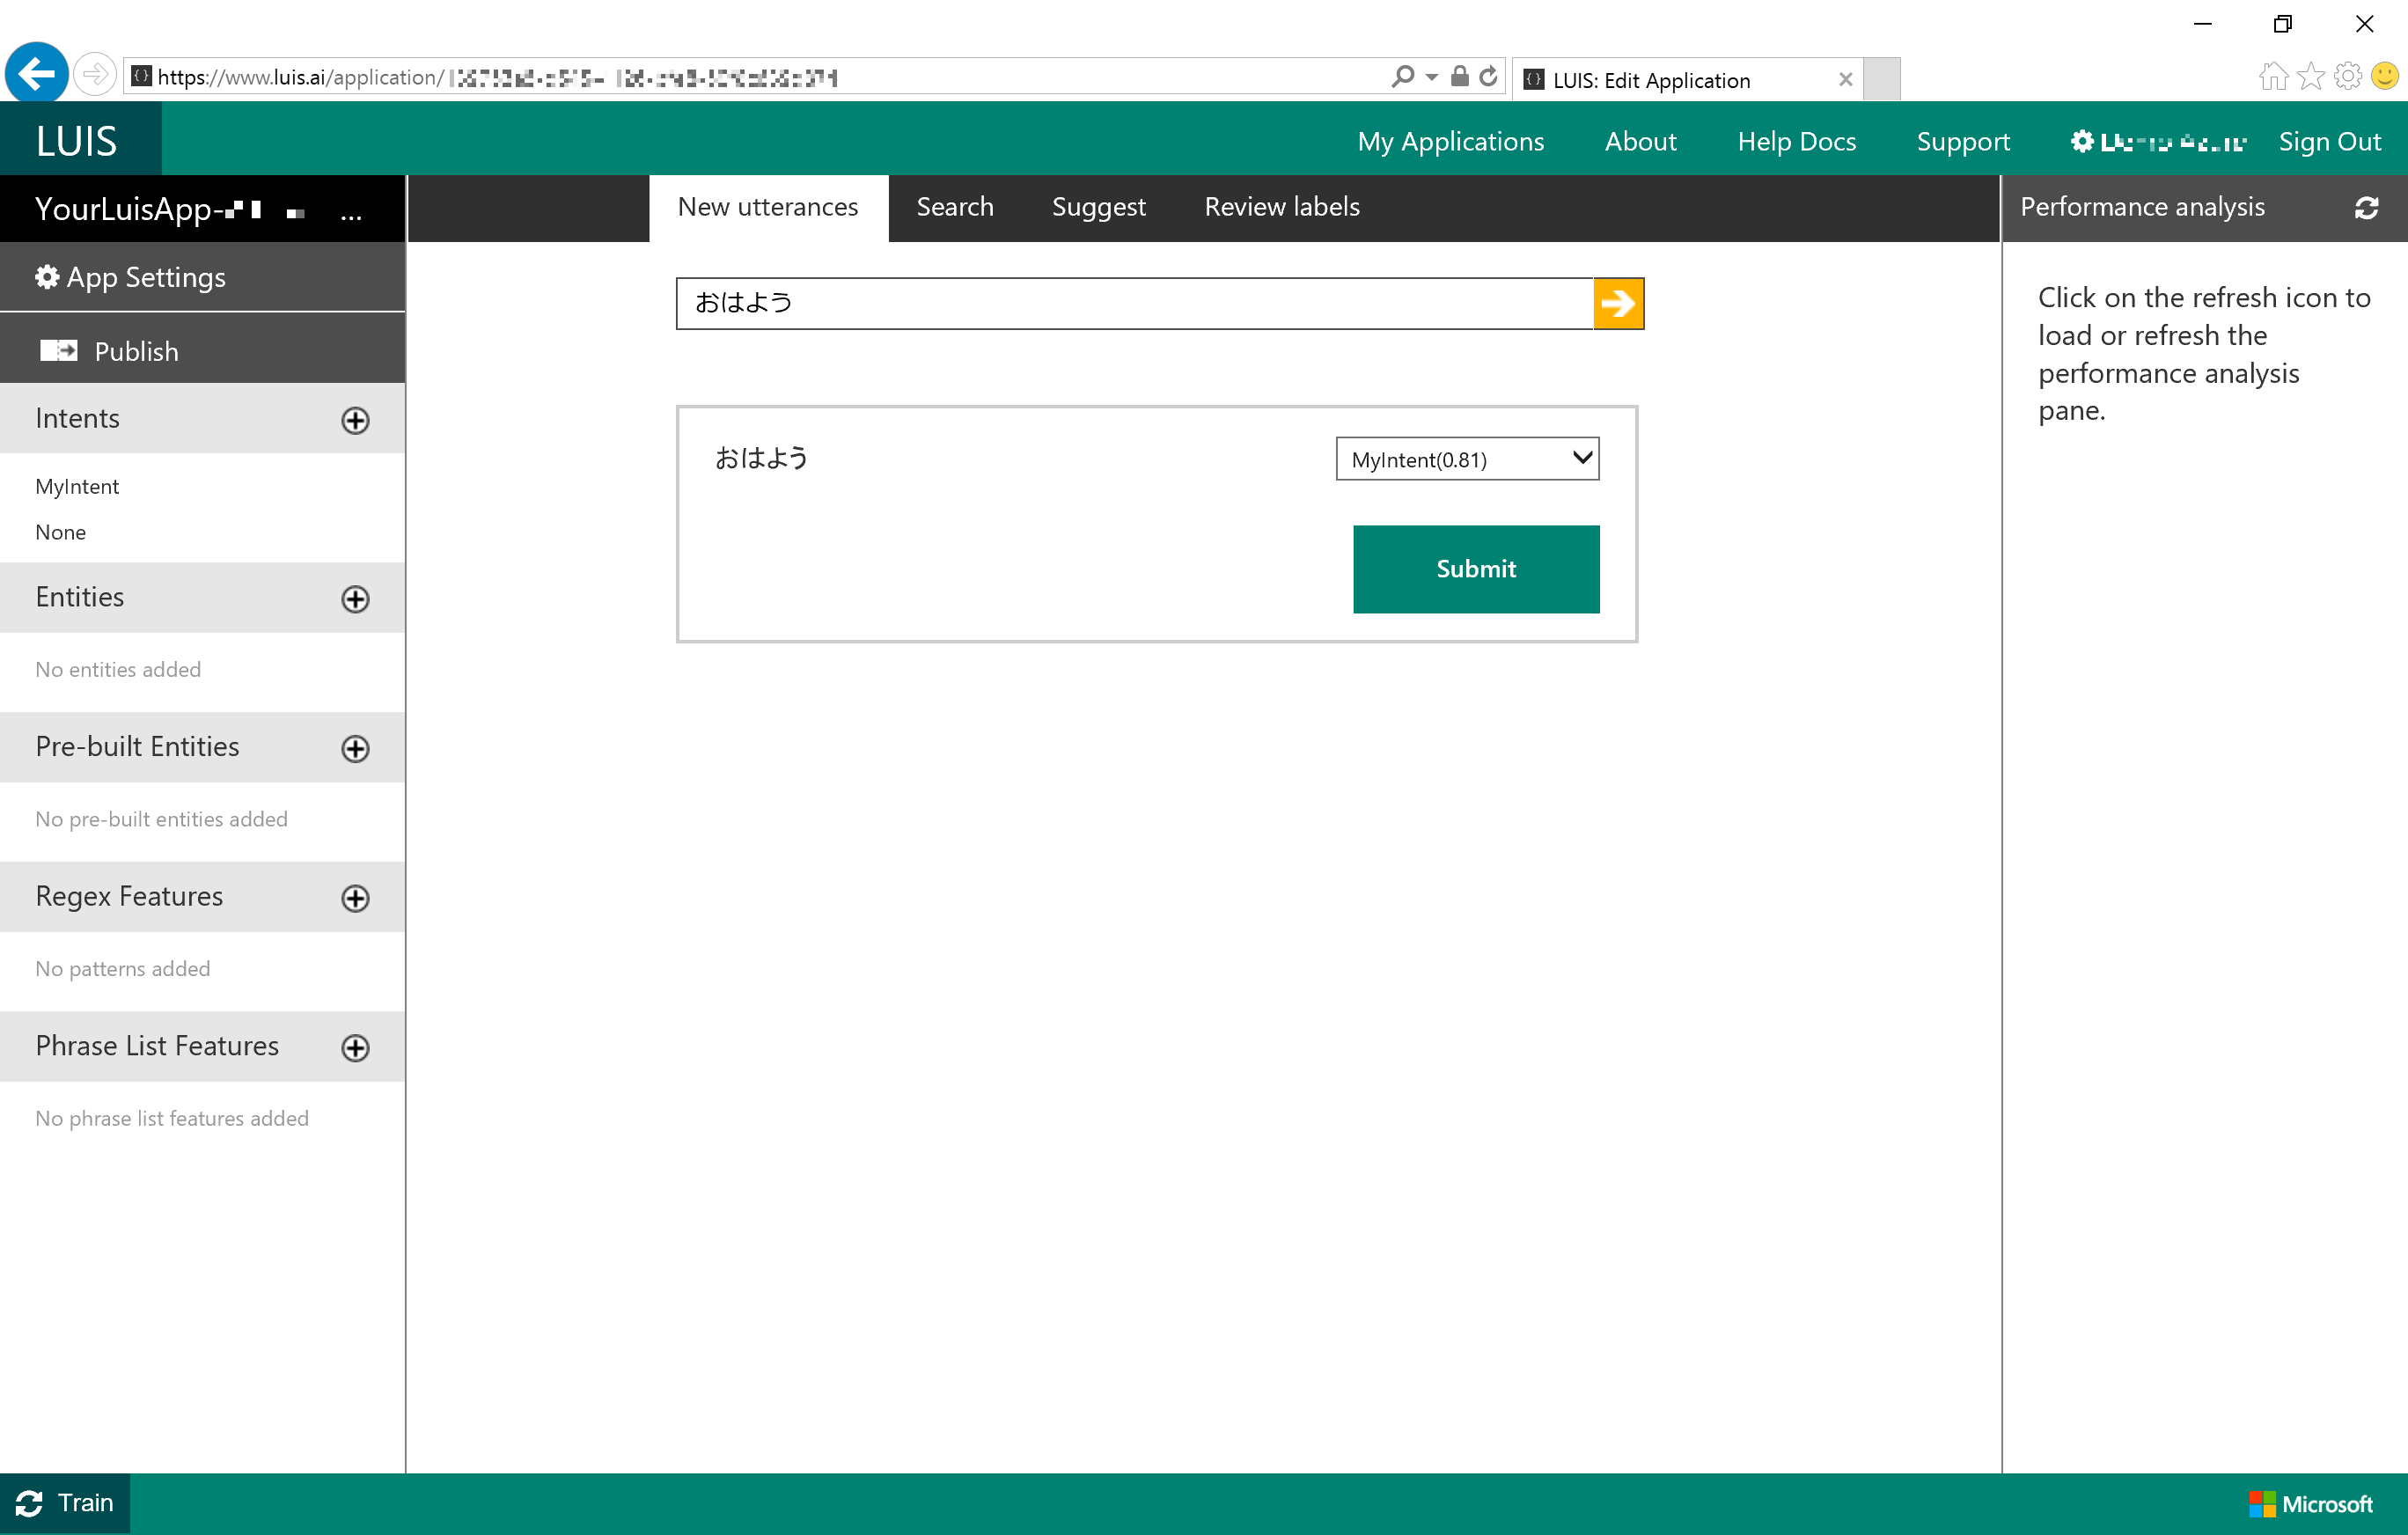
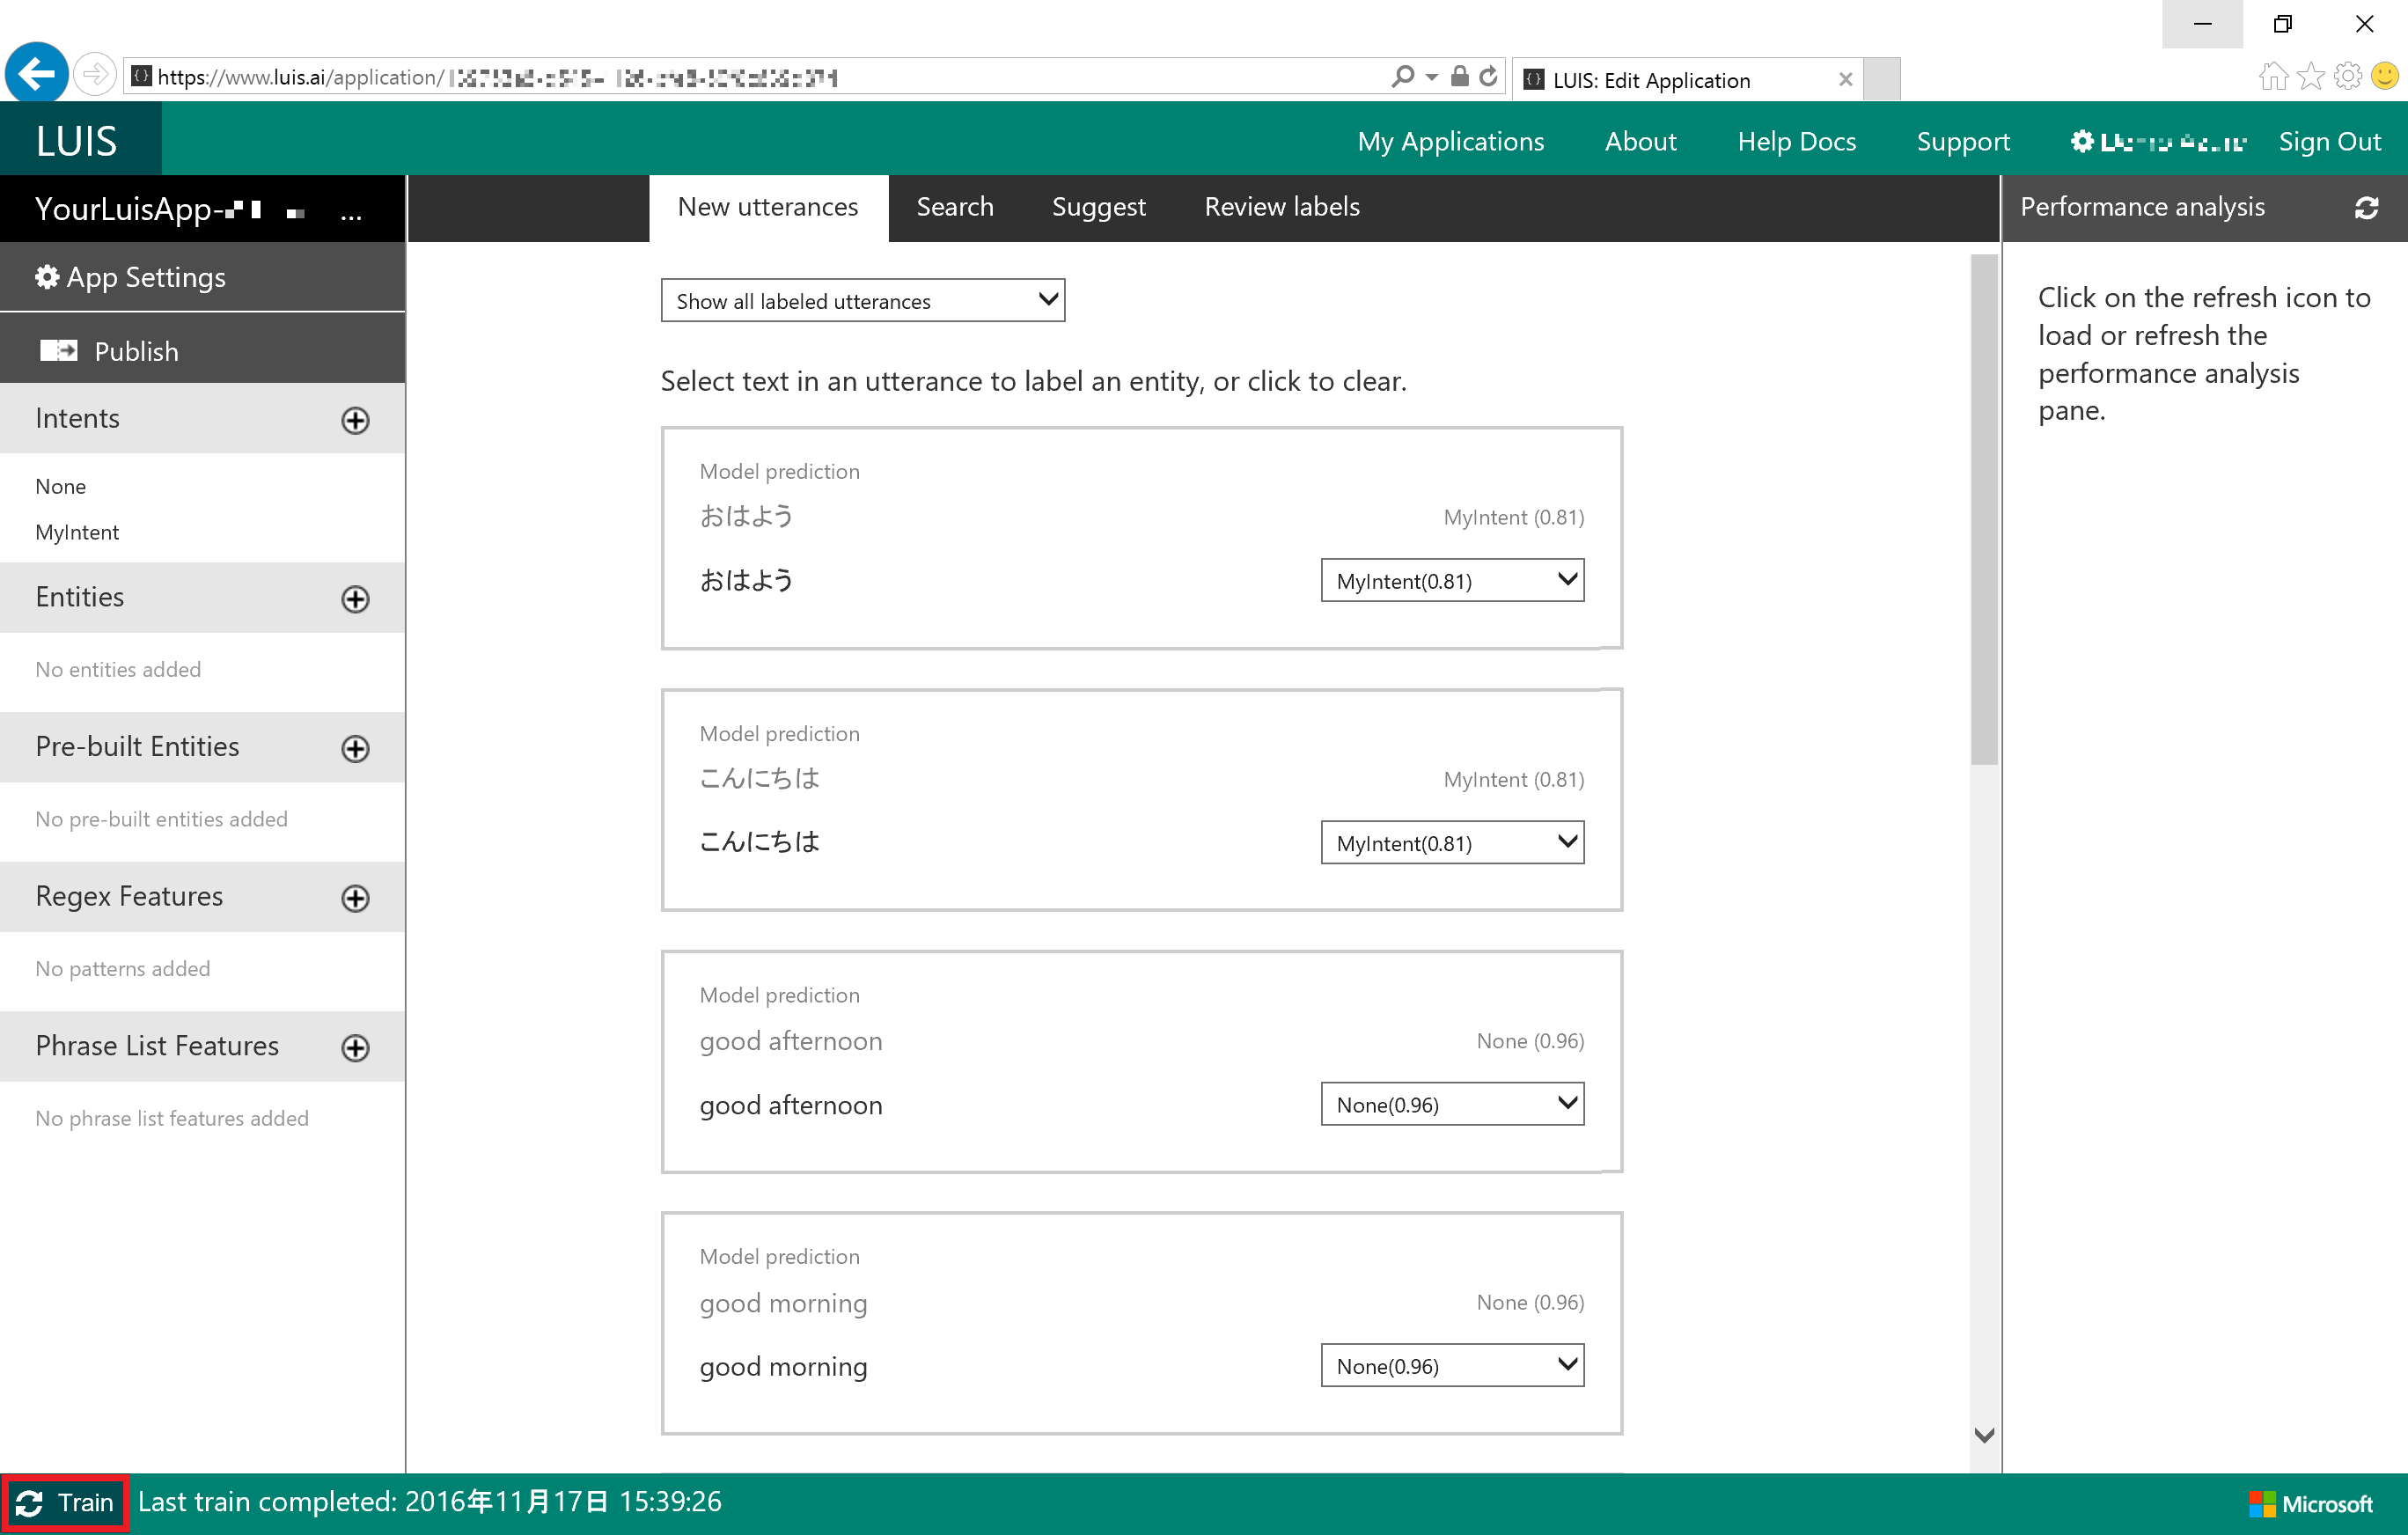
At [New Utterances] tub, enter Japanese sentences and submit as "MyIntent". Otherwise, enter English sentences and submit as "None" intent. Click [Train] to let this model learn.
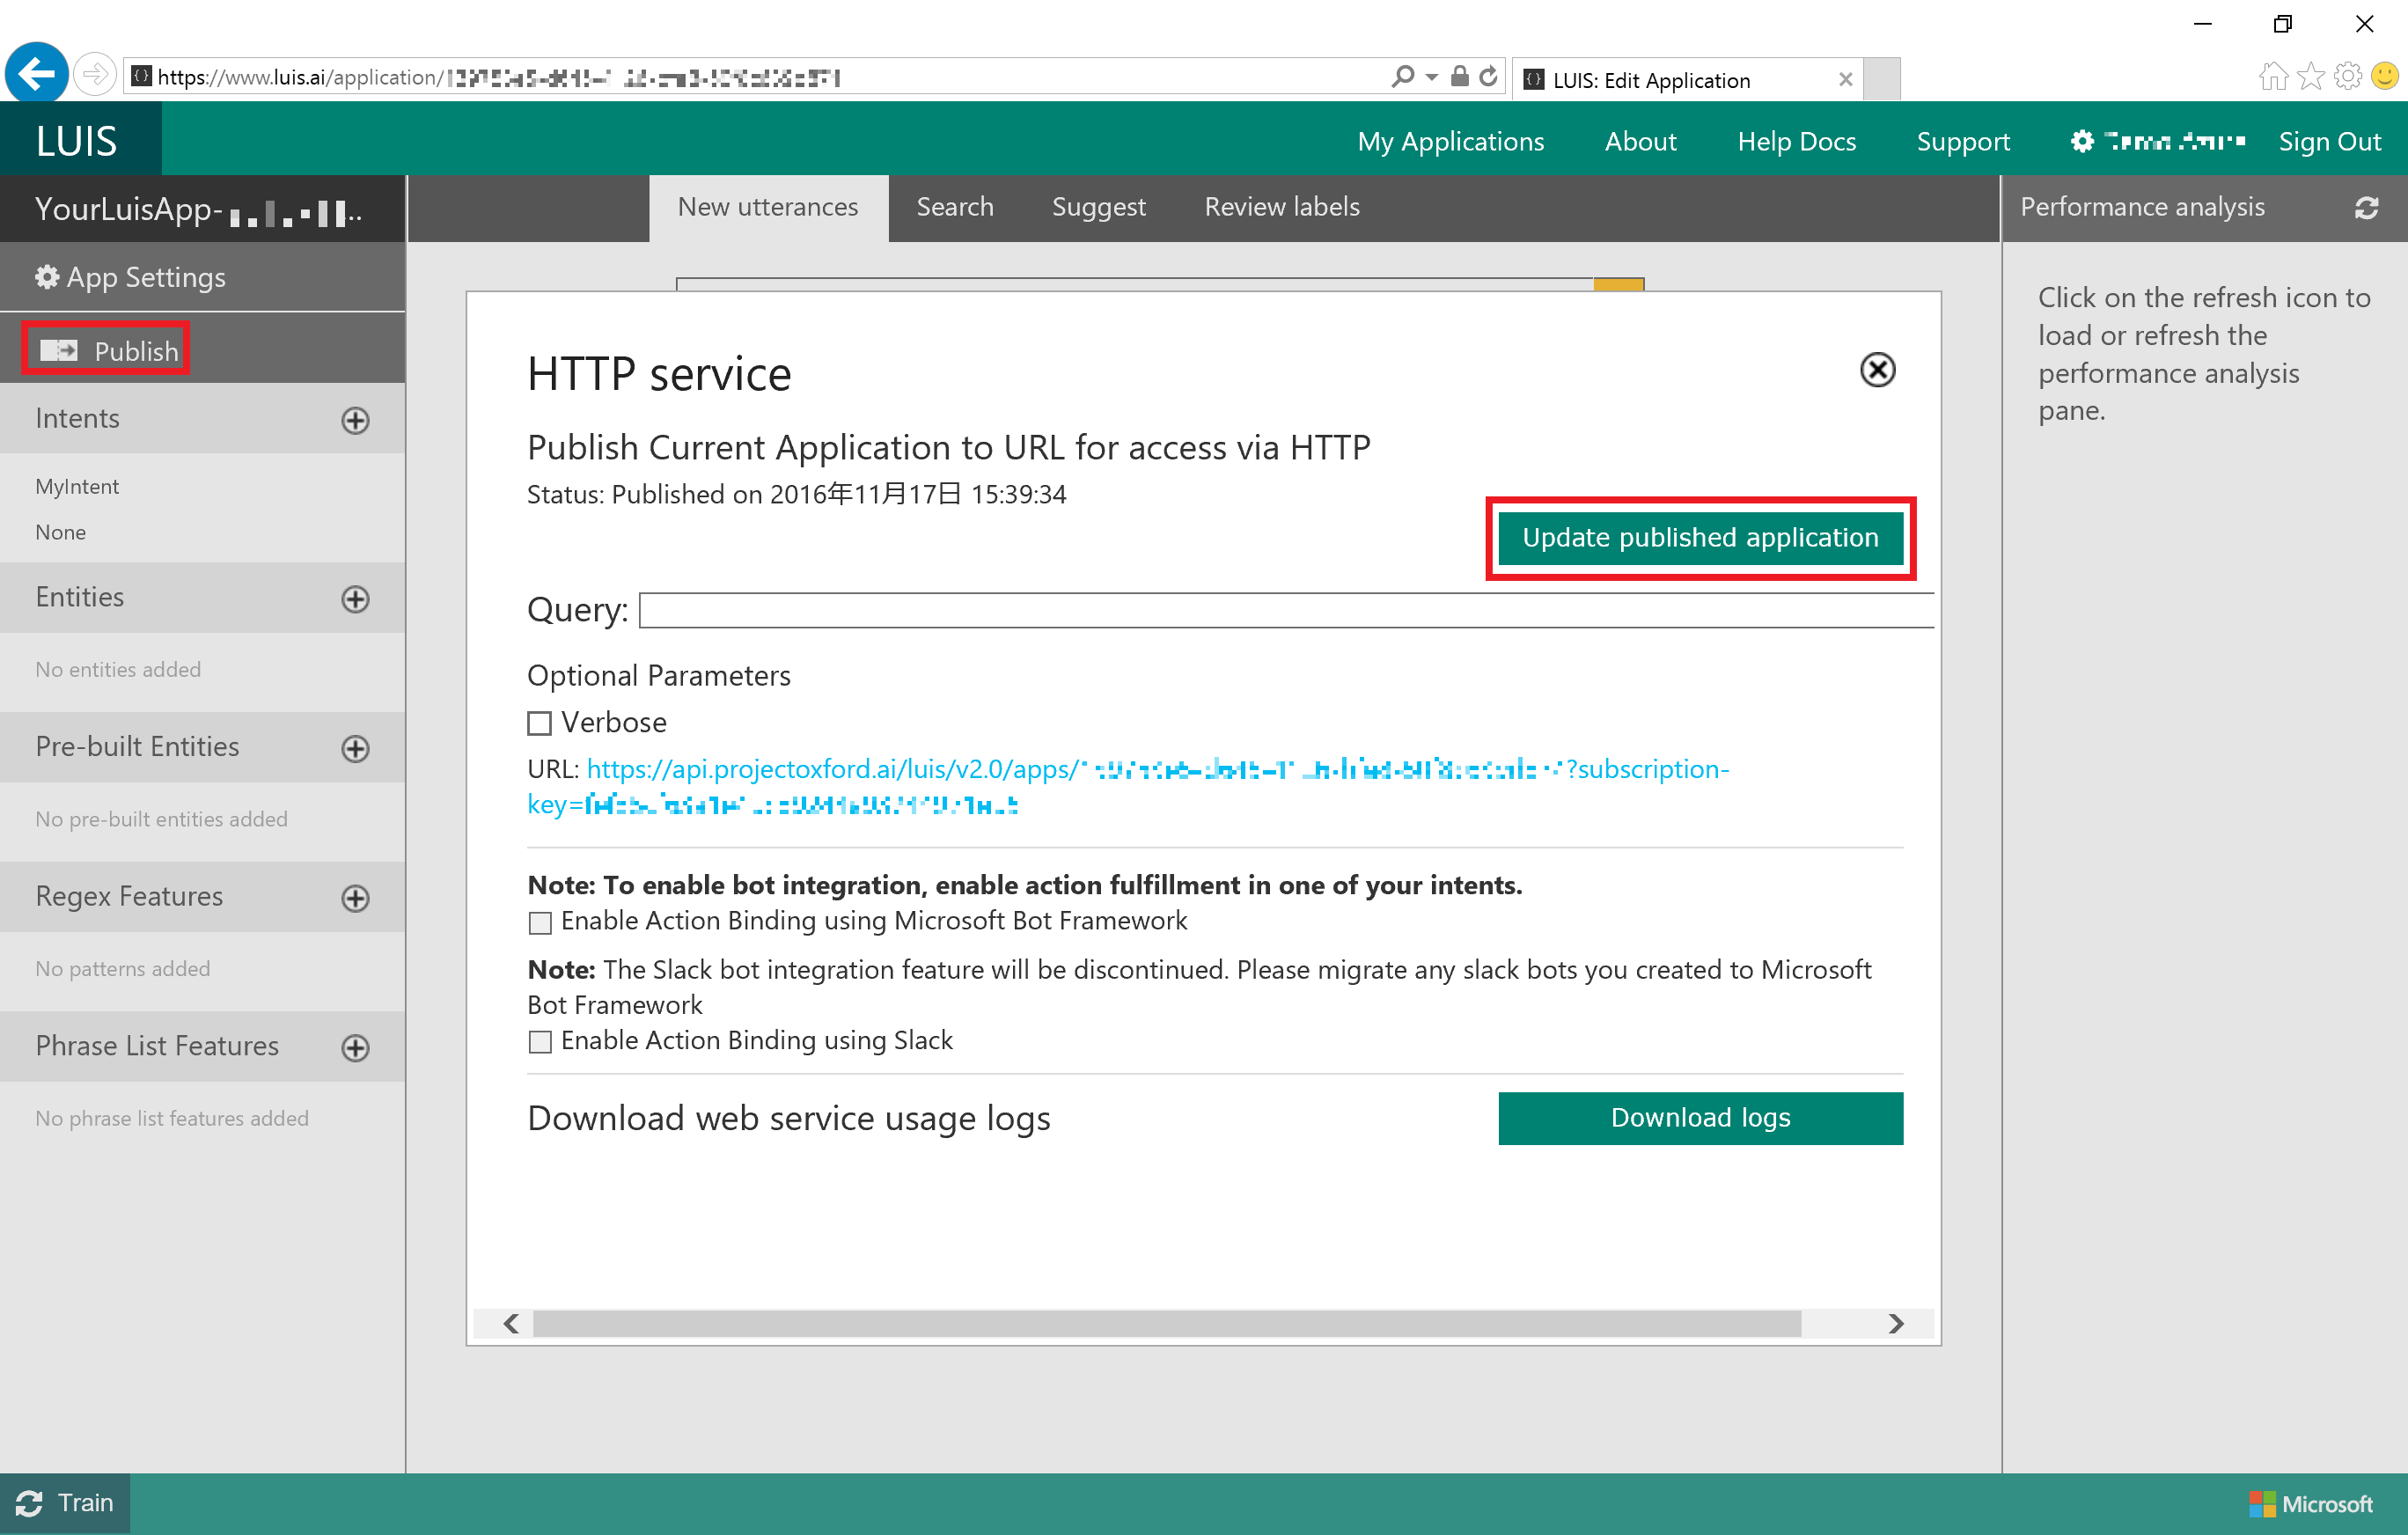
Go to [Publish] and click [Update published application] to update to public.
Check how it works
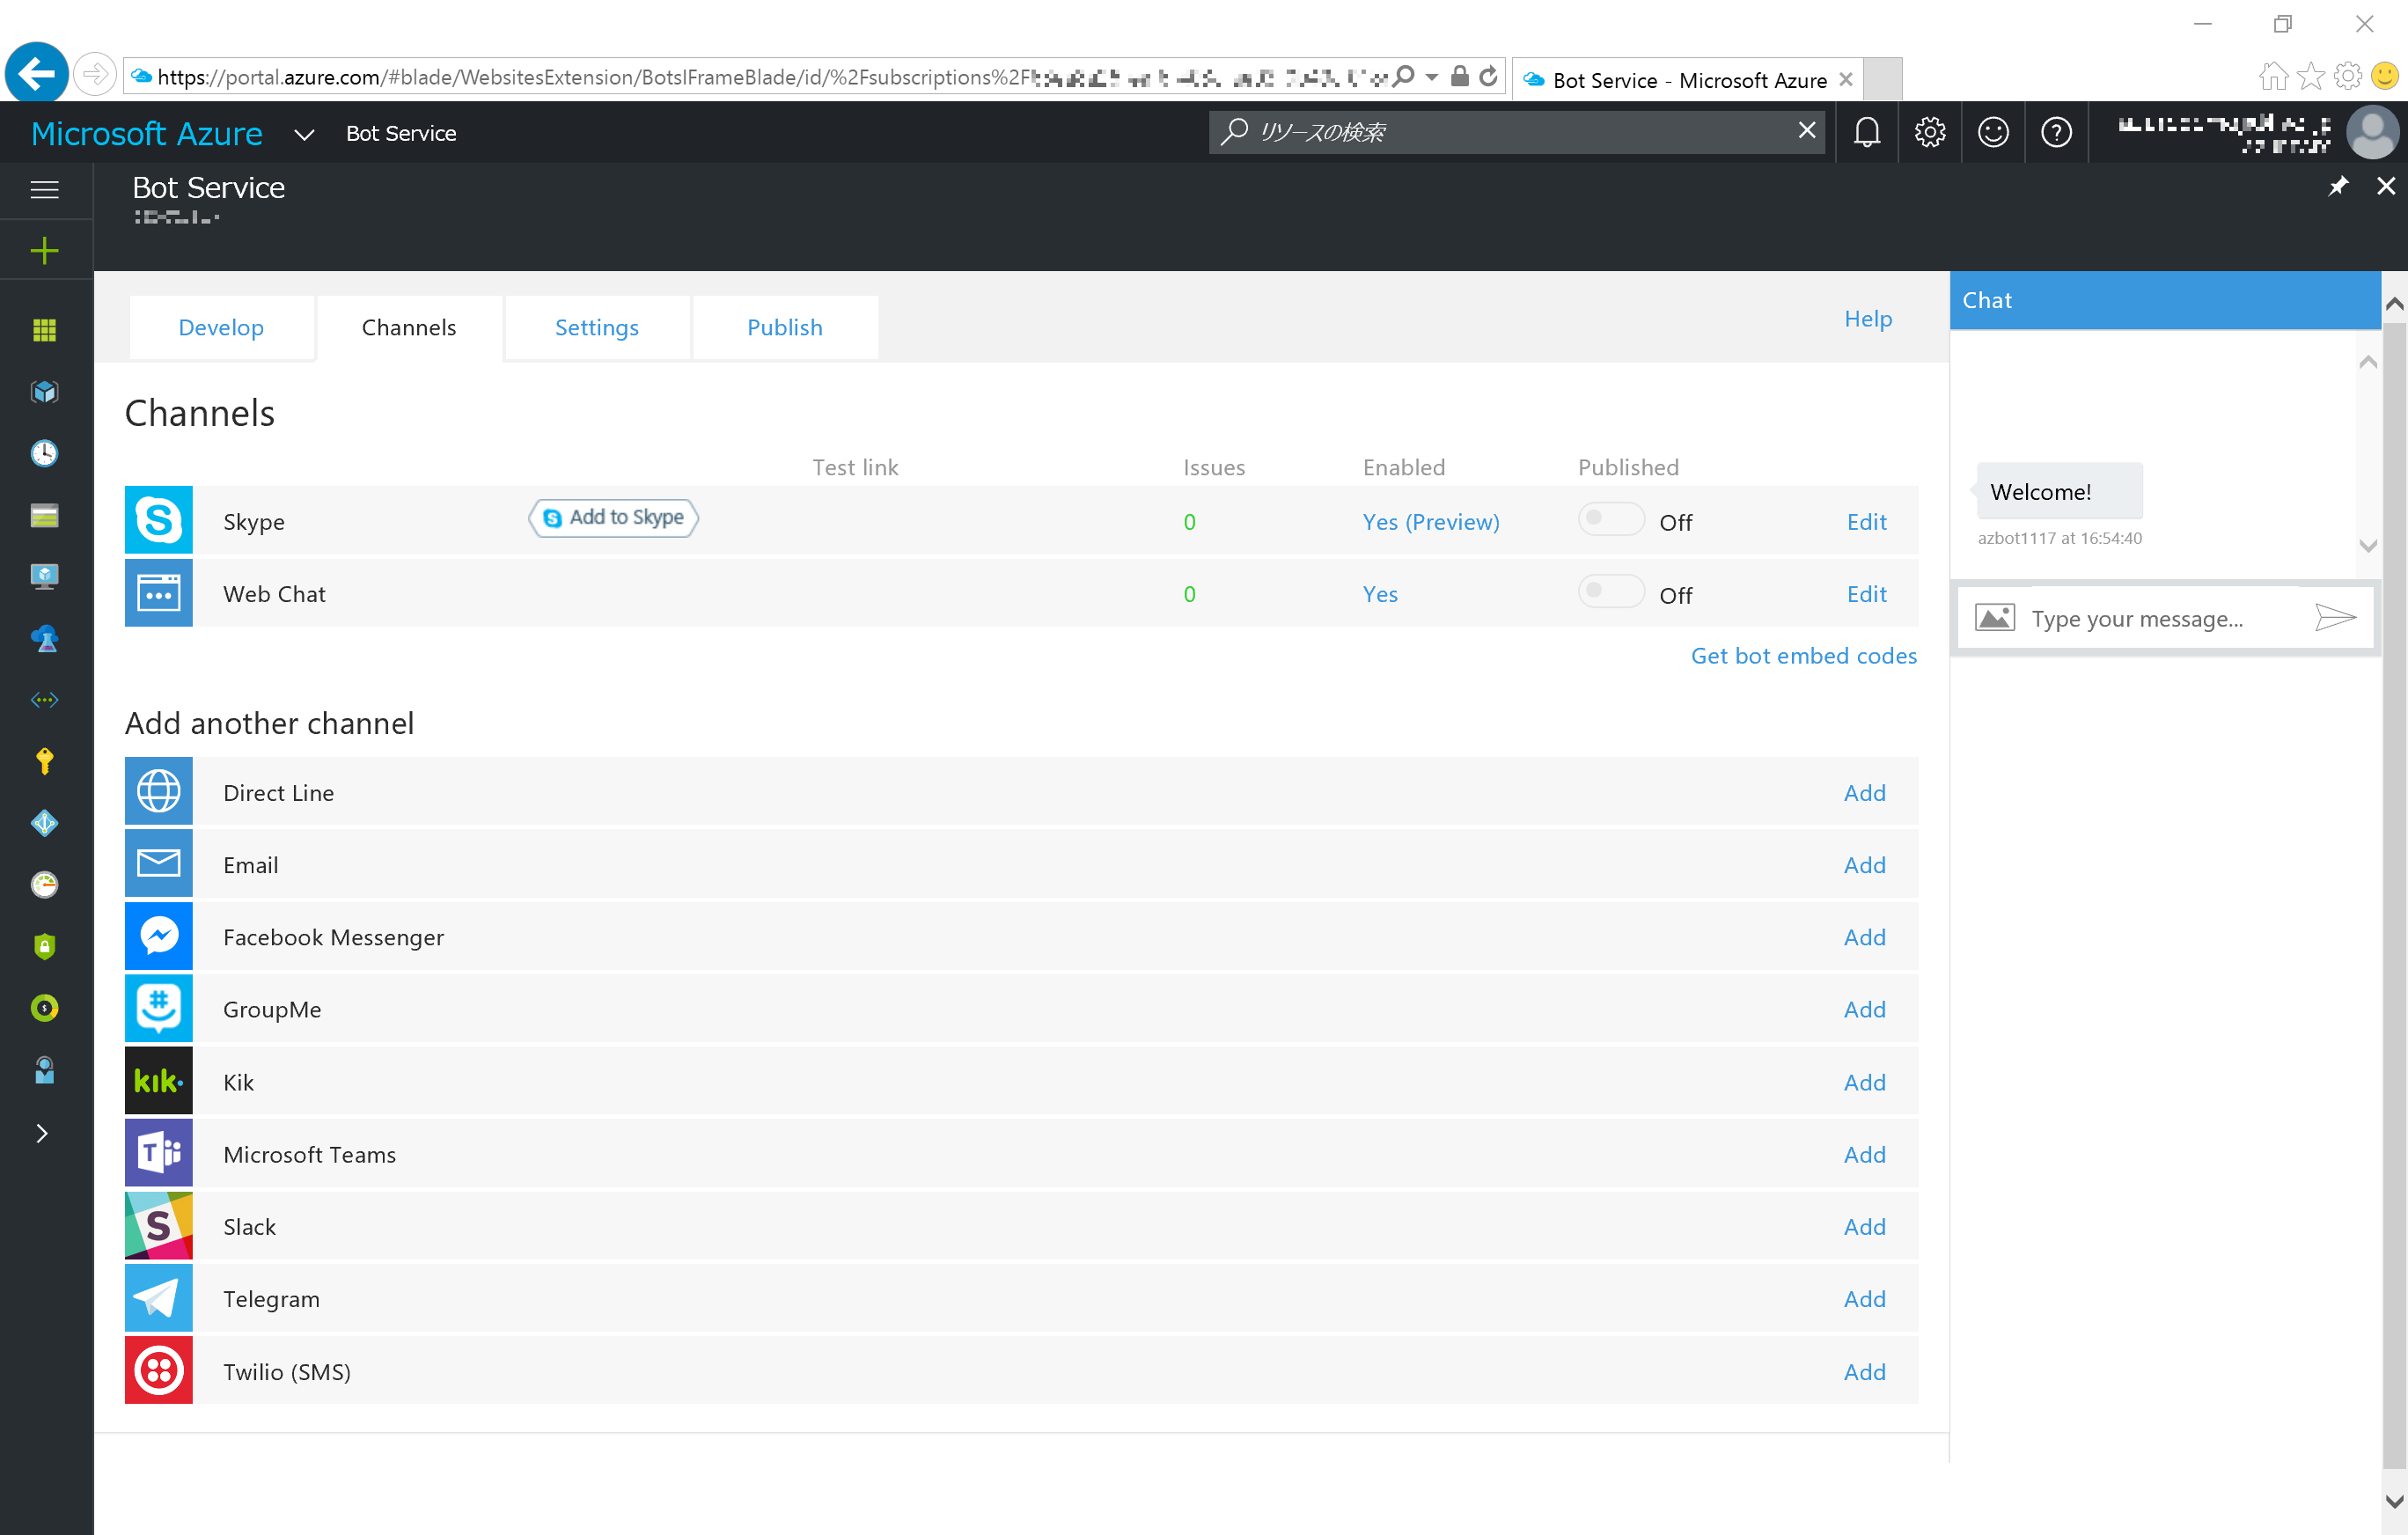
Go back to Bot Service blade in Azure Portal, check behavior in web chat. Or, you can set it up to your website with iframe. Go to [Channels] Tab, and get from [Get bot embed codes]
Here is my bot as created as above. Enjoy!