Ask Learn
Preview
Please sign in to use this experience.
Sign inThis browser is no longer supported.
Upgrade to Microsoft Edge to take advantage of the latest features, security updates, and technical support.
Note
Access to this page requires authorization. You can try signing in or changing directories.
Access to this page requires authorization. You can try changing directories.
11/15 付で Azure Functions 上で Bot Framework による BOT を展開するサービスである Azure Bot Service が発表され、プレビュー利用可能になりました。
Azure Bot Service により、これまで Bot Framework で BOT アプリ作成 → Azure で公開 → Bot Directory に登録、という手順が必要だったところを、Azure Portal から 一度に作成できるようになりました。
Microsoft Azure > Azure Bot Service Microsoft Azure Blog > Microsoft Azure Announces Industry’s First Cloud Bot-as-a-Service 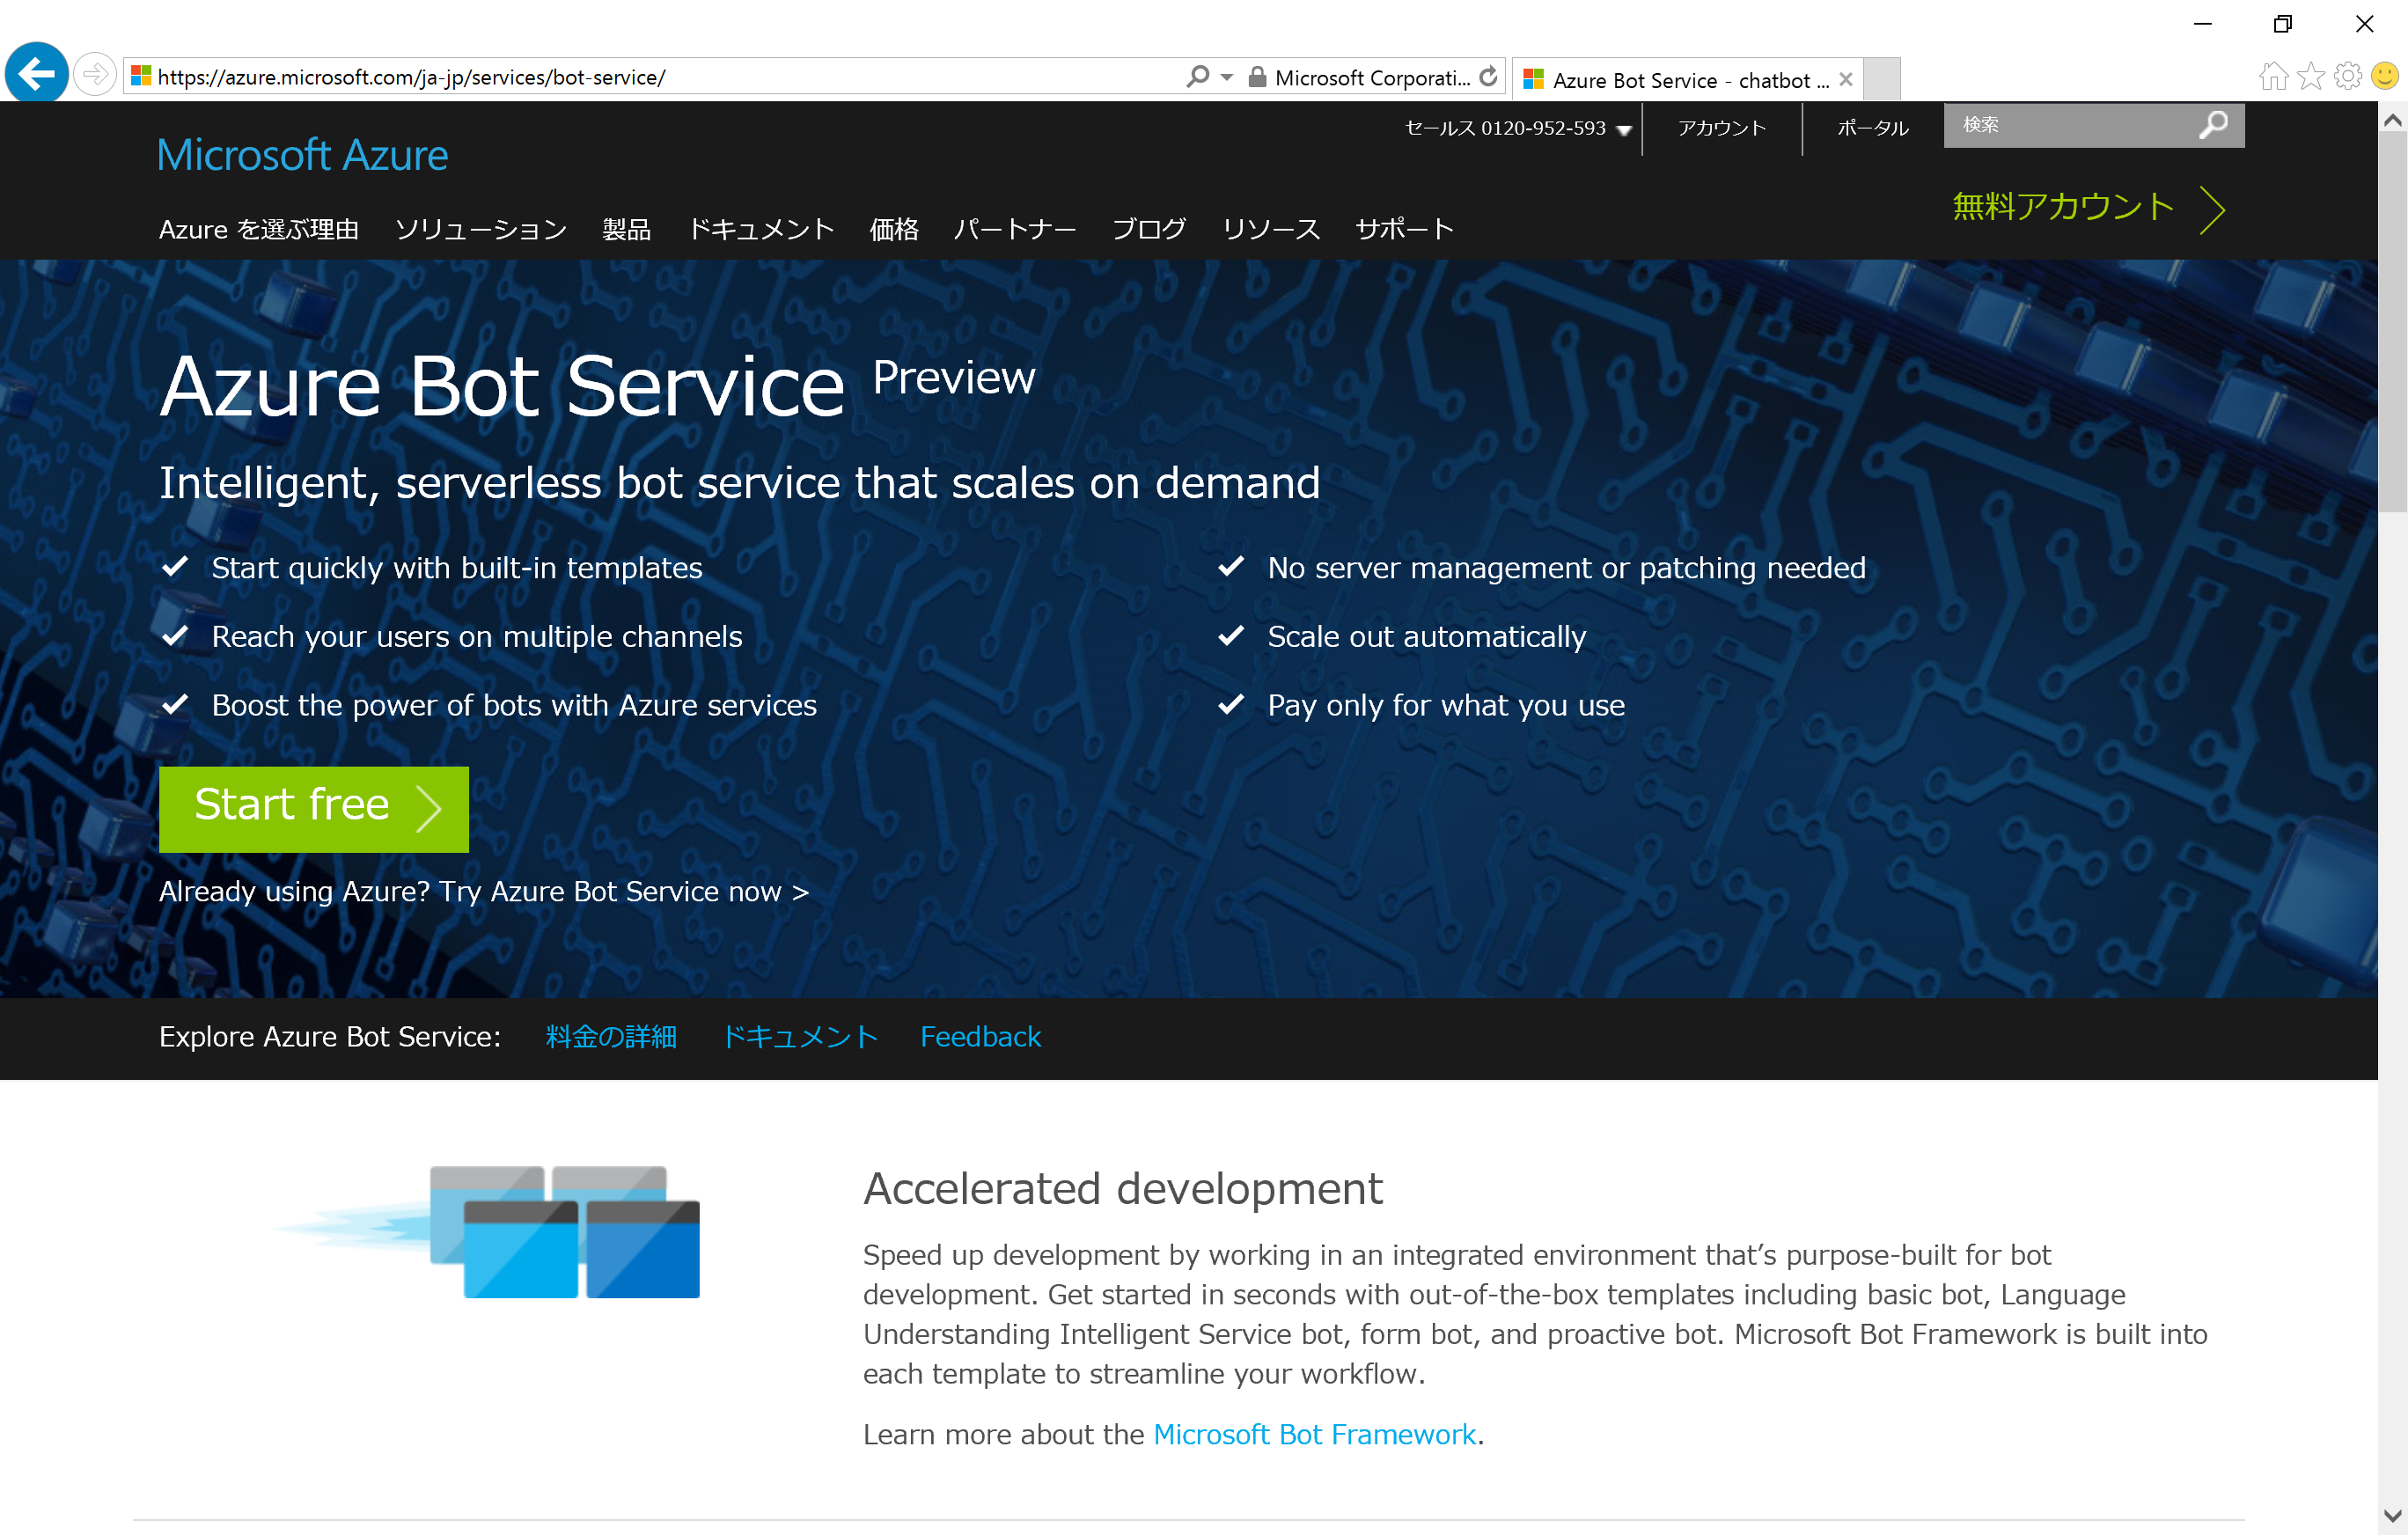
以下、Azure Bot Service による BOT 作成&公開手順を簡単にご紹介します。(※Azure Bot Service の利用には Azure サブスクリプションが必要です)
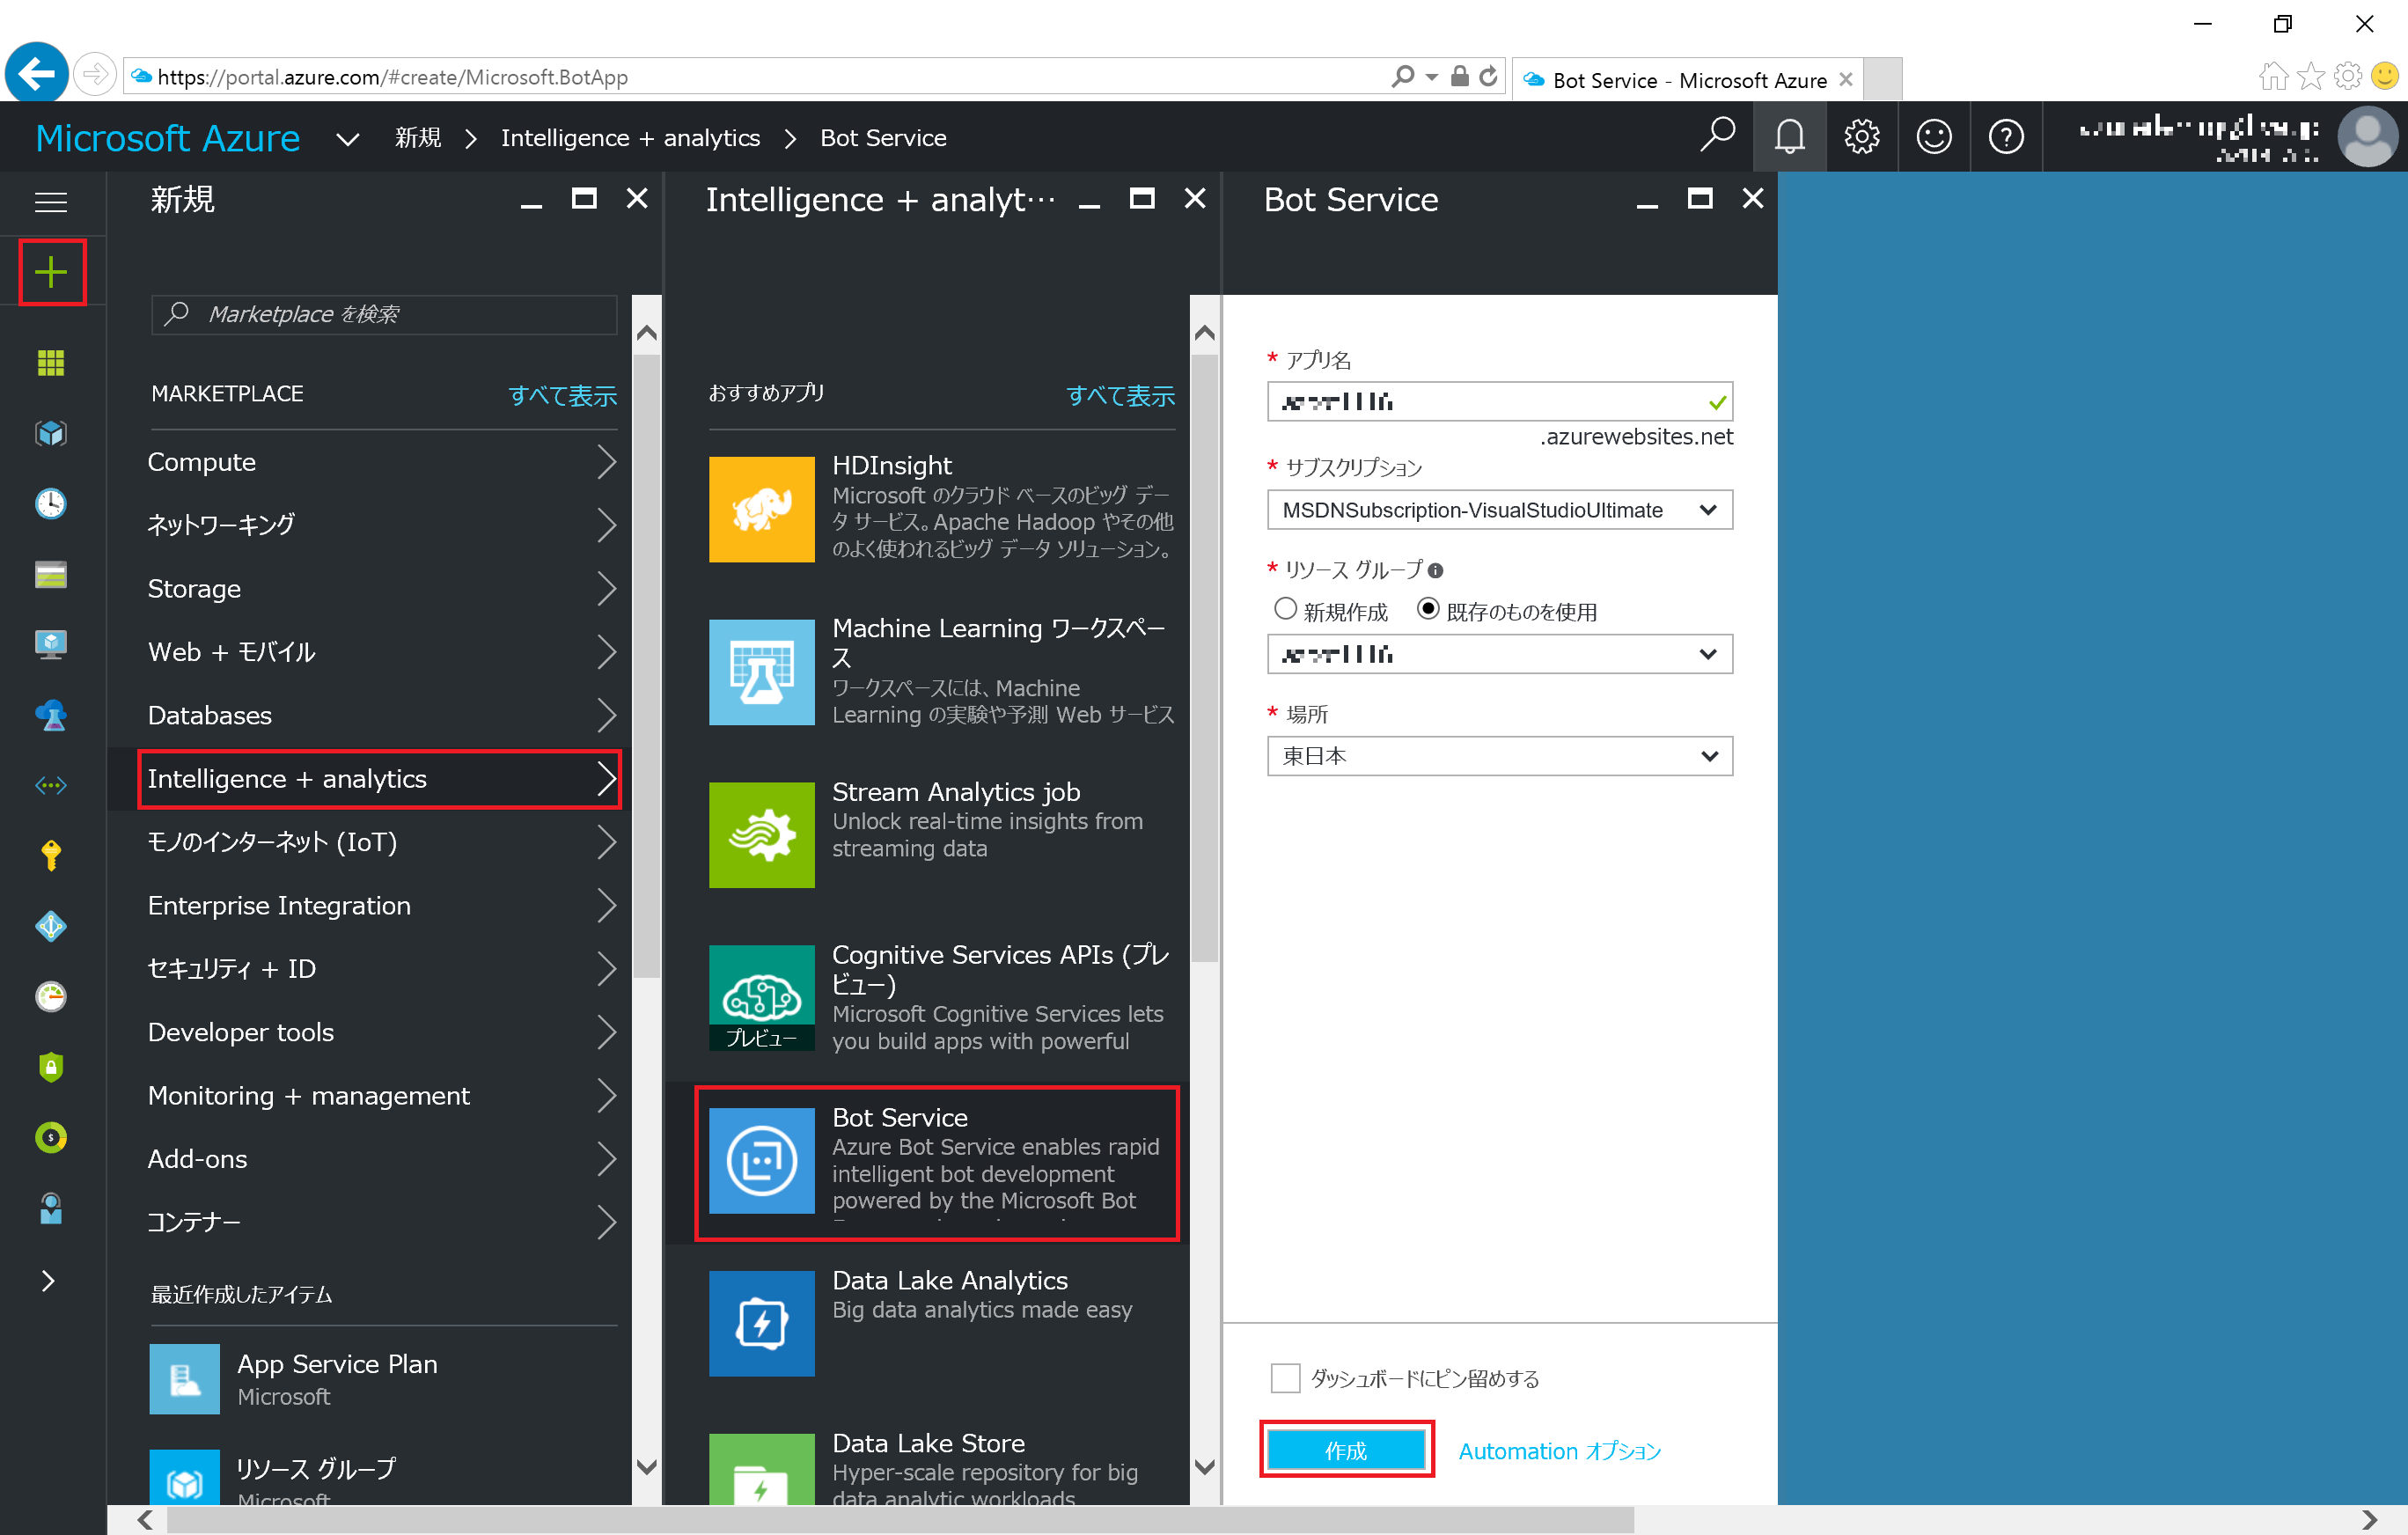
Azure Portal にアクセスし、Azure サブスクリプションが利用可能なアカウントでサインインを行います。[+新規] から [Intelligence+analytics] を選択、[Bot Service] を選択します。Bot Service の新規作成ダイアログで アプリ名、リソースグループ、データセンターの場所を入力&選択し、[作成] をクリックします。
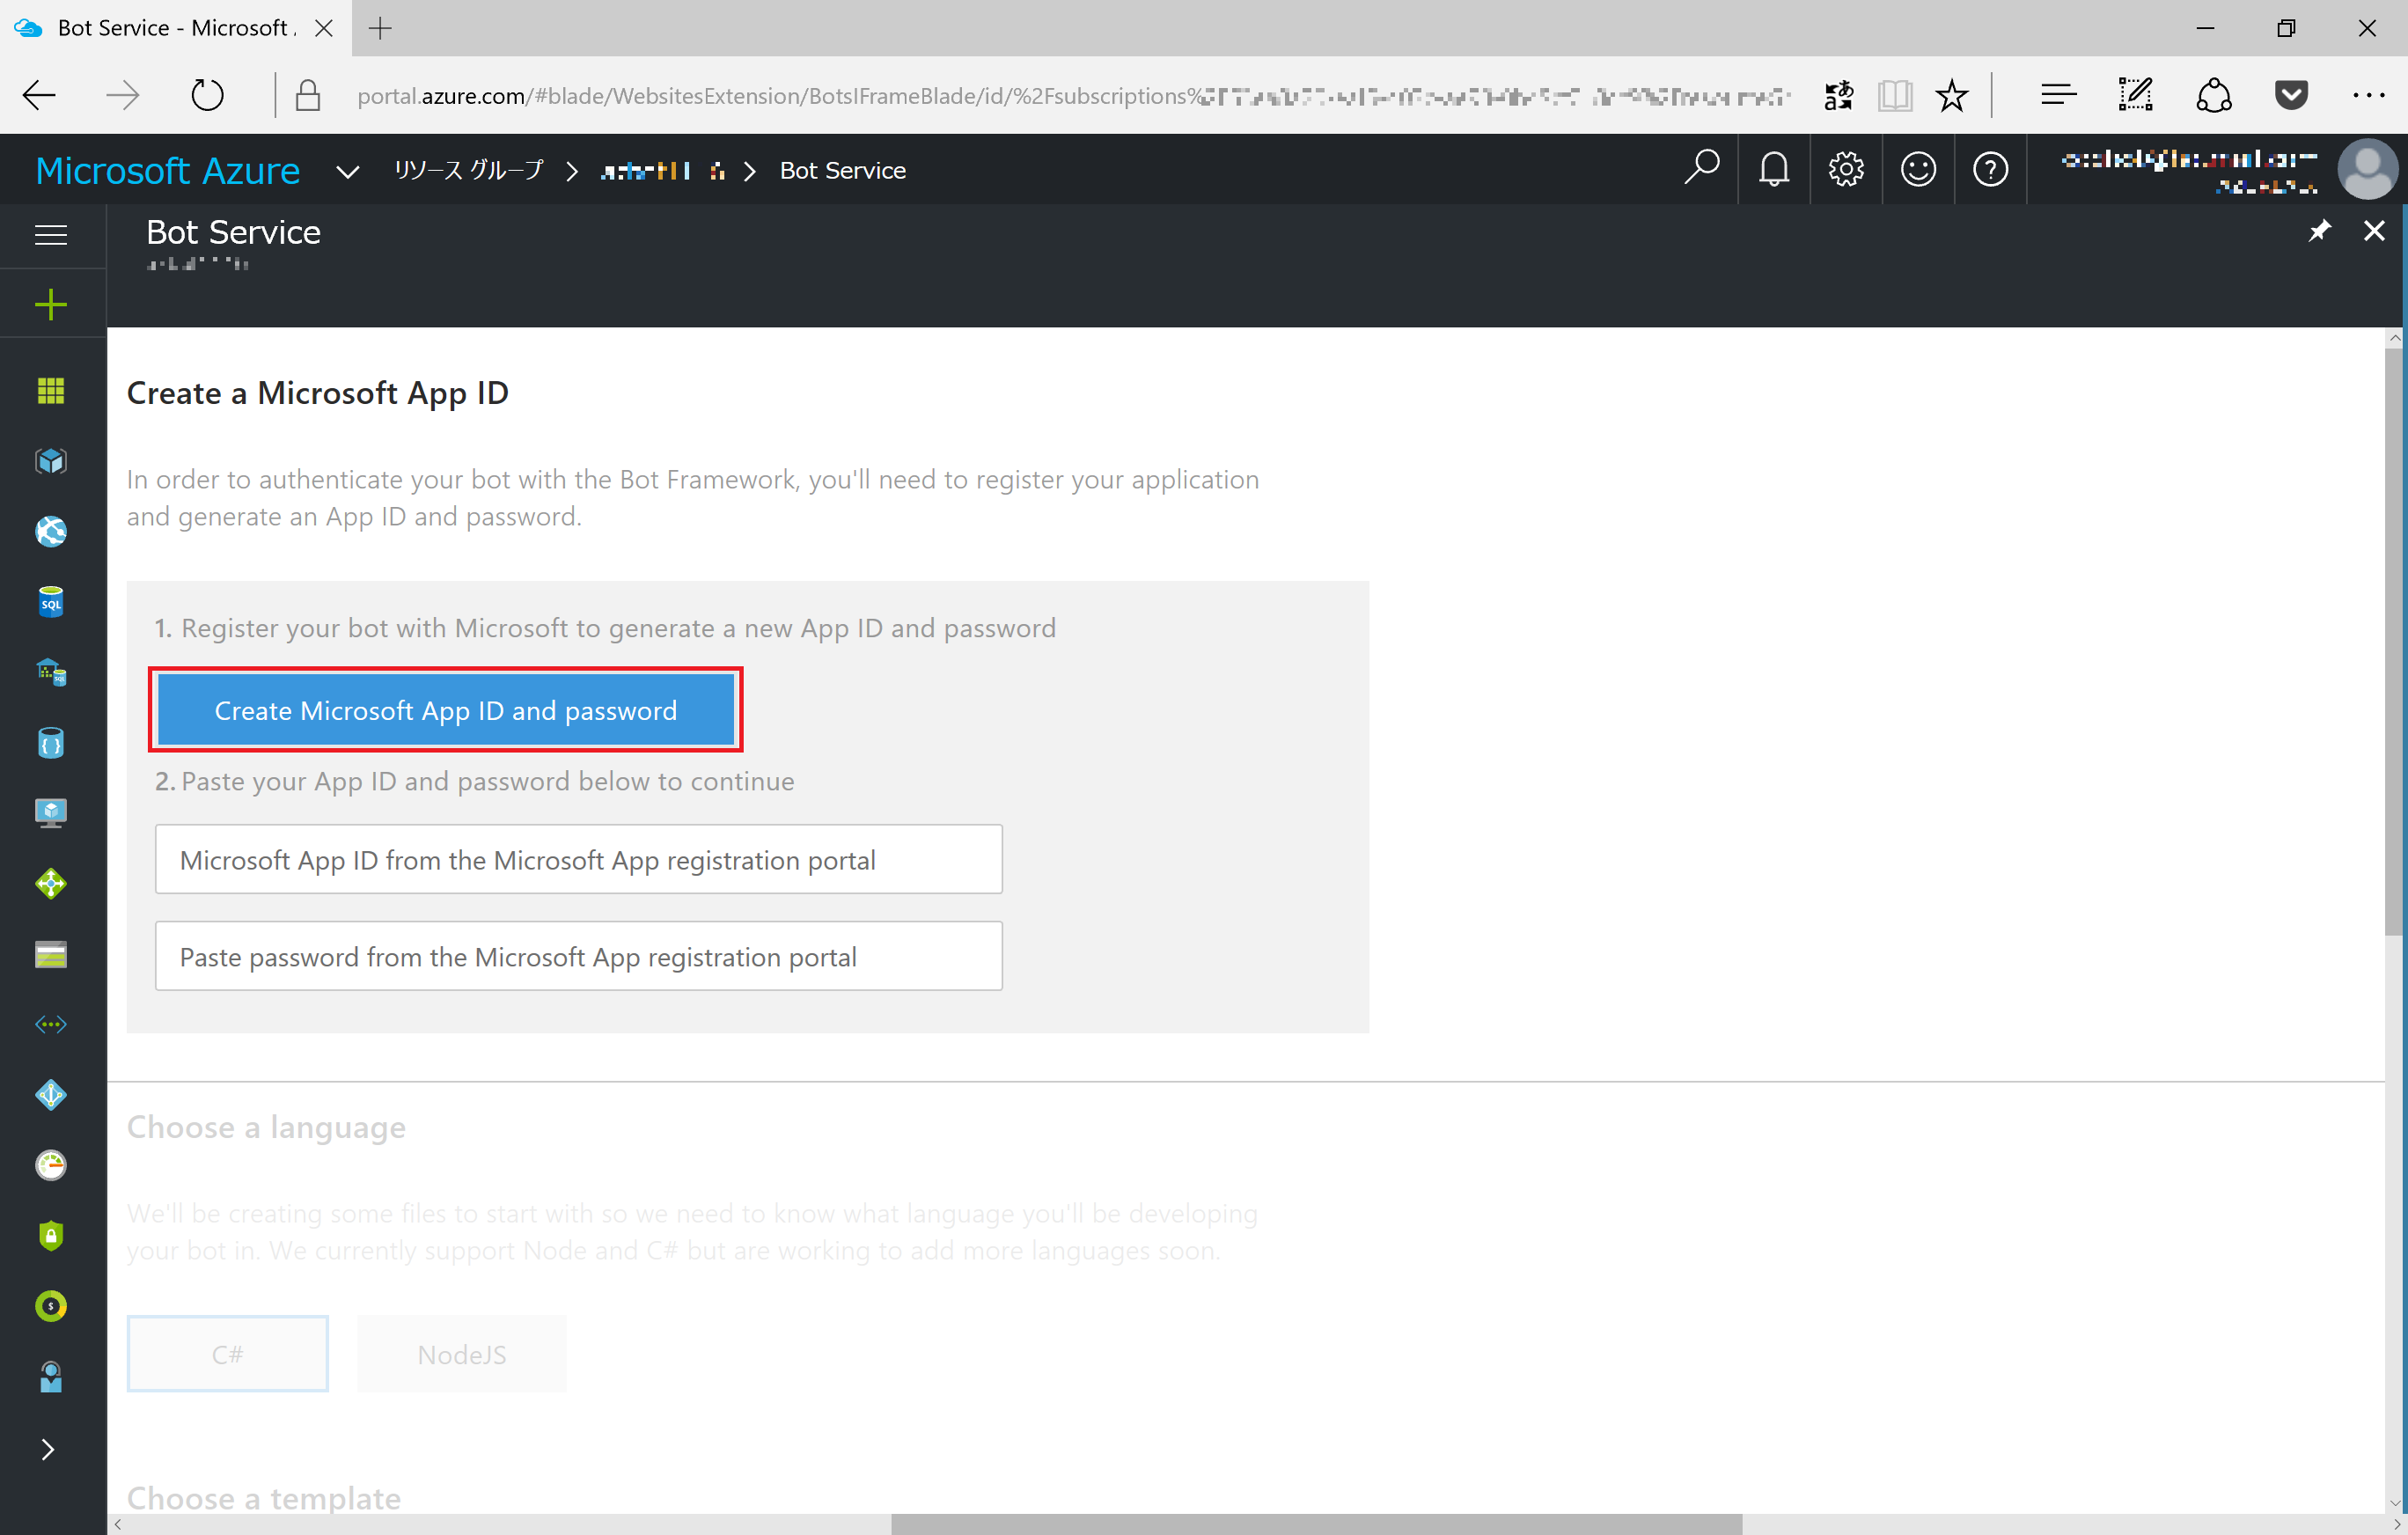
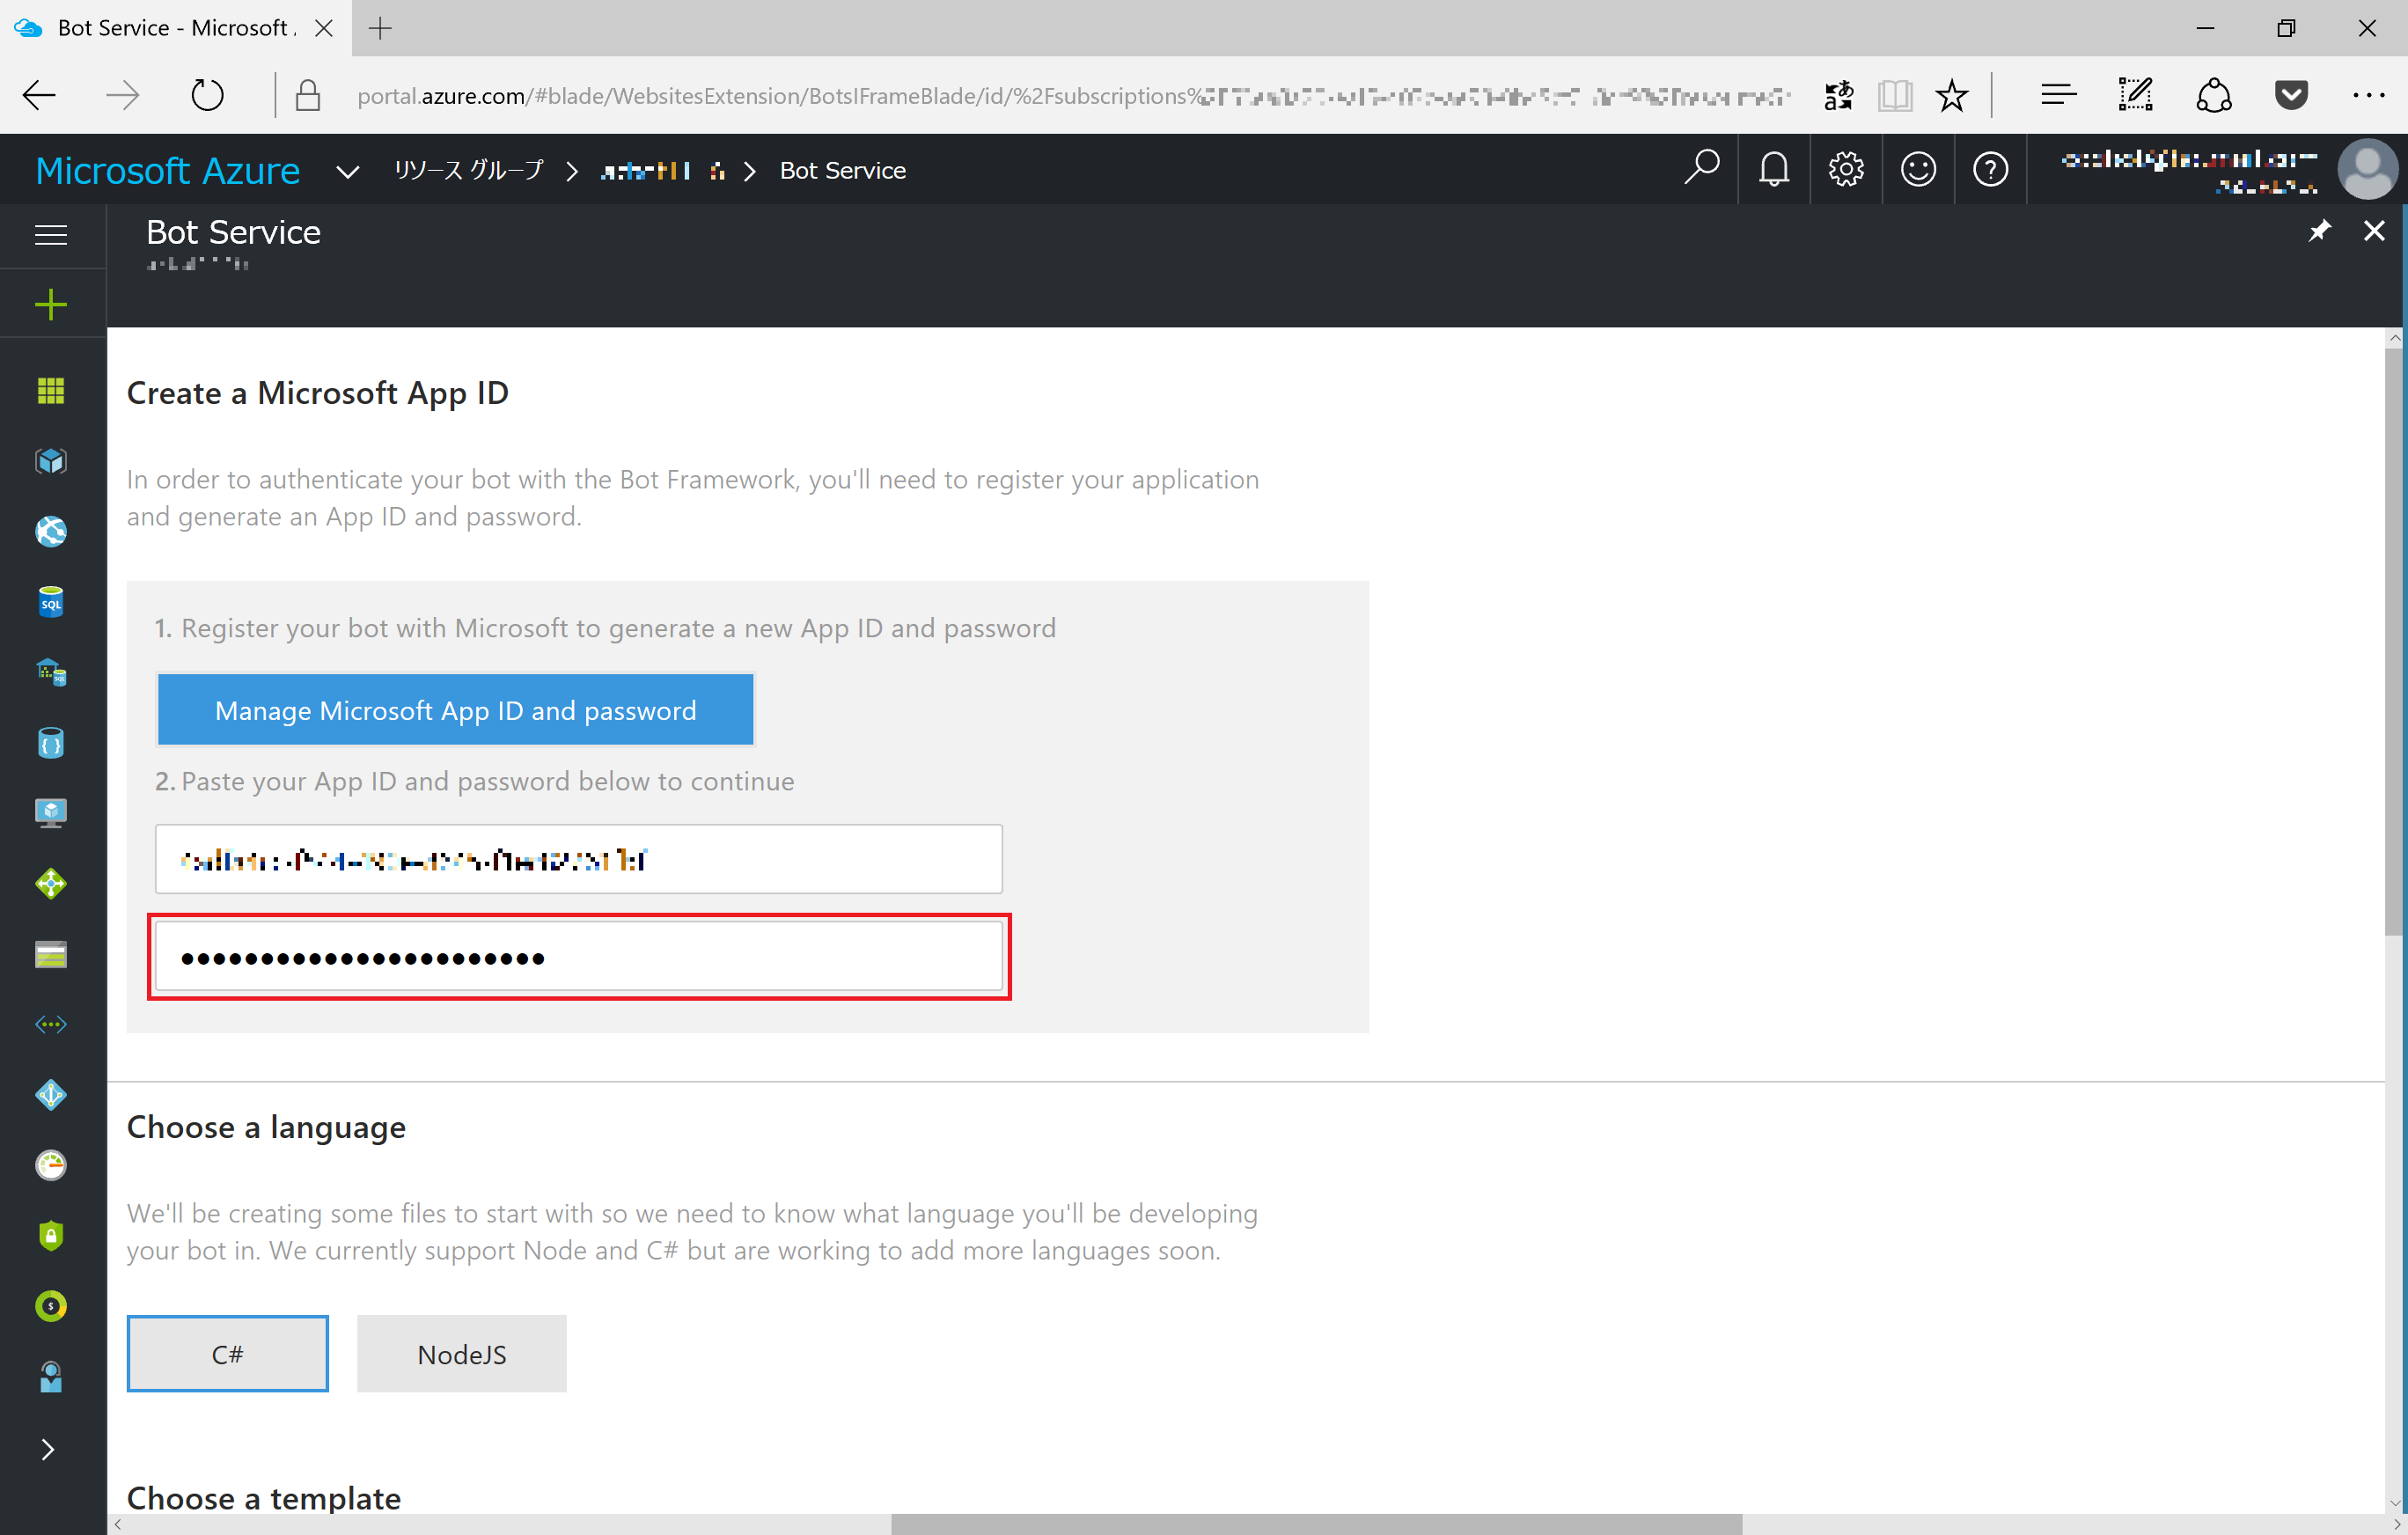
「デプロイが成功しました」のメッセージが表示されたら、クリックして作成された Bot Service を表示します。[Create a Microsoft App ID] のダイアログで、[Create Microsoft App ID and password] をクリックします。
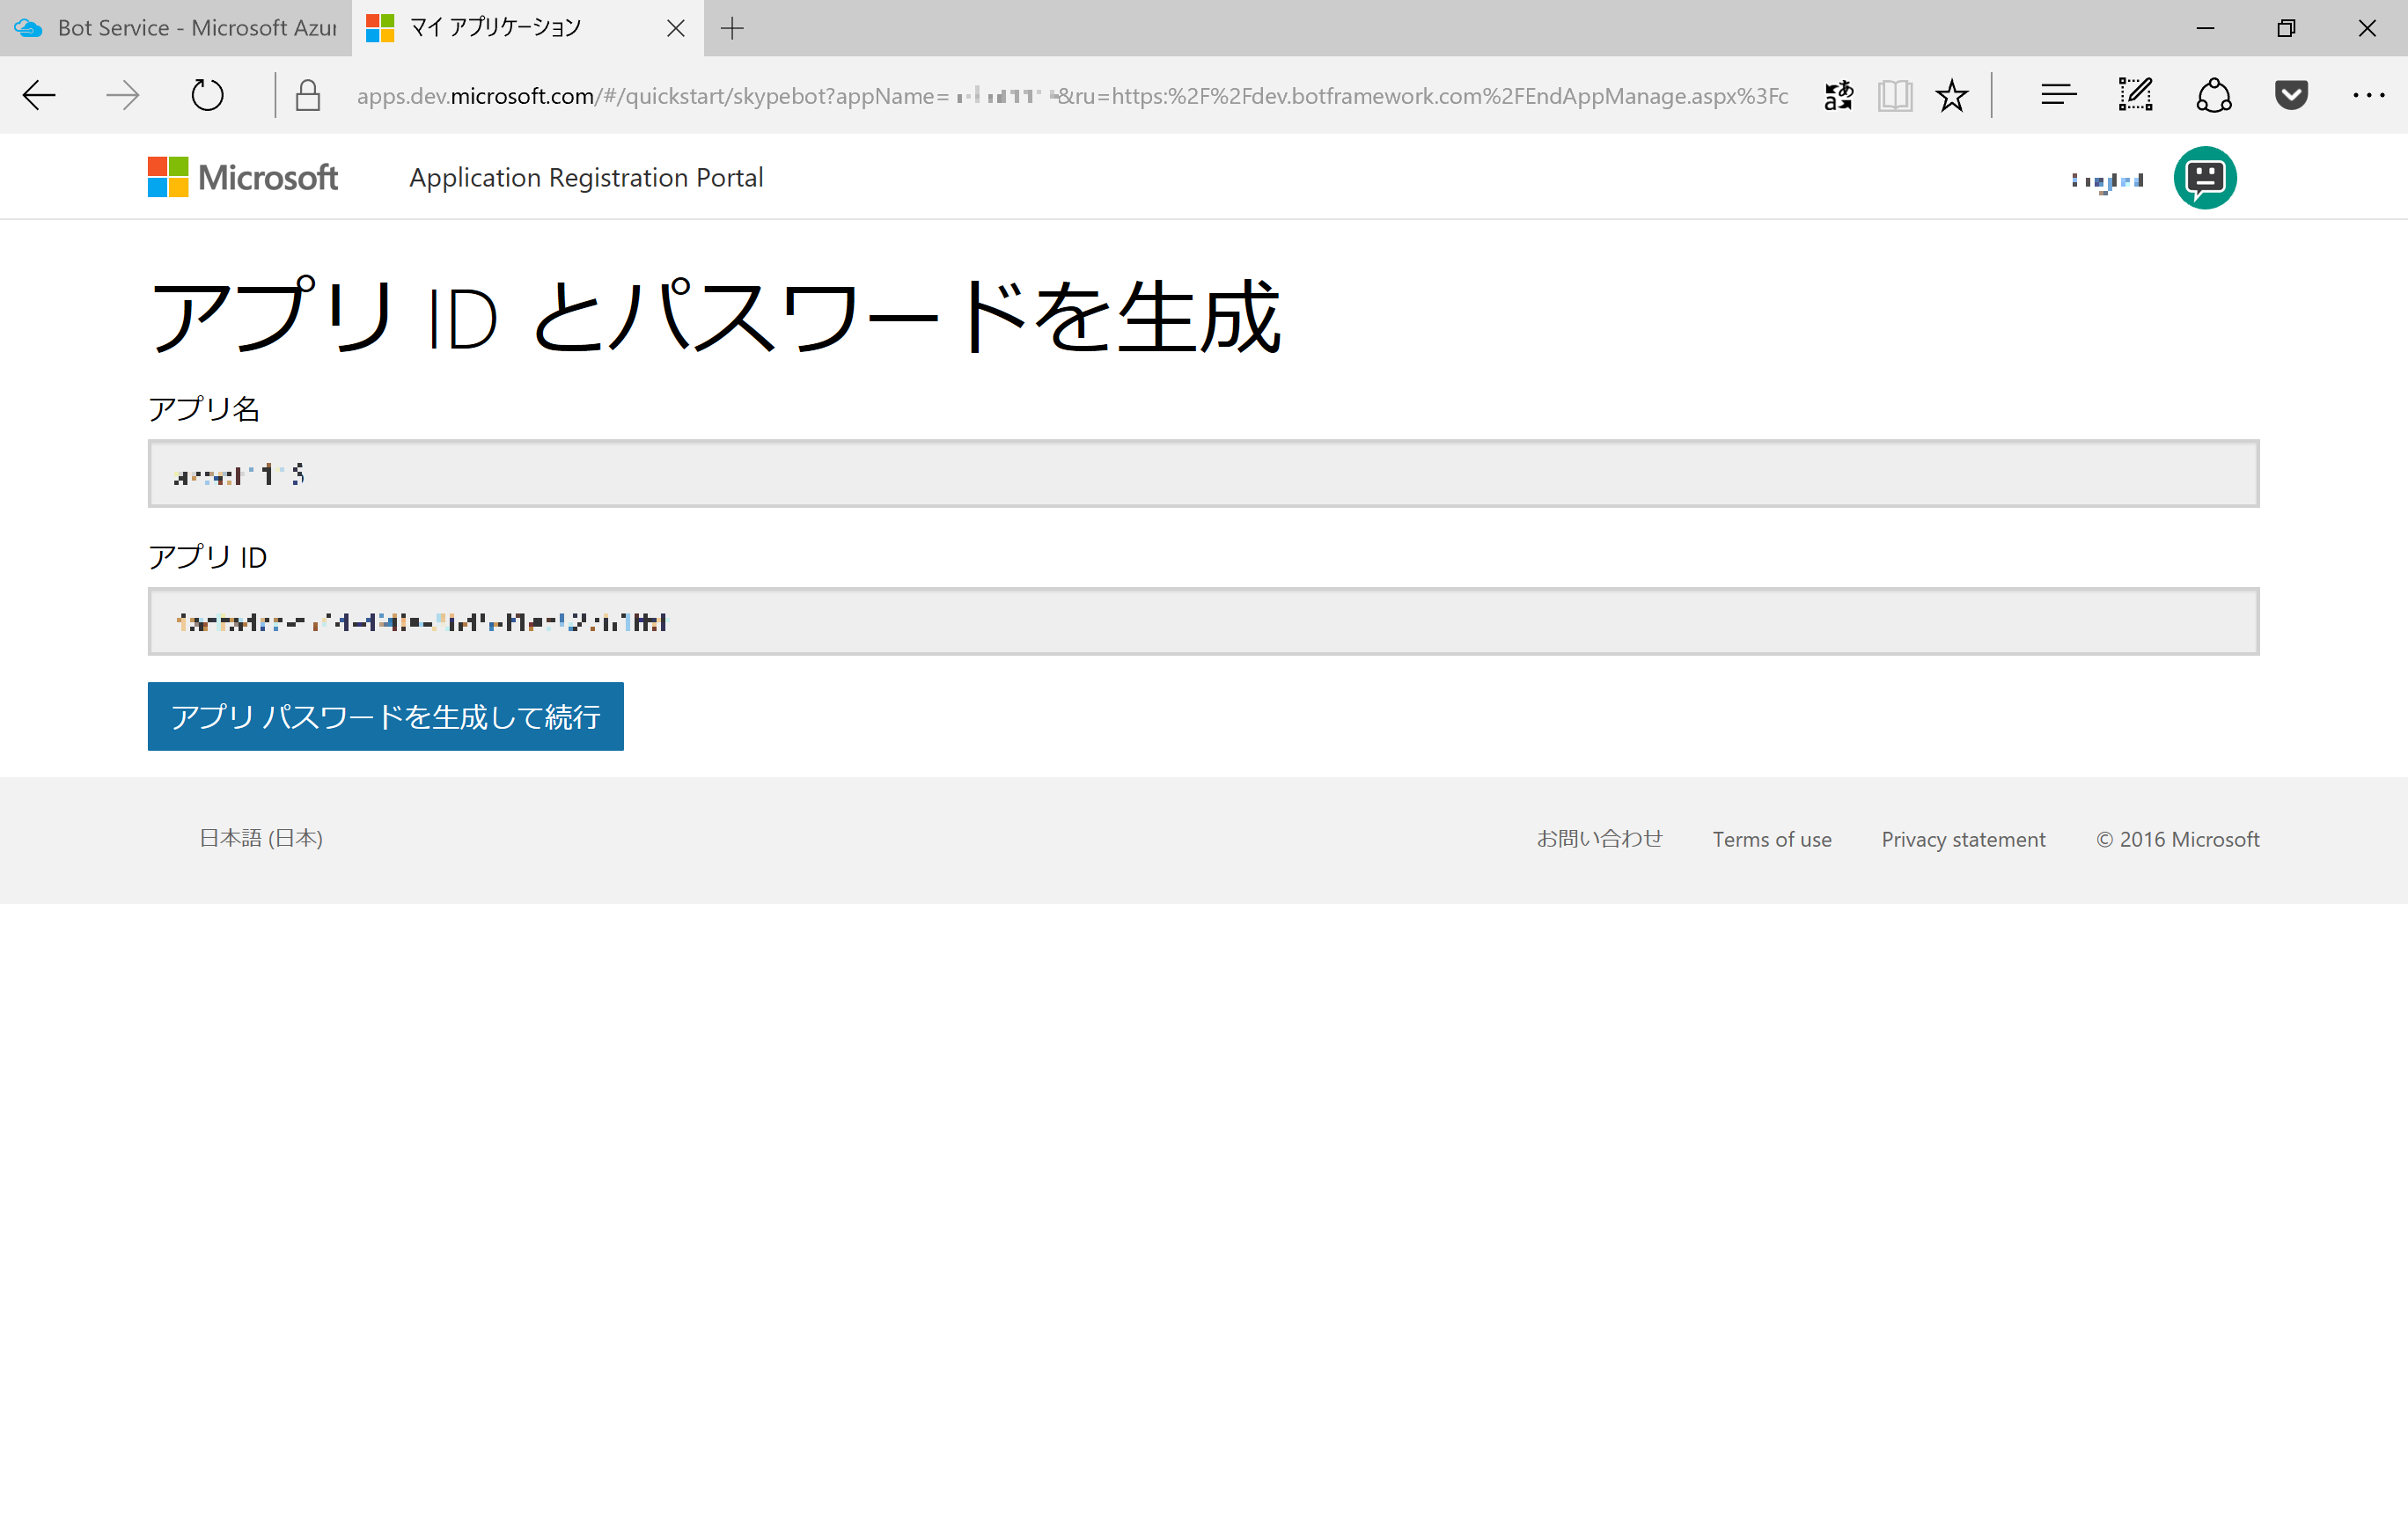
[アプリIDとパスワードを生成] 画面が表示されたら、 [アプリパスワードを生成して続行] をクリックしてパスワードを生成します。生成されたパスワードが表示されますので、コピーしておきます。
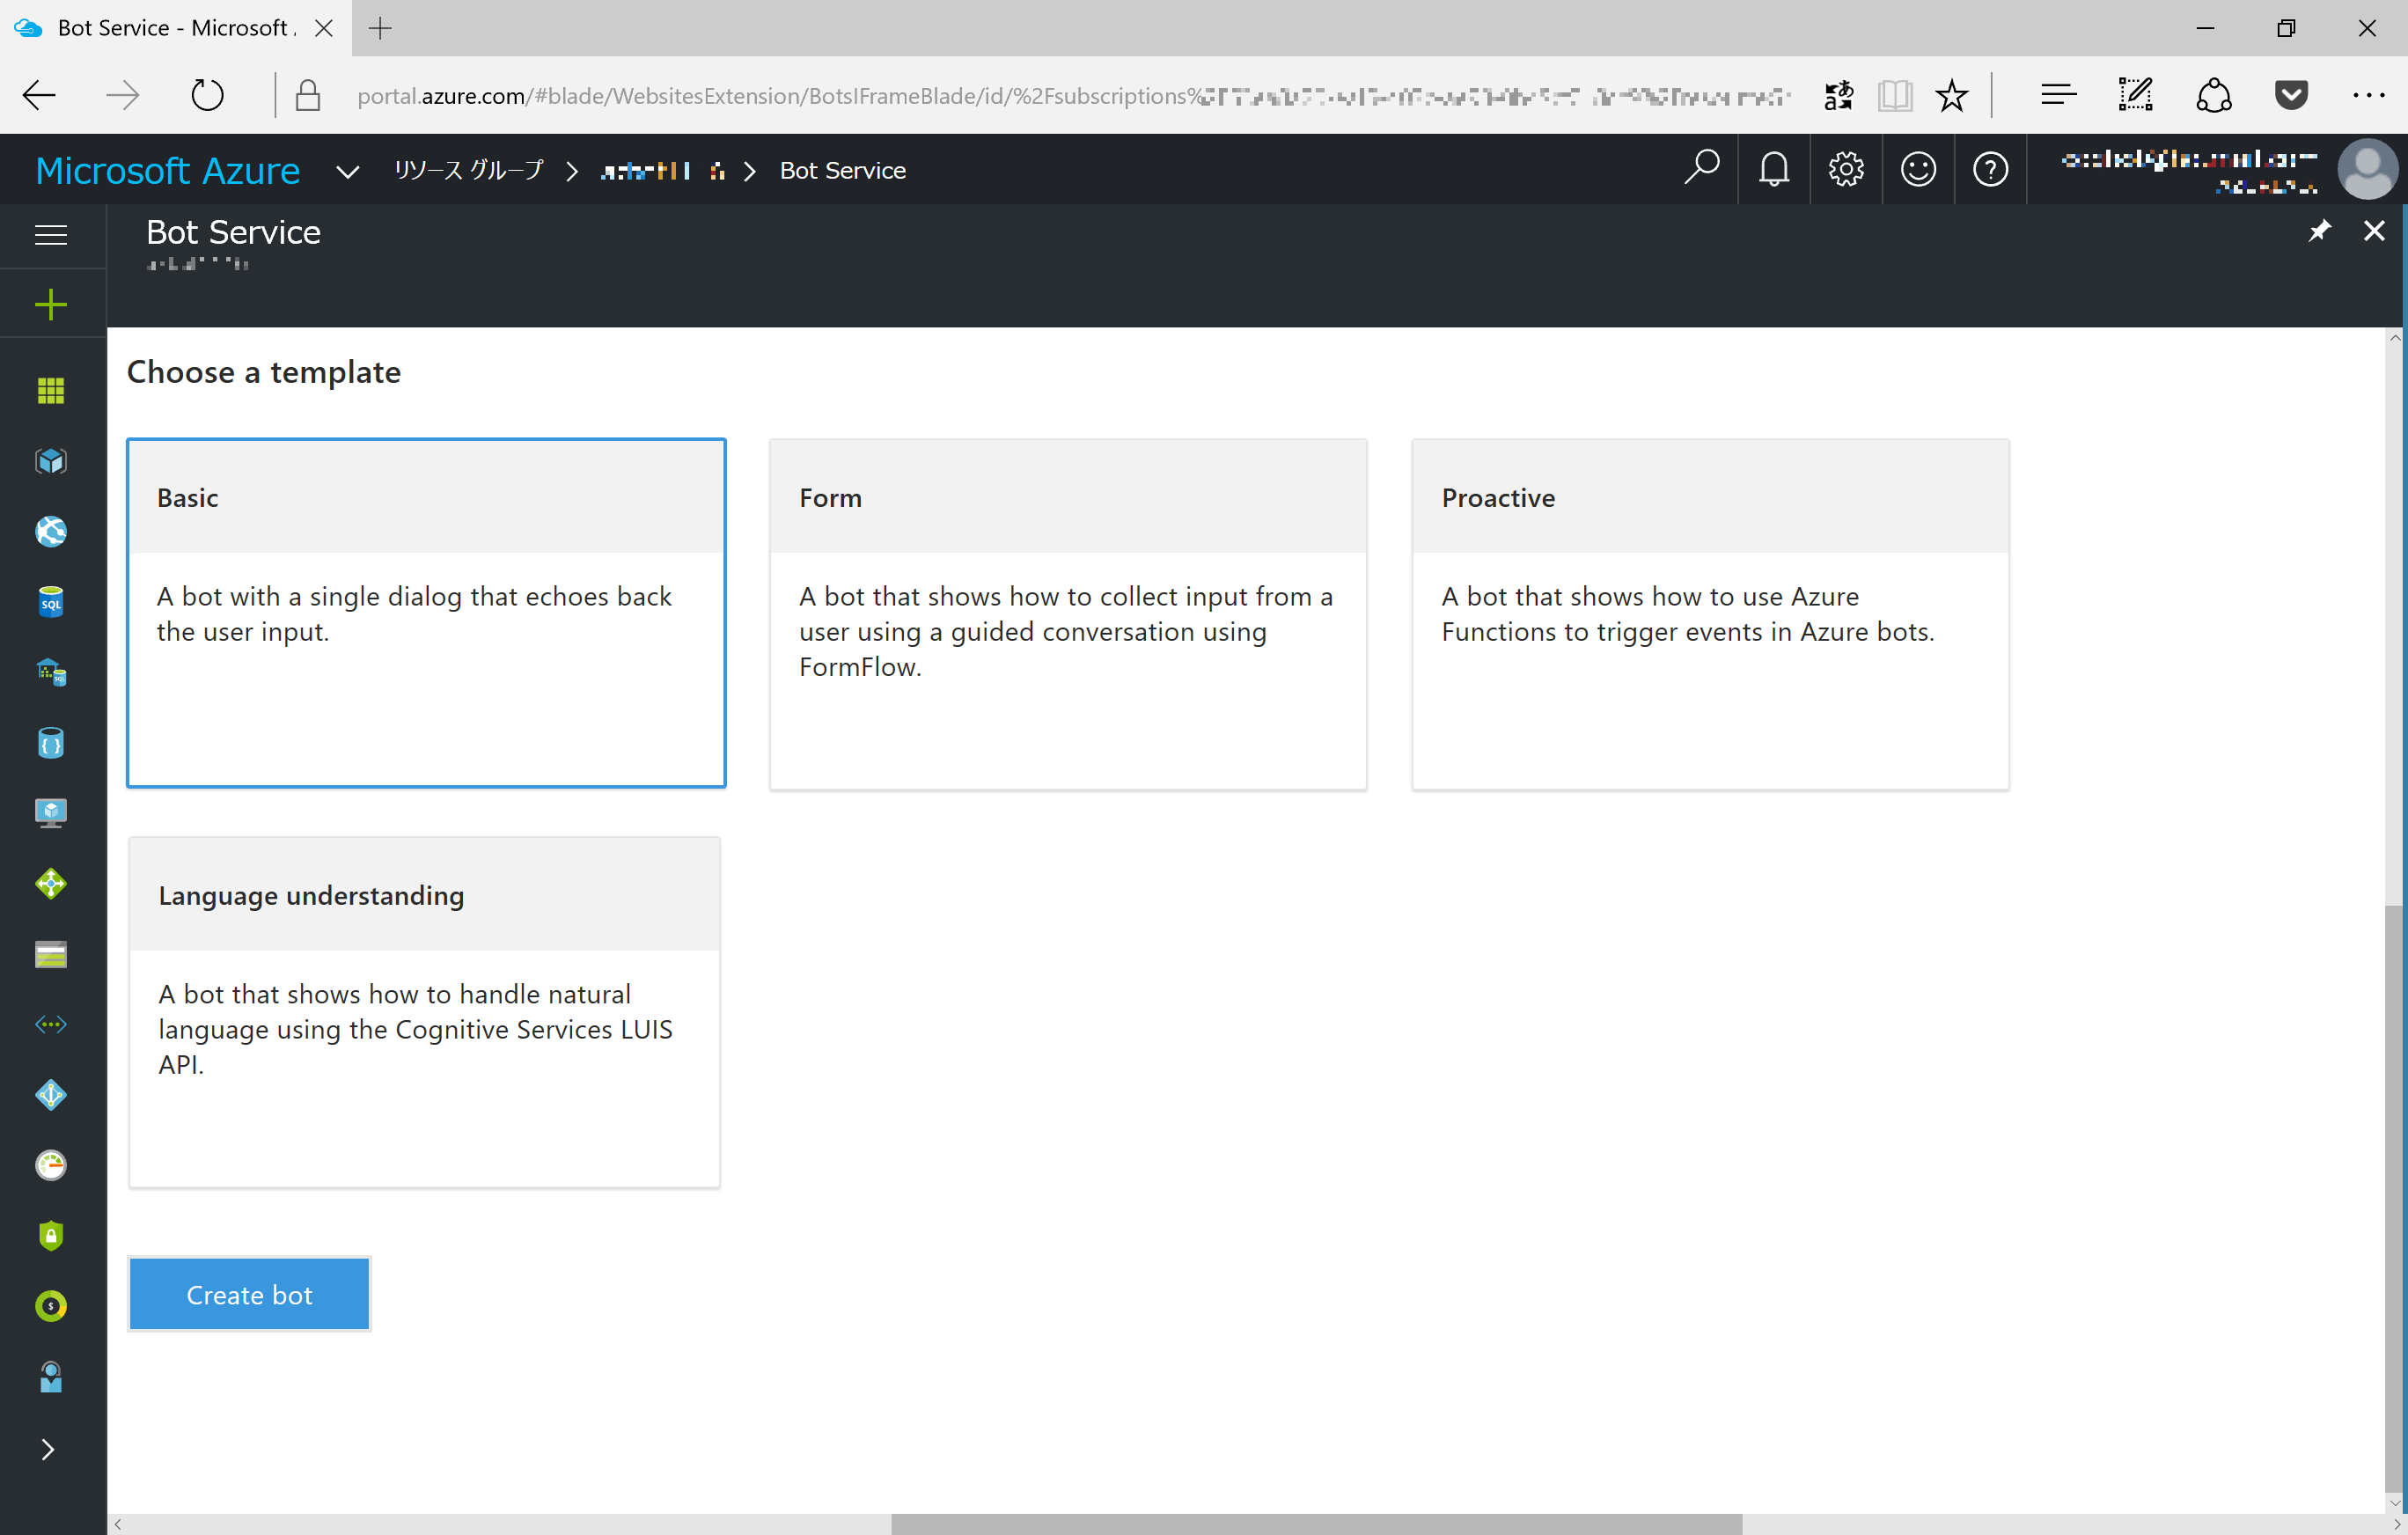
元の画面に戻ると App ID が自動挿入されますので、コピーして置いたパスワードをペーストします。言語 (C#, node.JS) とテンプレートが選択できるようになります。
テンプレートで [Basic] を選択して [Create Bot] をクリックすると、受信したメッセージを返すシンプルな BOT が作成されます。
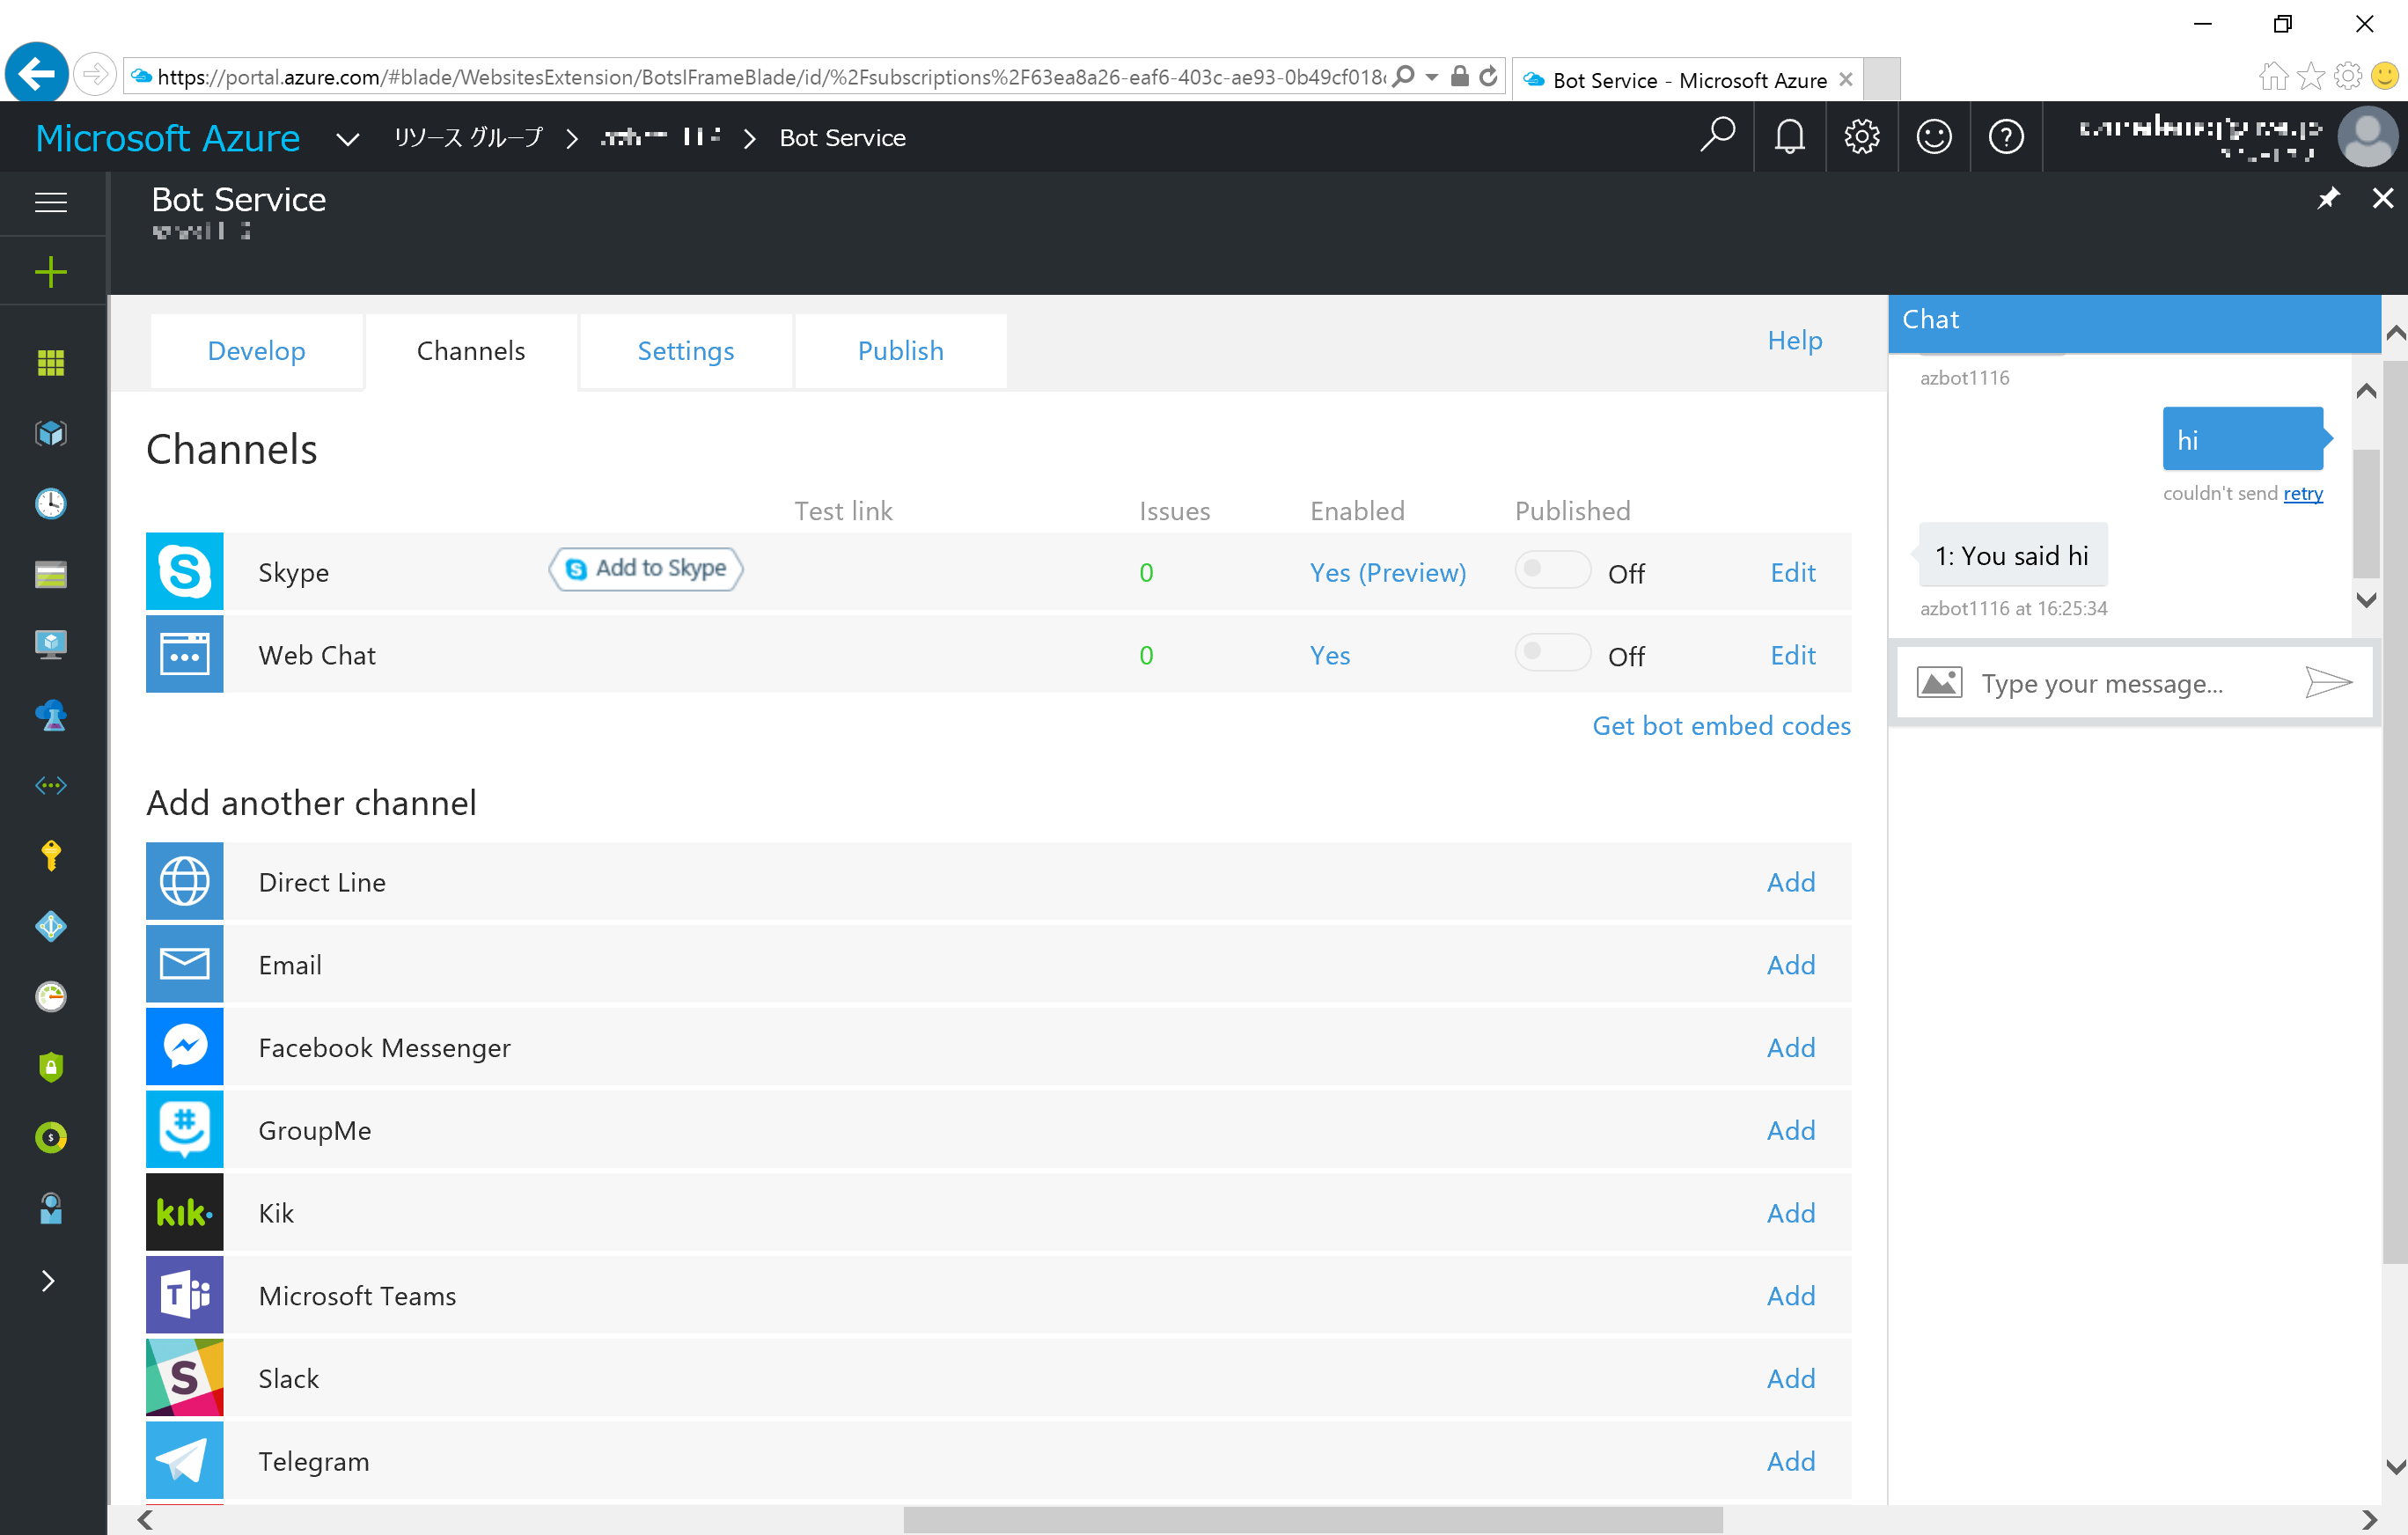
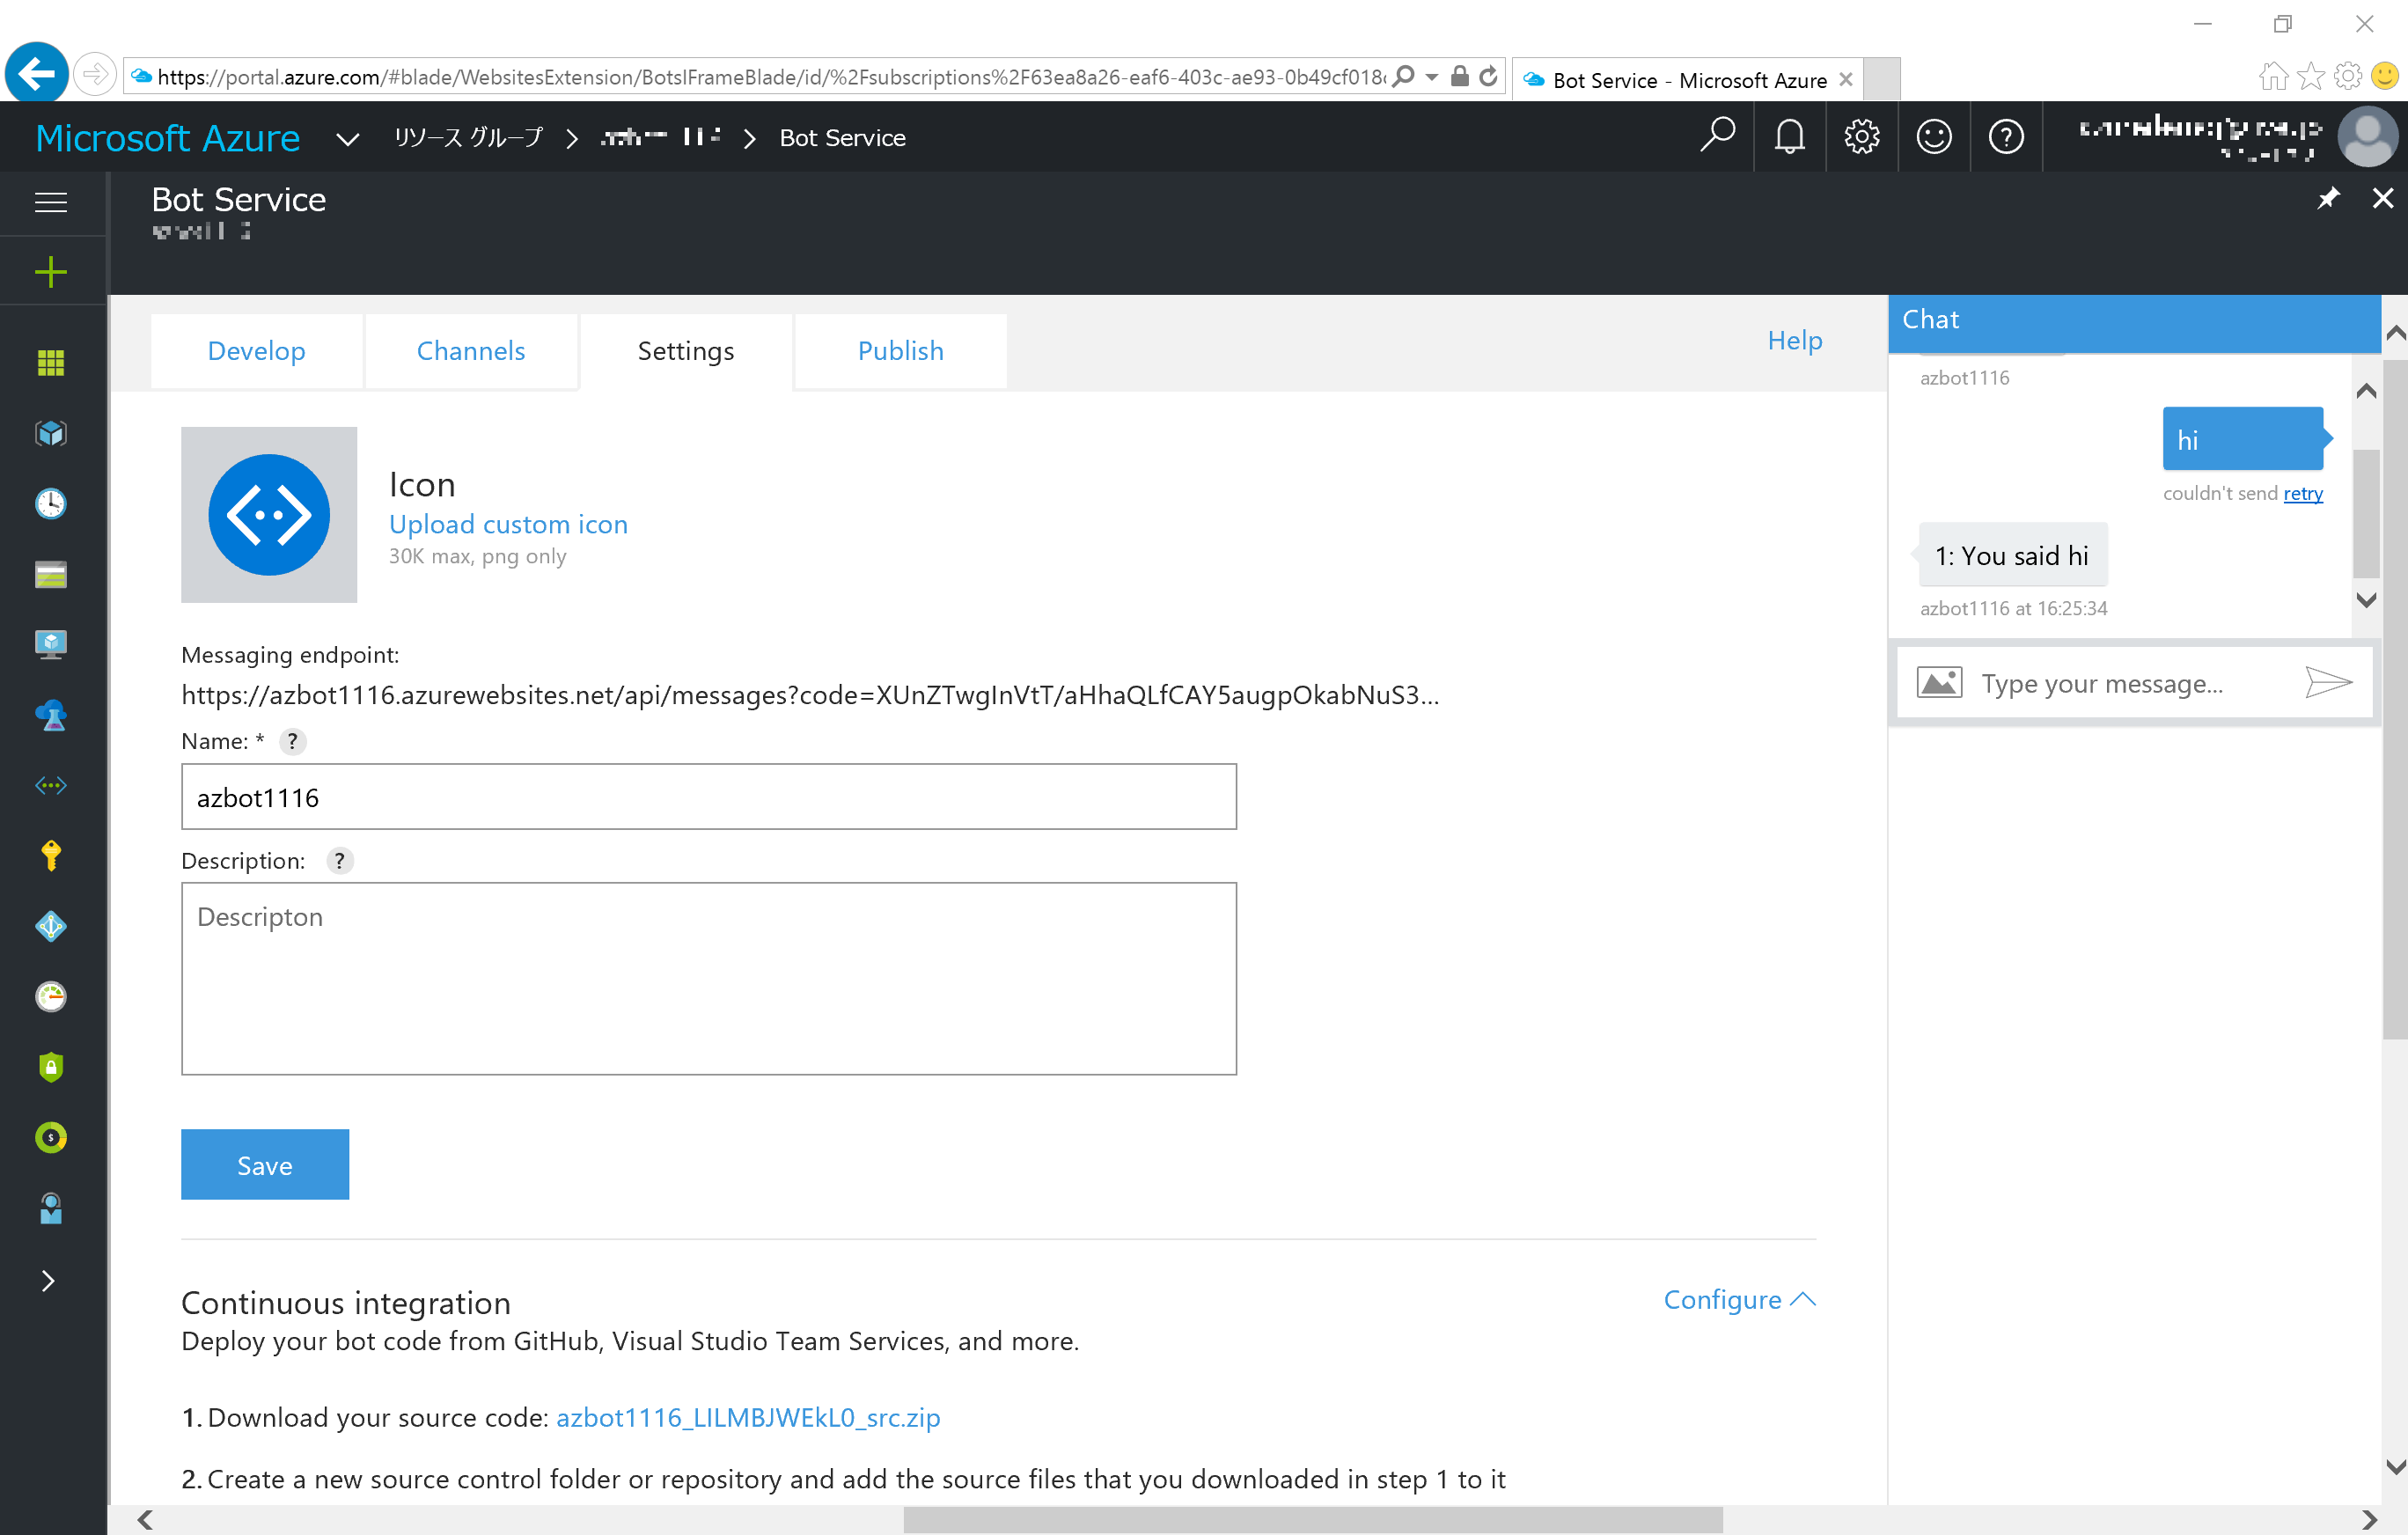
EchoDialog.csx に記述されている Task MessageReceivedAsync で Bot の返答が作成されています。Chat 画面で動作を確認することも可能です。

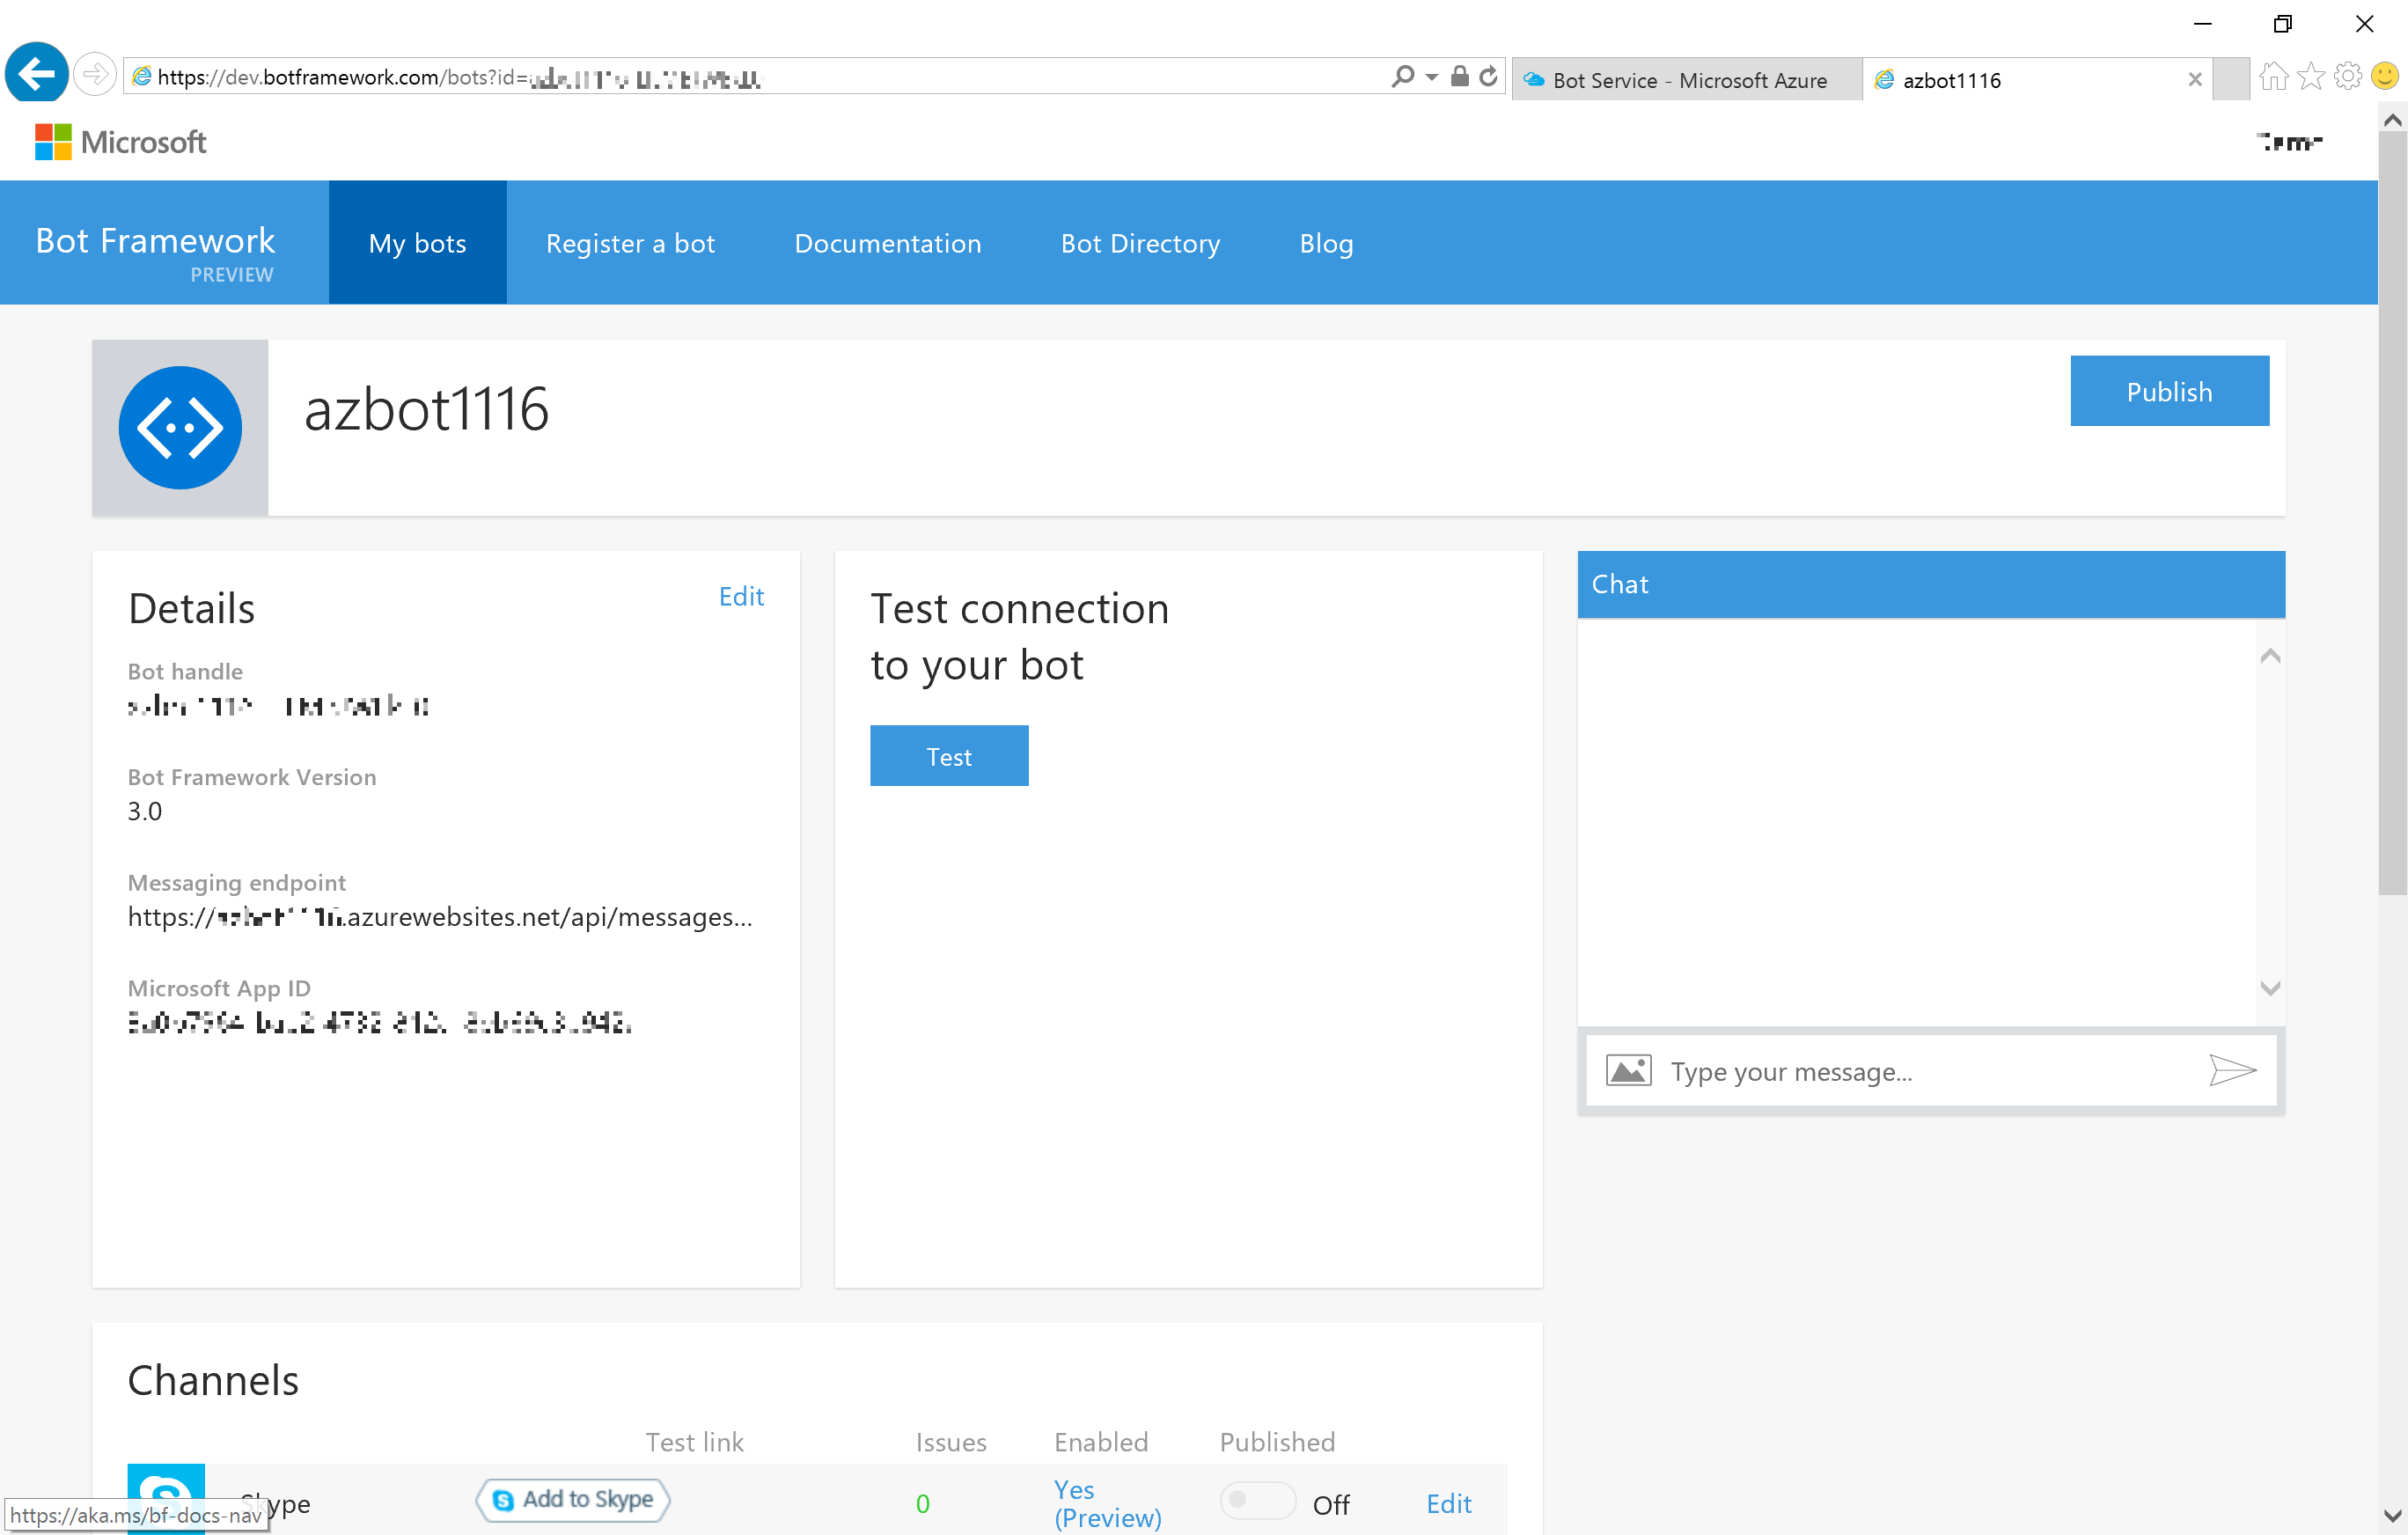
各種 Channel (Skype, Web Chat,... ) の設定も 同じ画面の [Channels] から設定できます (が、Bot Framework > My bots から見たほうが速いかもしれません...)。
コードのダウンロード、継続的なアップデートについては、[Settings] から操作&設定できます。
Please sign in to use this experience.
Sign in