Ask Learn
Preview
Ask Learn is an AI assistant that can answer questions, clarify concepts, and define terms using trusted Microsoft documentation.
Please sign in to use Ask Learn.
Sign inThis browser is no longer supported.
Upgrade to Microsoft Edge to take advantage of the latest features, security updates, and technical support.
Note
Access to this page requires authorization. You can try signing in or changing directories.
Access to this page requires authorization. You can try changing directories.
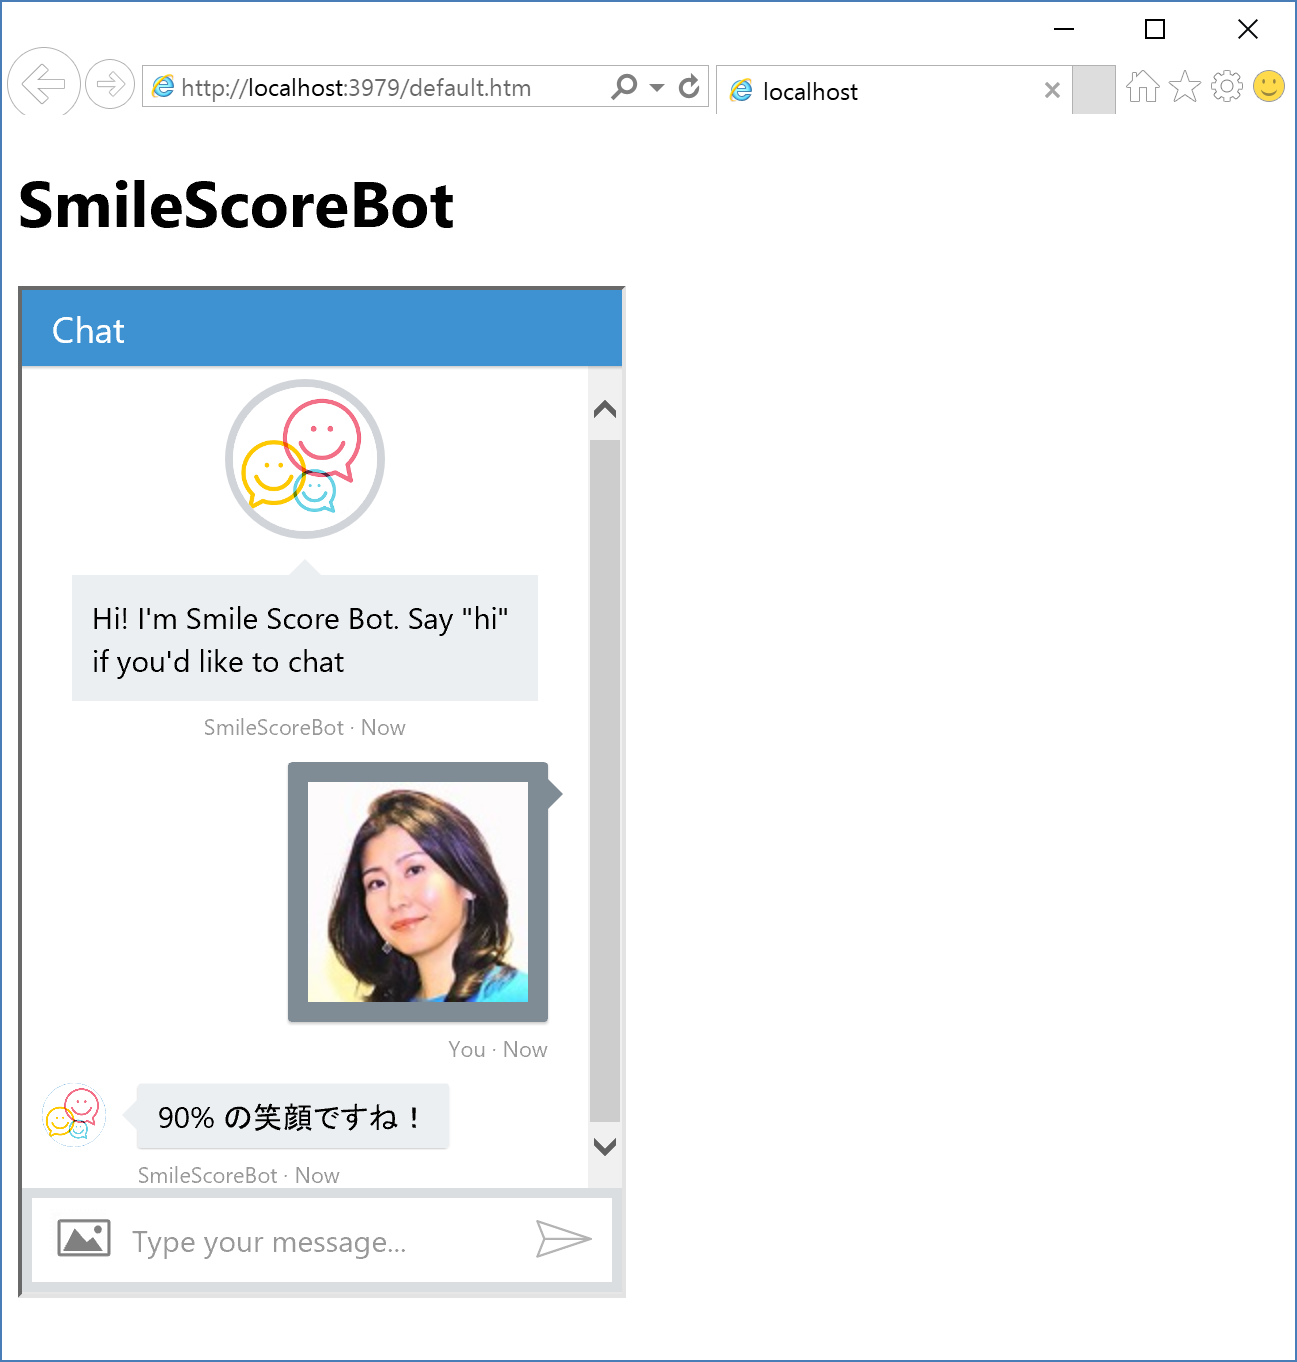
Tech Summit 2016 でもご紹介いたしました「笑顔判定BOT」を5ステップで作成する手順をご紹介いたします。こちらは写真を送ると、人物の表情を分析し、スコア (0~100%) を返答する BOT です。Bot Framework の C# テンプレートをベースとして、Cognitive Services の Emotion API を利用するクラスライブラリーを追加して開発を行います。
【2017/3/27 追記】Emotion API C# クラスライブラリーの変更に伴い、コードを修正しました。

Visual Studio を起動し、上部ツールバーから [ファイル]>[新規作成]>[プロジェクト] を選択して、新規プロジェクトを作成します。中央列に表示されるテンプレートから [Bot Application] を選択し、名前を入力した後、[OK] をクリックして作成します。

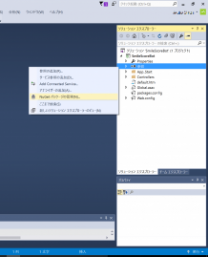
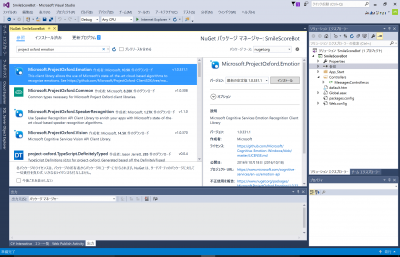
プロジェクトが作成されたら、[ソリューションエクスプローラー]から [参照] を選択して右クリックし、[NuGet パッケージの管理] を選択します。[参照] タブで 「Project Oxford Emotion」と入力して検索し、Microsoft.ProjectOxford.Emotion を選択してインストールします。
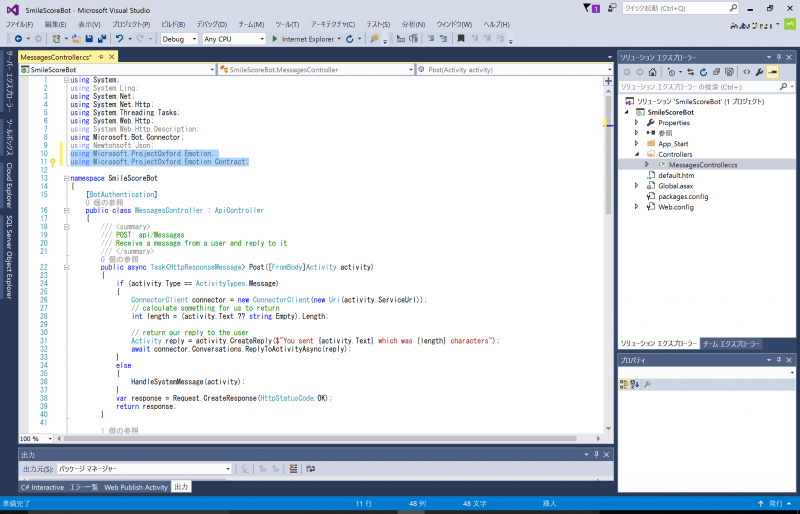
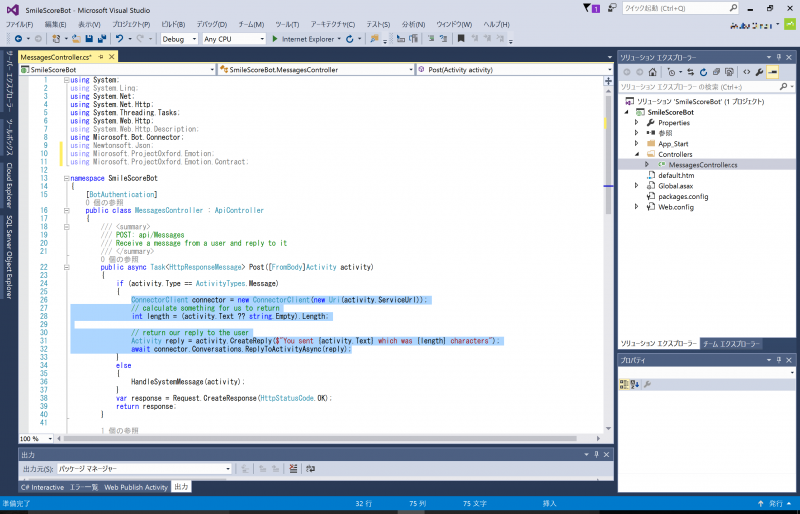
[ソリューションエクスプローラー] に表示されている [Controllers] フォルダをクリックして開き、MessageController.cs をクリックして表示、コードを編集します。
最初に Microsoft.ProjectOxford.Emotion への参照を追加します。
 using Microsoft.ProjectOxford.Emotion;
using Microsoft.ProjectOxford.Emotion.Contract;
Task<HttpResponseMessage> Post の内容を修正します。
下記のように
 if (activity.Type == ActivityTypes.Message)
{
   :(略)
}
else
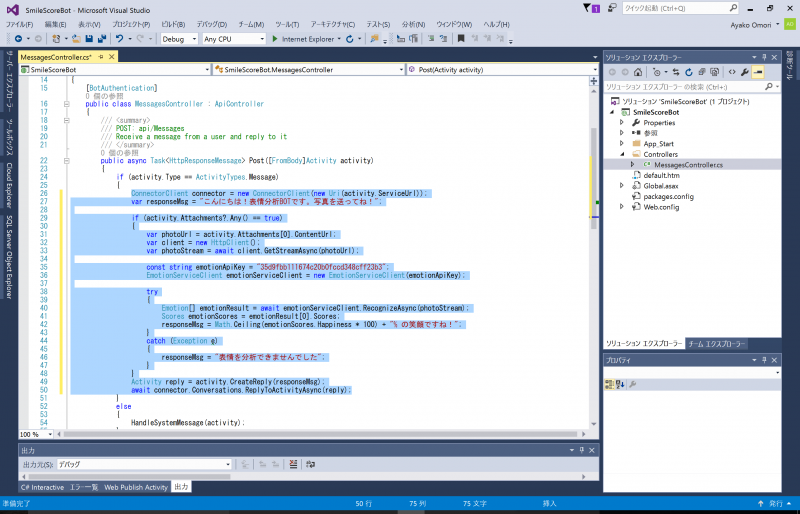
の if 部分の中身を入れ替えます。YOUR_SUBSCRIPTION_KEY は準備で取得した Emotion API のサブスクリプションキーをコピーしてください。
 if (activity.Type == ActivityTypes.Message)
{
    // ConnectorClient を作成、デフォルトの返答メッセージをセット
    ConnectorClient connector = new ConnectorClient(new Uri(activity.ServiceUrl));
    var responseMsg = "こんにちは!表情分析BOTです。写真を送ってね!";

    // 受信したメッセージに Attachment (画像ファイル) がある場合
    if (activity.Attachments?.Any() == true)
    {
        // 画像ファイルを Stream として取得
        var photoUrl = activity.Attachments[0].ContentUrl;
        var client = new HttpClient();
        var photoStream = await client.GetStreamAsync(photoUrl);

        // Emotion API のサブスクリプションキーをセットして EmotionServiceClient を作成
        const string emotionApiKey = "YOUR_SUBSCRIPTION_KEY";
        EmotionServiceClient emotionServiceClient = new EmotionServiceClient(emotionApiKey);

        try
        {
            // 画像を判定、happiness スコアのみを取得して、返答メッセージにセット
            Emotion[] emotionResult = await emotionServiceClient.RecognizeAsync(photoStream);
            float score = emotionResult[0].Scores.Happiness;
            responseMsg = Math.Ceiling(score * 100) + "% の笑顔ですね!"; /* [ja] */
        }
        catch (Exception e)
        {
            responseMsg = "表情を分析できませんでした";
        }

        // メッセージを返答
        Activity reply = activity.CreateReply(responseMsg);
        await connector.Conversations.ReplyToActivityAsync(reply);
    }
| 修正前 | → | 修正後 |
 |
 |
ツールバーから [ビルド]>[ソリューションのビルド] をクリックしてビルドします。エラーなどなければ、ローカル環境でデバッグ実行 (F5) を行います。ブラウザが起動して Bot アプリのデフォルト画面が表示されたら準備完了です。
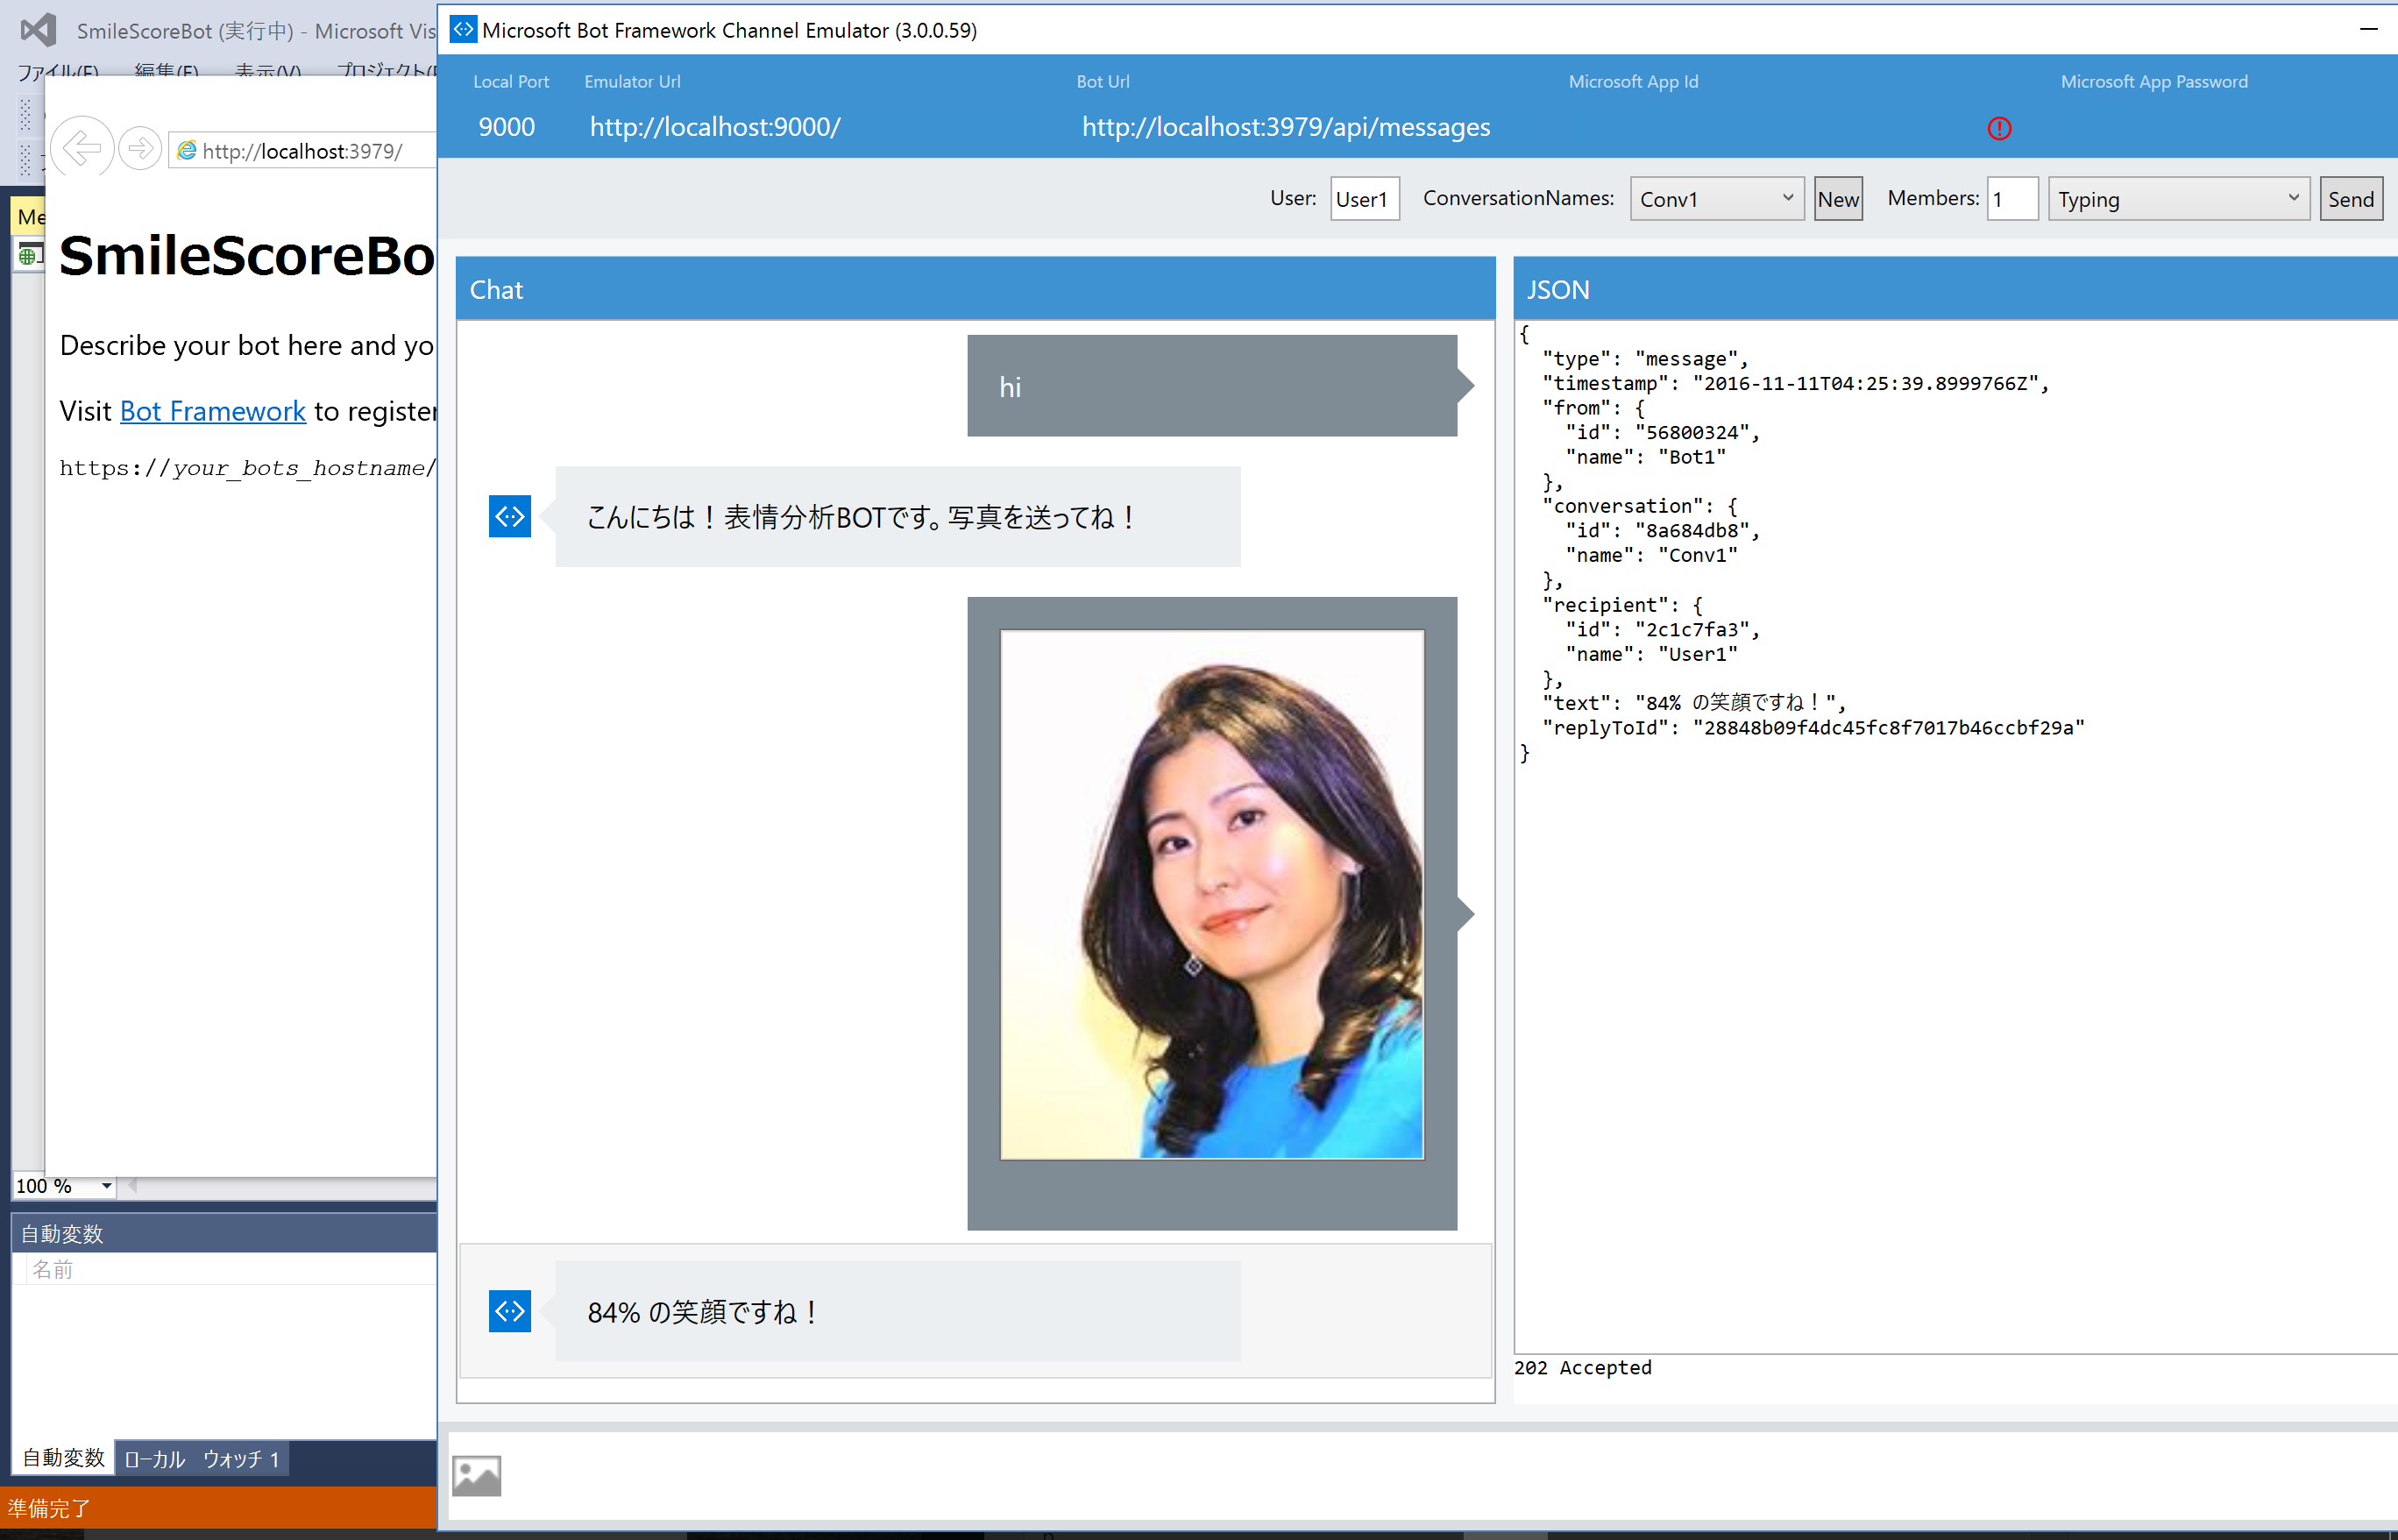
Bot Framework Channel Emulator を起動して、[Bot URL] に https://localhost:[ポート番号]/api/messages を入力します。Bot アプリが実行されているポート番号になっているか確認してください。(下記環境では Bot アプリが https://logalhost:3979/ で稼働しているので、Bot URL には https://localhost:3979/api/messages を指定しています。) 文章や写真を送信して返答されたらテストは完了です。
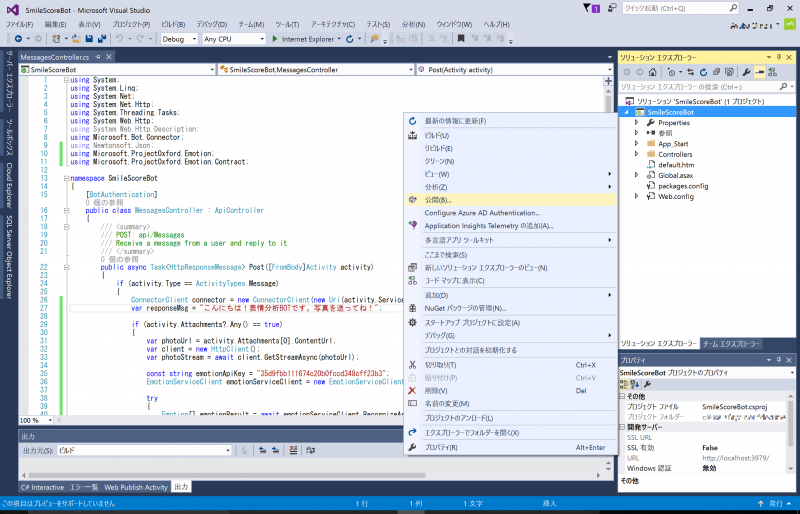
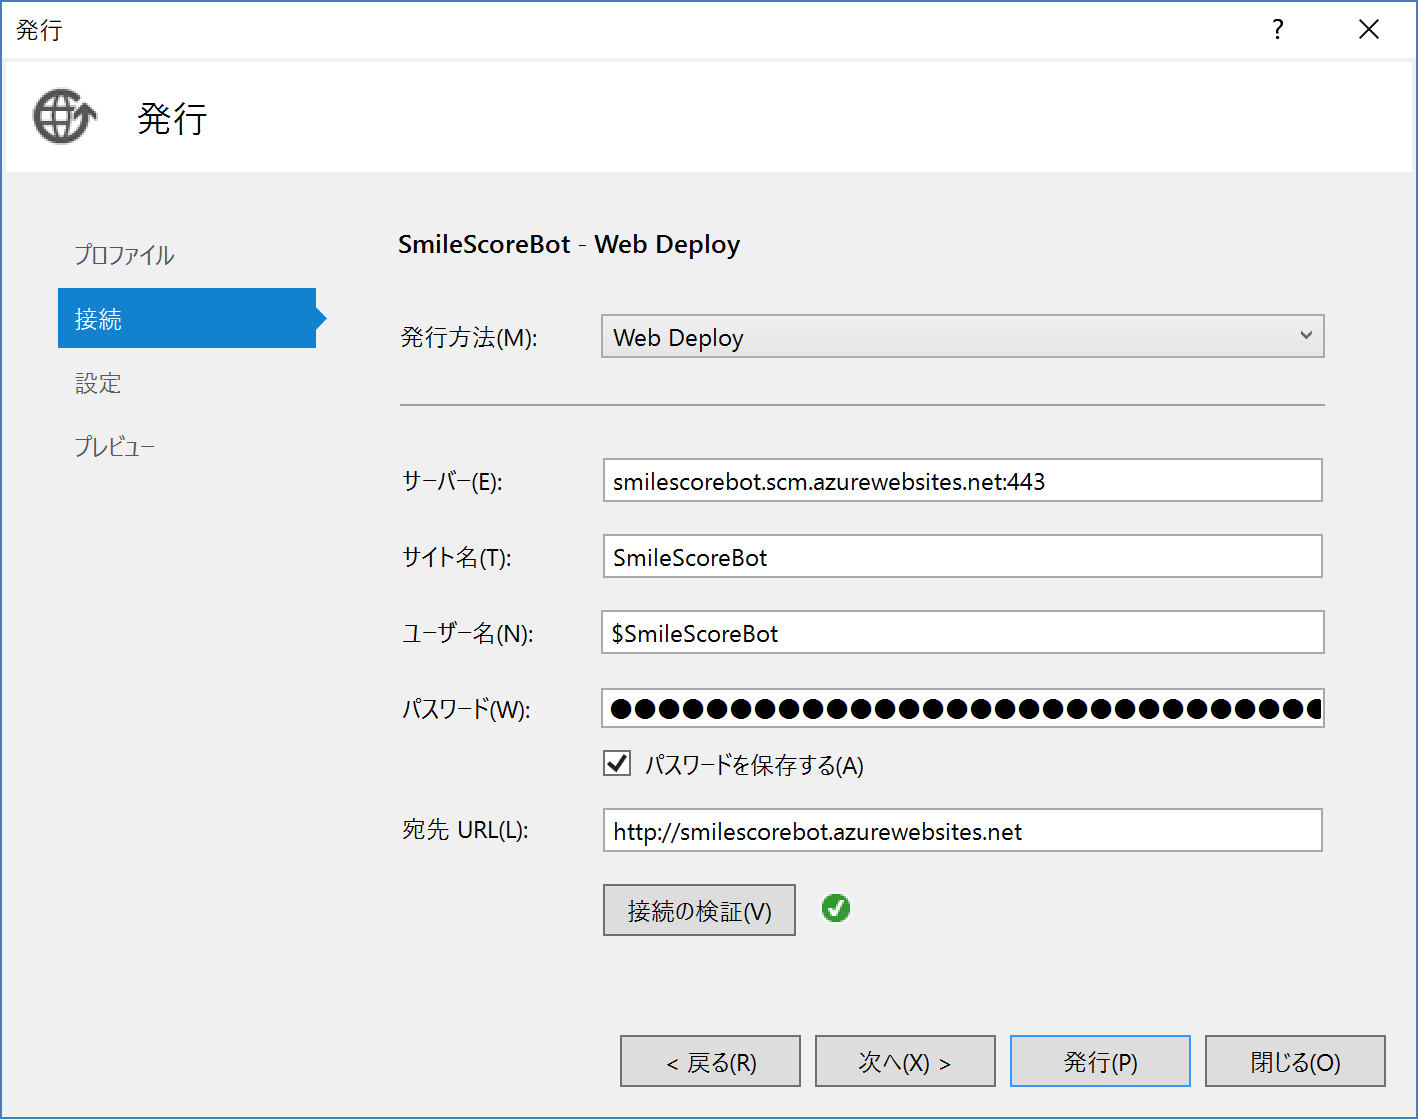
Bot アプリを Azure に発行して Web 公開します。、[ソリューションエクスプローラー]からプロジェクトを選択して右クリックし、[公開] を選択します。
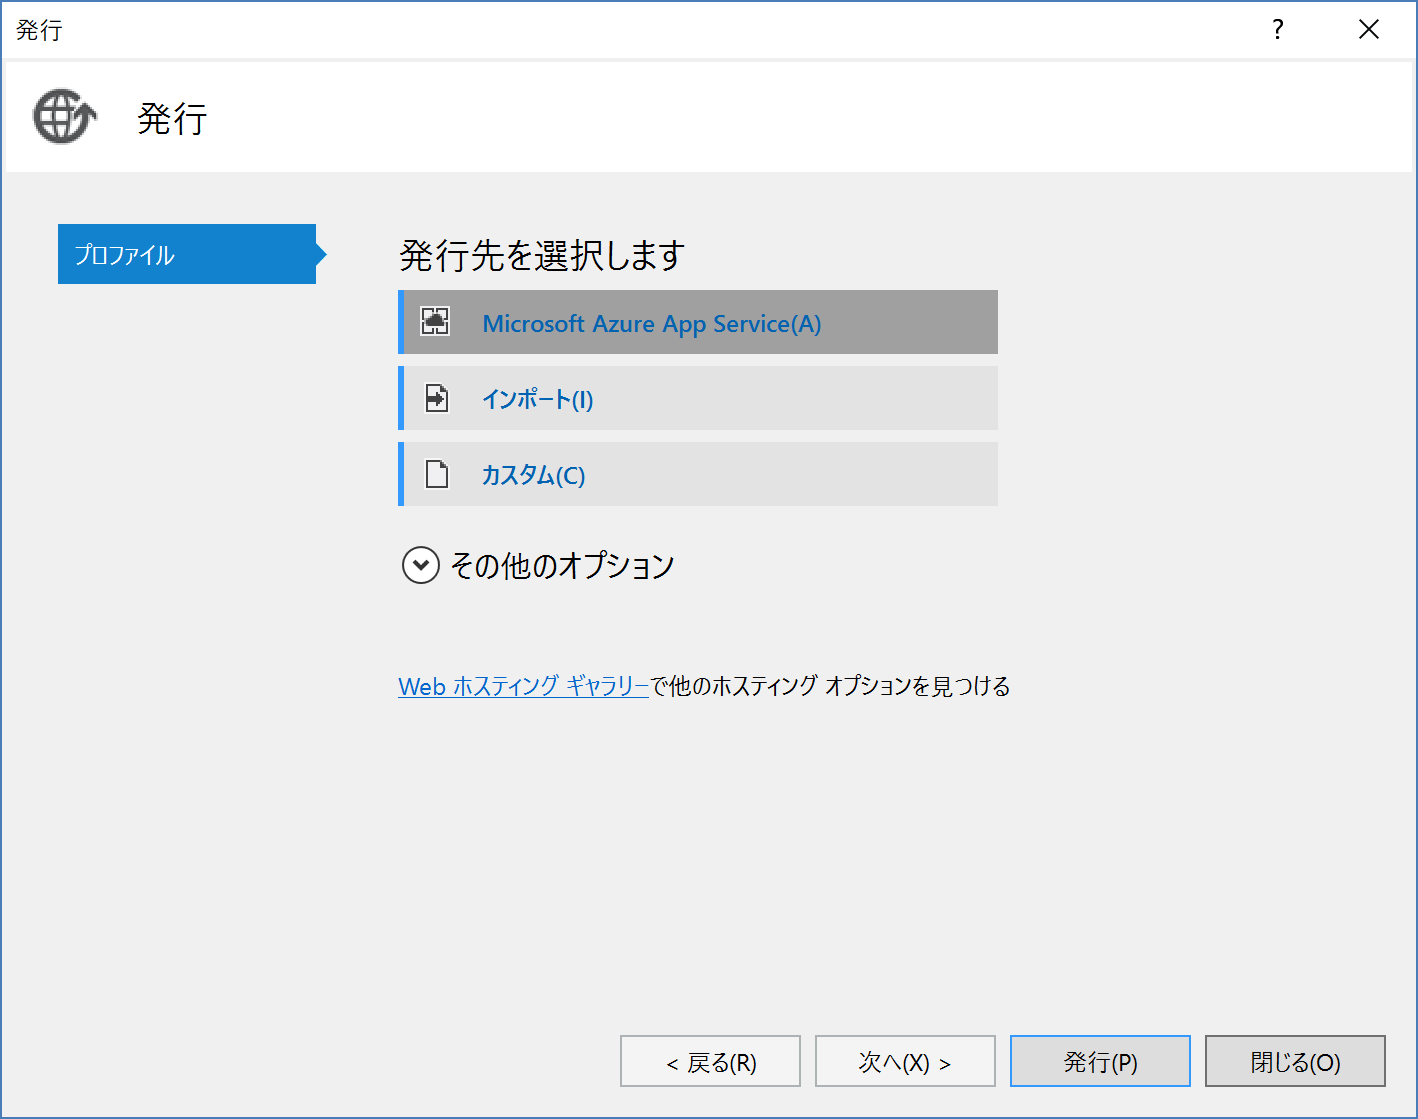
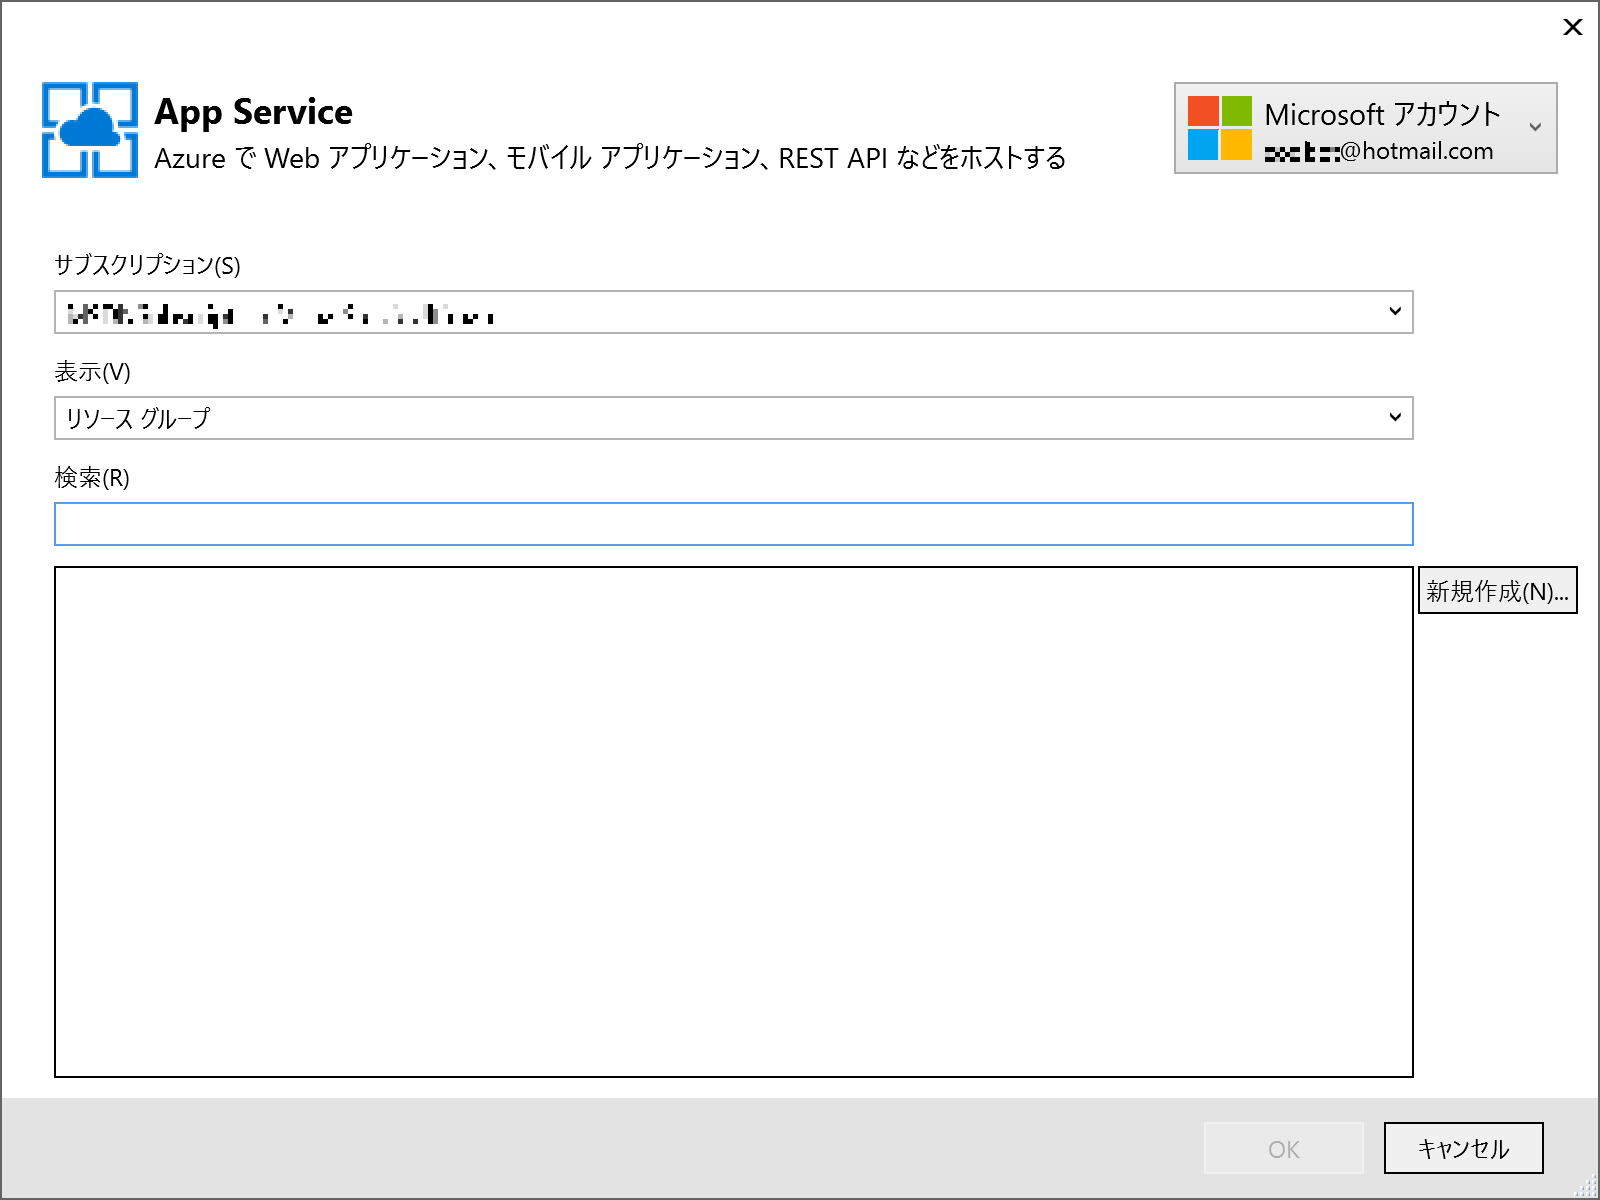
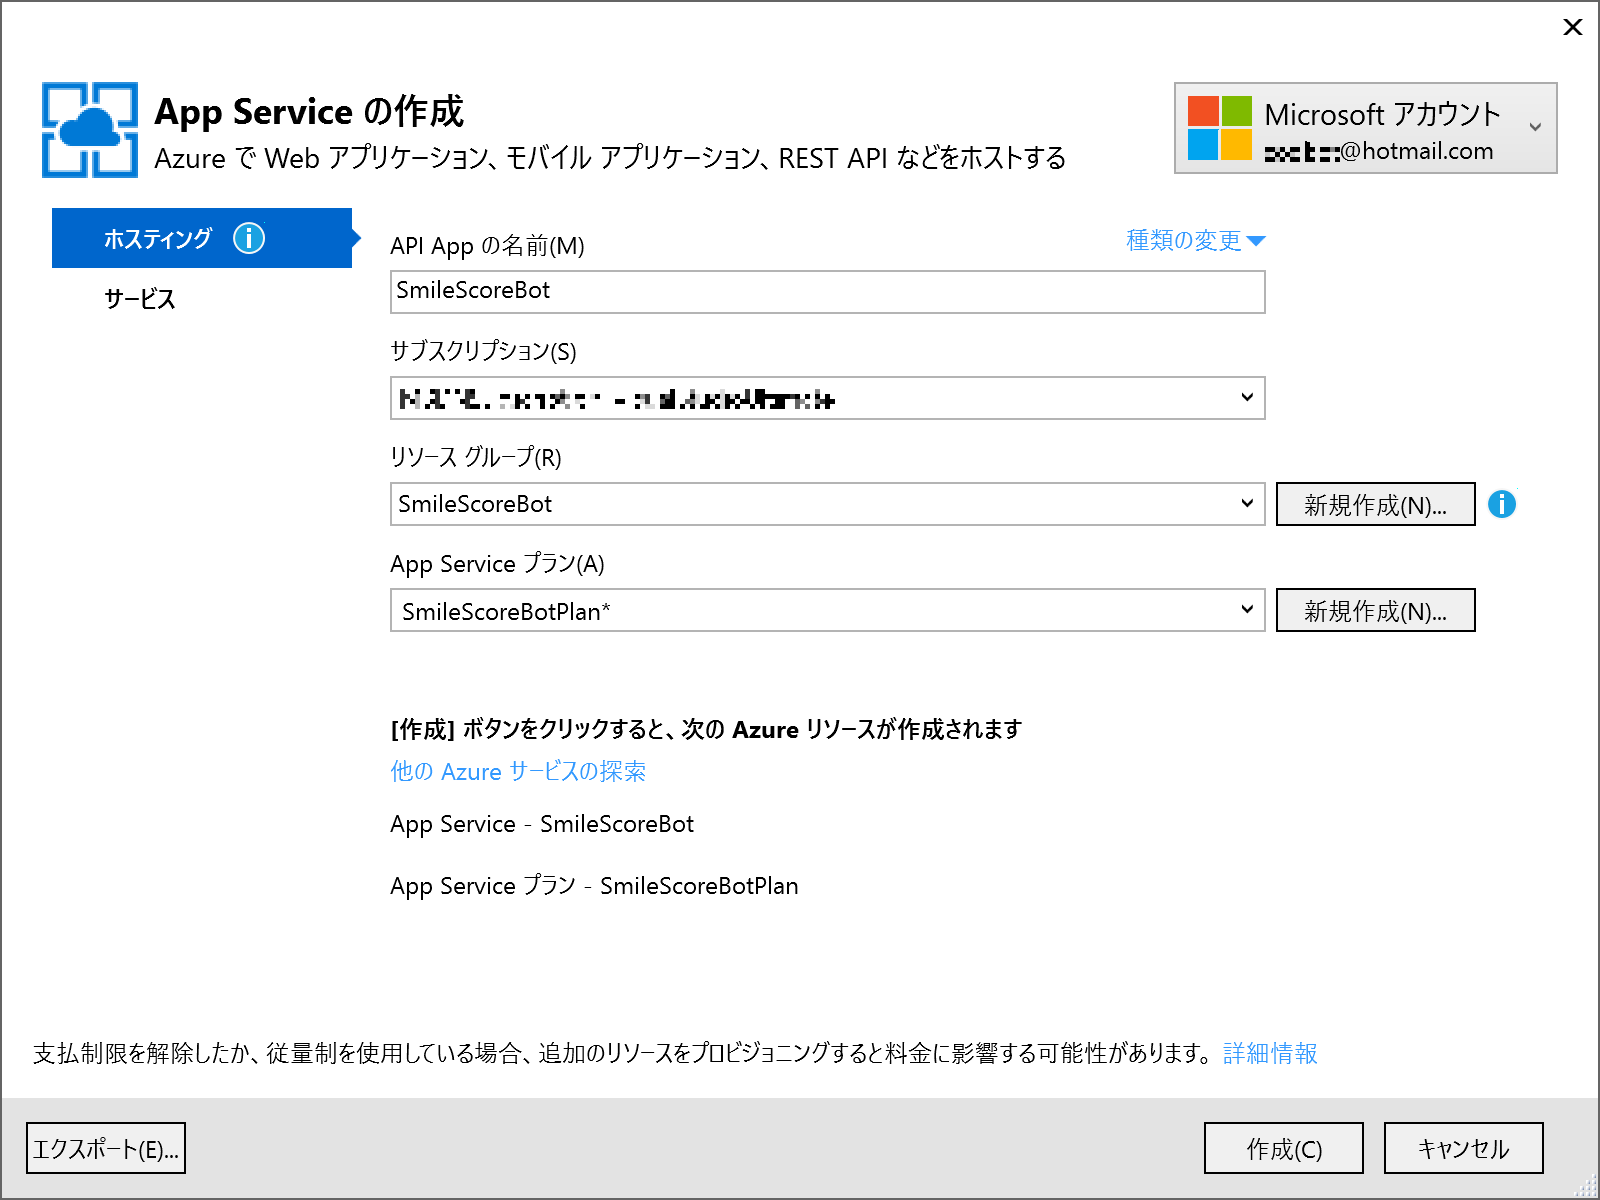
発行先は Microsoft Azure App Service を選択、必要に応じてリソースグループや App Service プランを作成し、[App Service の名前] にアプリケーション名を入力します。[発行]をクリックして Azure に発行します。公開した Bot アプリのURLは https://[アプリケーション名].azurewebsites.net になります。
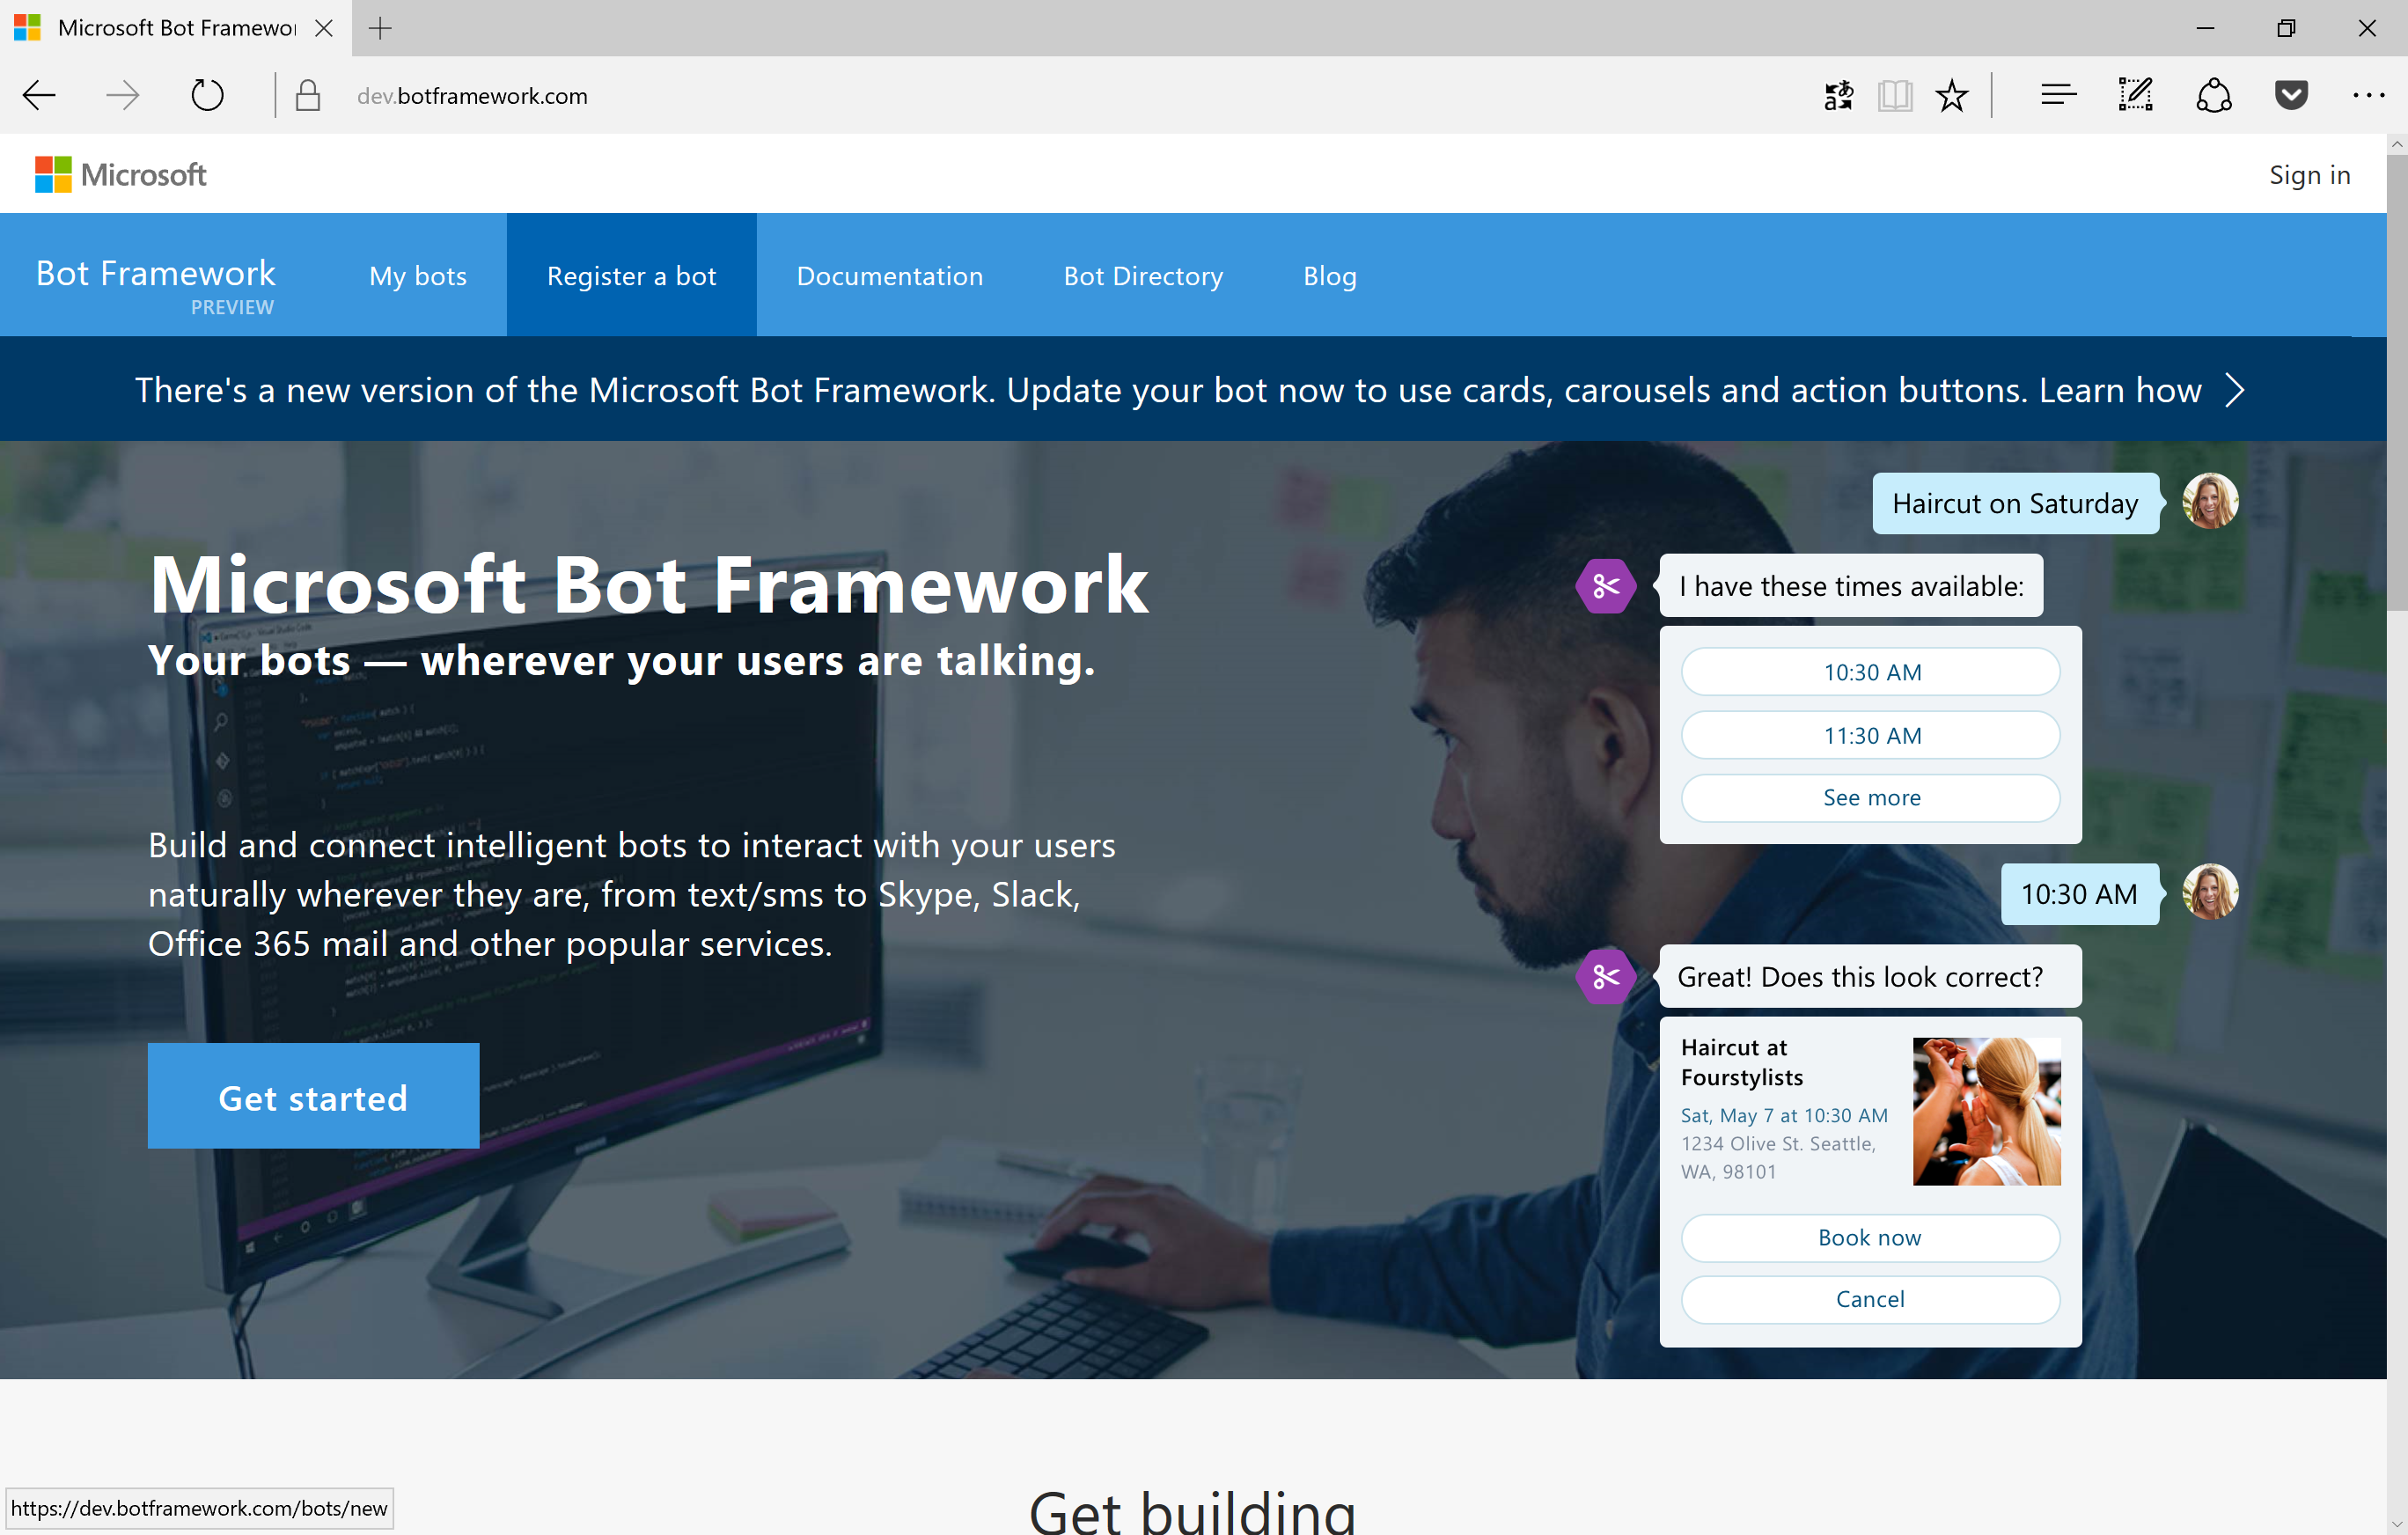
Bot Framework の Web サイト (https://dev.botframework.com/) で、Step 3 で公開した Bot アプリを登録します。
[Register a bot] をクリックし、Microsoft アカウントでログインします。
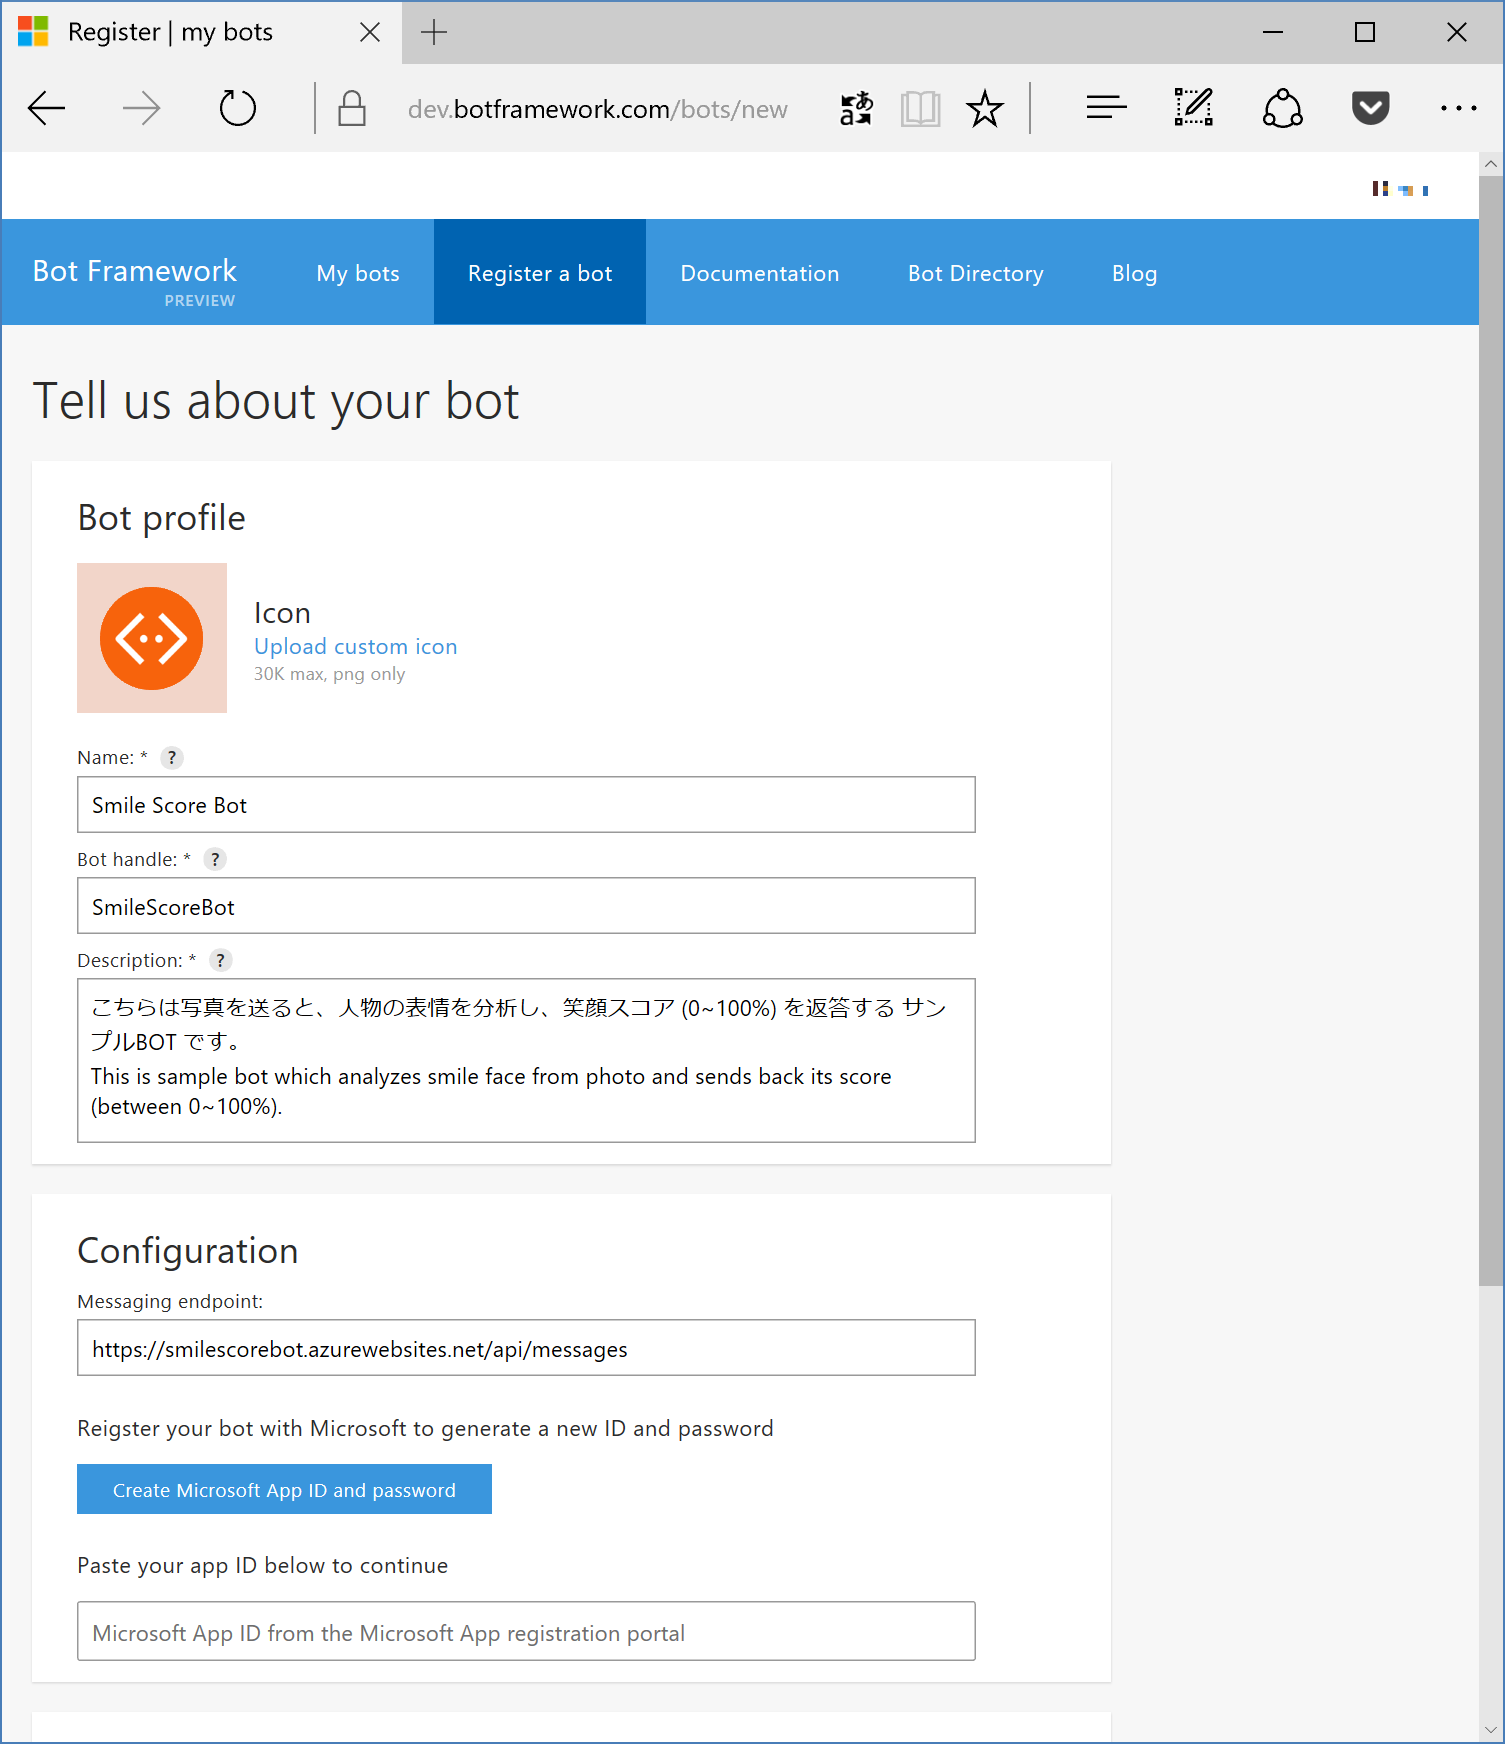
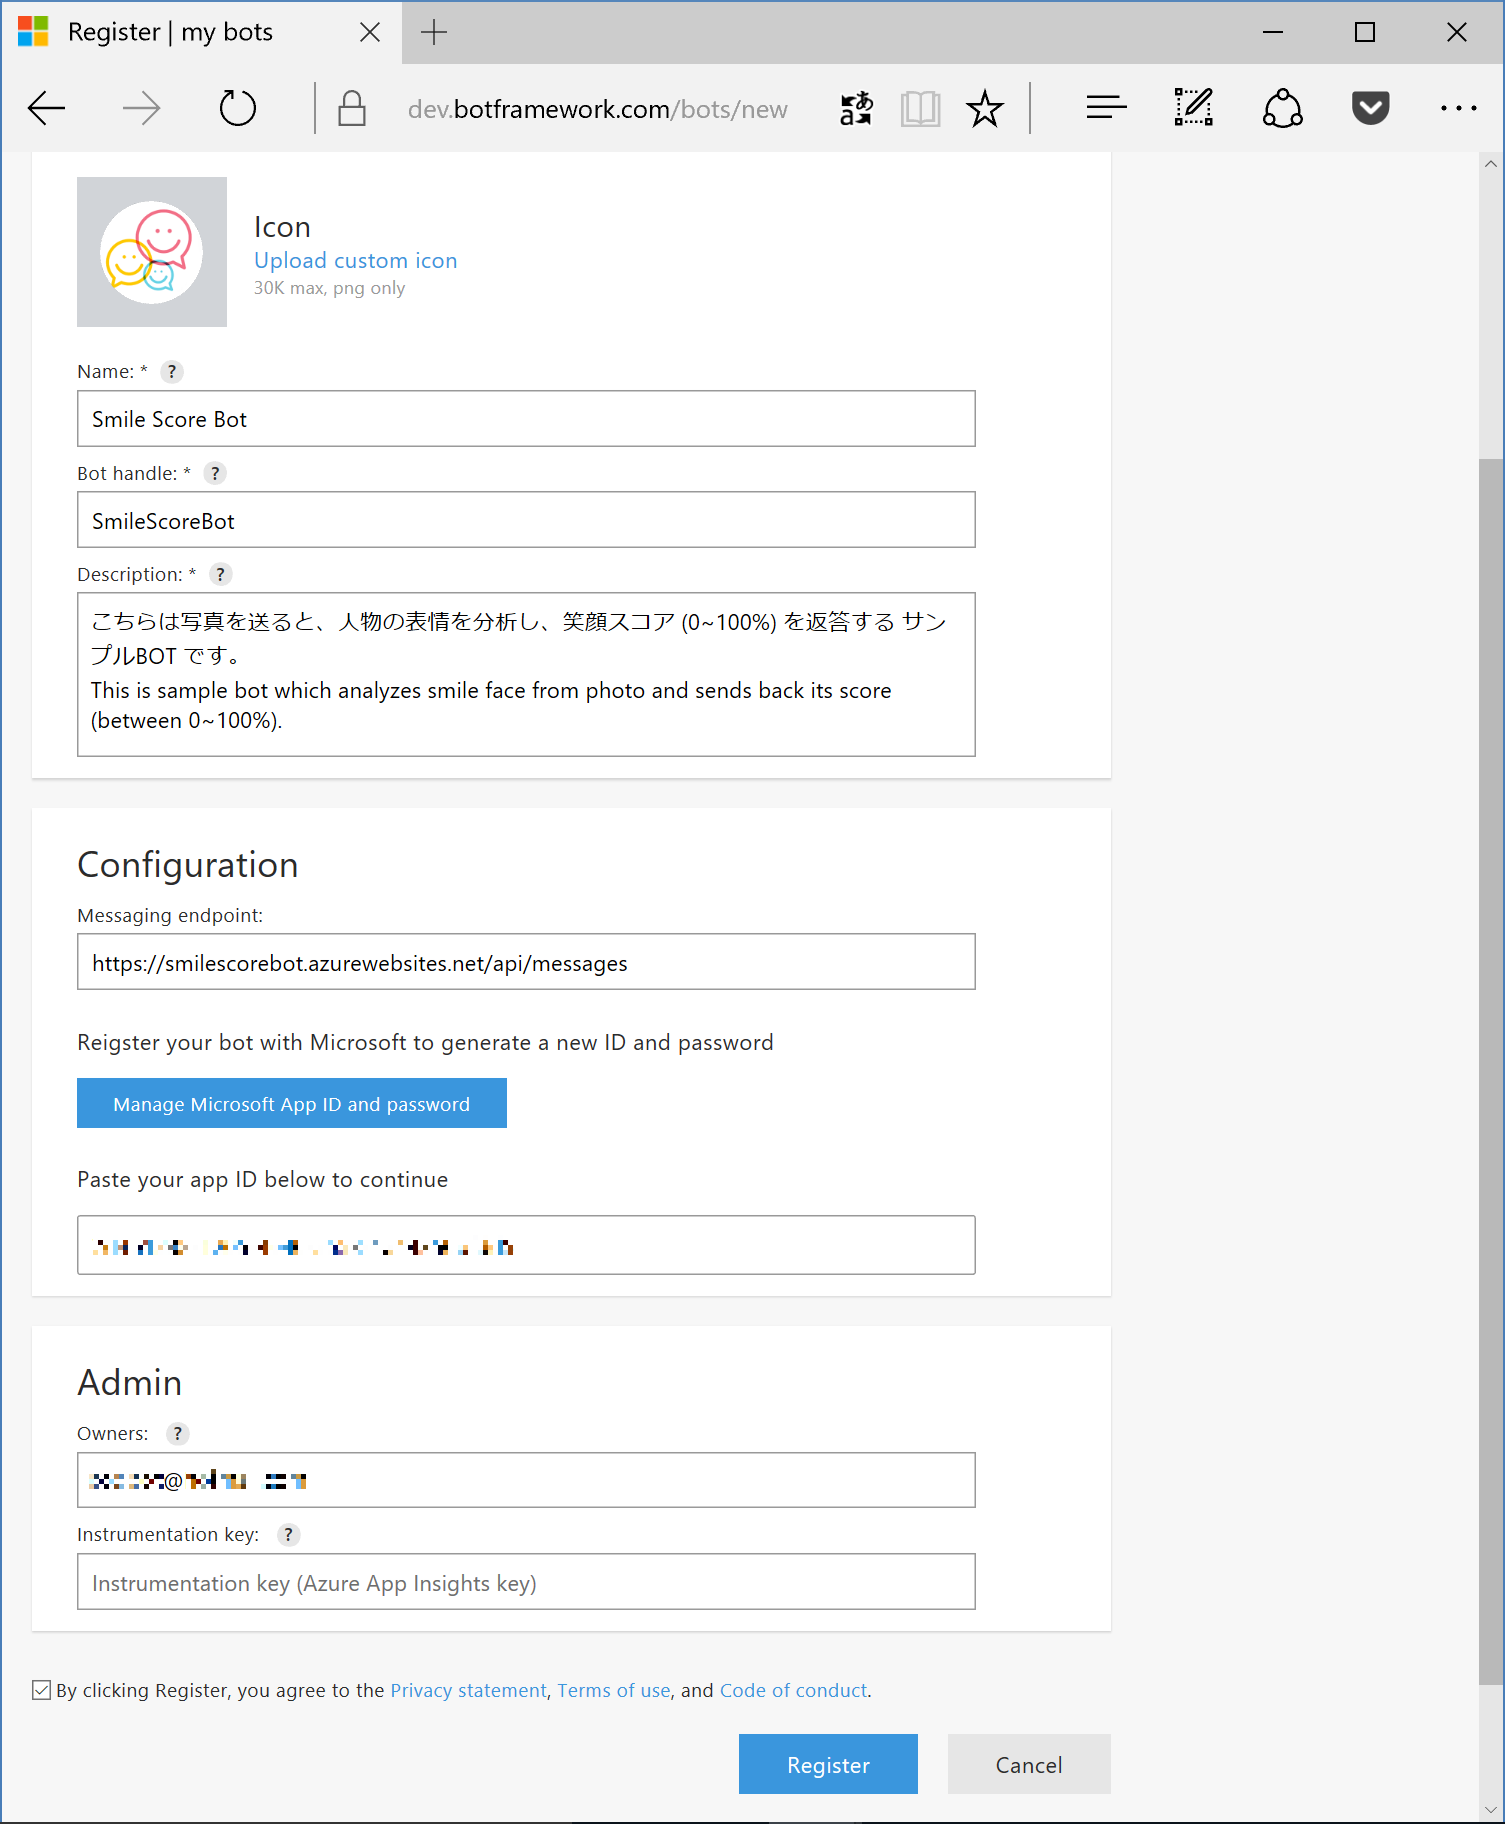
[Bot Profile] の欄で、 Bot name (Bot の表示名)、Bot handle (Bot Directory で認識される一意のID。Bot ID とも呼ぶ)、Description (Directory で表示される説明) を入力します。[Configration] の Messaging endpoint は https://[アプリケーション名].azurewebsites.net/api/messages/ を入力します (https にするのをお忘れなく)。その後、[Create Microsoft App ID and password] をクリックします。
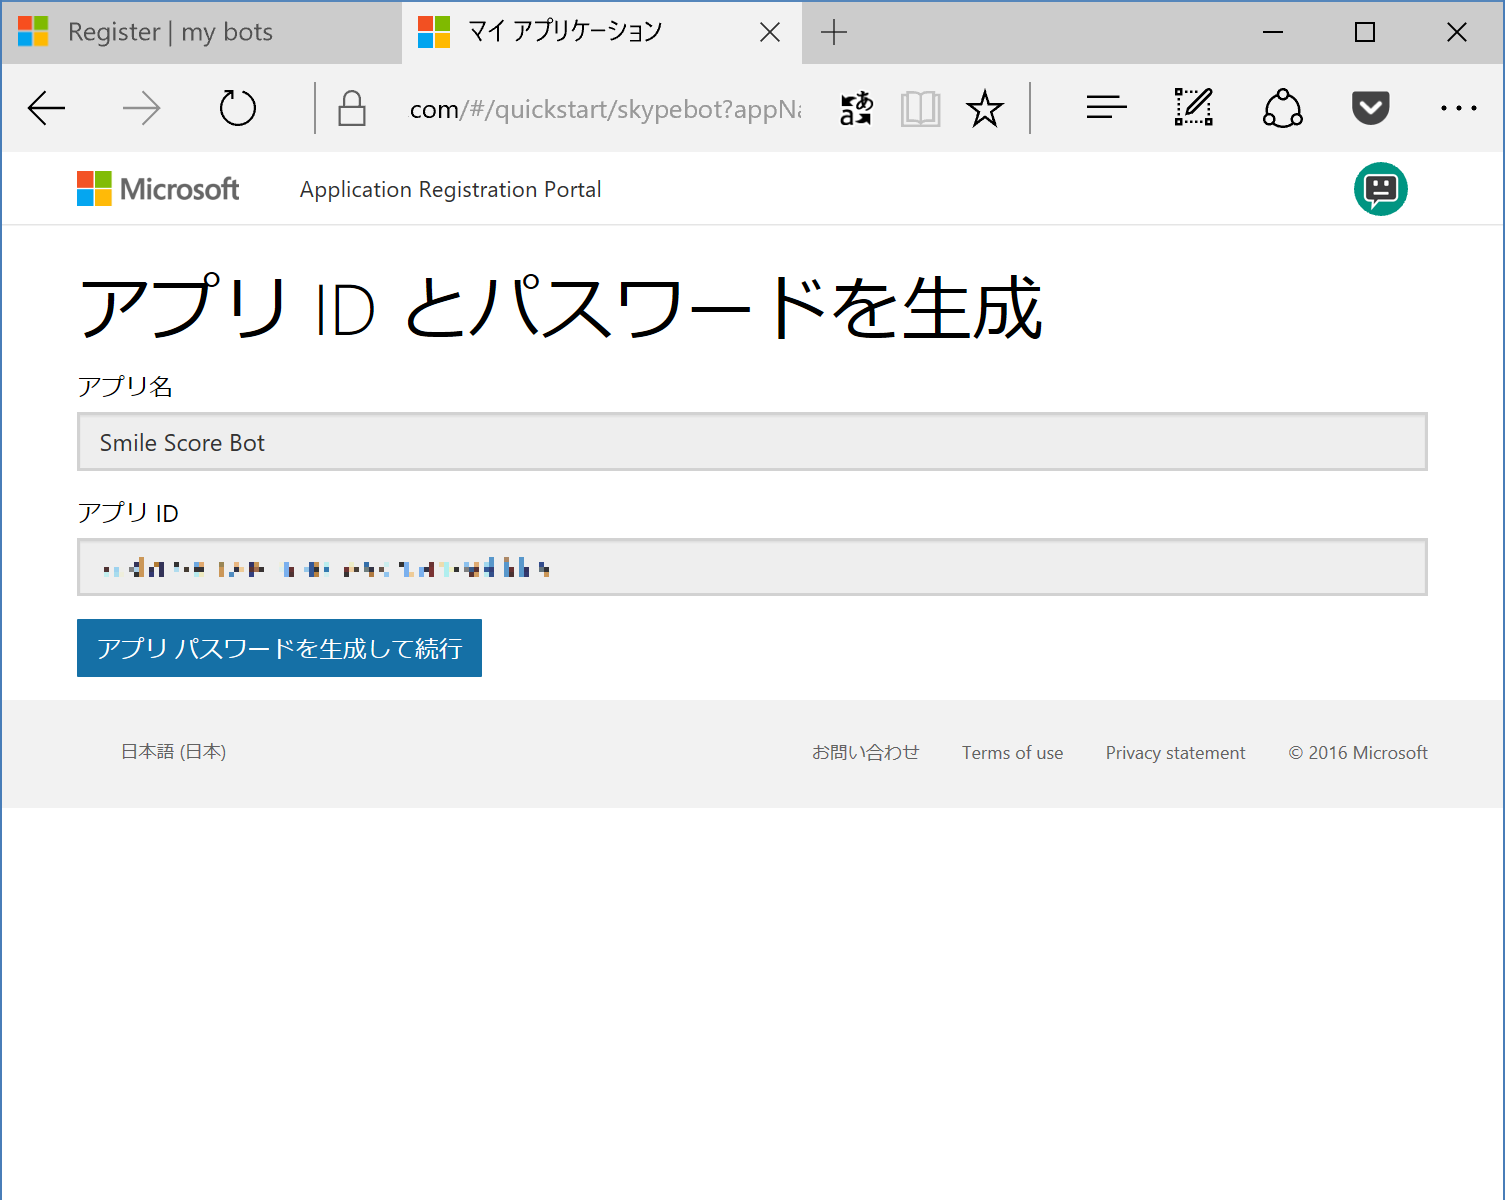
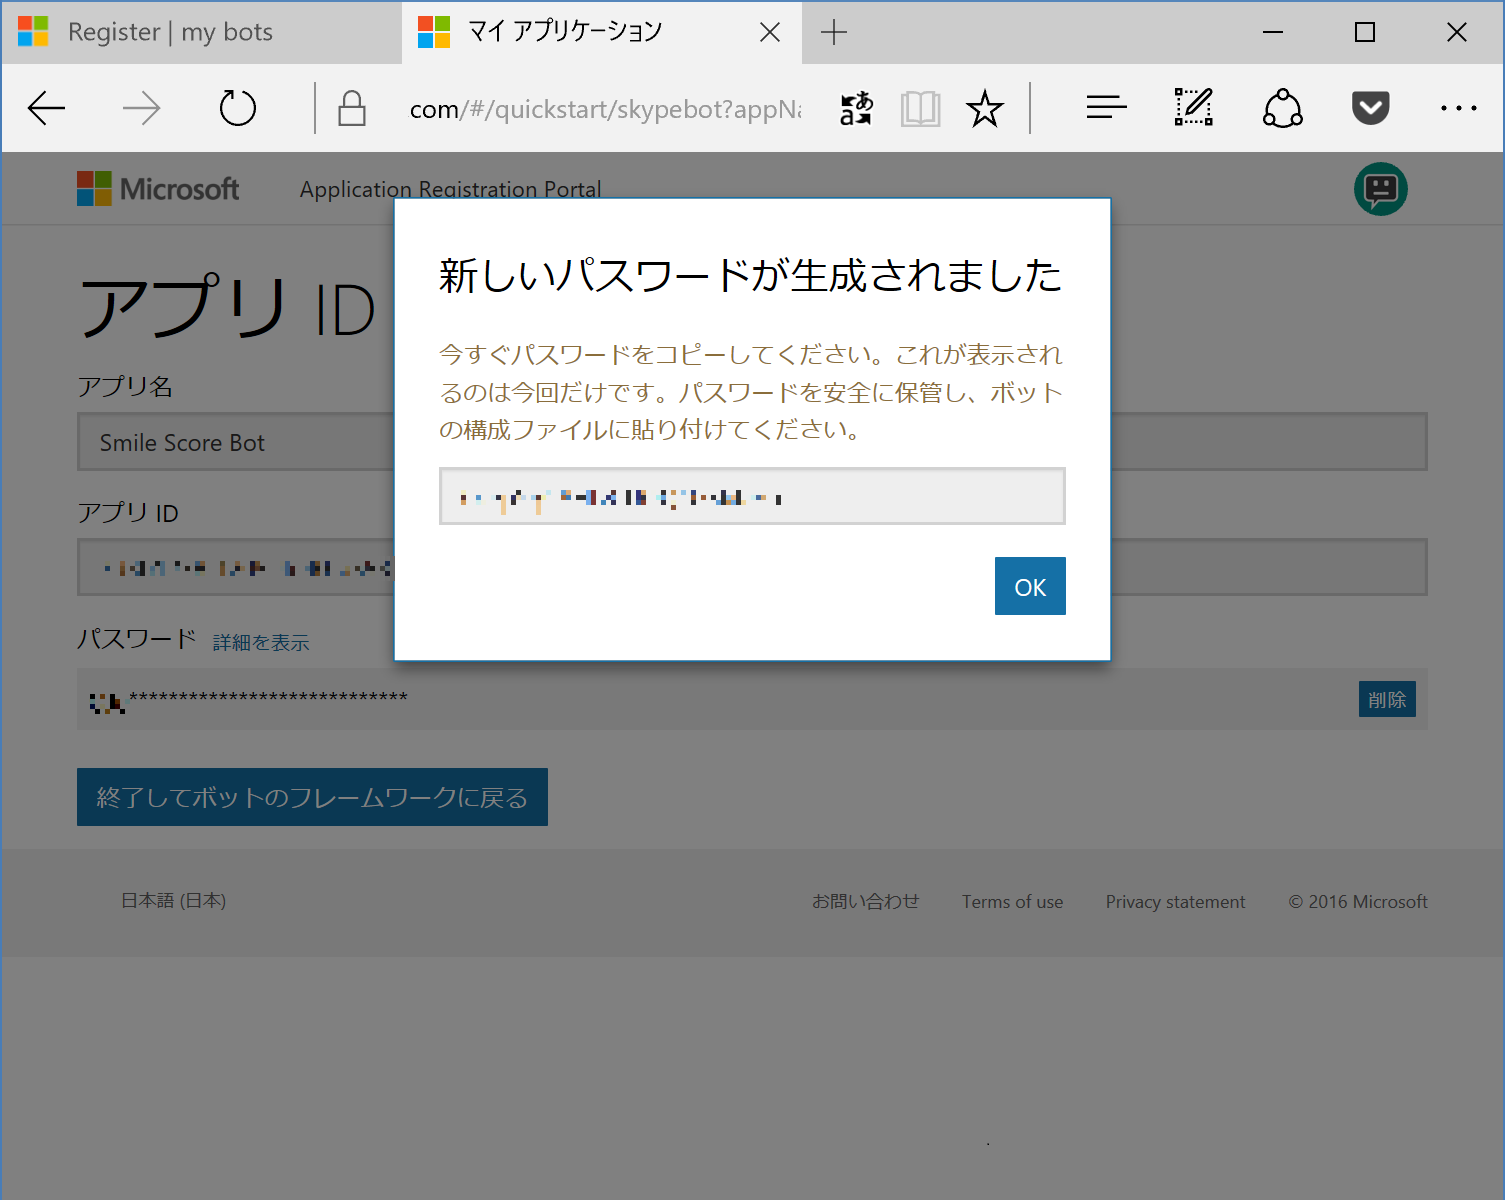
アプリIDとパスワードの生成画面になりますので、[アプリのパスワードを生成して続行] をクリックします。パスワードが生成されますので、アプリIDと共にコピーしてローカルに保存しておきます。[OK]をクリックして元の画面に戻ります。
[Configration] の 欄にある App ID が自動入力されます。画面下の Privacy Statement 他確認事項にチェックをつけて [Register] をクリックすると、登録は完了です。
[Icon Designed by Freepik]
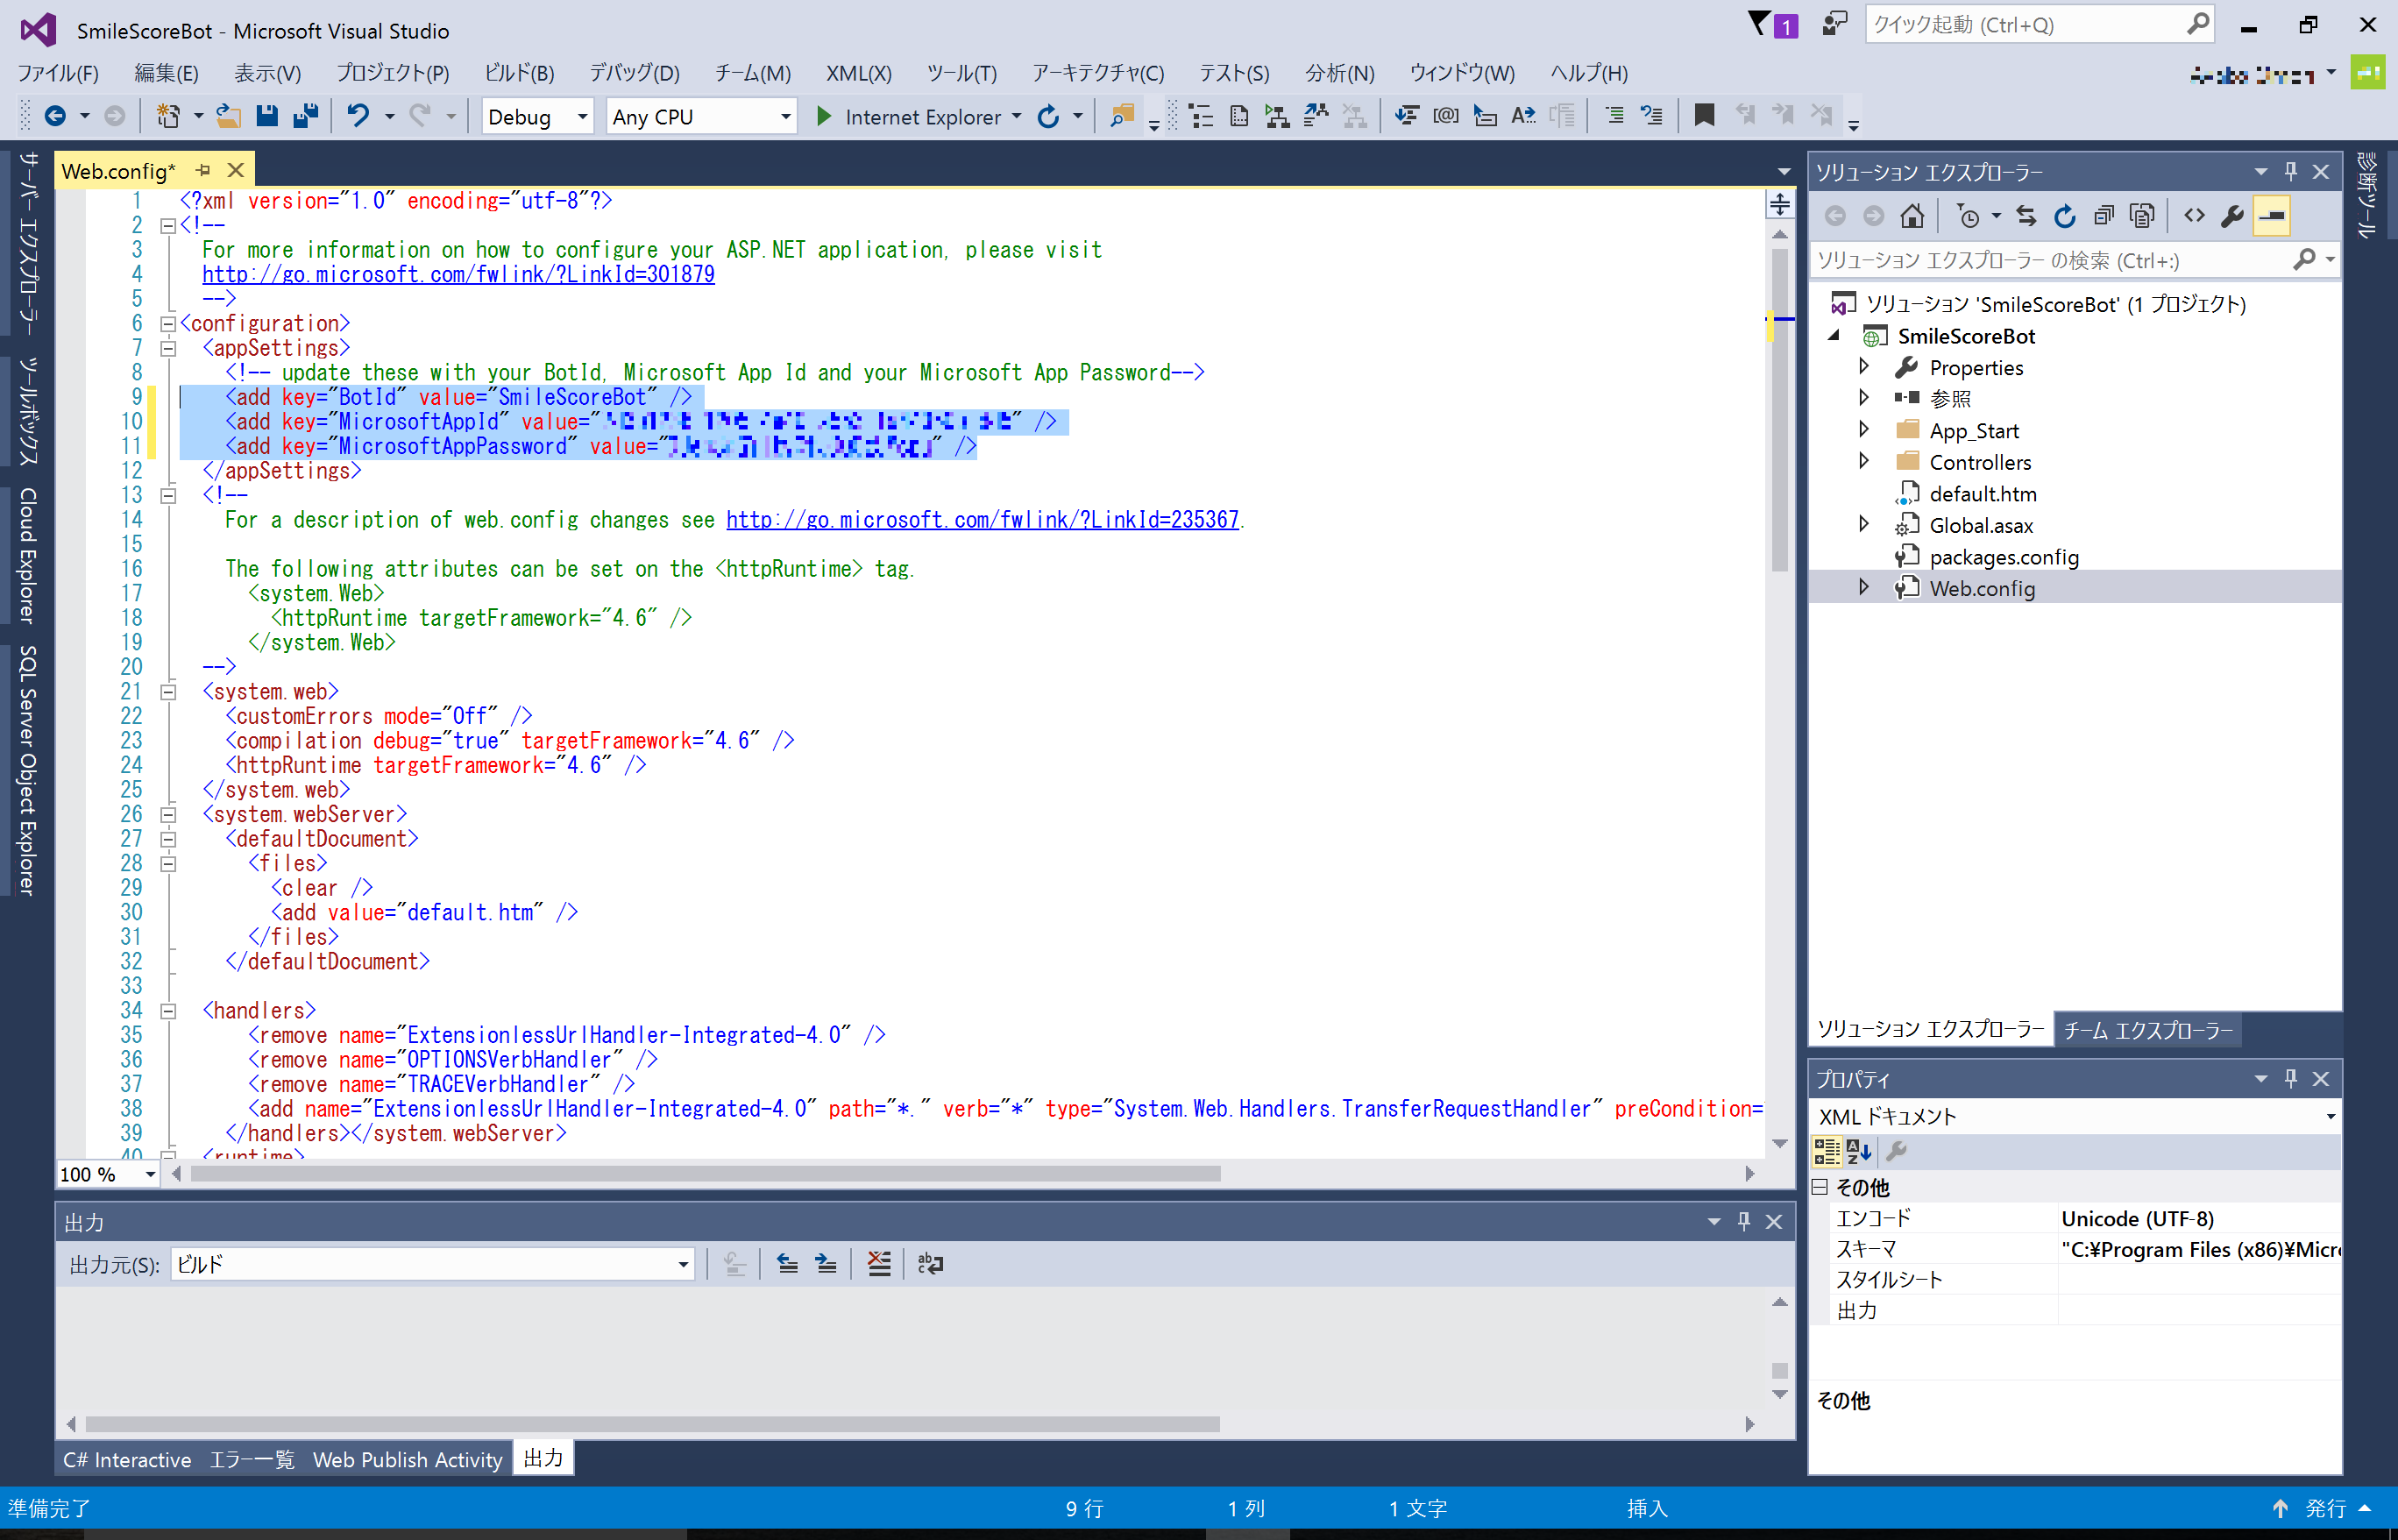
Visual Studio に戻り、設定した Bot ID, App ID, App Password を設定します。
Web.config をクリックして表示し、
 <configuration>
    <appsettings>
    <!-- update these with your BotId, Microsoft App Id and your Microsoft App Password-->
    <add key="BotId" value="YourBotID" />
    <add key="MicrosoftAppId" value="" />
    <add key="MicrosoftAppPassword" value="" />
    </appsettings>
: (略)
の部分にある value にそれぞれの値をコピーして保存します。その後 Step 3 と同様に再度 Azure への発行を行って Bot アプリを更新してください。
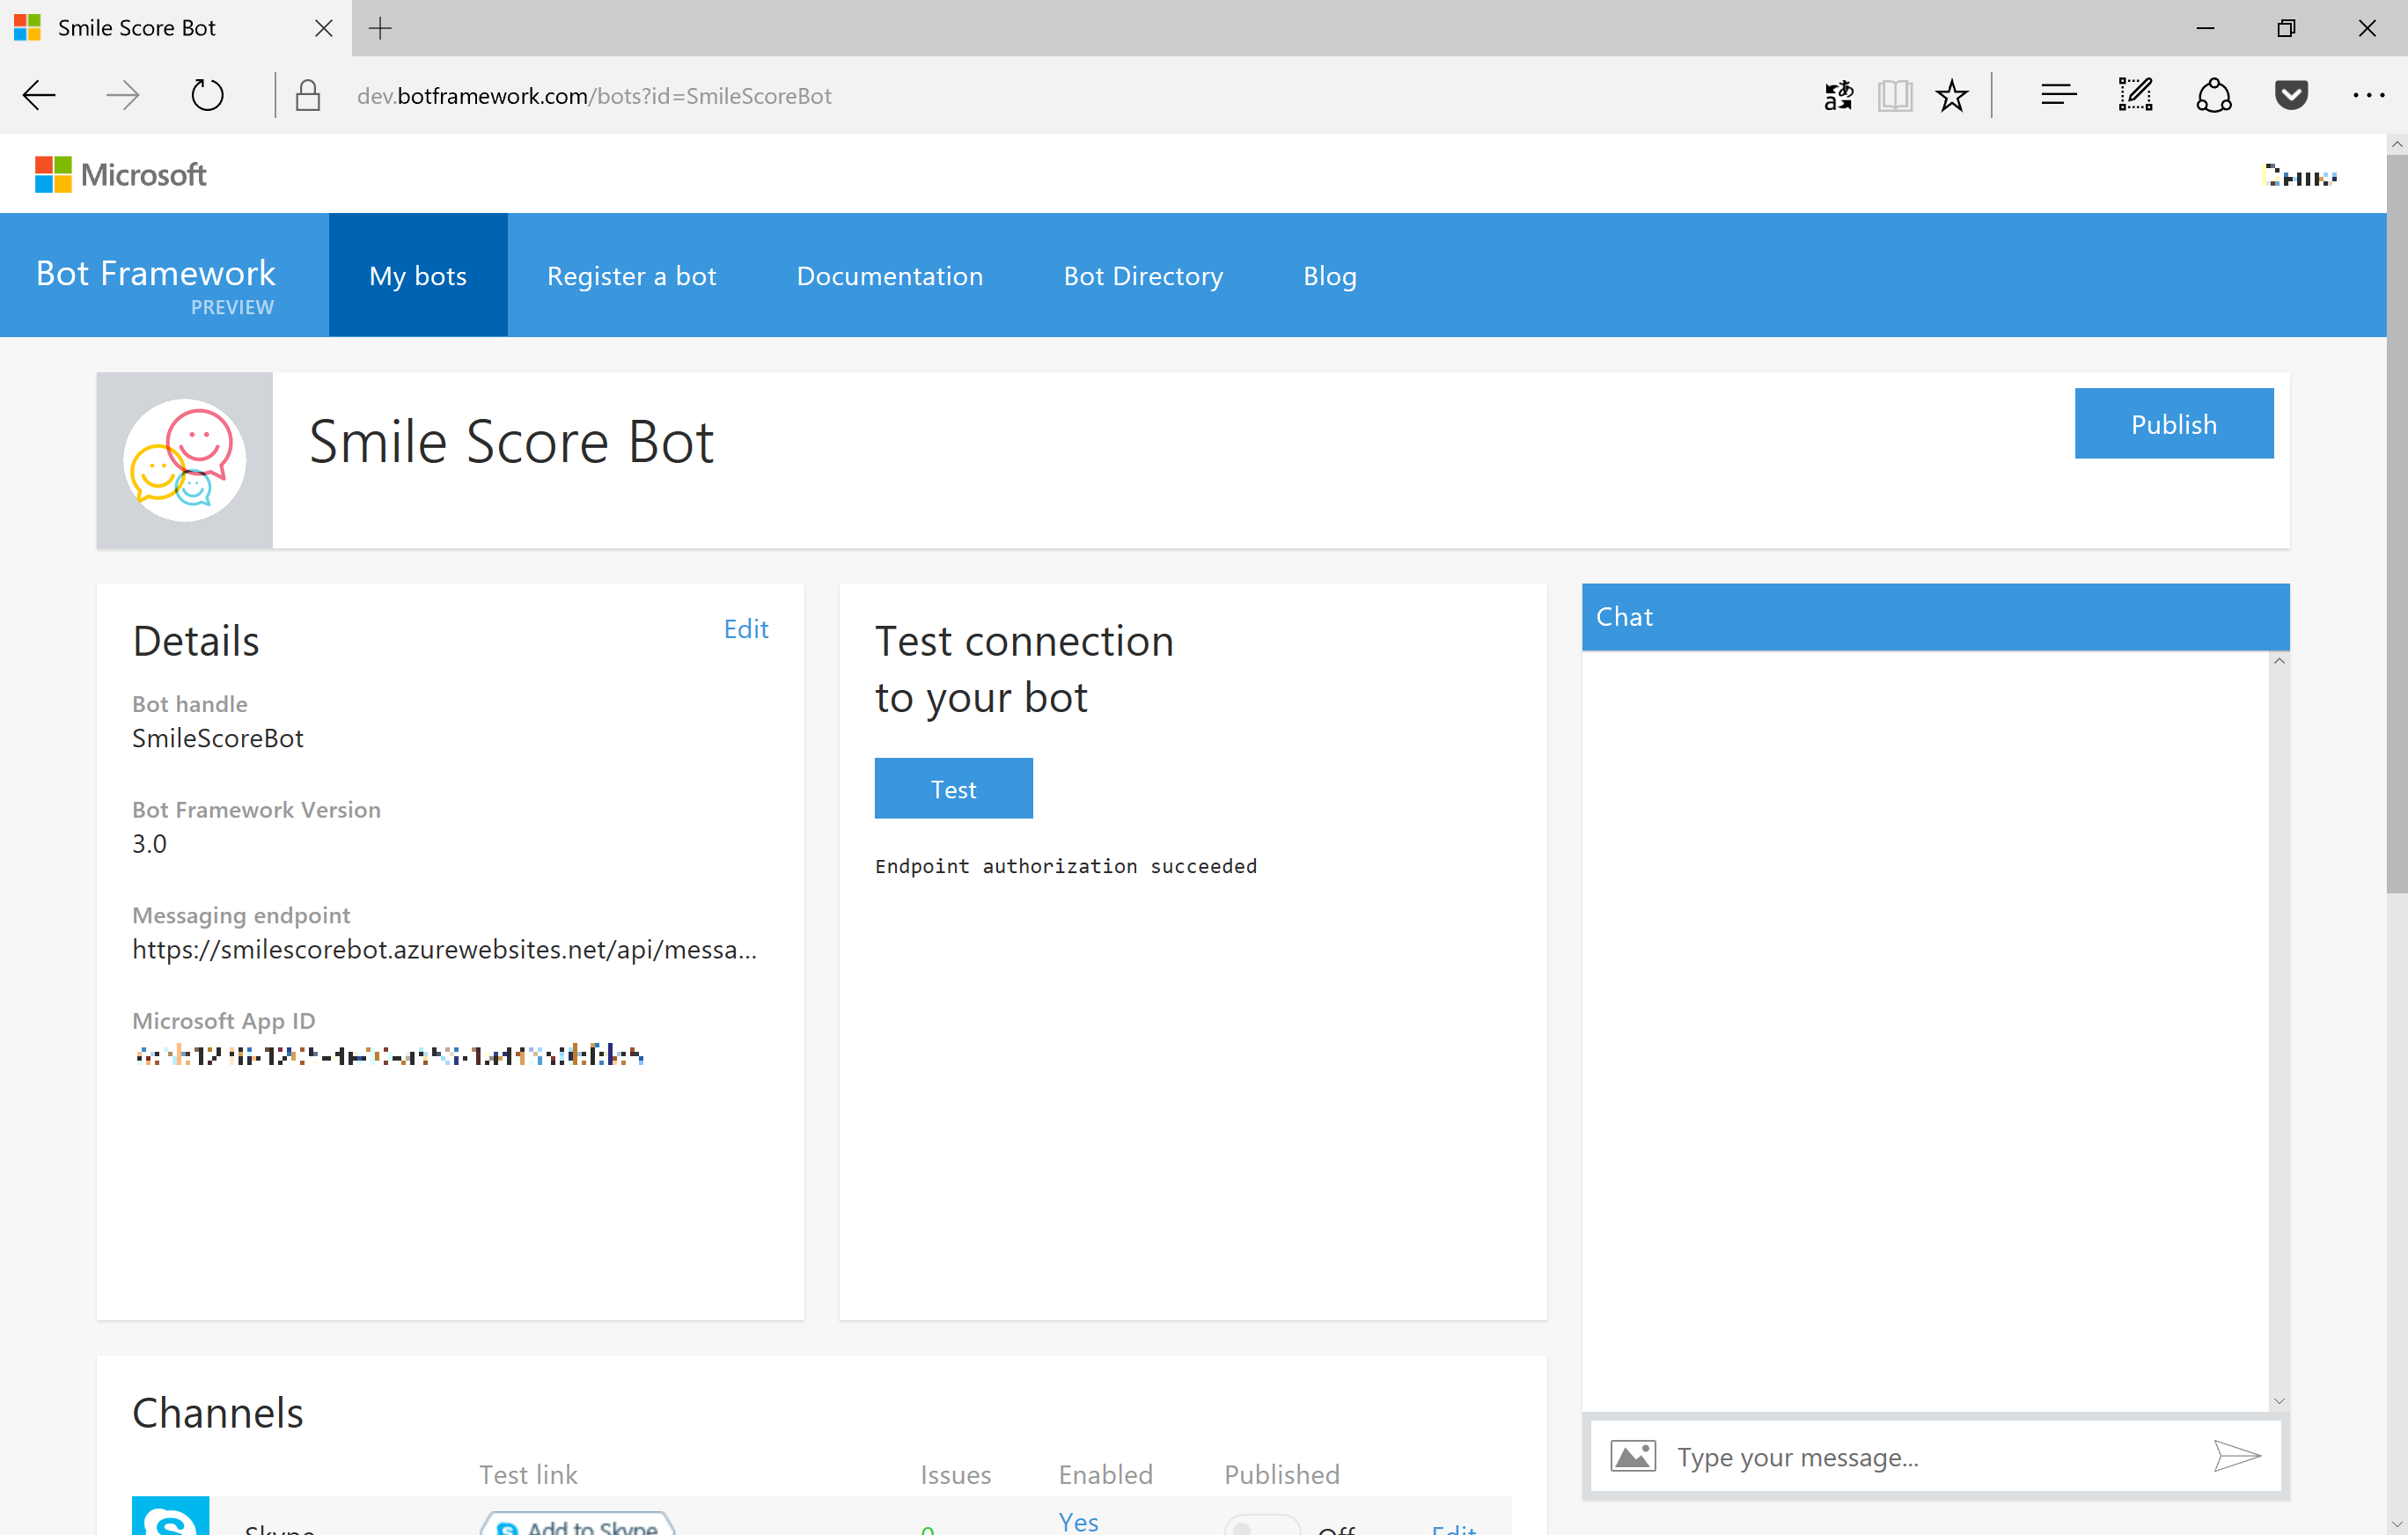
Bot Framework の Web サイト を開き、My Bots から登録した Bot アプリを選択して詳細を表示します。
[Test connection to your bot] の欄にある [Test] をクリックして、"succeeded" と表示されるのを確認してください。
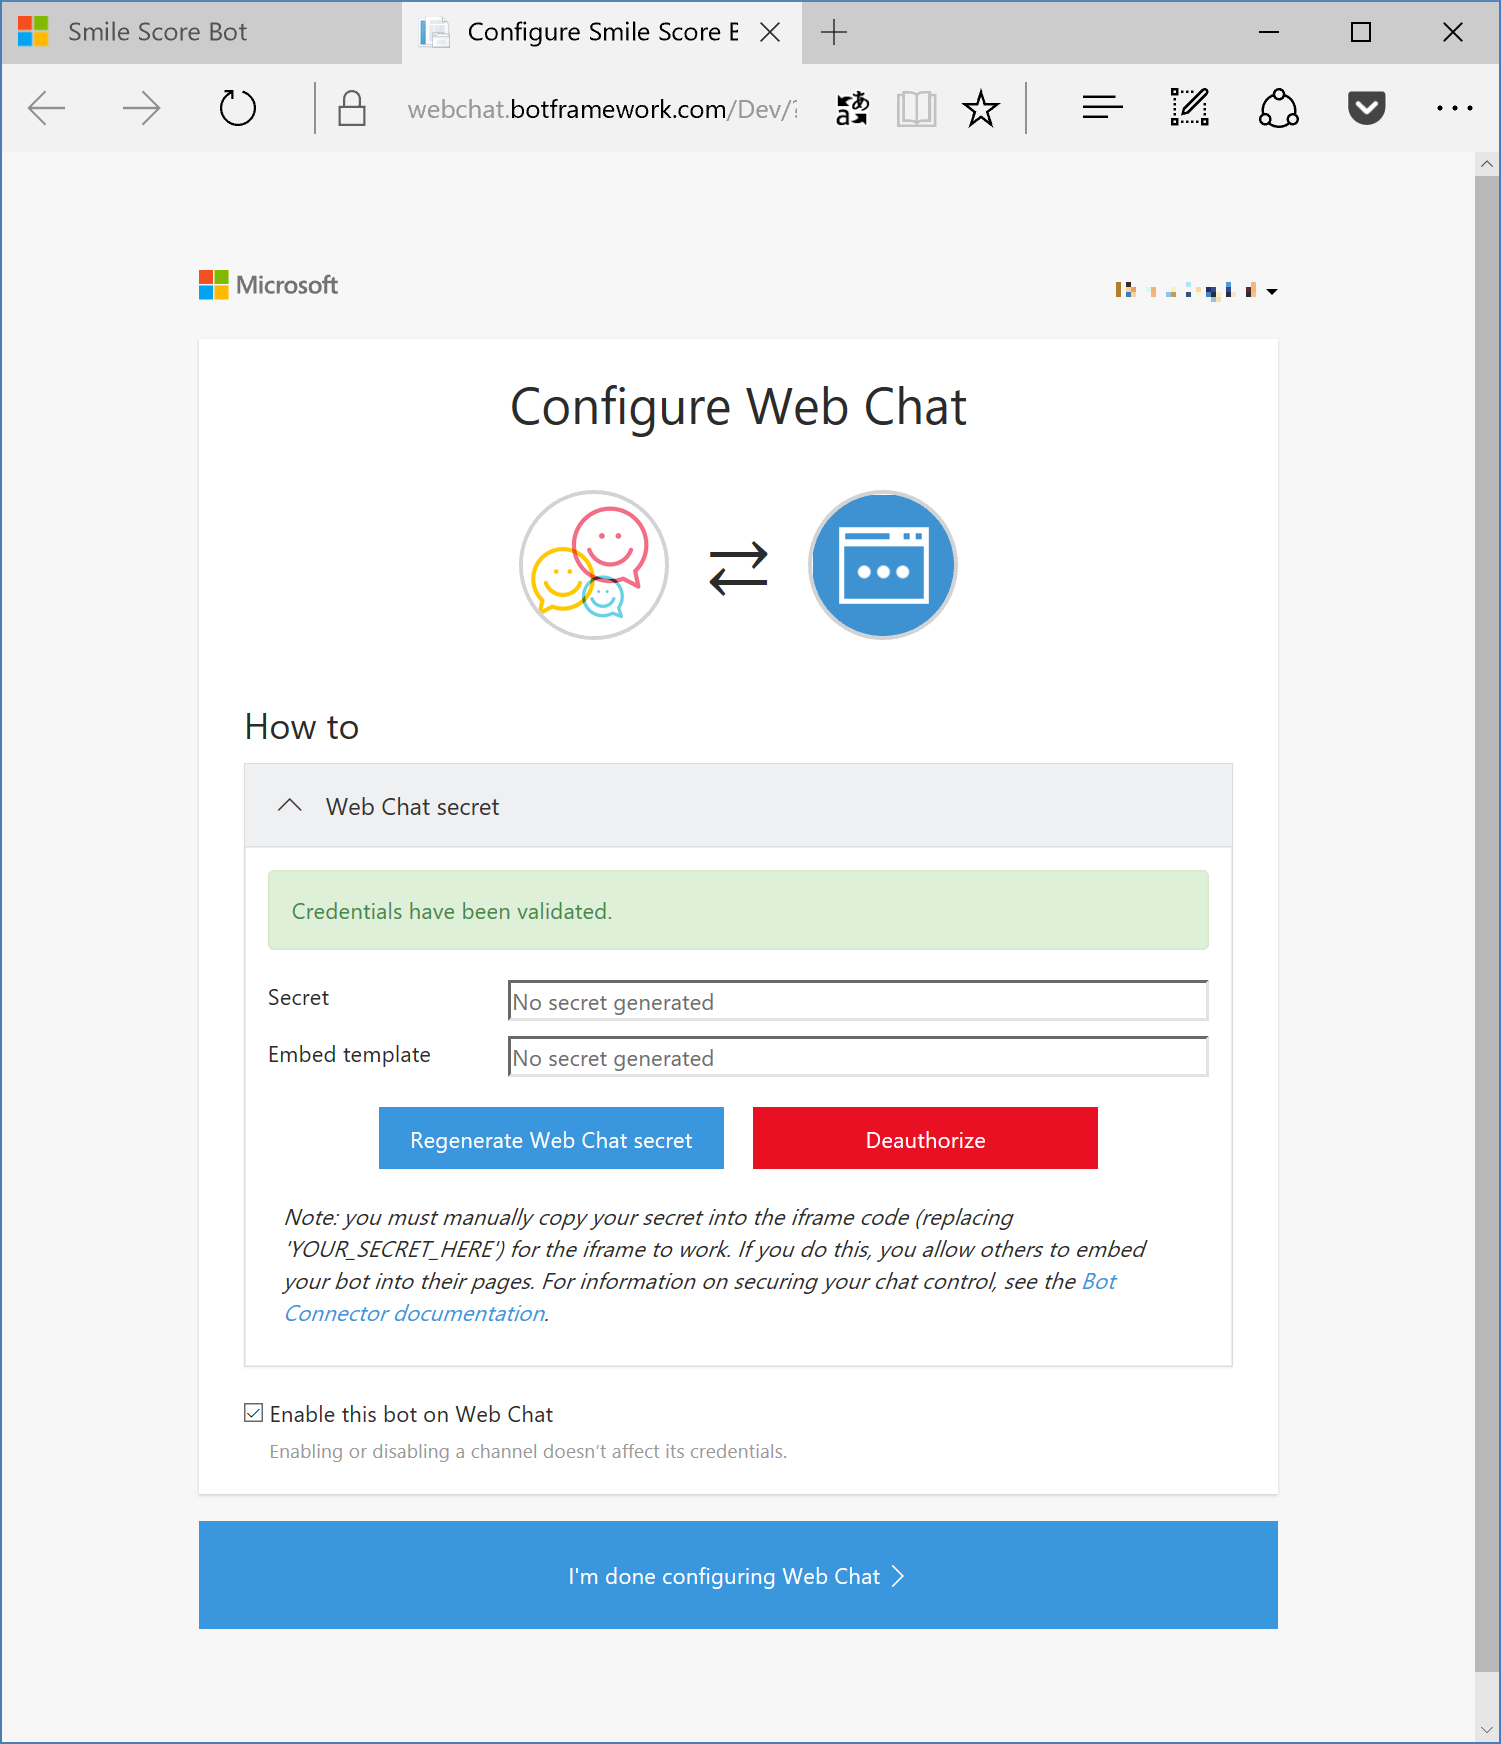
その後、[Channels] > [Web Chat] の欄にある [Edit] をクリックして、Web Chat の設定を行います。
Generate Web Chat Secret をクリックし、Web Chat に必要な Secret Code を生成します。[Done Confituring Web Chat] をクリックして元の画面に戻ります。
[Get bot embed codes] をクリックして、Web Chat を貼り付けるコードを表示します。
<iframe src="https://webchat.botframework.com/embed/[BotID]?s=[SecretCode]" style="height: 502px; max-height: 502px;"></iframe>
のように、Bot IDと設定した Secret Code を使って Web Chat を利用できます。

Web サイトなどに iframe で Web Chat を貼り付けて、動作すれば設定完了です。
コメントつきの完成形ソースコードを公開しました。
https://github.com/a-n-n-i-e/CognitiveEmotionAPI-SmileScoreBot
動きを確認したい方はこちらをお試しください。
https://smilescorebot.azurewebsites.net/
Ask Learn is an AI assistant that can answer questions, clarify concepts, and define terms using trusted Microsoft documentation.
Please sign in to use Ask Learn.
Sign in