Creating an Azure ASP.NET MVC Project
You've installed all the software you need to build an ASP.NET MVC application and run it on Azure. Now it's time to make your first application.
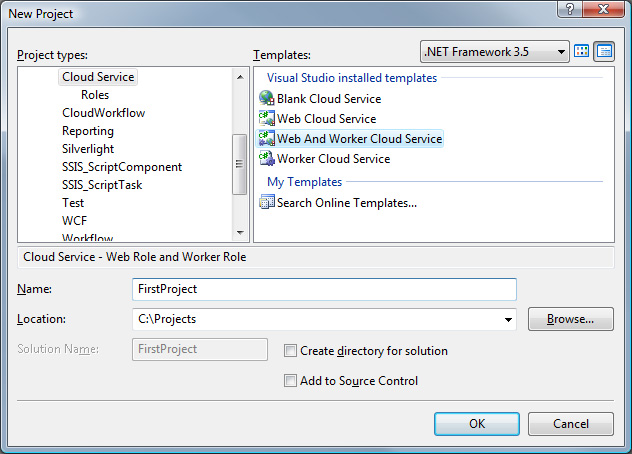
The first step is creating the Azure project:
- Select File/New/Project from Visual Studio 2008.
- Pick Cloud Service as the Project type.
- Pick Web And Worker Cloud Service as the Template.
- Don't select Create directory for solution as it will make a ridiculous directory structure.
- Name your project, and press OK.
Once you've done this, you will see the following in your root directory:

Move a Few Things Around
The fact that the SLN/SUO files wind up outside the root folder is a bit annoying, but simple to fix. Close the solution (close VisualStudio), and simply move the SLN/SUO files into the "FirstProject" folder and edit the FirstProject.sln file in notepad to remove the extra "FirstProject\" path segments:
"FirstProject\FirstProject\FirstProject.ccproj" becomes
"FirstProject\FirstProject.ccproj"
"FirstProject\FirstProject_WebRole\FirstProject_WebRole.csproj" becomes
"FirstProject_WebRole\FirstProject_WebRole.csproj"
"FirstProject\FirstProject_WorkerRole\FirstProject_WorkerRole.csproj" becomes
"FirstProject_WorkerRole\FirstProject_WorkerRole.csproj"
Once you've done this, your root folder will look like:

Which is much cleaner. What are these folders?
FirstProject is the Azure service project. This project contains the Azure service definition, Azure service configuration, and Azure roles. It is the project that binds the web role and the worker role into a deployable Azure service.
FirstProject_WebRole is the web role of the Azure service. We will be replacing this project shortly, but if you were going to build a standard ASP.NET Azure application, this is where it would live.
FirstProject_WorkerRole is the worker role of the Azure service.
Re-open the FirstProject.sln file at this point.
Introducing ASP.NET MVC to Azure
Because Azure is currently a CTP, and ASP.NET MVC has just come out in RC1 form, there is currently no built-in template for adding an ASP.NET MVC web role to an Azure service project.
This means we need to color outside the lines to introduce ASP.NET MVC into our Azure service project.
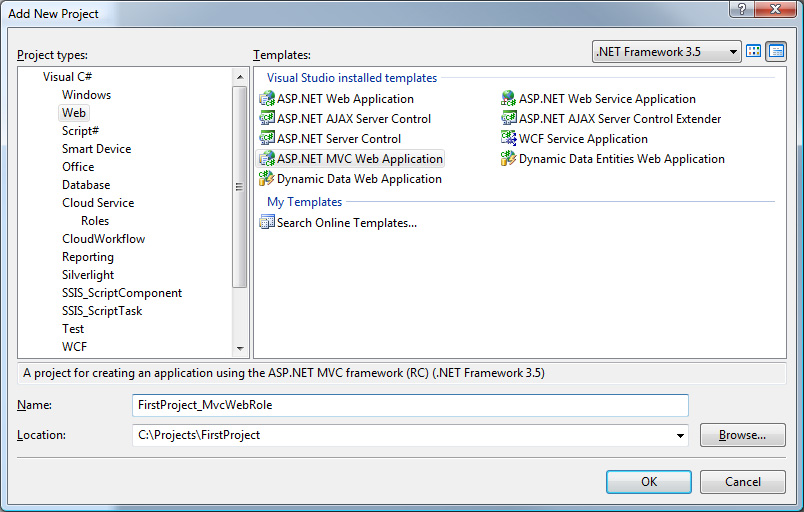
Step 1 - Add an ASP.NET MVC Web Application as a new project to your solution (following the Azure naming convention, augmented with an Mvc prefix):
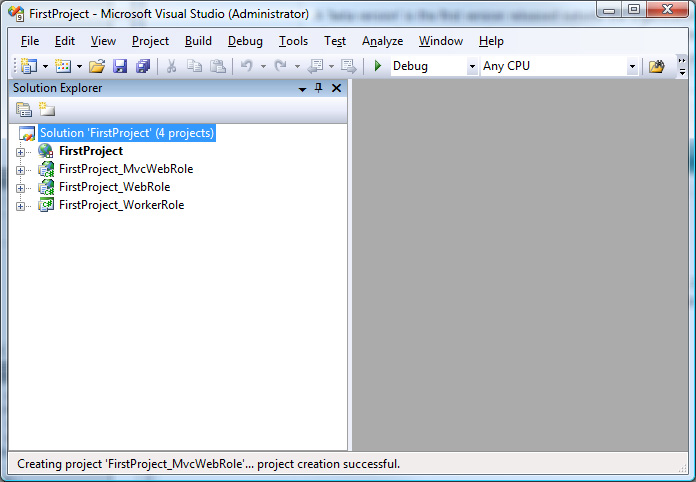
Once this is done, your solution will look like:
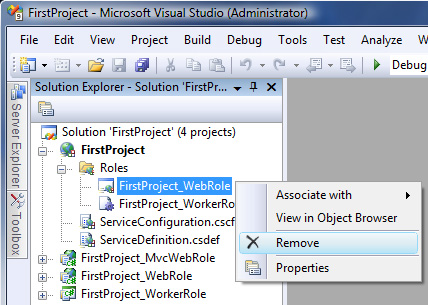
It is at this point we need to go manual:

(Flip the switch up now.)
First, remove the ASP.NET web role from the Azure service project:
Next, remove the ASP.NET web role from the solution:
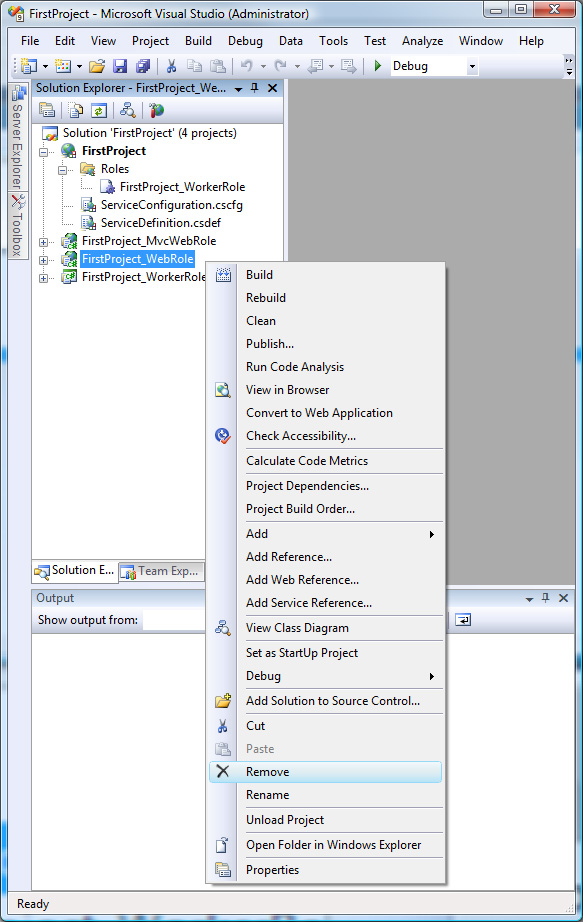
Don't worry, we'll add the FirstProject_MvcWebRole shortly.
Next, we need to make a manual adjustment to the FirstProject_MvcWebRole.csproj file. To do this, close Visual Studio at this point.
Using notepad (or your favorite text editor) open FirstProject_MvcWebRole.csproj for text editing and paste these two lines into the file:
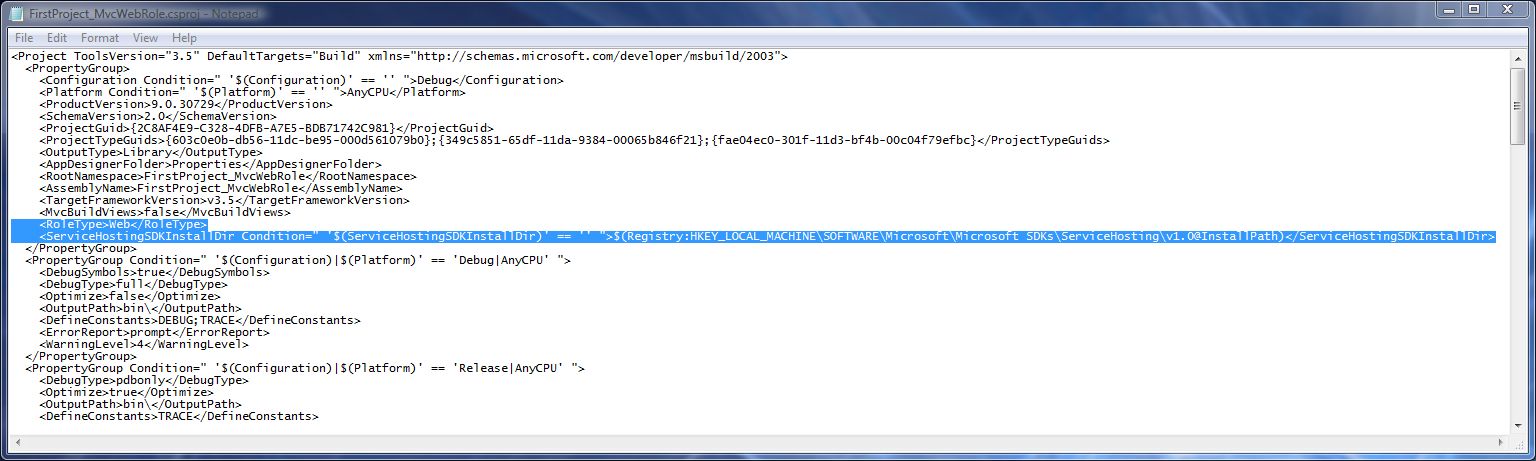
<RoleType>Web</RoleType>
<ServiceHostingSDKInstallDir Condition=" '$(ServiceHostingSDKInstallDir)' == '' ">$(Registry:HKEY_LOCAL_MACHINE\SOFTWARE\Microsoft\Microsoft SDKs\ServiceHosting\v1.0@InstallPath)</ServiceHostingSDKInstallDir>
These lines allow the ASP.NET MVC project to be a web role in the Azure service project.
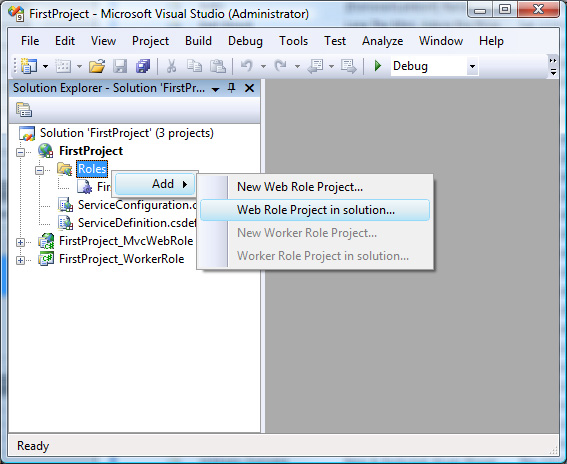
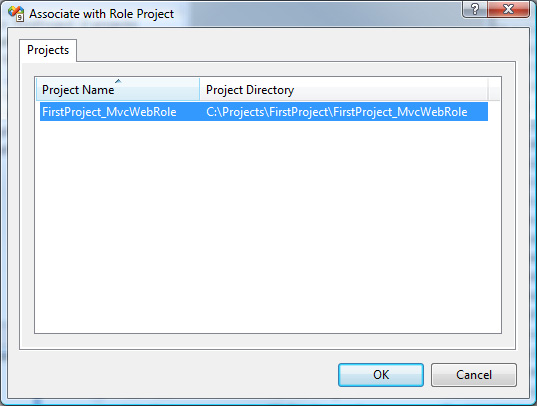
Next, add the ASP.NET MVC project as a web role in the Azure service project:
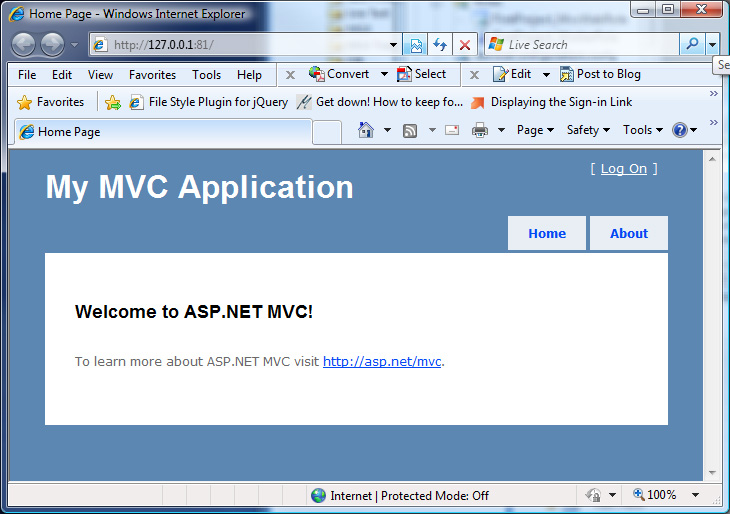
Run It
At this point, if you did everything correctly, you should be able to press CTRL-F5 and run the application:
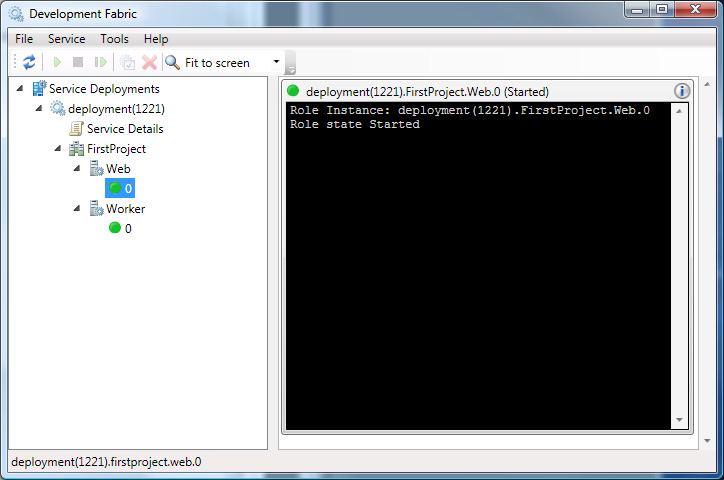
And see it running in the Development Fabric:
Best!
Brian