BizTalk Server On Windows Azure Infrastructure Services
Setting up and getting started
With the release of BizTalk Server on Windows Azure Infrastructure Services, a whole new set of possibilities has opened up for BizTalk customers. Infrastructure as a Service (IaaS) is a model in which an organization outsources the equipment used to support operations, including storage, hardware, servers and networking components. In this post, we will be focusing on Setting up BizTalk Server 2013 on IaaS via the Windows Azure Portal. The same can be done via PowerShell scripts and the whole process can be automated as well which will be covered in a later post.
Pre-Requisites:-
- The first and foremost requirement for this would be to have a Windows Azure subscription. In case you don’t have an azure subscription, you can sign up for a free trial account here.
Create a BizTalk Server 2013 Standard Virtual Machine
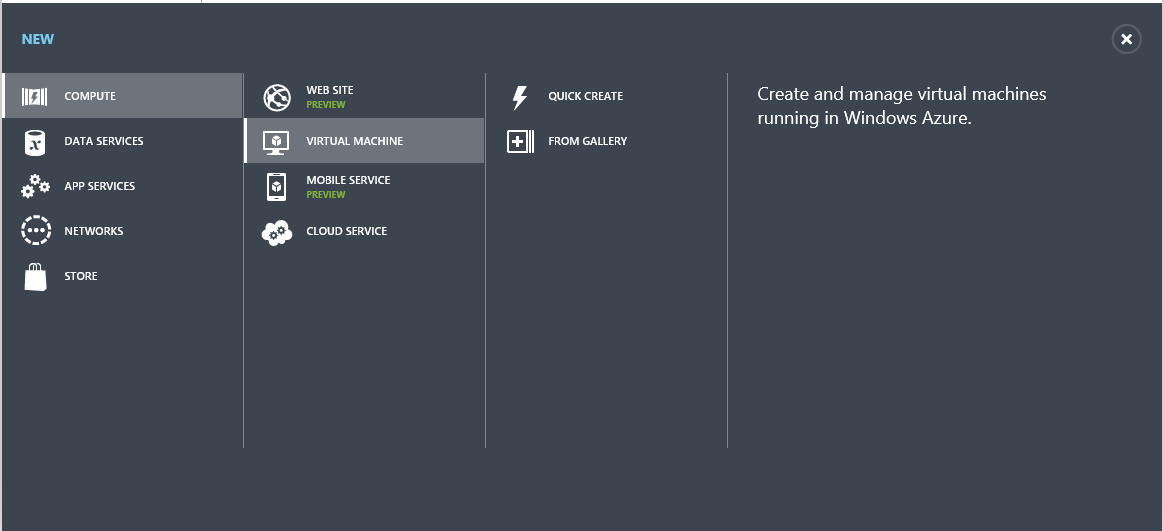
1. In the Windows Azure Management Portal , Click on New->Compute->Virtual Machine->From Gallery
2. Click on Platform Images. You will see a list of Platform images that Windows Azure offers.
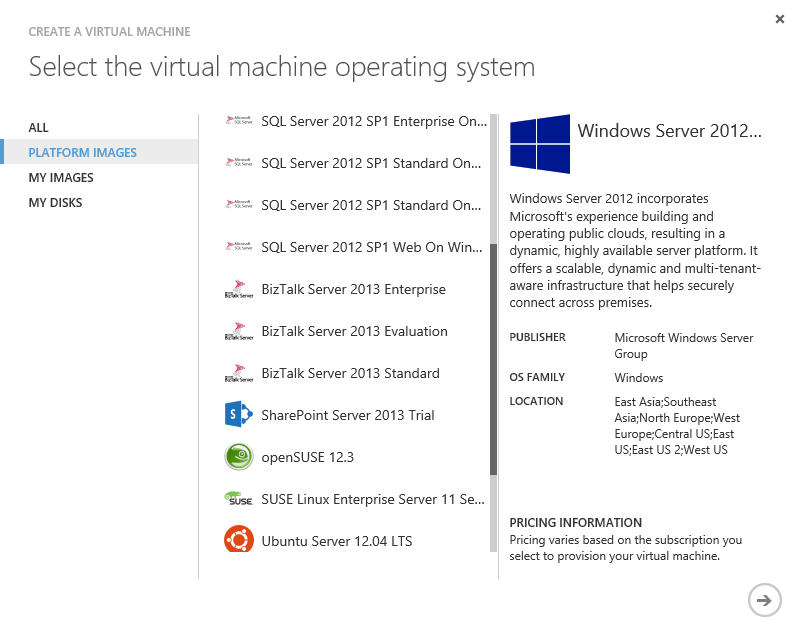
Specific to BizTalk Server 2013, you will see three versions of it
- BizTalk Server 2013 Enterprise
- BizTalk Server 2013 Evaluation
- BizTalk Server 2013 Standard
3. Select one of the BizTalk images (for example select BizTalk Server 2013 Evaluation)
4. A dialog box will appear asking about the configuration of the new BizTalk Machine that you are about to create.
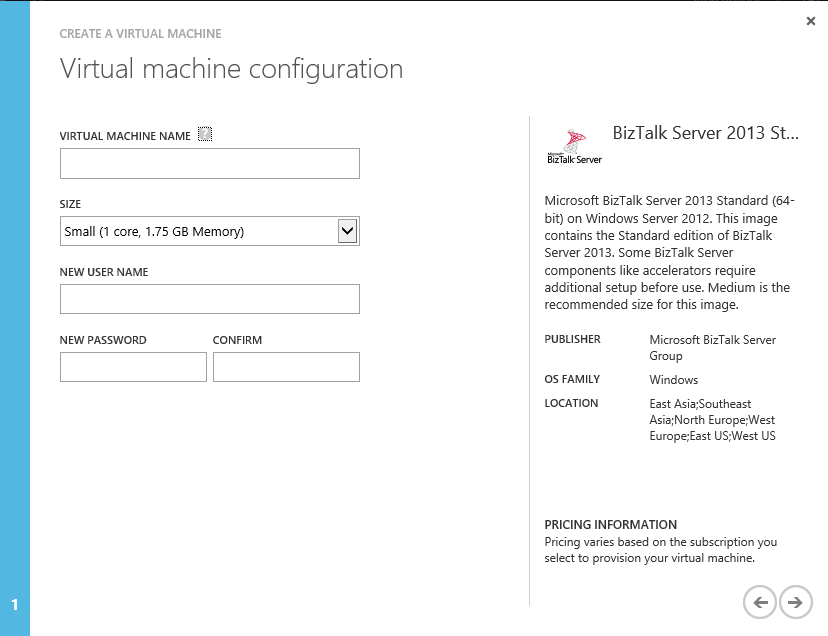
You are required to give a unique name to this machine. Also select the size of the virtual machine – the size varies from Small (1.75GB) to A7 (56GB). For pricing refer here. MSDN subscribers can also make use of the new MSDN benefits in Windows Azure.
You are also required to give an administrator user name and password, which you can later use to log-in to this machine.
After providing the required details, proceed to the next page
5. In this page we will configure the virtual machine mode. You could either create a stand-alone virtual machine or connect to an existing virtual machine.
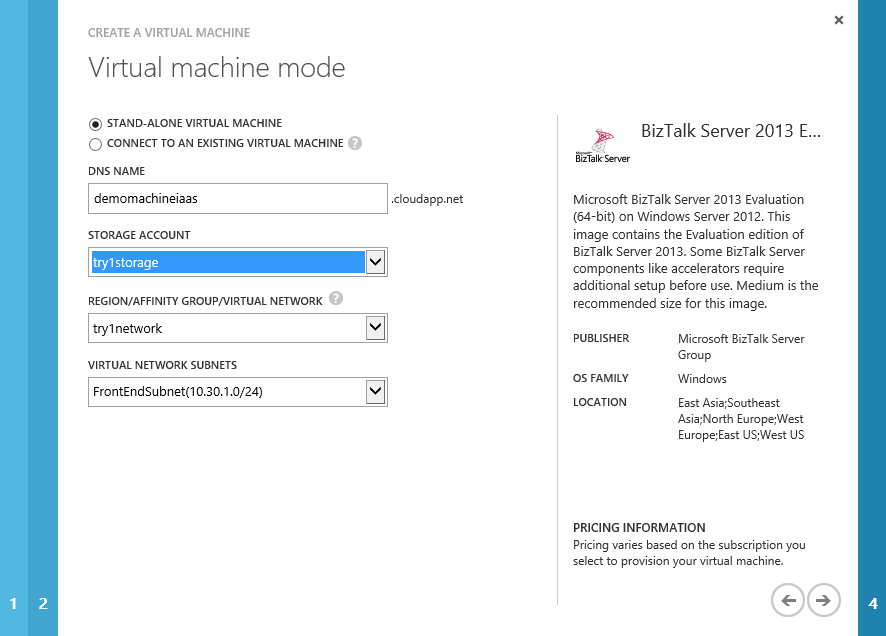
In this case, however, we are going to create a stand-alone instance. Select a name for the Storage account and also choose the region in which the virtual machine will be deployed.
6. Proceed further and let the availability set be none and the “Remote PowerShell” option be enabled. Proceed further and the process of creating your virtual machine and provisioning it will be started. This will take a few minutes.
Once the Virtual Machine is created, it will be shown in your portal with a status of “Running”.

You can now use Remote Desktop Protocol (RDP) to login to the machine using the credentials stated while creating this machine.
Once you log into the machine, everything that is required for BizTalk Server to be functional, including its pre-requisites are already available. Configuration can be done on BizTalk Server 2013 virtual machine the same way it is done on a BizTalk Server Software installed on a physical machine. Proper documentation regarding manual configuration of a BizTalk Machine can be found here.
By this point you should hopefully have the virtual machine running and configured. This should help you get started on BizTalk Server 2013 in Windows Azure Infrastructure Services. You can find the full MSDN documentation for BizTalk Server 2013 here.