Publishing Reporting Services reports to MOSS
(Many, many thanks to Heidi Steen of the super-duper UE team at Microsoft for providing the material below. Hell, she even created screen shots!)
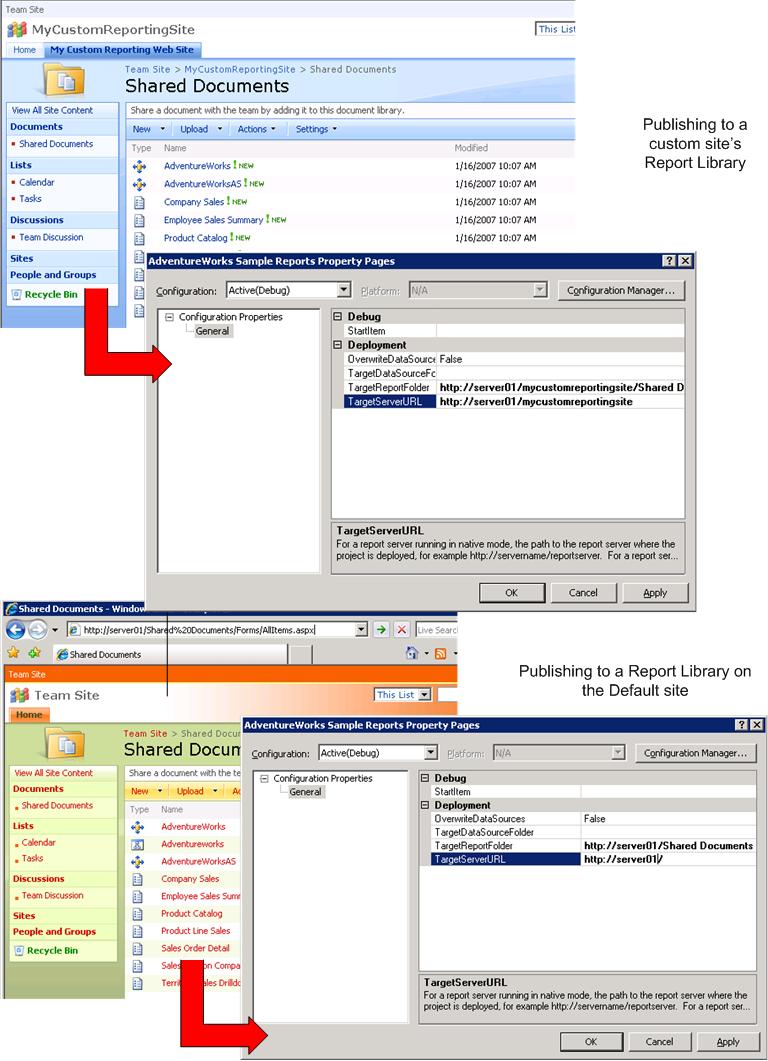
Now that lots of folks are happily playing around with SSRS/MOSS integration, it’s important to understand exactly how you publish the things to MOSS via Business Intelligence Studio. You still use the same dialogs you’re used to, but plug different values into them. Here are some nice, step-by-step instructions:
1. In SQL Server Business Intelligence Development Studio,
open an existing or new Report Server project.
2. From the Project menu, click Properties. The <project>
Property Pages dialog box opens.
3. Choose the Configuration you use to publish to a SharePoint site.
For example, Active(Debug) or Production.
4. In the Deployment section, for the optional TargetDataSourceFolder,
type a fully qualified URL to a library or library folder. For example,
https://server01/mycustomreportingsite/Shared Documents.
If left blank, this defaults to the TargetReportFolder value.
5. For TargetReportFolder, type a fully qualified URL to a
library or library folder. For example,
https://server01/mycustomreportingsite/Shared Documents.
6. For TargetServerURL, type a URL to a SharePoint
top-level site or sub-site. If you do not specify
a site, the default top-level site is used. For
example, https://servername, https://servername/site
or https://servername/site/subsite.
7. Click OK.
8. In Solution Explorer, right-click on the report
you want to publish, and click Deploy. The report
is published to the location specified in
TargetReportFolder. Deployment errors appear in the Output window.
NOTE: In order to upload data sources and reports to MOSS, the user in question must have “Contribute” or “Full Control” permissions.
Below, I’ve attached some screenshots which demonstrate publishing to a library in a custom and default MOSS site (again, thanks to Heidi!)
[ImageAttachment]