Using cross/outer apply in Azure Stream Analytics
Recently I got involved in working with a problem where JSON data events contain an array of values. The goal was to read and process entire JSON data event including the array and the nested values using Microsoft Azure Stream Analytics service.
Below is the sample data as an example
{
"Itemid": "0001",
"Itemtype": "donut",
"Itemname": "Cake",
"Itemppu": 0.55,
"Itemtopping":
[
{ "Tid": "5001", "Ttype": "Liquid Eggs" },
{ "Tid": "5002", "Ttype": "Syrups" },
{ "Tid": "5005", "Ttype": "Cocoa" },
{ "Tid": "5007", "Ttype": "Powdered Sugar" },
{ "Tid": "5006", "Ttype": "Chocolate with Sprinkles" },
{ "Tid": "5003", "Ttype": "Chocolate" },
{ "Tid": "5004", "Ttype": "Vanilla" }
]
}
In the above sample data, you will notice that it contains an array (named Itemtopping). You can see the convention is to list multiple records objects, each one in curly braces {}, with commas between the multiple records, all inside the same array (denoted with square brackets [ ] ). This is a standard way to make an array when following JSON conventions as you can read at https://www.json.com/json-array
This blog explain about how such a stream can be processed in Microsoft Azure Stream Analytics Service.
To process such streams cross/outer apply operator can be used. This operator used to flatten a stream containing arrays in one or more columns. The difference between cross apply and outer apply is that if array is empty there is no output will be written in case of cross apply while with outer apply it return one row with Arrayindex and Arrayvalue as null. Below are the steps explained to test the scenario.
Sending Events to Event hub
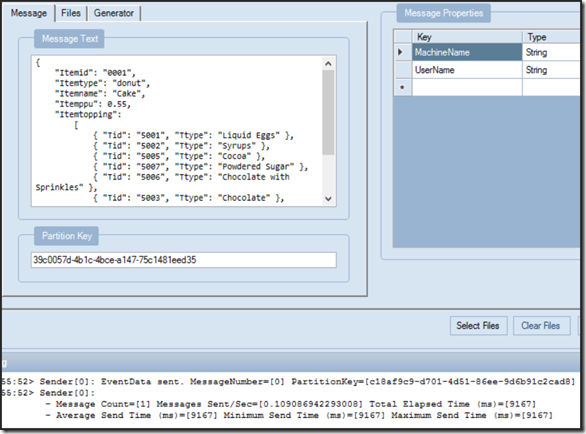
In this example I am using a convenient and free tool called the Service Bus Explorer for sending my sample events to Microsoft Azure Event Hub. Stream Analytics has built-in adapters to read from and write to Event Hub as an input or output. Please make sure an Azure Event Hub exists before connecting/sending events to it (see Service Bus in the Azure portal). There are other methods to do the same via code or other tools, so you can use whatever method is comfortable to you.
Using the tool, I have sent couple of events into the queue for this test scenario by editing the sample data a bit before sending each message.
Creating Input in Microsoft Azure Stream Analytics
- Go to Microsoft Azure portal website
- Click STREAM ANALYTICS
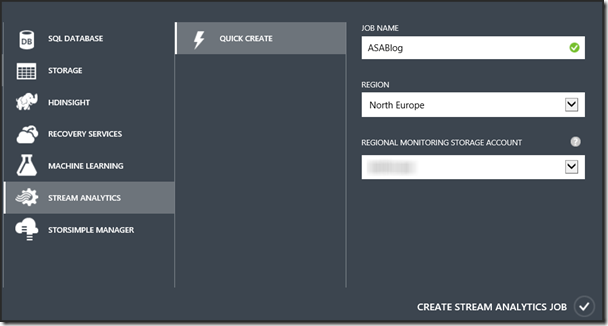
- Click NEW. Provide a Job name, specify the Region, and select a Regional Monitoring Storage Account. Click CREATE STREAM ANALYTICS JOB
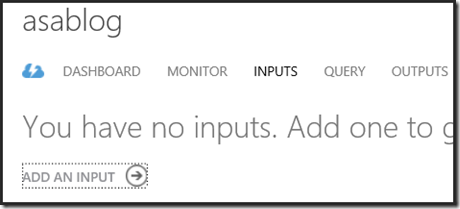
- Click INPUTS and ADD AN INPUT
- Click Data Stream and Next
- Select Event Hub and Next
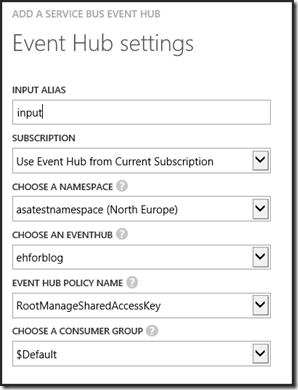
- Provide the details for the Event Hub
- Click Next
- Select EVENT SERIALIZATION FORMAT as JSON
- Select ENCODING as UTF8
- Click Finish
Writing A Query
- Click QUERY
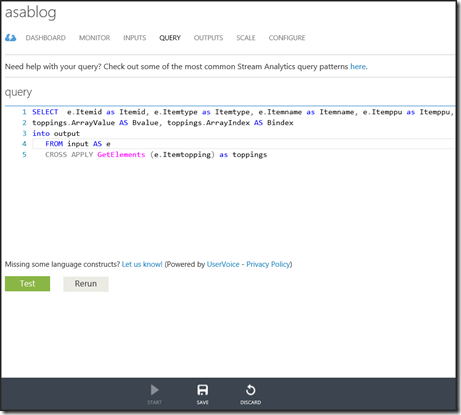
- Provide below query. Notice the highlighted portion of the query where the nested JSON object is parsed and represented. Notice the GetElements() function is used to expand the nested array of records, and the Label.ArrayValue and Label.ArrayIndex retrieves metadata about the JSON array that is fetched.
SELECT e.Itemid as Itemid, e.Itemtype as Itemtype, e.Itemname as Itemname, e.Itemppu as Itemppu,
toppings.ArrayValue AS Bvalue, toppings.ArrayIndex AS Bindex
INTO output
FROM input AS e
CROSS APPLY GetElements (e.Itemtopping) as toppings
- Click SAVE
Setting the Output
- Click OUTPUTS
- Click ADD AN OUTPUT
- Select Table storage
- Click Next
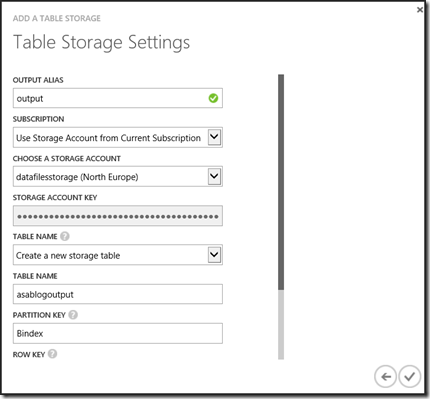
Note:- I am using Bindex as PARTITION KEY and Itemid as ROW KEY. For more information on partition and row key please refer here.
- Click Finish
- Once output is created, click START to run ASA job
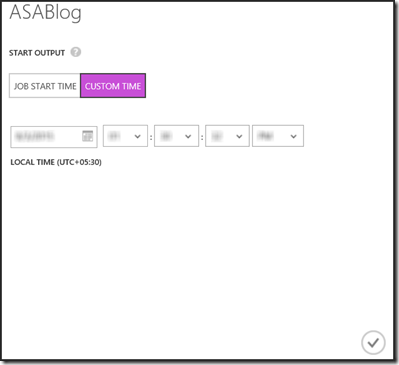
- I am using CUSTOM TIME option since I already have events in event hub
- Click Ok
Analyzing Output
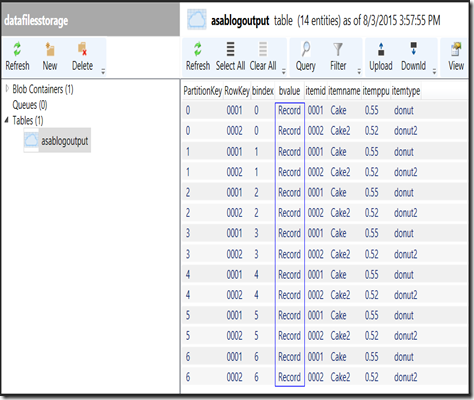
After wait for some time, the output will be seen in table storage as mentioned below. In this example, I am using Azure Storage Explorer to view the output.
Notice the bvalue column has the token “Record” value rather than actual data. The reason for this is since Cross Apply did perceive the nested JSON object as a nested record, but this shape of table cannot represent all the nested properties in the record object in a single column. So we need to further expand the record the nesting by selecting the individual record fields explicitly to divide it into separate columns.
Change in Query
Let’s change the query to get data from array.
- Delete table storage from Azure Storage Explorer
- Stop Azure Stream Analytic job
- Switch to QUERY tab
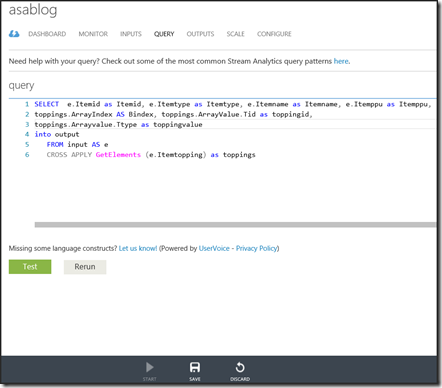
- Change the query to match the example. Notice the nested properties in the JSON record array are enumerated in the SELECT clause using a two-period notation Label.ArrayValue.property for the named nested record properties that we fetch using GetElements() function.
SELECT e.Itemid as Itemid, e.Itemtype as Itemtype, e.Itemname as Itemname, e.Itemppu as Itemppu,
toppings.ArrayIndex AS Bindex, toppings.ArrayValue.Tid as toppingid, toppings.Arrayvalue.Ttype as toppingvalue
INTO output FROM input AS e
CROSS APPLY GetElements (e.Itemtopping) as toppings
- Click SAVE
- Click START to start ASA job
Final Output
After processing the data, switch to output and watch records in Azure Storage Explorer. Notice all the data details including the nested JSON array of record objects lands successfully in table storage as separate columns and rows. 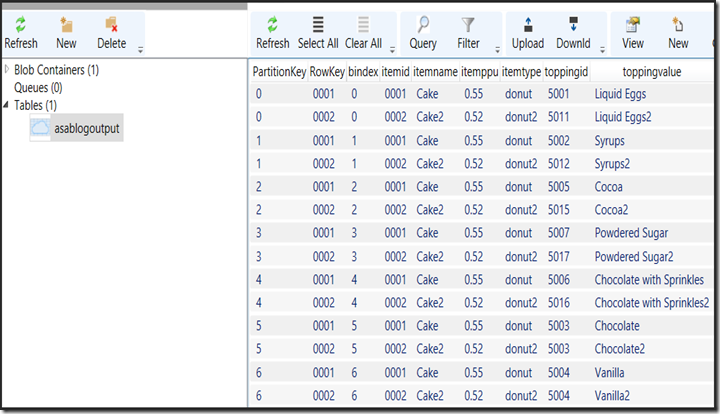
I hope this will be a useful post. Thanks for reading it. Have a nice time and happy learning!
