Installing and configuring SQL Reporting services on SharePoint 2013
In this article I am going to make out the steps required for installing and configuring SQL Reporting services on SharePoint 2013. Below steps included are based on my experience while configuring SQL Reporting services on SP 2013. I have three servers 1) Domain Controller 2) Microsoft SQL Server 2012 (I call it SQL BOX) 3) Microsoft SharePoint 2013 (I call it SP BOX). Below are the steps I followed to get it installed properly.
Assuming we already have Domain control in place and both the machines are part of it. Here we go…
Microsoft SQL Server Reporting Services:-
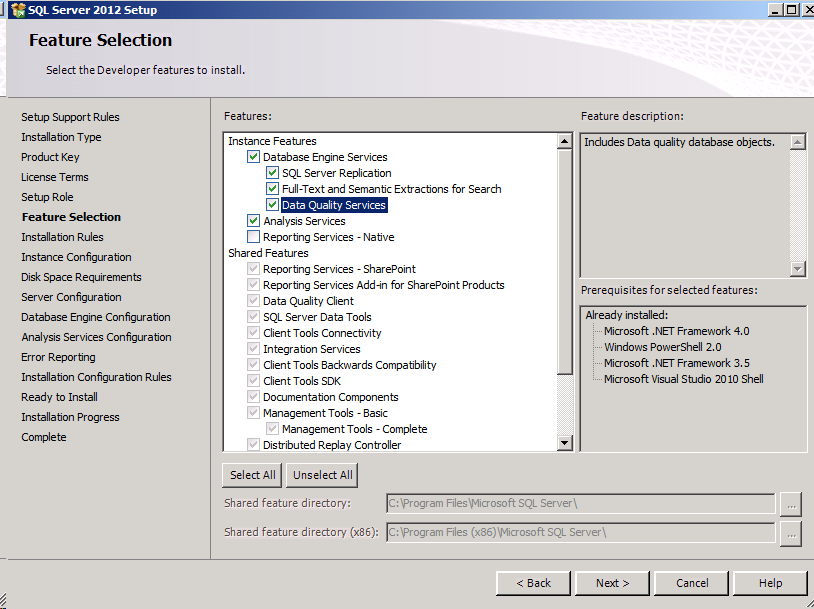
1) On SQL BOX, Install Microsoft SQL Server 2012developer or enterprise edition
2) I’ll have two instance of SQL on same box. One instance create for Tabular model (this will be act as data source for power view source) and another for multi-dimensional model (this will be used for configuring Power pivot)
3) On first instance, I’ll have DB engine, Analysis Services in tabular mode and Reporting services add-in for SharePoint installed on it. Install other services if required.
4) Install SQL Server 2012 SP1 from here. Why do I need SP1 is mentioned here. For specific to reporting services mentioned here.
5) Better to restart.
Microsoft SharePoint Server 2013:-
1) Install SharePoint 2013
2) When it’s done run “SharePoint 2013 Products Configuration Wizard” to connect SQL Box to configure SharePoint
3) One of error encounters is unable to connect configuration database is user information provided to connect SQL BOX doesn’t have appropriate permission.
4) After configuration done it will automatically open SharePoint central admin site.
5) Goto “System Settings” Click “Manage Services on Server”
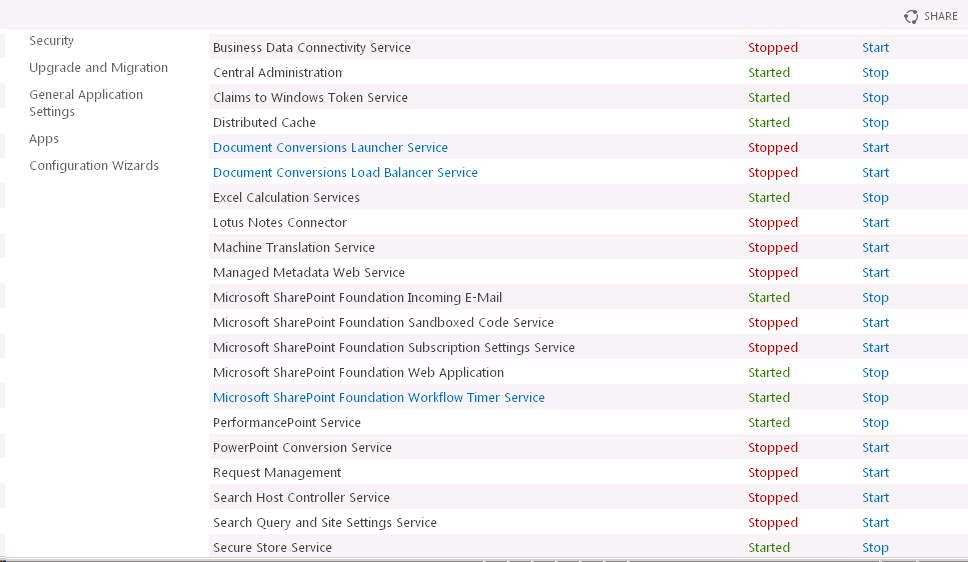
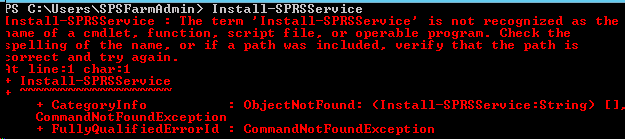
6) SQL Server Reporting Services Service is not available. Even if try through SP2013 PowerShell “SharePoint 2013 Management Shell” using Install-SPRSService it will give an error
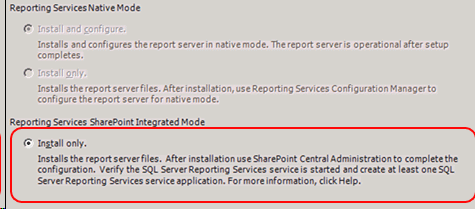
7) No worries. I Install “Reporting services Add-in for SharePoint” on SP Box from SQL media and install SP1 on top of it. During the installation of Report add-in make sure to select “Reporting Services SharePoint Integrated Mode”. Check image below.
8) Once done, run “Install-SPRSService “ cmdlet from “SharePoint 2013 Management Shell” to install the service.
9) Run “Install-SPRSServiceProxy” to install the service proxy
10) Run “get-spserviceinstance -all |where {$_.TypeName -like "SQL Server Reporting*"} | Start-SPServiceInstance” to start the service.
11) Now “Microsoft SQL Server Reporting Services service” will be available there.

12) Next step to configure SQL Reporting services service application. Goto Central Administration then Application Management Click Manage service application under Service Applications
13) Click on New and click on “SQL Server Reporting Services Service Application”
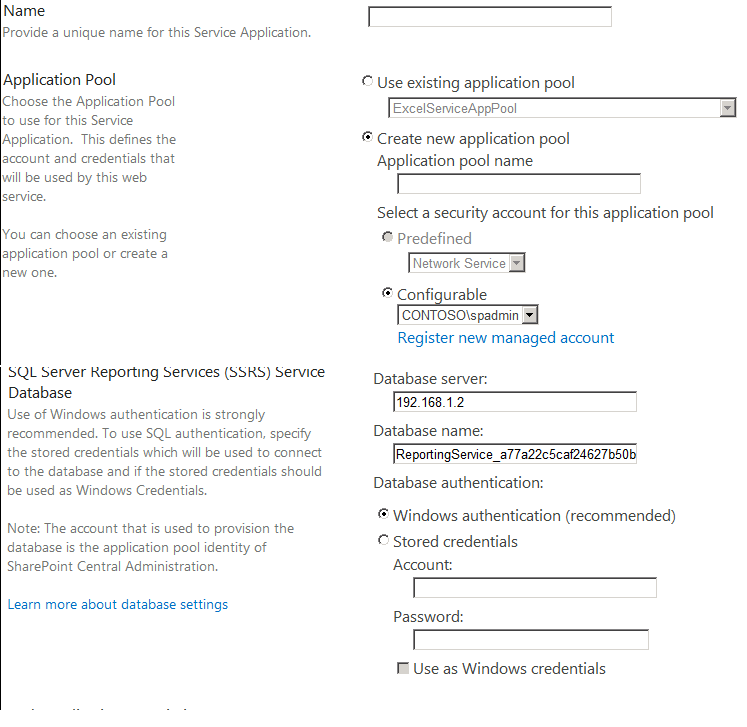
14) Provide Service Application Name, Create New Application Pool and provide Application Pool Name, select security account for app pool name prefer domain account, Provide Database server and credential to connect to DB server. Select the Web Application to be provisioned for access by the current Reporting Services Service Application.
15) Once Service application created. Create a site.
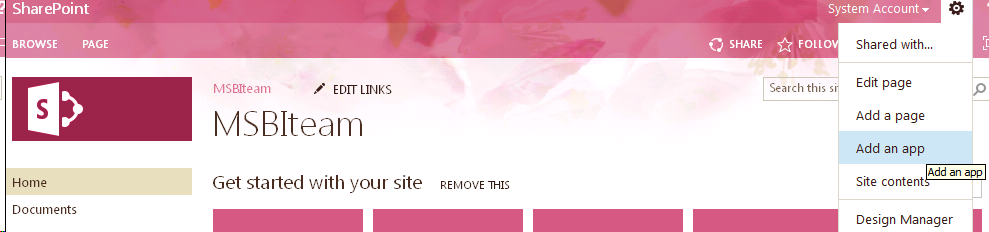
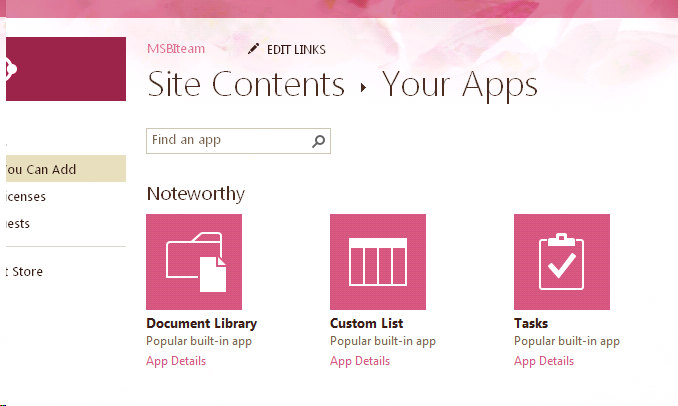
16) After that create document library. Goto setting and click on “Add an App”
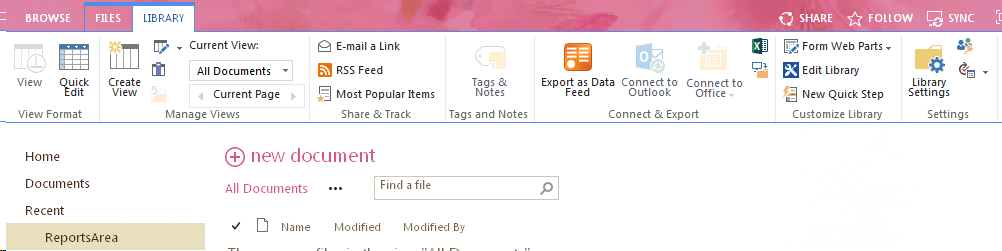
17) Create a document gallery goto Library Setting -> Advance Settings -> Select Yes for “Allow management of content types” and click on Yes.
18) Navigate down select “Add from existing site content types” under “Content Types”
19) Now we will add content types
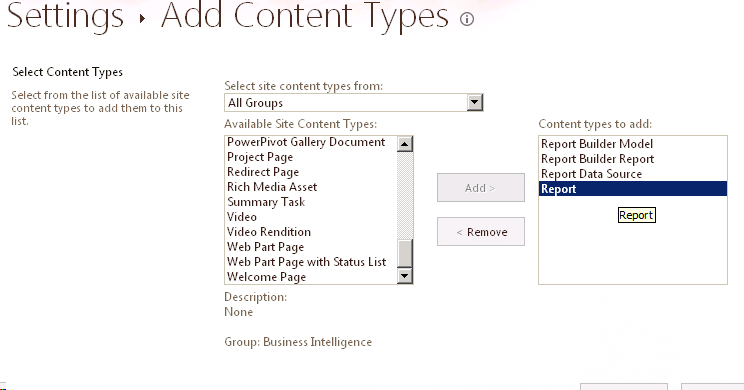
20) I am done now and can deploy reports to SharePoint.