How to Use a Picker as a Filter in your LightSwitch apps
I’ve gotten more than a few questions over the last couple months on how to do this common pattern for filtering data based on a picker. For instance, I have a table of customers and I want to pick from a list and then pull up their details. Or say I have a list of Customers and I want to see all the related Orders for them.
Honestly, I thought I already had a blog post on how to do this somewhere -- but if I can’t find it then you probably can’t either! The steps are simple and you don’t need to write any code, so here it goes…
Filtering Data in the Same Table
Let’s say we have a Customer table and we want a screen where the user should select the customer in a picker before the rest of the fields are displayed to them. Here are the steps:
1 – Create a Query that retrieves the customer by ID
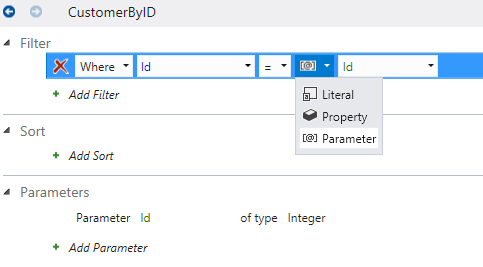
On the Customers table in the Solution Explorer, right-click to Add a Query, for this example I’ll name it CustomerByID. Add a filter Where ID equals, select parameter, then select Add New to create a new query parameter named Id.
Note that you can select the parameter and set whether it is optional in the properties window. If you do that then all the customer details will be displayed when the screen comes up. If you leave it required, then the user must select a customer to see the details.
2- Create a screen using the query
Regardless of what client you are using (Silverlight or HTML) the technique here is similar, just the template varies. Right-click on your client node and Add New Screen…
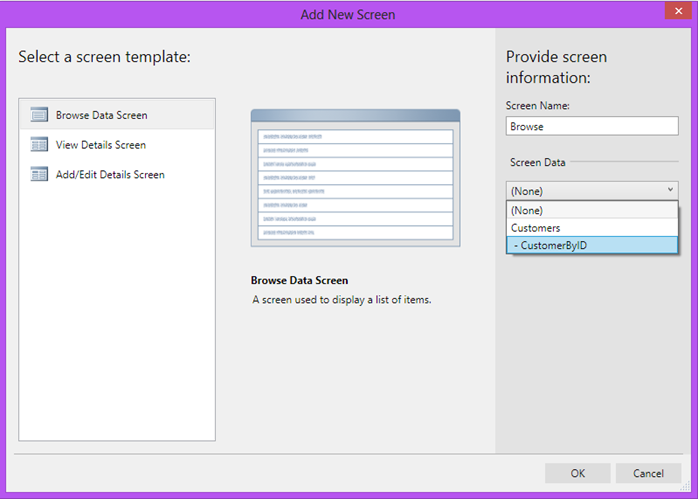
Select the CustomerByID as the Screen Data. Choose the Browse template if you’re using the HTML client. If using the Silverlight client, just pick any list screen like the Search screen.
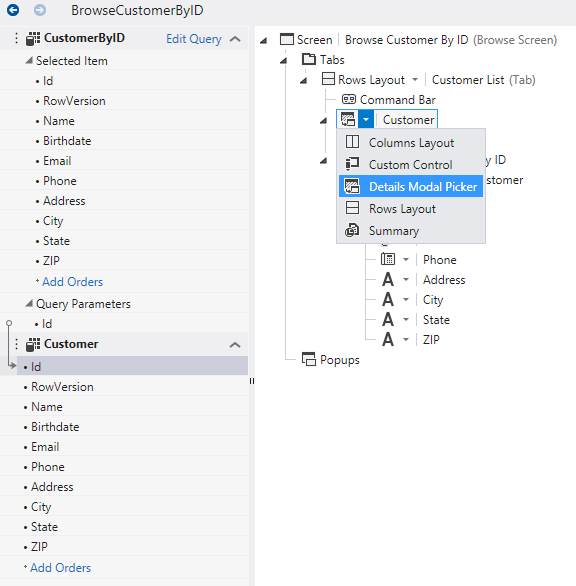
Select the CustomerId property in the view model and change the name to Customer in the properties window. Notice that your view model is set up automatically for you where the Customer property is really a Customer entity and its Id is data bound to the CustomerByID Query’s Id parameter (as indicated by the arrow when you select the Customer.Id item in the view model). The CustomerByID query will also be auto executed automatically as indicated in the properties window. That means the query will fire when all the required parameters are entered, in this case, the Customer is selected.
Next change the Customer control from Summary to a Details Modal Picker. If you’re using the Silverlight client this will already be set to an auto-complete box but you can also choose a Modal Window Picker if you like.
3- Run it!
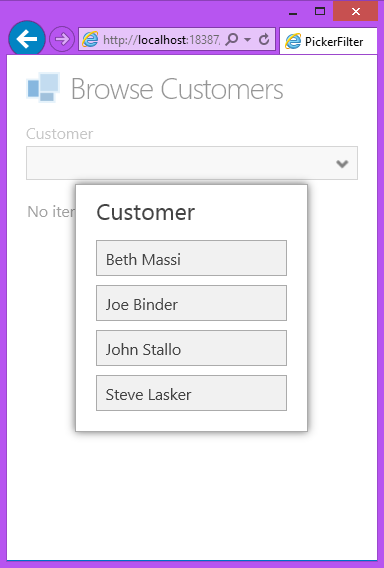
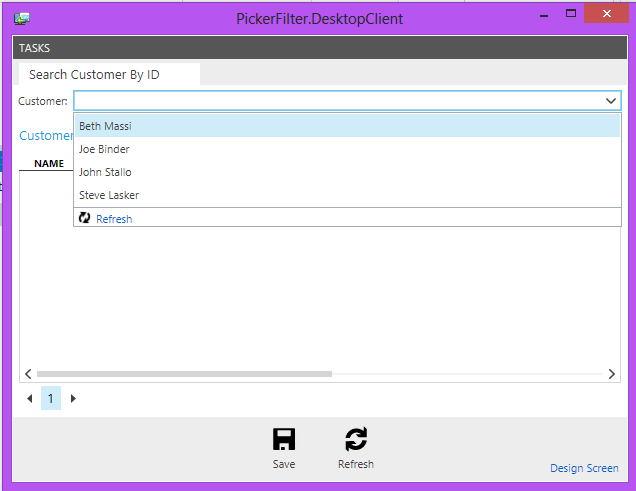
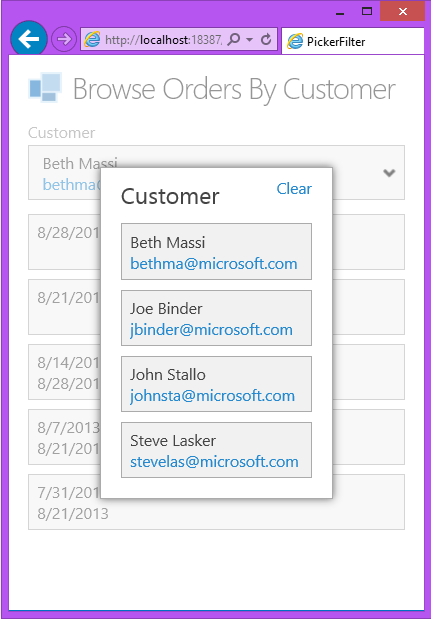
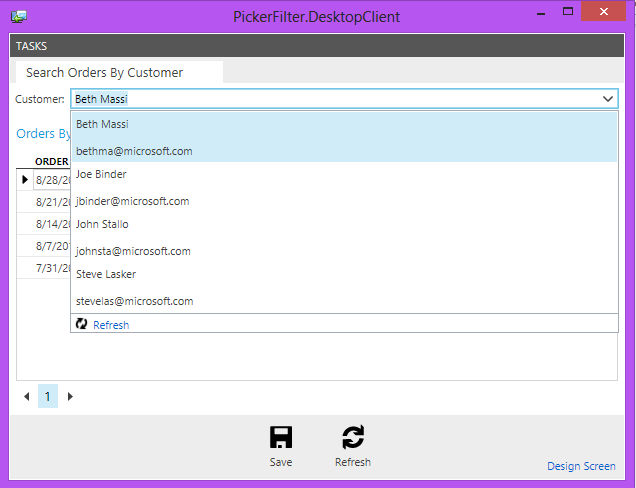
When the screen comes up, the user will have to choose a customer before their details are displayed.
HTML Client:
Silverlight Client:
Note that if you have a lot of potential customers in the system, I recommend you provide a filter based on field(s) and allow users to simply type in the parameters (like name, phone, etc.) For the Silverlight client you can use a Modal Window Picker instead which provides a search automatically. See:Filtering Lookup Lists with Large Amounts of Data on Data Entry Screens
Filtering Data Across Relationships
What if we want to use a filter across relationships? For instance say we have a one-to-many relationship from Customer to Orders and we want to display all the customer’s related orders when we select a customer in a picker. The technique is almost exactly the same, it’s just the query that’s different.
1 – Create a Query that retrieves the Orders by Customer ID
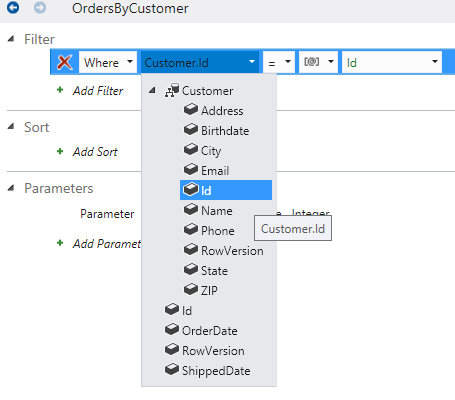
On the Orders table in the Solution Explorer, right-click to Add a Query, for this example I’ll name it OrdersByCustomer. Add a filter Where Customer.ID equals, select parameter, then select Add New to create a new query parameter named Id.
2- Create a screen using the query
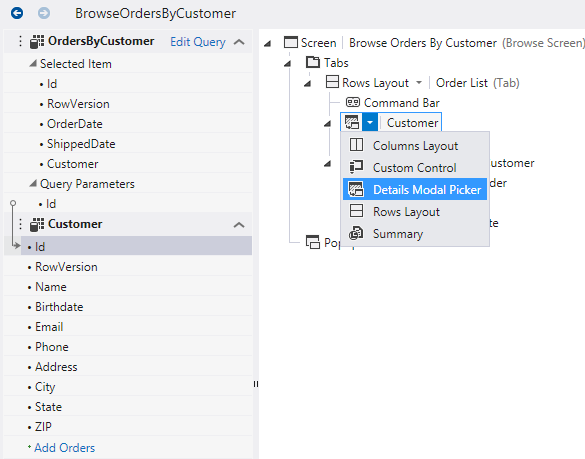
Use the same steps as above to add the query to a Browse screen, then change the name of the OrderId property in your view model to Customer. (The reason why LightSwitch picked OrderId for the name of the property is because we created a query based on “Orders” and named our parameter “Id”. If we had named the parameter to CustomerId then we would see OrderCustomerId in the screen’s view model. I digress…).
Finally change the Customer control in your content tree from a Summary control to a Details Modal Picker. Make sure you pick the outer control and not the content inside the control.)
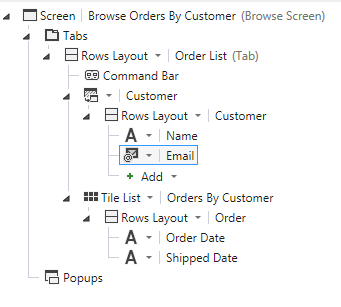
Tip: If you want to display more than just the Summary property in the Details Modal Picker, change the content control inside to a Rows layout and select the fields you want.
3 – Run it!
Run it and same as before, users will have to select a customer before the query will execute. Once you select a customer, now the related orders will be displayed.
HTML Client:
Silverlight Client:
Wrap Up
Those are a couple variations on how you can use the common pattern of using pickers on your screens to filter data how you want. There are three key pieces -- the data model (easy), the query design (pretty easy), and the screen designer (medium). The screen designer definitely has the most knobs on it out of all the LightSwitch designers. It takes practice and exploration, trial and error, but hopefully not too much pain and suffering ;-) I hope I showed you how easy this particular pattern can be to set up.
Enjoy!
