Sending Email from a LightSwitch SharePoint App using Exchange Online
About a week ago I showed you how to get started building SharePoint 2013 apps with LightSwitch HTML Client Preview 2 by signing up for a free Office 365 developer account and working through the Survey App tutorial. If you missed it:
Get Started Building SharePoint Apps in Minutes with LightSwitch
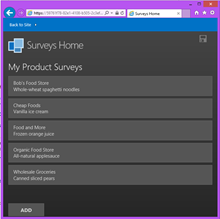
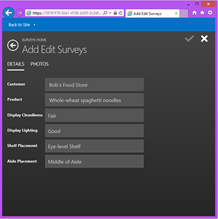
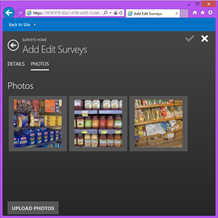
After working through the tutorial you have a SharePoint app that allows sales representatives of a foods distributor to conduct quality surveys of partner stores. Quality surveys are completed for every product to measure the presence that the product has within the store, like aisle placement, cleanliness, etc. -- and these surveys are performed via the sales rep’s mobile devices on site. They can also take pictures and upload them directly to the SharePoint picture library.
(click images to enlarge)
This tutorial demonstrates how LightSwitch handles the authentication to SharePoint using OAuth for you. It also shows you how to use the SharePoint client object model from server code, as well as writing WebAPI methods that can be called from the HTML client.
Today I want to show you how we can send an email notification to partner stores when a survey is completed. Because this SharePoint App is running in Office 365, I’ll show you how you can take advantage of Exchange Online to send the email.
Sending Email from LightSwitch – Tapping into the Update Pipeline
I’ve written before on how you can send email using Outlook as well as SMTP mail: How To Send HTML Email from a LightSwitch Application
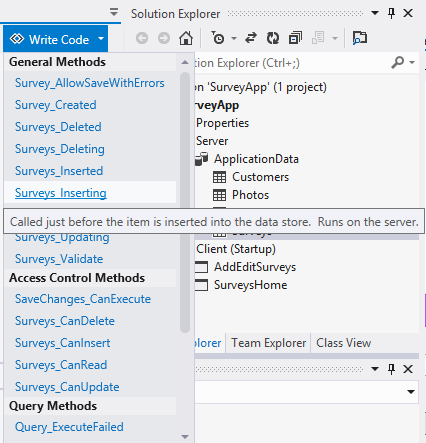
When sending a notification email from the server side, you can tap into the entity_Inserting/ed methods on the server, which is part of the LightSwitch update pipeline. The update pipeline gives you many hooks into events that are happening on the server side when processing entities. To see this, just open up the entity in the data designer and drop down the “write code” button at the top right of the designer:
In this example, we’ll send the email by hooking into the _Inserting method. That way if there is an error sending the email, the user will be notified on screen and the save will not happen. This allows the user to retry the operation. However, you may decide that it’s better to place the code in the _Inserted method instead so that records are always saved regardless if an email can be sent.
Add an Email Field to the App
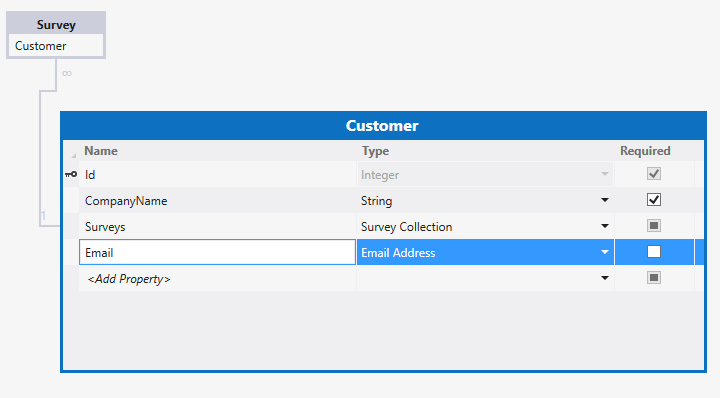
In order to send an email to the customer, we’ll first need to add a field to capture the email on the Customer entity. Using the data designer, open the Customer entity, add a field called Email of type EmailAddress, and uncheck Required.
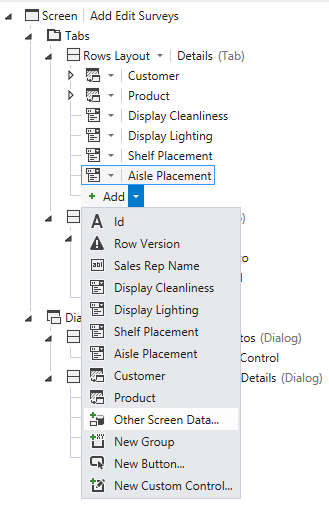
Next, add the email field to the AddEditSurveys screen by clicking the +Add button under the first rows layout and selecting “Other Screen Data…”
Then specify the Customer.Email and click OK:
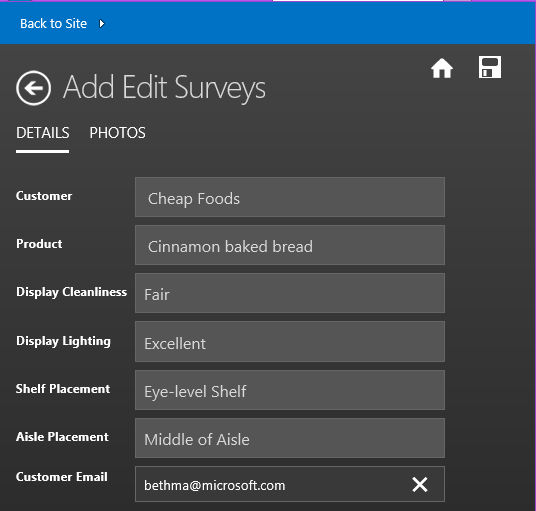
Then change the control to an Email Address Editor and change the display name to “Customer Email”. This will allow sales reps to enter/verify the customer email right on the survey screen.
Adding Code to the Update Pipeline
In the Data Designer, now open the Survey entity and drop down the “write code” button and select Surveys_Inserting method. This will open the ApplicationDataService class where all the server-side processing happens. There is already some code there from one of the steps in the Survey App tutorial which sets the SalesRepName to the logged in user. Now all we need to do is write the code to send the email.
 Namespace LightSwitchApplication

    Public Class ApplicationDataService

        Private Sub Surveys_Inserting(entity As Survey)
            entity.SalesRepName = Me.Application.User.Name

            'Write code to send email through Exchange online

        End Sub
Sending Email through Exchange Online
Okay now we’re ready to get dirty and write some code! You can write this code directly in the ApplicationDataService class or you can create your own class like I showed here by flipping to File View and adding your own class file to the Server project. For this example I’ll keep it simple and just add a SendSurveyMail method to the ApplicationDataService class.
Adding Exchange References
The first thing we’ll need to do is add references to the Exchange Web Services Managed API 2.0. The Exchange server assemblies are installed when you install Preview 2. (But you can also install them manually here.)
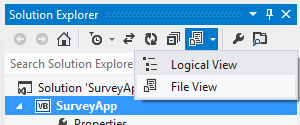
To add references, in the Solution Explorer first flip to File View:
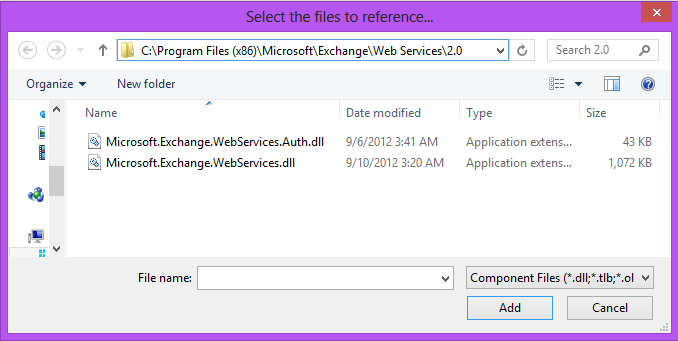
Then expand the Server project, right-click on References and select “Add Reference…”. Then browse to C:\%ProgramFiles%\Microsoft\Exchange\Web Services\2.0 and add both Microsoft.Exchange.WebServices.dll and Microsoft.Exchange.WebServices.Auth.dll
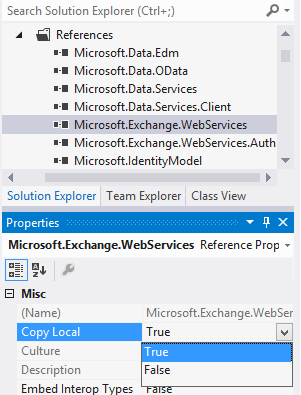
Next make sure that you set these assemblies to “Copy Local” in the properties window so that when you deploy the app to SharePoint, the assemblies are also deployed.
For the code I’m going to write, I’ll also need a reference to System.Xml.Linq in order to easily create HTML-formatted email. So under the Framework tab on the Add Reference dialog, also tick off the System.Xml.Linq assembly as well. Since this is part of the core framework, we don’t need to Copy Local on this one.
Figuring out the Service.Url
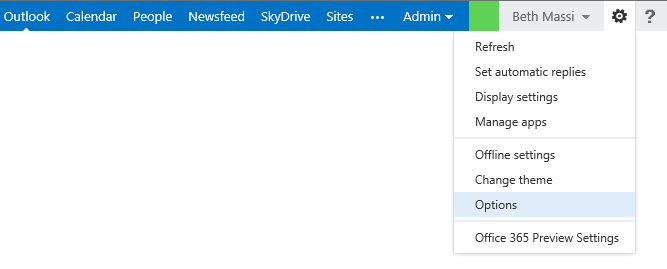
In order to send email through the Exchange online service via Office 365 you’re going to need to know the URL of the Exchange service. Log into your Office 365 account, click the Outlook tab at the top and then select Options under the gear.
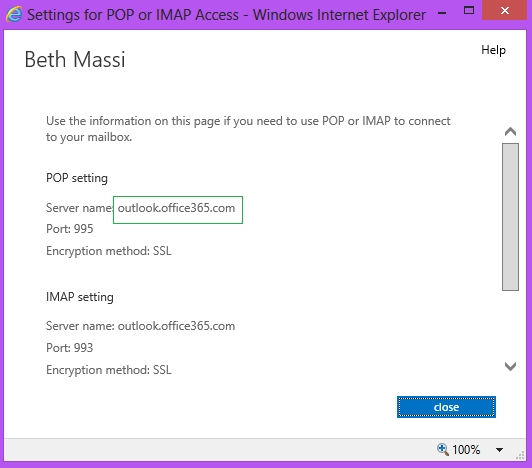
Then click the link “Settings for POP or IMAP access…” and you will see your server name. In my case it’s outlook.office365.com.
The service address we need is in this format:
https:// servername /EWS/Exchange.asmx
So in my case it’s https://outlook.office365.com/EWS/Exchange.asmx
Another way to obtain this URL programmatically is by using AutoDiscover.
Writing the code
Okay now we’re ready to write the code to send email. I’m going to construct an HTML email and send it from an administrator account, while CC-ing the sales rep email. We can extract the sales rep email from their login. The first thing we’ll need is to import the Exchange web service namespace at the top of the ApplicationDataService class.
Imports Microsoft.Exchange.WebServices.Data
Now call a method to send the email from the Surveys_Inserting method.
 Private Sub Surveys_Inserting(entity As Survey)
    entity.SalesRepName = Me.Application.User.Name

    'Write code to send email through Exchange online
    Me.SendSurveyMail(entity)
End Sub
And finally, write code for SendSurveyMail. Make sure that you have the correct username/password credentials for sending email. I am using the same administrator I logged into my Office 365 account.
 Private Sub SendSurveyMail(entity As Survey)
    Try
        If entity.Customer.Email <> "" Then

            'Set up the connection the Exchange online service
            Dim service As New ExchangeService(ExchangeVersion.Exchange2013)
            service.Credentials = New WebCredentials("username", "password")
            service.Url = New Uri("https://outlook.office365.com/EWS/Exchange.asmx")

            'Get the sales rep email from their logged in username
            Dim salesRepEmail = entity.SalesRepName.
                    Substring(entity.SalesRepName.LastIndexOf("|") + 1)

            'Create a new HTML email message
            Dim message As New EmailMessage(service)
            message.Subject = "New survey!"

            Dim text = <html>
                <body>
                  <p>Hello <%= entity.Customer.CompanyName %>!</p>
                  <p>We wanted to let you know that a survey has been created
                  about one of your products: <%= entity.Product.ProductName %></p>
                  <p>This is an automated courtesy message, please do not reply directly.
                  If you have any questions please contact your sales rep
                  <%= Application.User.FullName %> at <%= salesRepEmail %></p>
                  <p>Thanks for your business!</p>
                 </body>
                </html>.ToString

            Dim body As New MessageBody(BodyType.HTML, text)
            message.Body = body

            'Add the customer email and CC the sales rep
            message.ToRecipients.Add(entity.Customer.Email)
            message.CcRecipients.Add(salesRepEmail)

            'Send the email and save a copy in the Sent Items folder
            message.SendAndSaveCopy()
        End If
    Catch ex As Exception
        Throw New InvalidOperationException("Failed to create email.", ex)
    End Try
End Sub
Run It!
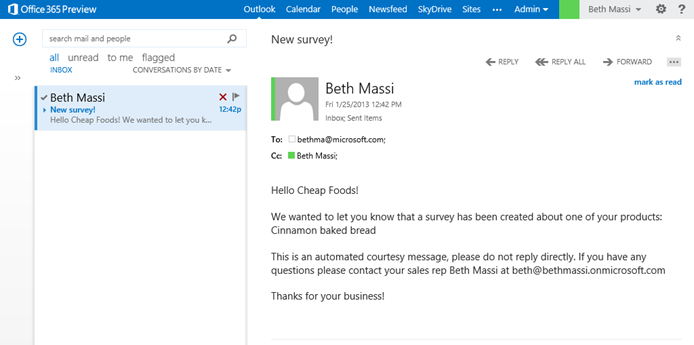
Hit F5 to run the SharePoint app in debug mode. Now when we fill out a new survey we see the customer email address and when we save the survey an email is generated through Exchange online.
Wrap Up
Building SharePoint apps on top of Office 365 gives you a great set of connected services for doing business. And with LightSwitch’s ability to drastically reduce the time to build customized business apps, you now have a robust business platform for building business applications fast on top of Office 365 that can also service your mobile workforce.
I encourage you to learn more at dev.office.com and msdn.com/lightswitch.
Enjoy!
