Enhance Your LightSwitch Applications with OData
NOTE: This information applies to LightSwitch in Visual Studio 2012.
As John announced on the LightSwitch Team Blog, the next version of Visual Studio will include LightSwitch right in the box and there are a lot of awesome new features. My personal favorite is the Open Data Protocol (OData) services support. LightSwitch can now consume as well as produce OData services from it’s middle-tier. This means that applications you create with LightSwitch will automatically expose data as open services which allows a multitude of clients easy (secure) access into your data. It also means that you will be able to consume data services from within LightSwitch in order to enhance the capabilities of your applications. In this post I’m going to show you how you can take advantage of using OData in your LightSwitch applications. In the next post I’ll show you how you can work with the OData services LightSwitch creates. But first, a little background on OData.
What is the Open Data Protocol (OData)?
OData is an open REST-ful protocol for exposing and consuming data on the web. It attempts to break down the silos of data that are common across the web by standardizing on the way that data is accessed. Instead of learning new APIs to access data specific to each application’s web service, OData provides a common way to query and update data via REST. You can learn a lot more about OData at www.odata.org.
OData has been around for a couple years and there are more and more providers of data services popping up all the time all over the web. Within Microsoft, many of our products expose and consume data services via the Open Data Protocol. For instance, SharePoint exposes all of its list data as OData services. Similarly, reports you create with Reporting Services can be exposed via OData. PowerPivot is an add-in to Excel 2010 that allows you to consume data services and perform complex data analysis on them. So it makes perfect sense that LightSwitch, which centers around data, also should work with data services via OData. Many enterprises today use OData as a means to exchange data between systems, partners, as well as provide an easy access into their data stores.
To dive deeper into data services and the OData protocol you can read articles on OData.org, or here on my blog. A really good article I recommend is by Chris Sells - Open Data Protocol by Example.
In this post I’m going to show you how to consume OData in your LightSwitch applications. For this example we’ll use some data from the Azure DataMarket. In my next post I’ll show you how to consume OData services that LightSwitch exposes in other clients, like Excel.
The Azure DataMarket
The Azure DataMarket is a place where producers can host their data sets and people can subscribe to them to enhance their client applications. There are all kinds of datasets you can subscribe to, some are free some are pay. There is weather, traffic, NASA, UN, and all sorts of other kinds of data available that you can use. (Note: It’s important to remember that all feeds are not equal – each one may have varying levels of support for the underlying OData query operators that LightSwitch applications rely on. Behind the scenes, LightSwitch makes various optimizations to make it easier to consume these feeds. For details see: OData Consumption Validation in LightSwitch Visual Studio 2012 .)
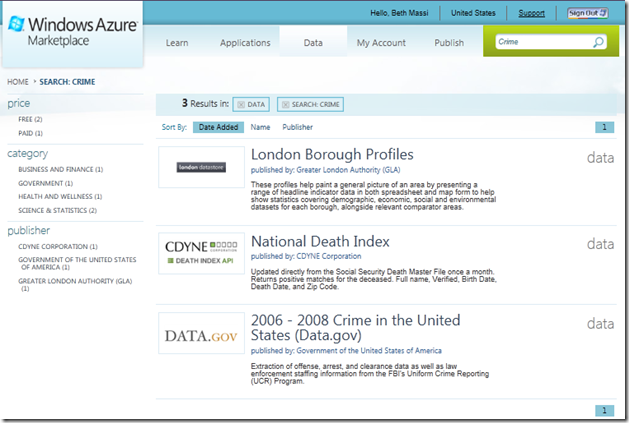
First you need to sign up for an account by navigating to https://datamarket.azure.com/. Once you sign up, you will be given a customer ID and an Account Key. Now you can browse the plethora of data sets available to you in a multitude of categories. Let’s subscribe to a free dataset from Data.gov. In the Search box at the top right of the page search for “Crime” and in the results you will see the Data.gov dataset.
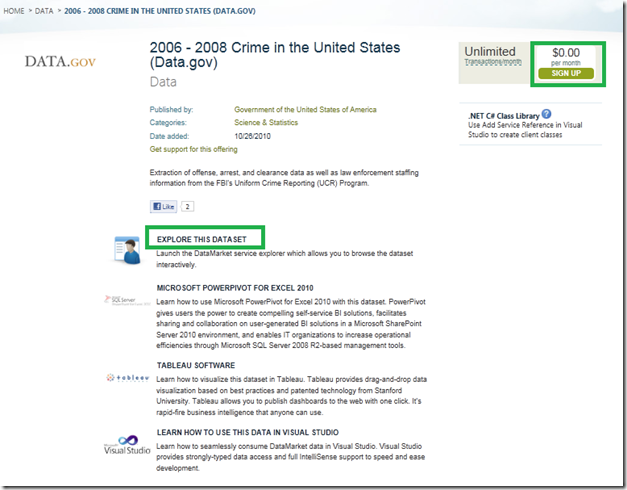
Select the Data.Gov dataset and then click the Sign Up button on the right to activate the subscription. Then click the “Explore this Dataset” link to browse the data.
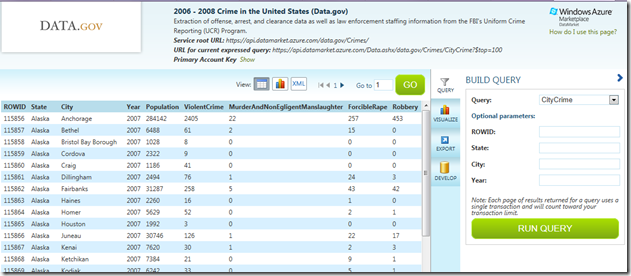
Click the “Run Query” button and the first 100 rows of the data will be returned to you.
Notice at the top of the page you will see the Service root URL. This is the location of the service that we will use in our LightSwitch application. In this case it’s https://api.datamarket.azure.com/data.gov/Crimes/
Enhancing Contoso Construction with Crime Data
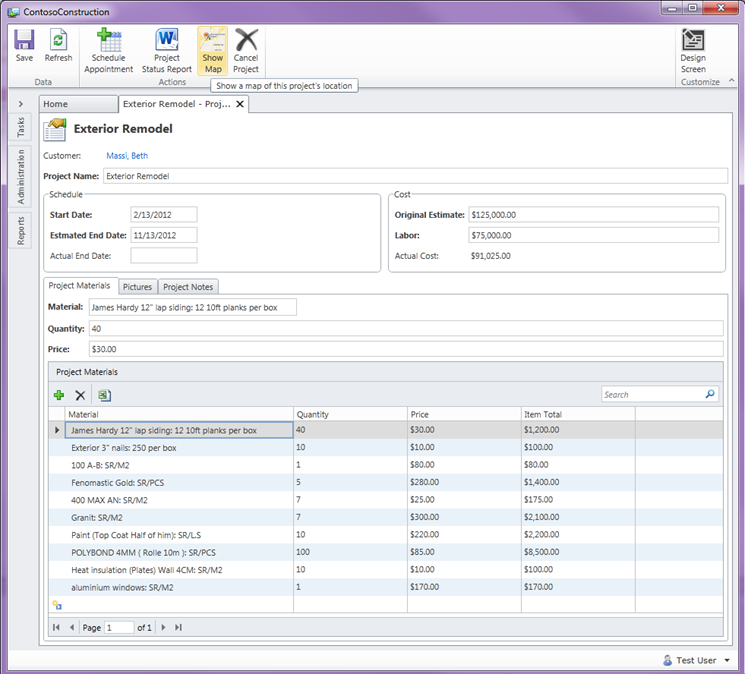
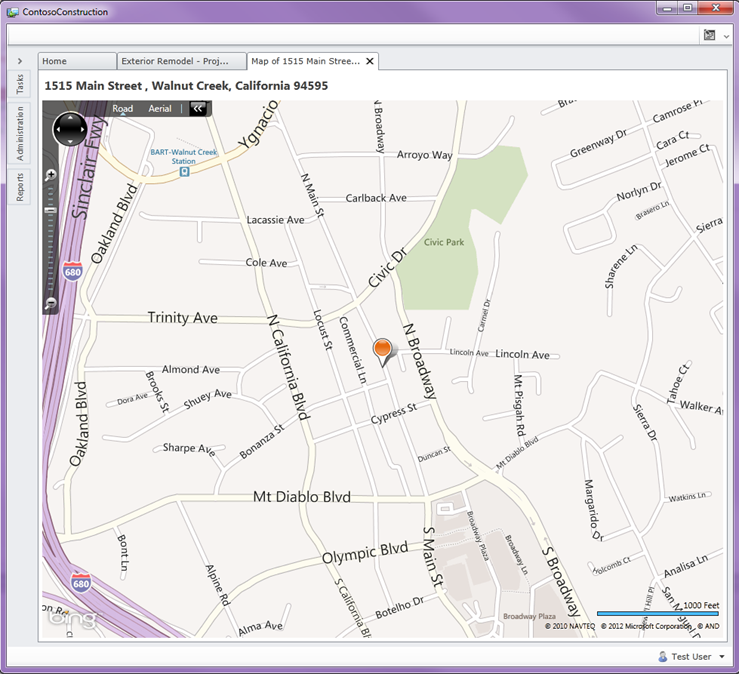
I’m going to take a variation of a sample I built a while ago that is an example of an application that could be used in the construction business. One of the features of this application is that it displays a map screen of the construction project location. From the Project screen users can click the Show Map button to open the map screen which uses a Bing Map control extension (included with the sample) to display the location.
What we’d like to do is also display the crime data to the user so that they can see whether working in that city is generally safe or not. This is information we can get for free from the dataset we just subscribed to from the Azure DataMarket.
Connect LightSwitch to an OData Service
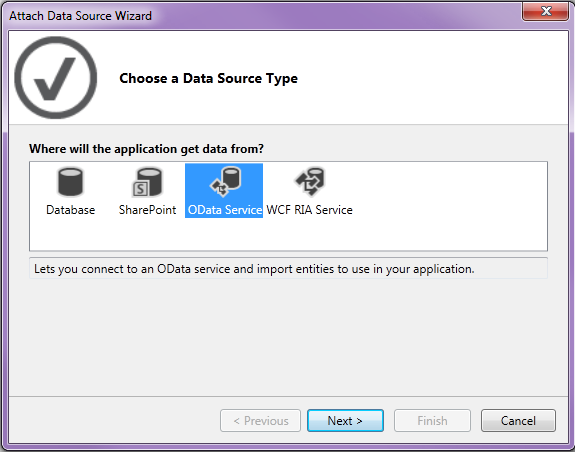
You add an OData service to your LightSwitch application just like you would any other external data source. Right-click on the Data Sources node in the Solution Explorer and then select “Add Data Source” to open the Attach Data Source Wizard. You will now see OData Service as an available choice.
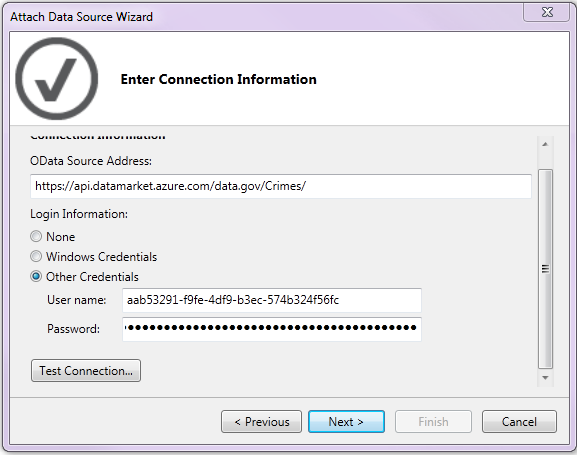
Click Next and enter the service root URL from above. Then for login information choose Other Credentials and enter your DataMarket Customer ID for the username and your Account Key for the password. You can get this information by logging into the DataMarket and navigating to “My Account” https://datamarket.azure.com/account/info.
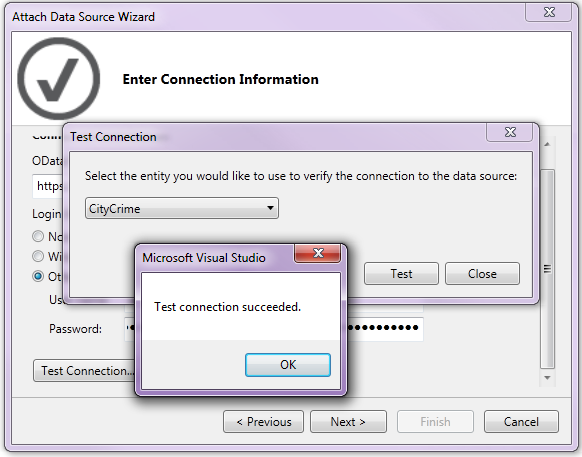
Click the Test Connection button and select the CityCrime dataset and click Test to make sure everything is working properly.
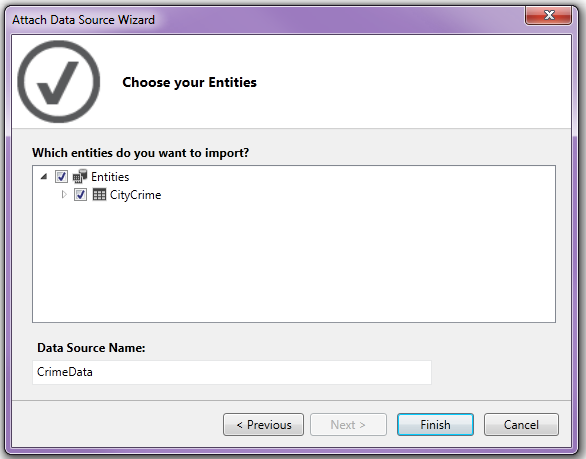
Click Next and LightSwitch will display all the available entities for you to choose from. Select CityCrime and then name the Data Source “CrimeData” and click Finish.
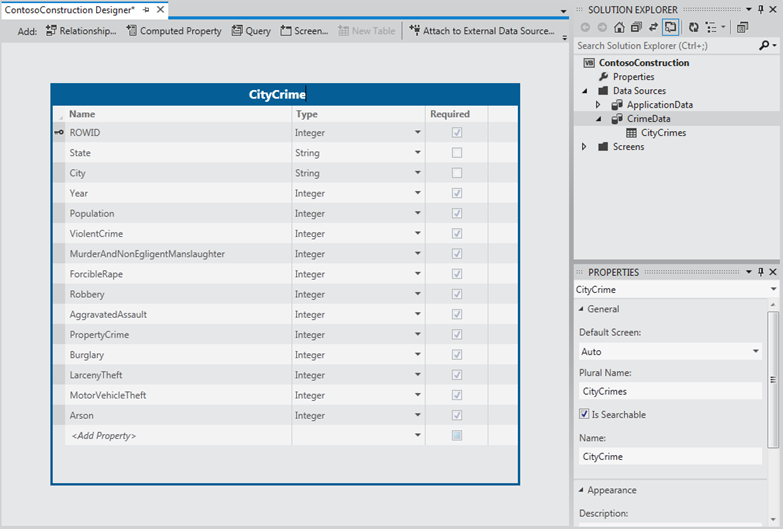
Next you will see the CrimeData added to the list of data sources in the Solution Explorer and LightSwitch will open the Data Designer where you can model the entities further. You can add business rules, set additional properties as well as add calculated fields. Just like any other external data source, you cannot change the underlying structure of the data, but you can select business types, declarative and custom validations, and configure a variety of other smart defaults.
What we want to do is display to the user the probability of being a victim to a violent crime in a specified city. So we need to calculate the ratio of violent crime using a computed property. Click the “Computed Property” button at the top of the Data Designer, call it ViolentCrimeRatio and make it a String. On the Properties window click “Edit Method” and provide the following result.
Private Sub ViolentCrimeRatio_Compute(ByRef result As String) ' Set result to the desired field value If Me.ViolentCrime > 0 Then result = String.Format("1 in {0}", Me.Population \ Me.ViolentCrime) End If End Sub
We’re also going to want to set a Summary property for the entity so it displays nicely on screens. Add another computed String property called Summary and write the following code:
Private Sub Summary_Compute(ByRef result As String) ' Set result to the desired field value result = Me.City & ", " & Me.State & ": " & Me.Year End Sub
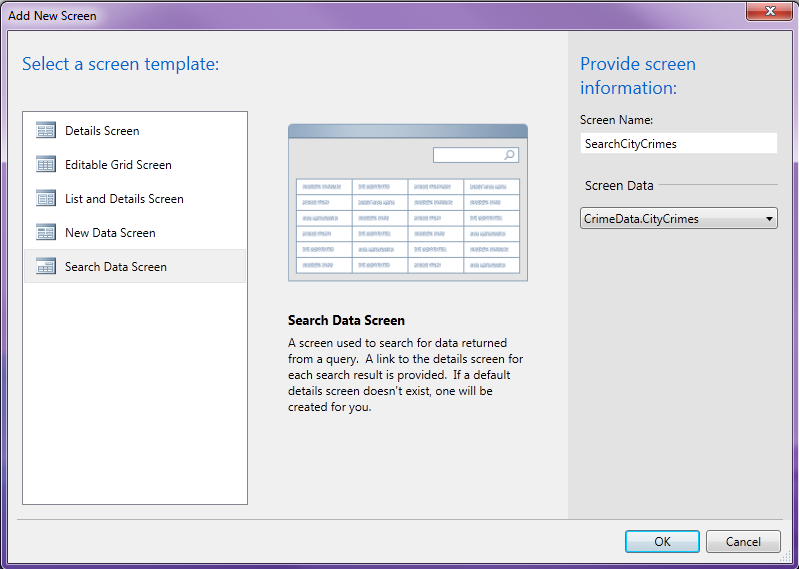
Then select the CityCrime entity and at the bottom of the properties window set the Summary Property to the Summary field. At this point we can test out the data set by adding a quick Search Screen and selecting CrimeData.CityCrimes for the screen data.
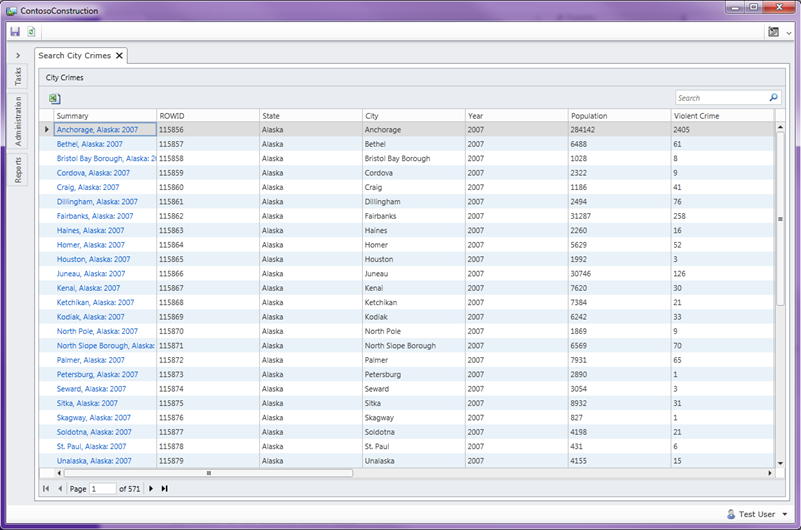
Hit F5 to build and run the app and open the Search City Crimes screen. Notice that LightSwitch is loading the data asynchronously and paging it for us automatically.
Writing Queries Against an OData Service
Now that we’ve got our connection to the OData service, we want to write a query that pulls the data for a specific City and State. Writing a query against the OData services is the same experience as any other data source in LightSwitch.
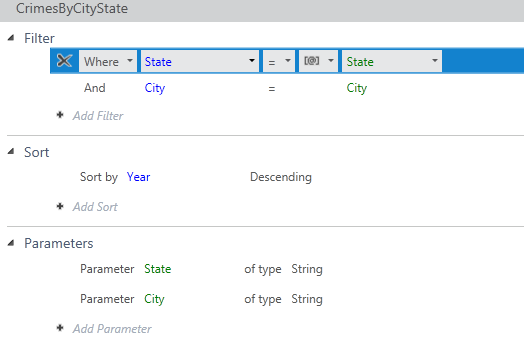
To add a new LightSwitch query, right-click on the CityCrimes entity in the Solution Explorer and select “Add Query” to open the Query Designer. Name the query CrimesByCityState. Then add two filter conditions; 1- Where the State is equal to a New Parameter called State, and 2- Where the City is equal to a New Parameter called City. We’ll also sort the results by Year descending.
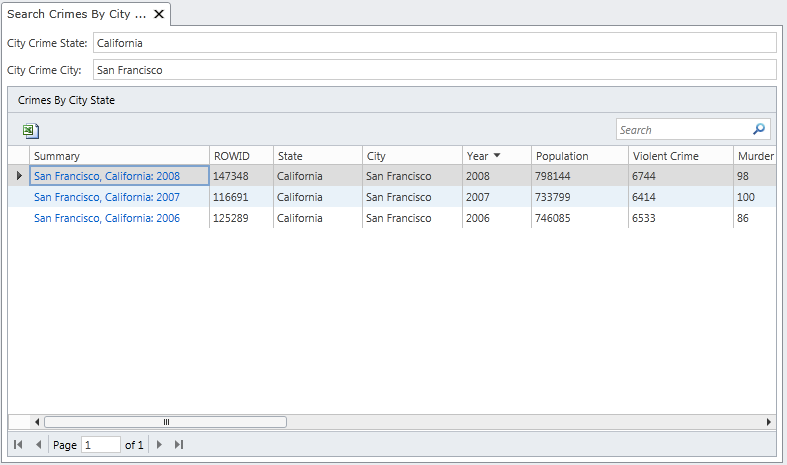
To test this query really quickly, add another Search Screen and this time select the CrimesByCityState query. When you run this screen, LightSwitch will ask you for the State and City parameters. Because they are both required, once you enter both of them LightSwitch will automatically execute the query. You can choose to make parameters optional in the query designer properties window.
Enhancing the Map Screen with Crime Data
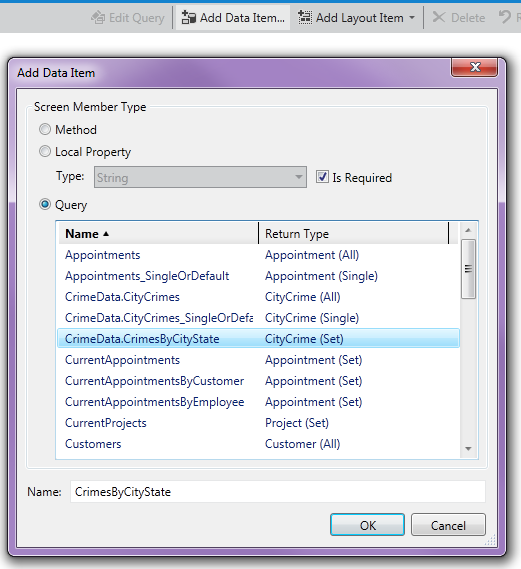
Instead of a separate screen we want to display this information on the Map Screen. Open the MapScreen and click “Add Data Item” at the top of the Screen Designer and select the CrimesByCityState query.
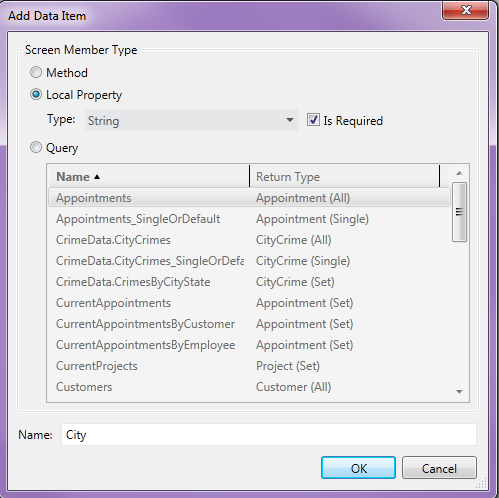
Next add two local properties one for City and one for State by clicking Add Data Item again, this time selecting Local Property of type String.
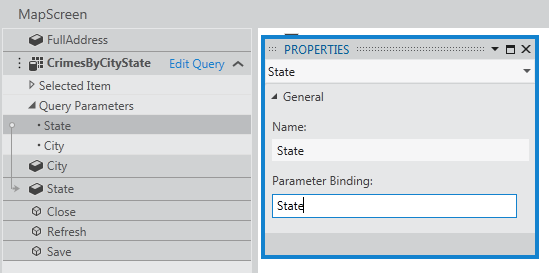
Now you need to bind these local properties to the query parameters. In the screen designer, select the query parameter State and in the properties window set the Parameter Binding to “State”. Repeat for City by selecting the City query parameter and setting the Parameter Binding to “City”.
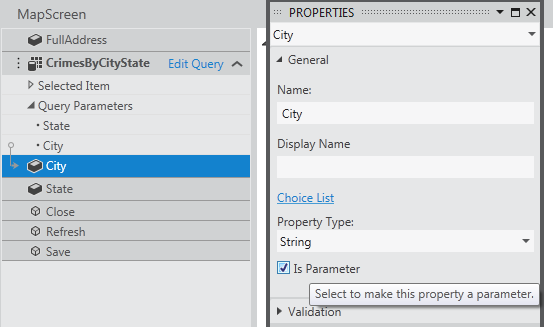
You know you have it right when there is a grey arrow from the query parameter to the local property. Finally, select both the local properties and in the property window check “Is Parameter” for both of them. This will allow us to pass in the city and state from the Project screen.
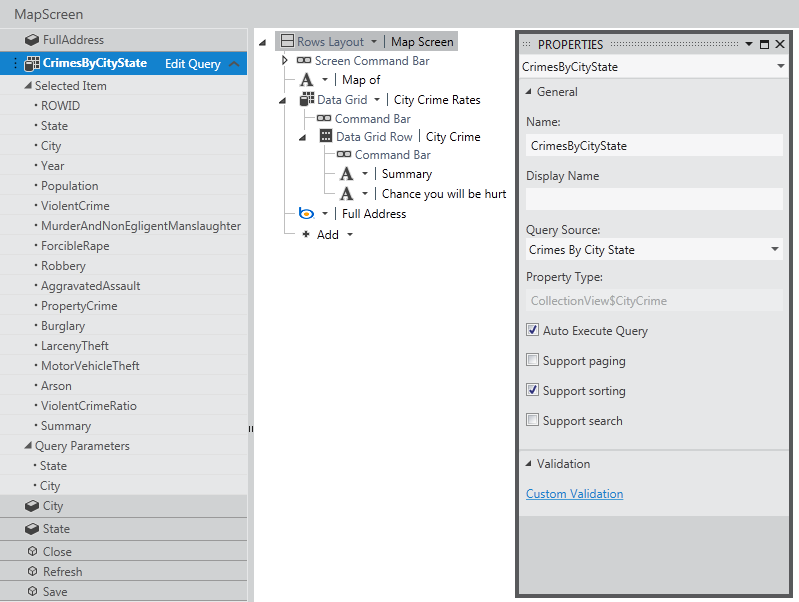
Next, drag the CrimesByCityState from the left onto the content tree where you want it. I’ll add it to the top of the screen and I’m just going to display the two computed properties, Summary and ViolentCrimeRatio. Also, since we’re now filtering the data only a few rows will be returned so I can turn off paging & sorting to save some room on the screen. Select the CrimesByCityState query and in the properties window uncheck “Supports paging” and “Supports searching”. Also since this data is read-only, I’ll remove all the commands from the data grid row command bar.
So after adjusting the visual properties of the screen how we want, the final thing we need to do is pass the city and state into the map screen along with the address. From the ProjectDetail screen select the Show Map button, right-click and select “Edit execute code”, and adjust the code as follows:
Private Sub ShowMap_Execute() 'Show a map of the customer address as well as crime data Me.Application.ShowMapScreen(Me.Project.Customer.FullAddress, Me.Project.Customer.City, Me.Project.Customer.State) End Sub
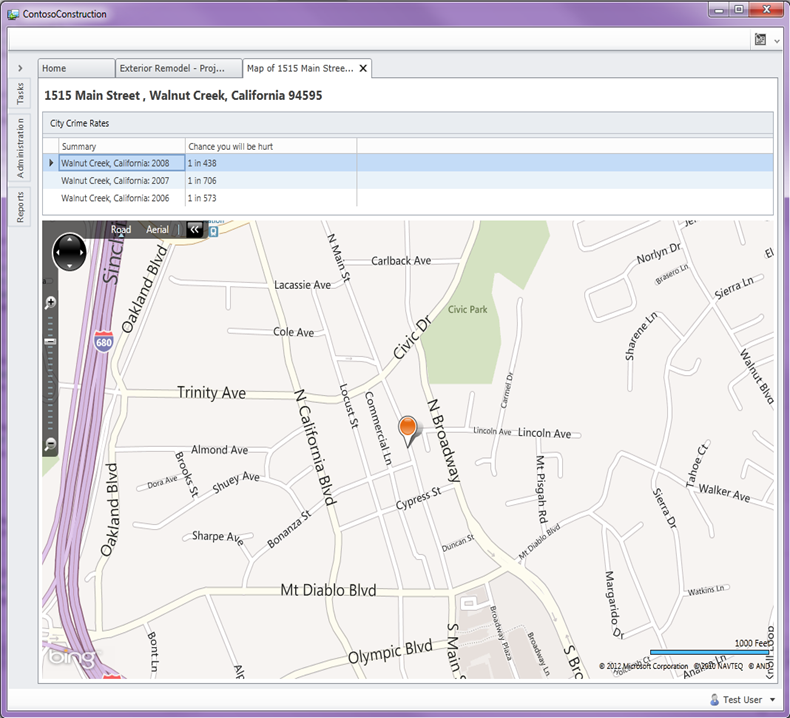
Now when we run the application, open the Project Detail screen, and click the Show Map button, it will display the crime data from the OData service on the Azure DataMarket.
Wrap Up
I hope this post has demonstrated how you can use data from OData services inside your LightSwitch applications. Keep in mind that not all services provide all operations against the data (for instance the Crime Data is read only) so that using random OData feeds may not be compatible with LightSwitch if they do not support querying, sorting or filtering. We’re working on guidance that will detail more about what operations are necessary to have a good LightSwitch experience and we will be working with partners to prepare them as we move from Beta to the final release.
I have updated the Contoso Construction application for LightSwitch in Visual Studio 2012 so have a look. There are a lot of new features that I took advantage of in there, not just the crime data OData service.
In the next post you will see how LightSwitch creates OData services from the data sources you define and how you can write external clients to get to that data, including business rules and user access control. In Visual Studio 11 beta, LightSwitch is the simplest way to create business applications and data services for the desktop and the cloud.
Enjoy!
UPDATE 3/9/2012: Read my next post on OData - Creating and Consuming LightSwitch OData Services
