Using the Save and Query Pipeline to “Archive” Deleted Records
Before Microsoft, I used to work in the health care industry building software for hospitals and health insurance companies. In all of those systems we had detailed audit trails (change logging), authorization systems, and complex business rules to keep patient data safe. One particular requirement that came up often is that we never delete patient information out of the system, it was merely archived or “marked” as deleted. This way we could easily maintain historical data but limit the data sets people worked with to only current patients.
Fortunately LightSwitch makes this extremely simple because it allows us to tap into the save pipeline to perform data processing before data is saved. We can also tap into the query pipeline to filter data before it’s returned. In this post I’ll show you how you can mark records for deletion without actually deleting them from the database as well as how to filter those records out so the users don’t see them.
Tapping into the Save Pipeline
The save pipeline runs in the middle tier (a.k.a. logic tier) anytime an entity is being updated, inserted or deleted. This is where you can write business logic that runs as changes are processed on the middle tier and saved to data storage. (For more details on the save pipeline please see Getting the Most Out of the Save Pipeline in Visual Studio LightSwitch.)
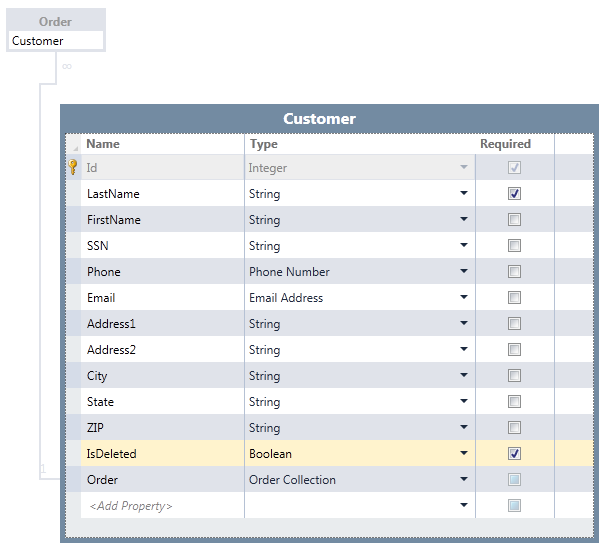
Let’s say we have an application that works with customers. However we don’t ever want to physically delete our customers from the database. There’s a couple ways we can do this. One way is to “move” the record to another table. This is similar to the audit trail example I showed here. Another way you can do this is to “mark” the record as deleted by using another field. For instance, let’s take a simple data model of Customer and their Orders. Notice that I’ve created a required field called “IsDeleted” on Customer that is the type Boolean. I’ve unchecked “Display by Default” in the properties window so that the field isn’t visible on any screens.
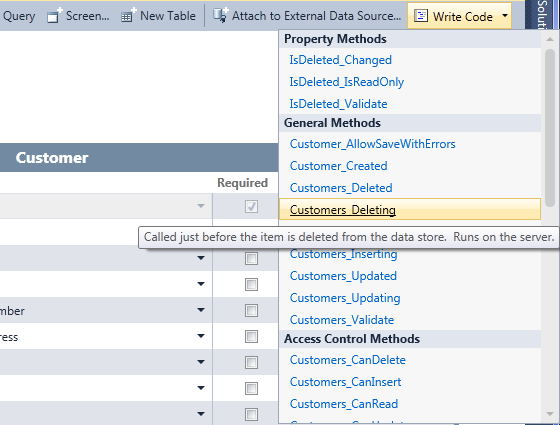
In order to mark the IsDeleted field programmatically when a user attempts to delete a customer, just select the Customer entity in the data designer and drop down the “Write Code” button and select Customers_Deleting method.
Here are the 2 lines of code we need to write:
 Private Sub Customers_Deleting(entity As Customer)
    'First discard the changes, in this case this reverts the deletion
 entity.Details.DiscardChanges()
    'Next, change the IsDeleted flag to "True"
 entity.IsDeleted = True
End Sub
Notice that first we must call DiscardChanges in order to revert the entity back to it’s unchanged state. Then we simply set the IsDeleted field to True. That’s it! Keep in mind when we change the state of an entity like this, the appropriate save pipeline methods will still run. For instance in this case, the Customers_Updating will fire now because we changed the state of the entity from Deleted to Unchanged to Modified. You can check the state of an entity by using the entity.Details.EntityState property.
Tapping into the Query Pipeline
Now that we’re successfully marking deleted customers, the next thing to do is filter them out of our queries so that they don’t display to the user on any of the screens they work with. In order to apply a global filter or sort on any and all customer entities in the system, there’s a trick you can do. Instead of creating a custom global query and having to remember to use that query on all your screens, you can simply modify the built-in queries that LightSwitch generates for you. LightSwitch will generate xxx_All, xxx_Single and xxx_SingleOrDefault queries on all entities for you and you can modify them in code. You access them the same way you do the save pipeline methods.
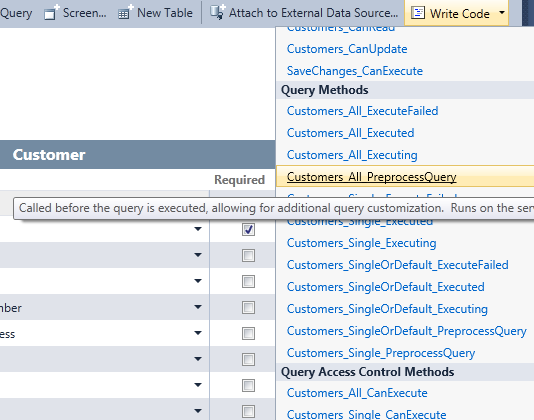
Drop down the “Write Code” button on the data designer for Customer and scroll down to Query methods and select Customers_All_PreprocessQuery.
This query is the basis of all the queries you create for Customer. I usually use this method to sort records in meaningful ways so that every default query for the entity is sorted on every screen in the system. In this case we need to also filter out any Customers that have the IsDeleted flag set to True, meaning only return records where IsDeleted = False:
 Private Sub Customers_All_PreprocessQuery(ByRef query As System.Linq.IQueryable(Of Customer))
    query = From c In query
            Where c.IsDeleted =  False Order By c.LastName, c.FirstName
End Sub
Notice we also have a related table called Order. I can do a similar filter on the Order entity as well. Depending on how you have users navigate to orders, this may not be necessary. For instance if you only show Orders on Customer detail screens then you don’t have to worry about the extra filter here.
 Private Sub Orders_All_PreprocessQuery(ByRef query As System.Linq.IQueryable(Of Order))
    query = From o In query
            Where o.Customer.IsDeleted =  False
 Order By o.OrderDate Descending
End Sub
See it in Action!
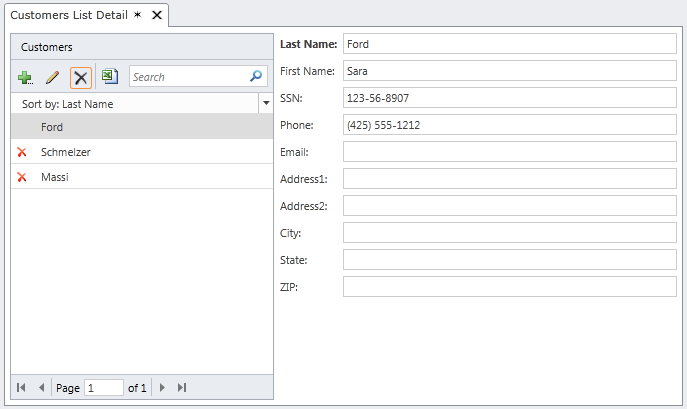
Okay time to test this and see if it works. I’ve created a List and Details screen on Customer. When we run this I can perform inserts, updates and deletes like normal. There’s nothing on the screen that needs to be changed and it acts the same as it normally would.
You mark the records for deletion….
.. and then click save to execute our Customers_Deleting logic. Once I delete a record and save, it disappears from the list on my screen, but it’s still present in the database. We can see that if we look in the actual database Customer table.
Leveraging the save and query pipelines can provide you with a lot of power over your data. This is just one of many ways you can use them to manipulate data and write business rules.
Enjoy!
LightSwitch V2 UPDATE 4/26/2012: Using the Save and Query Pipeline to Flag and Filter Data with LightSwitch in Visual Studio 11


