Customizing the LightSwitch Time Tracker Starter Kit
Visual Studio LightSwitch released with a set of 7 Starter Kits that people can use as starting points for their own applications. You can download them or install them directly in Visual Studio LightSwitch using the Extension Manager. Take a look at Robert Green’s Visual Studio Toolbox episode for more info.
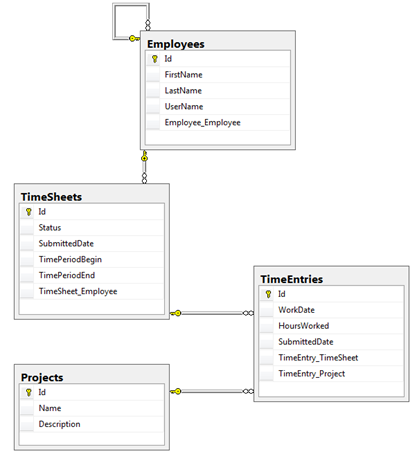
One of the Starter Kits is a Time Tracker application for tracking employee timesheets against projects they are working on. Here’s the data model:
Employees enter multiple time entries onto their time sheets and a project is selected on each of the time entries. This week a blog reader asked how he could get a tally of all hours worked on a given project for a given employee. In this post I’ll describe how to create a screen that filters on project and employee and tallies all the time entries.
Creating the Parameterized Query
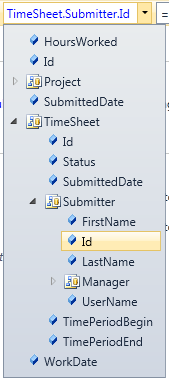
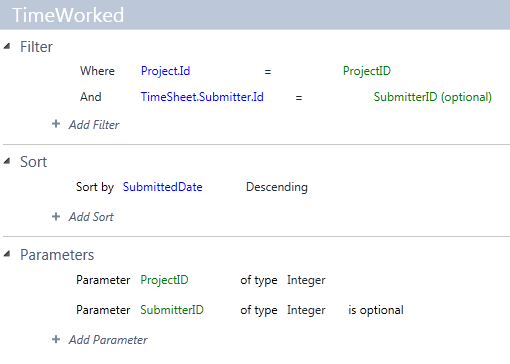
In order to do this we’ll need to create a parameterized query that optionally filters on Employee and Project. Right-click on the TimeEntries table in the Solution Explorer and select “Add Query”. Name it TimeWorked. Next we need to add a filter on the Project.Id “equals” then choose “@ Parameter” and add a new parameter called ProjectID. Do the same thing for the employee by expanding TimeSheet.Submitter and select Id “equals” another “@ Parameter”. This time add a new parameter called SubmitterID.
Then select the SubmitterID parameter and in the property window check “Is Optional” to make that one an optional parameter. That way we can optionally see the total hours worked for a selected project across all our employees. Also add a sort by the SubmittedDate Descending. Your query should now look like this.
Create the Custom Search Screen
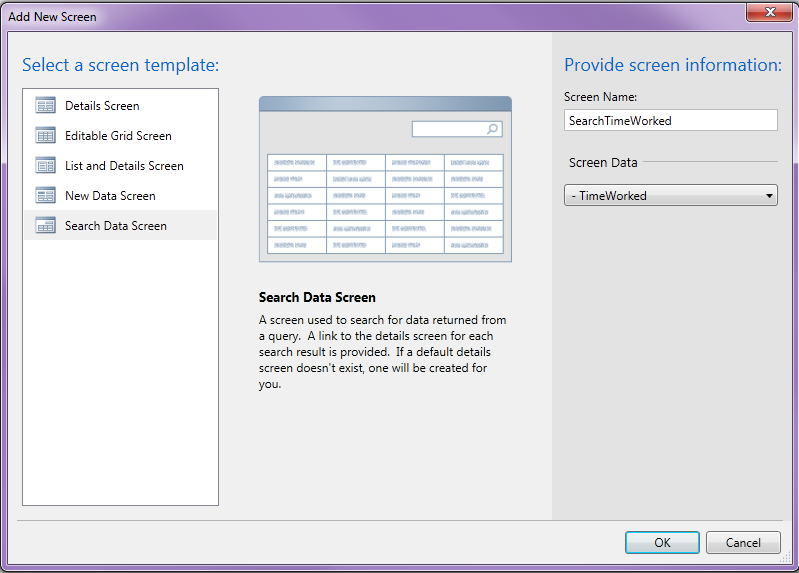
Next add a new search screen based on this query. Click the “Add Screen” button at the top of the query designer and choose the Search Data Screen template and select the TimeWorked query you just created for the Screen Data and click OK.
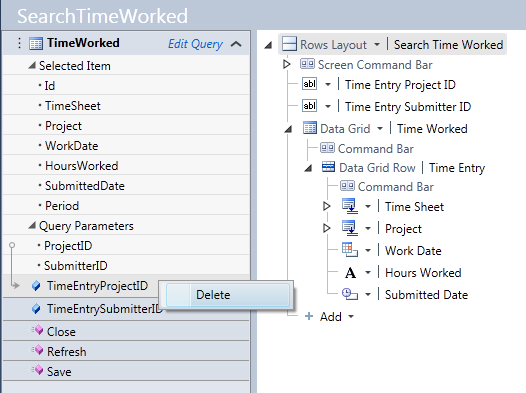
Notice that LightSwitch added screen fields for the filter criteria that needs to be fed into the query. However we don’t want users to have to type in IDs, instead we want a dropdown of choices for both Employee and Project. So delete the two fields on the view model on the left-hand side of the screen designer:
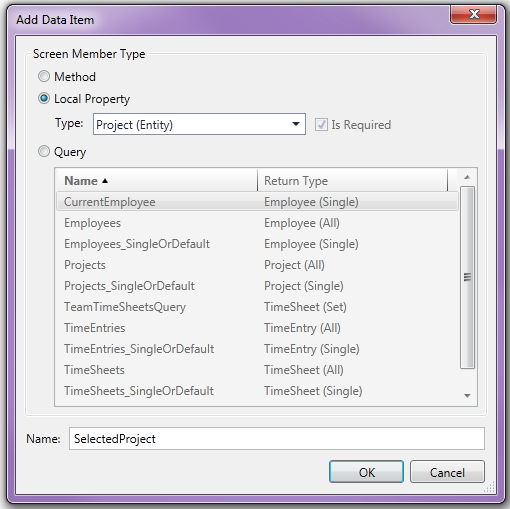
When you delete these fields the controls in the content tree will also be removed. Next click the “Add Data Item” button at the top and add a Local Property of Type “Project (entity)” and name it “SelectedProject”, then click OK.
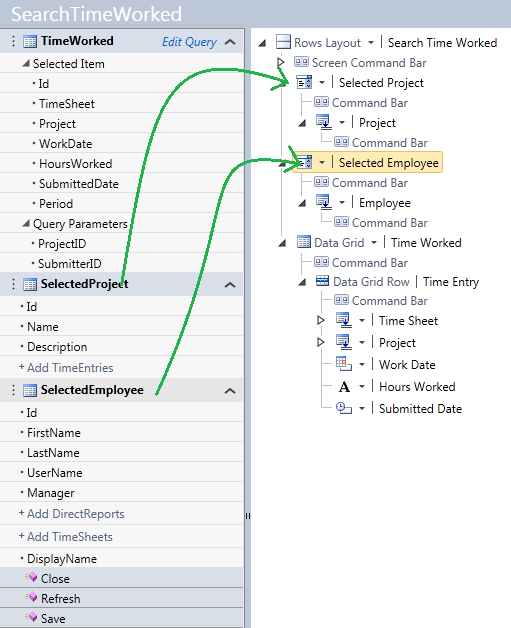
Do the same thing for Employee. Click the “Add Data Item” button again and add a Local Property of Type “Employee (entity)” and name it “SelectedEmployee”, then click OK. Now you should see Employee and Project in your view model. Drag them to the top of the content tree to place them above the results Data Grid. LightSwitch will automatically create drop-down controls for you.
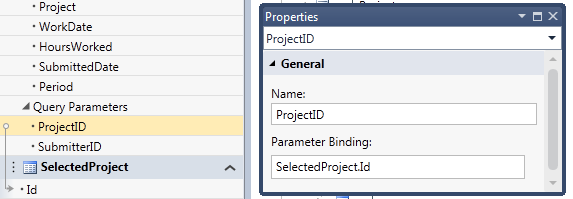
The next thing we need to do is hook up the selected items to the query parameters. First select the ProjectID query parameter in the view model, then in the properties window set the binding to SelectedProject.Id:
Once you do this a grey arrow will indicate the binding on the far left. Do the same thing for SubmitterID and set the binding to SelectedEmployee.Id.
Calculating Hours
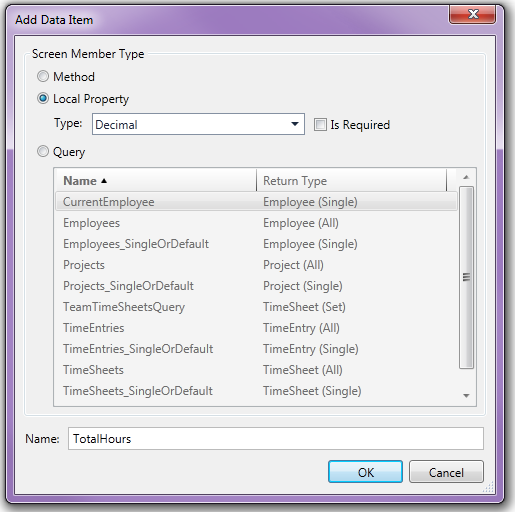
The final piece of the screen we need is the tally of all the hours worked across the time entries that are returned based on our filter criteria. Click “Add New Data Item” once again and this time choose Local Property of Type Decimal, uncheck “Is Required” and call it TotalHours.
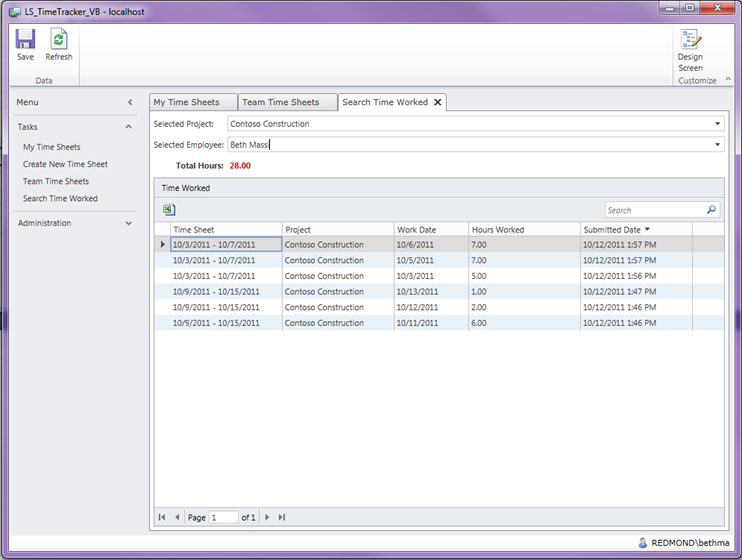
Now you will see the TotalHours field in the view model. Add it to the screen anywhere you want by dragging it to the content tree. In this example I’ll add it above the results grid. Make sure to change the control to a Label. You can also select how the label font appears by modifying that in the properties window.
Last thing we need to do is calculate the total hours based on this filter. Anytime the TimeWorked query is successfully loaded we need to calculate the TotalHours. Select TimeWorked in the view model and then at the top of the screen drop down the “Write Code” button and select the “TimeWorked_Loaded” method. Write this code to tally the hours:
 Private Sub TimeWorked_Loaded(succeeded As Boolean)
    Me.TotalHours = 0
    If succeeded Then
        For Each te In TimeWorked
            Me.TotalHours += te.HoursWorked
        Next
    End If
End Sub
Now run it! Once you select a project the query will execute and the total hours displayed for all employees that worked on the project. If you select an employee, the results will narrow down further to just that employee’s hours.
Starter kits are a GREAT way to get started with Visual Studio LightSwitch. I urge you to explore them and customize them for your exact needs.
Enjoy!
