How to Create a Screen with Multiple Search Parameters in LightSwitch
Note: This article has been updated for Beta 2 on 3/17/2011
A couple weeks ago I posted about how to create a custom search screen where you could specify exactly what field to search on. I also talked about some of the search options you can set on entities themselves. If you missed it:
Creating a Custom Search Screen in Visual Studio LightSwitch
Since then a couple folks asked me how you can create a custom search screen that searches multiple fields that you specify. Turns out this is really easy to do – you can specify multiple filter criteria with parameters on a query and use that as the basis of the screen. Let me show you how.
Creating a Parameterized Query with Multiple Filters
For this example let’s create a search screen that searches for Patients that were born within a certain date range. We’ll use the same Patient table that I used in the last article which has a date field called BirthDate. To search in a range, we’ll need two parameters – a StartDate and an EndDate – that will be used in the filter of the query.
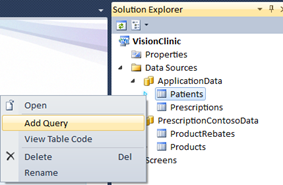
To create a query, right click on the Patient table in the Solution Explorer and select “Add Query”. Another way to do add a query is if you have the Table Designer open you can just click the “Query…” button at the top of the designer. (For an intro to the Query Designer see this video: How Do I: Sort and Filter Data on a Screen in a LightSwitch Application?)
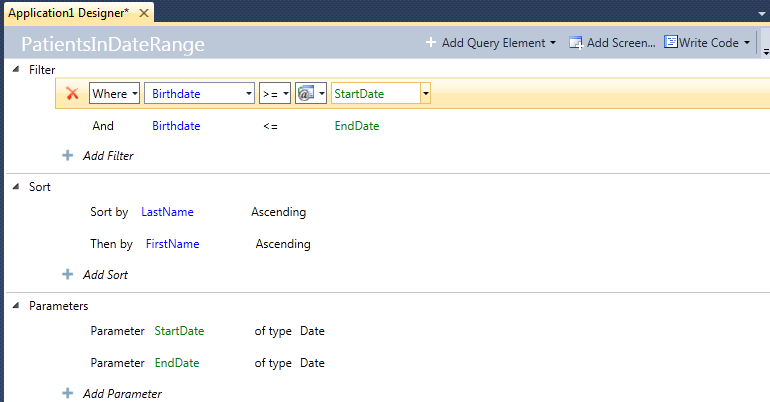
Name the query PatientsInDateRange . Click the “+ Add Filter” and add a “Where” condition and select Birthdate, >= (is greater than or equal to), and then choose “@ Parameter” for the value type. Then choose “Add New” and a parameter will be created below for you. Rename the parameter “StareDate”.
Next click on the “+ Add Filter” below the first condition you just created and add another “Where” condition. Select Birthdate, <= (is less than or equal to), and then choose “@ Parameter” for the value type and add a new parameter called “EndDate”. I’ll also add a sort on LastName then FirstName ascending. Your query should look like this:
Creating a Custom Search Screen
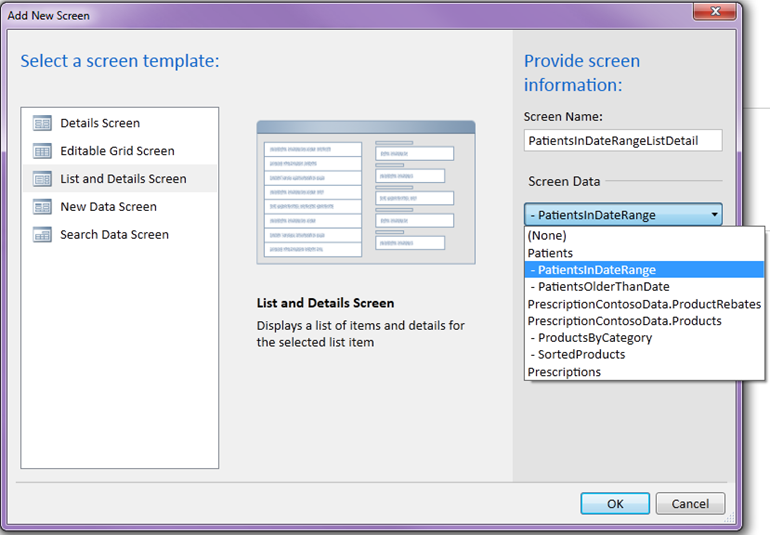
Now that we have a query that accepts multiple parameters we can create a screen based on this query. You actually don’t need to choose the Search Data Screen template, you can choose any template you want. In fact, for this example I will select the List and Details Screen. If you are still sitting in the Query Designer then you can just click the “Add Screen” button at the top of the designer then select the List and Details template and choose the PatientsInDateRange query we just created for the screen data:
Once you pick a template the screen designer opens. You will see the query and its fields on the left of the screen and a hierarchal view of the screen controls in the center. On the right is your properties window. Since our query has two parameters, LightSwitch automatically has added screen properties called “StartDate” and “EndDate” which are used as the parameters to the query (this is indicated by the arrow from the query parameter to the screen property). These values will be supplied by the user but you can control that by checking the “Is Parameter” property as I explained in my previous post.
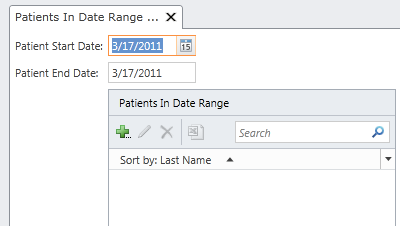
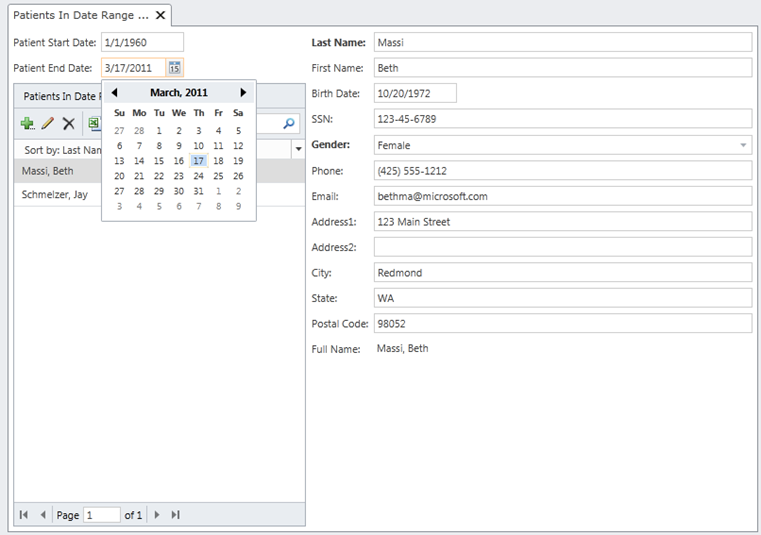
So let’s run this and see what we get. Hit F5 and open up the “Patients In Date Range List Detail” screen and you will see two Date Pickers at the top.
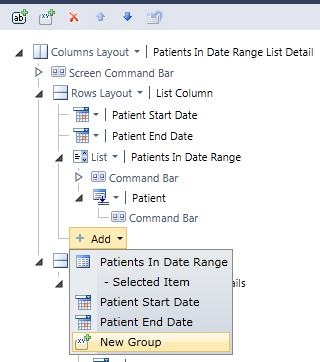
I want to adjust the layout a bit so that the labels of the date pickers are flush with the list box so click the “Design Screen” button in the upper-right corner, select the List Column then click Add, New Group.
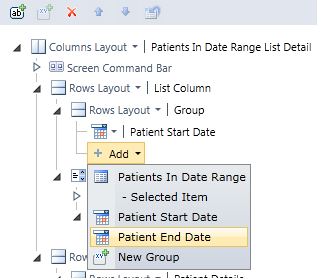
Move the group to the top using the blue arrow above. Delete the Patient Start Date and Patient End Date then select the Group and then click Add and select the Patient Start Date and Patient End Date fields to put then into the Group.
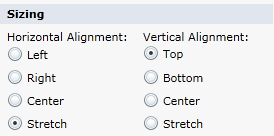
Finally, select the Group and in the properties below set the Vertical Alignment to Top.
That looks better! So now when we enter values the results are returned into the Patient ListBox below. And since we chose a “List and Details” screen template, when we select a Patient in the list we can edit the details:
Specifying Optional Parameters in Filters
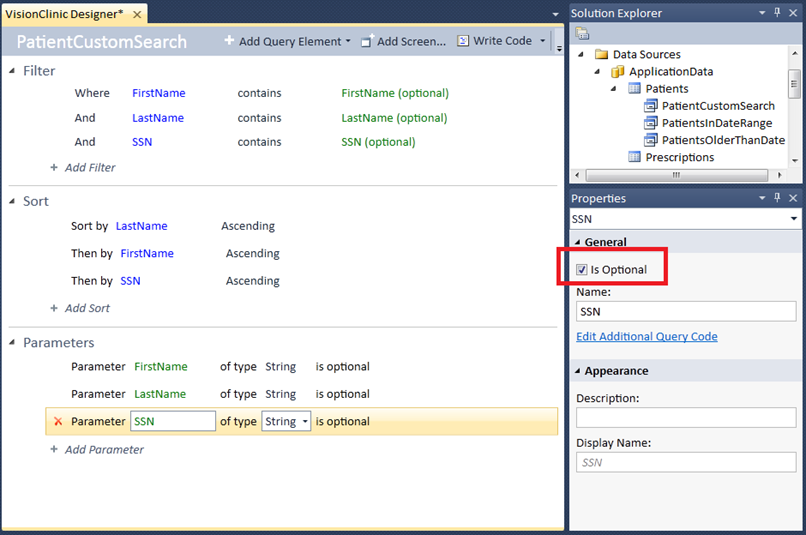
In the above example we’re requiring the user to enter both the Start and End dates before any meaningful results are returned. But what if we want a screen where the user can search on combinations of fields? That’s also easy to do as well. Let’s create a query called PatientCustomSearch that allows users to filter on any combination of LastName, FirstName or SSN. This time add a filter “Where” condition and select FirstName, contains, and then choose “@ Parameter” for the value type just like we did in the previous example. Choose “Add New” and a parameter will be created below for you. Do the same thing for LastName and SSN. Next select each parameter and in the Properties window check “Is Optional” for all of them.
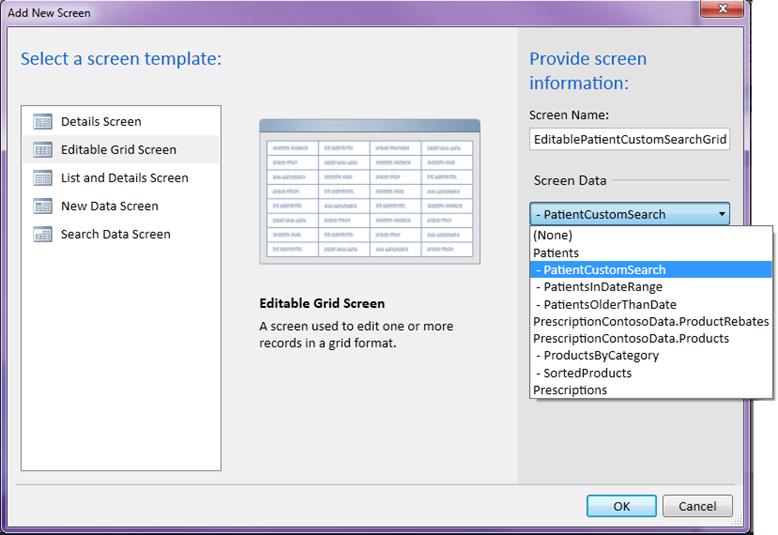
This time I’ll create a screen based on the Editable Grid screen template and select the PatientCustomSearch as the screen data.
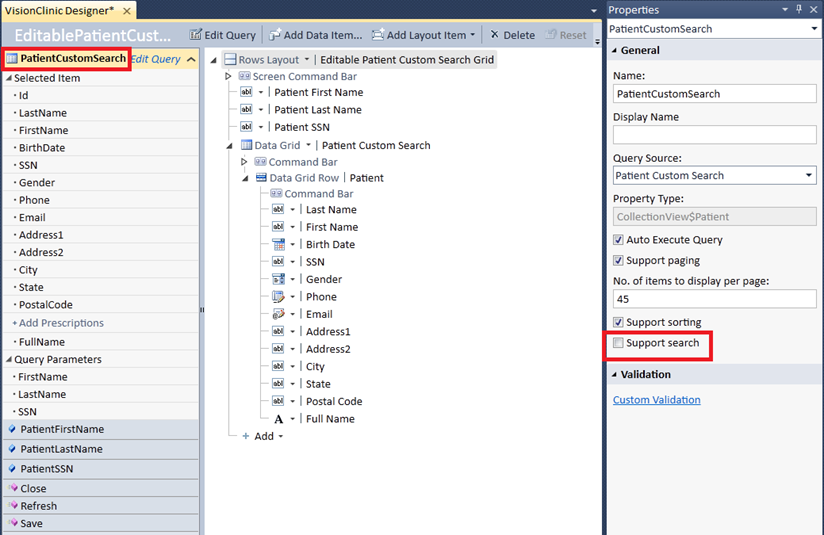
I’m also going to disable any searching in the grid because we have three fields to search combinations of records now. Select the PatientCustomSearch query on the left and uncheck the “Supports search”.
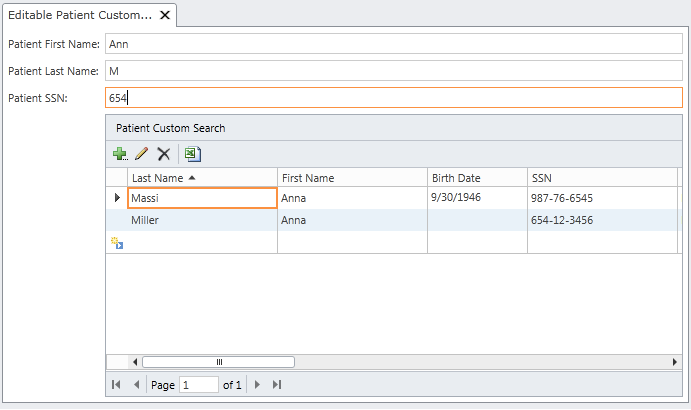
Now hit F5 to debug and open up the screen. You will see three textboxes at the top that you can use to enter any combination of search criteria and results will be returned that contain the criteria you enter as you enter it. In my query I am matching on strings that are found anywhere in the fields (contains). You may want to change the filter clauses to “equals” if you want to perform an exact match to the fields.
As you can see creating your own custom search screens doesn’t require code, it just requires a query that takes parameters the way you want them. LightSwitch was designed to make it easy to search, filter, sort and page data so I encourage you to try it our for yourself. Visit the LightSwitch Developer Center to learn more.
Enjoy!
