Creating a Custom Search Screen in Visual Studio LightSwitch
Note: This article has been updated for Beta 2 on 3/17/2011
While I was on my speaking trip in Europe a couple folks asked me how they could create their own search screen instead of using the built-in search functionality that LightSwitch provides. Basically they wanted the search to come up blank until a user entered specific search criteria and they only wanted to search on a specific field. In this post I’ll explain a couple options you have that allow you to tweak the default search screens and then I’ll show you how easy it is to build your own. Let’s get started!
Creating a Search Screen
Creating search screens in LightSwitch is really easy – it takes about 5 seconds once you have your table defined. You just describe your data, create a new screen and then choose the “Search Screen” template. Take a look at this video here: How Do I: Create a Search Screen in a LightSwitch Application?
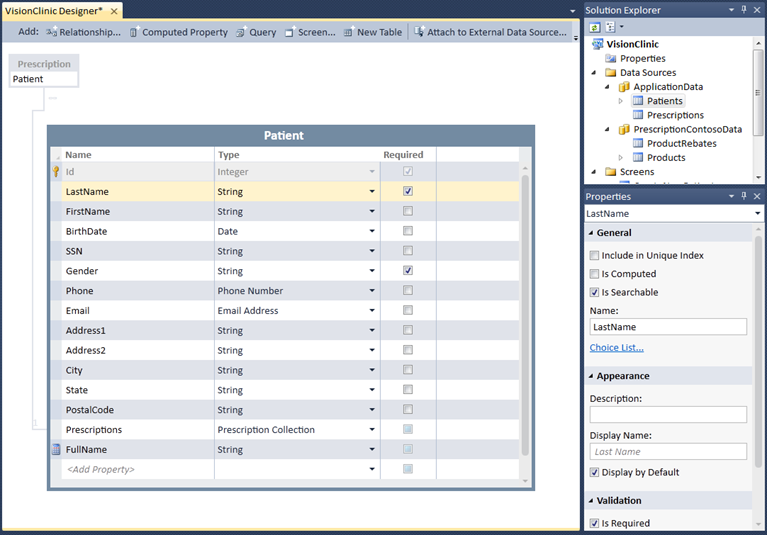
For instance, say we have a Patient table that we’ve created in LightSwitch (if you don’t know how to create a table in LightSwitch see this video):
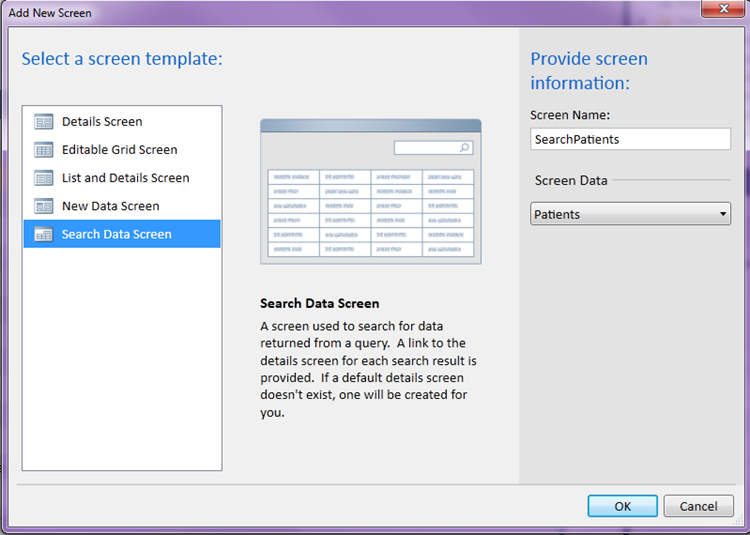
To create a search screen for Patient just click the “Screen…” button at the top of the designer or right-click on the screens node in the Solution Explorer and select “Add Screen”. Then select the “Search Data Screen” template and choose the Patients table for the Screen Data:
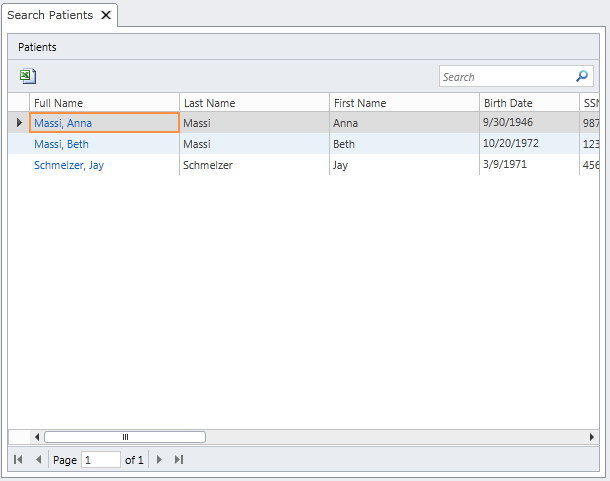
Hit F5 to debug the application and open the search screen. Out of the box you automatically get searching across any string field as well as paging and exporting to Excel.
Specifying “Is Searchable”
By default all string fields in a table (a.k.a. properties on an entity) are searchable in LightSwitch. For instance if we enter “Beth” into the search screen above then it will return all the patients with the string “Beth” matching in any of the string fields in the Patient table. Sometimes we don’t want all the fields to be searched. For instance if we’re not displaying some of the string fields in the search grid that could look confusing to the user if a match was found in one of those fields – they may think the search is broken. Or if there are many rows in the table with a lot of string fields you can improve performance by not searching on all of them.
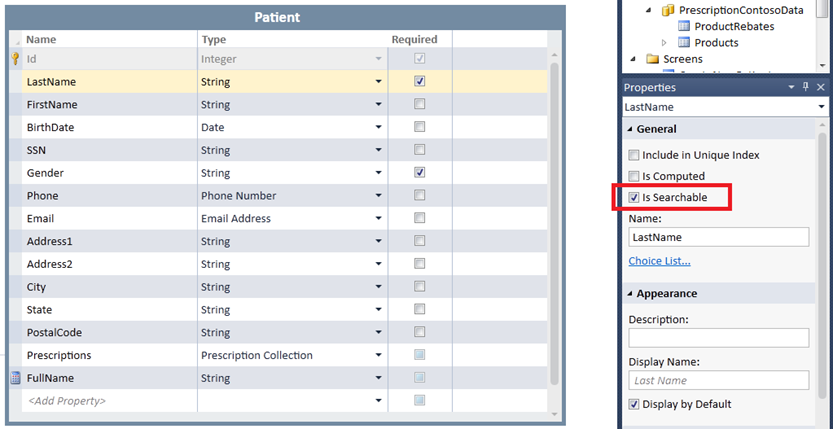
To prevent the user from searching on a field in a table, open the table designer (by double-clicking on the table in the Solution Explorer) and highlight the field you want. Then uncheck Is Searchablein the property window:
You can also specify whether the entire table should be searchable by default. If you select the table itself (by clicking on the name of the table at the top, in this case Patient) then you can toggle the Is Searchable property there as well. If you uncheck this, then anytime the table data is displayed in a grid in the system, there will be no search box on the top of the grid. However, what if we want to search on non-string fields? What if we want to show a blank search screen and require the user to enter some search criteria? We can create our own search screen very easily to accomplish this. First we need to write a query that takes a parameter.
Creating a Parameterized Query
For this example let’s create a search screen that searches for Patients older than a certain date that the user enters. In this case we will ask for the Patient’s birth date because we are storing a Birthdate field on the Patient table. To create a query that takes a parameter, right click on the table (in my case Patient) in the Solution Explorer and select “Add Query”. Another way to do that is if you have the Table Designer open you can just click the “Query…” button at the top of the designer. (For an intro to the Query Designer see this video: How Do I: Sort and Filter Data on a Screen in a LightSwitch Application?)
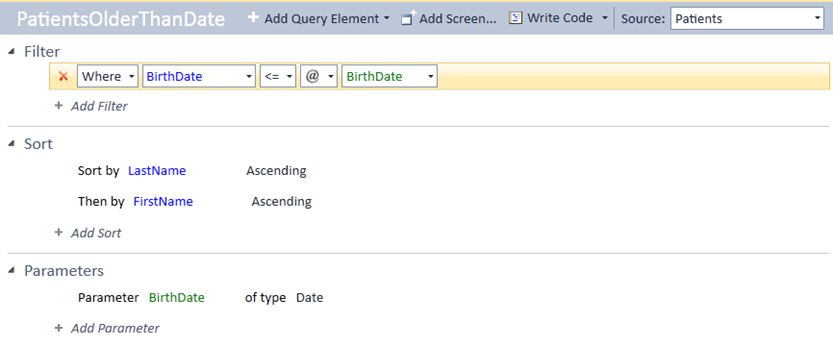
Name the query PatientsOlderThanDate, then add a “Where” filter condition and select Birthdate, <= (is less than or equal to), and then choose @parameter for the value type. Then choose “Add New” and a parameter will be created below for you. I’ll also add a sort on LastName then FirstName ascending.
Creating a Custom Search Screen
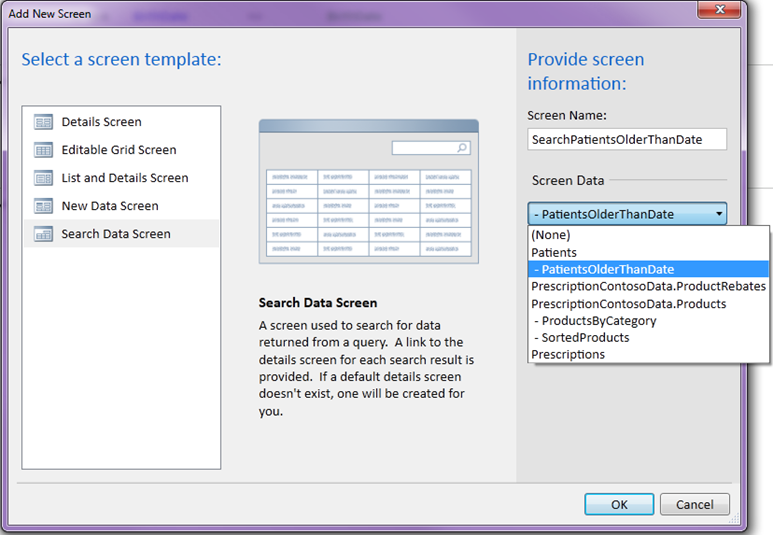
Now that we have a query that accepts a parameter we can create a screen based on this query. You actually don’t need to choose the Search Data Screen template, you can choose any template you want, but for this example I’ll stick with the search screen template. For the Screen Data, select the query we just created:
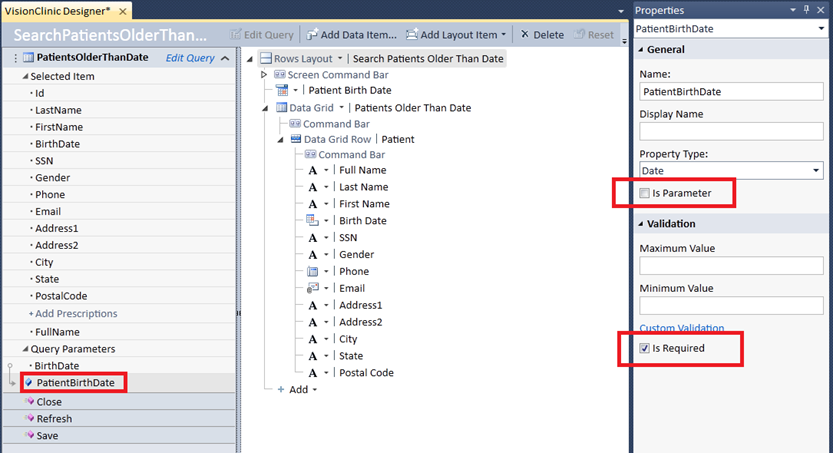
One you pick a template the screen designer opens. You will see the query and its fields on the left of the screen and a hierarchal view of the screen controls in the center. On the right is your properties window. Since our query has a parameter, LightSwitch automatically has added a screen property called “PatientBirthdate” which is used as the parameter to the query (this is indicated by the arrow from the query parameter to the screen property).
Now there’s a few ways you can run a custom search screen. If you select the PatientBirthDate and look in the properties window, you can indicate whether it should be a screen parameter or not and whether it’s required.
If you check “Is Parameter” and “Is Required” then you must call the screen in code and pass in a PatientBirthDate value. This also means that the screen will not show up in the navigation menu. Here’s how you would call it in code.
If you check “Is Parameter” but uncheck “Is Required” then this makes the screen parameter optional which means you can still pass the value in code but users will also see it on their navigation menu. For this example I’ll check off “Is Parameter” but not make it required. This gives me the most flexibility.
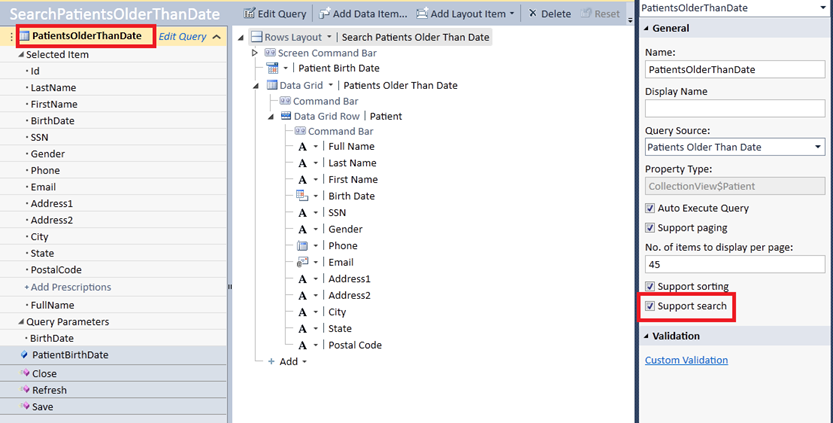
Finally you can decide whether you still want to show the search box on the grid by selecting the PatientsOlderThanDate query on the left and toggling the “Support search” property.
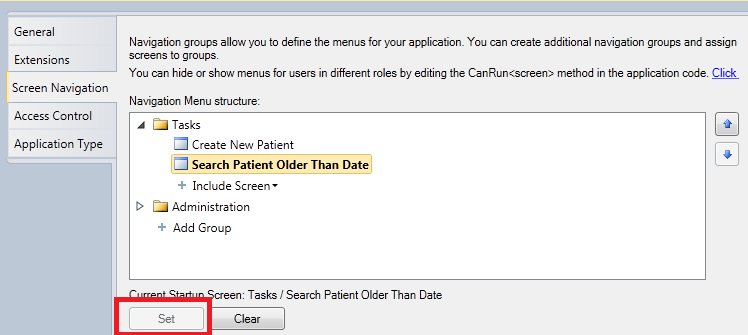
If you leave the search on the grid this means that you want to let users search within those results that are already displayed after executing our query. I find it to be a bit confusing to leave it on there but you may have your reasons. For this example, I’ll uncheck that. You can also change the display label for the search field and/or do other visual tweaks to the screen here or at runtime. If you want this search screen to be the default screen that opens when the application launches, from the main menu select Project –> Properties and then select the Screen Navigation tab and select the screen and click the “Set” button at the bottom of the page:
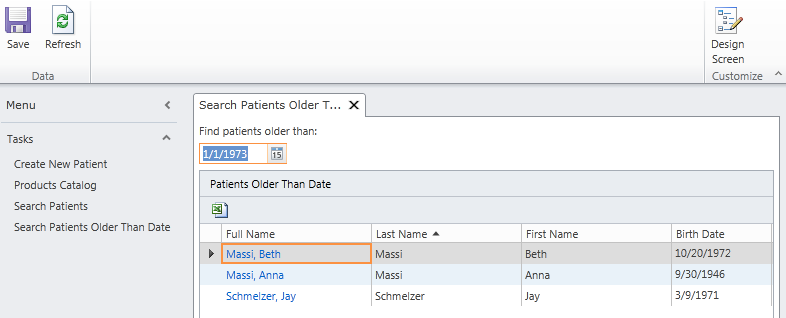
Now we can hit F5 to start debugging and we will see our custom search screen in the navigation menu. When we open the screen no records are displayed initially. You will also see the Birthdate field as a date picker on the top of the screen. When you enter a date and hit enter or tab, the query will automatically execute and display the results:
That’s it! It should literally take about 5 minutes to create your own custom search screen with Visual Studio LightSwitch.
Enjoy!
