How to Secure your Mobile App with 3rd party Identity
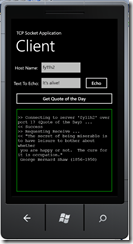 Today I’m heading out to my Alma Mater to speak to some Graduate Students on the beauty and magic of the Networking Stack, and we’ll build a Windows Phone 7.1 TCP client application. Basically it takes an example from the MSDN Library in which we create a SocketClient class to handle the threading, host and port operations, then talks to a Simple TCP service to call the ECHO and QOTD (quote of the day) services. These services are not enabled by default so in order to make the example work you have to turn them on. This is done in the Add & Remove Programs, select Windows Features, then enable Simple TCP Services.
The mobile client client is written in Silverlight, using XAML markup to describe the look and behavior of the interface. Simply copying the code from the article and pressing F5 gives us a working prototype. For fun I thought it would be interesting to add Authentication to pull back the user’s name as the text to echo and showcase leveraging Azure’s Access Control Services along the way. The basic flow of the altered demo is to have the user authenticate with credentials from some identity provider and then use them in the client application.
Access Control Services is part of the Windows Identity Foundation story and is enabled thru Windows Azure’s management portal. What it provides is a synchronization and management point to have a security conversation where you introduce a 3rd party, such as Google or Facebook, to authenticate the user and share a security token that contains identity information. To leverage these services you can download code examples in the form of the Identity Training kit, use some code shared on CodePlex, or copy the SL.Phone.Federation assembly from one of the Windows Azure Platform Training Kits. There is also a NuGet package, but it doesn’t appear to support Windows Phone.
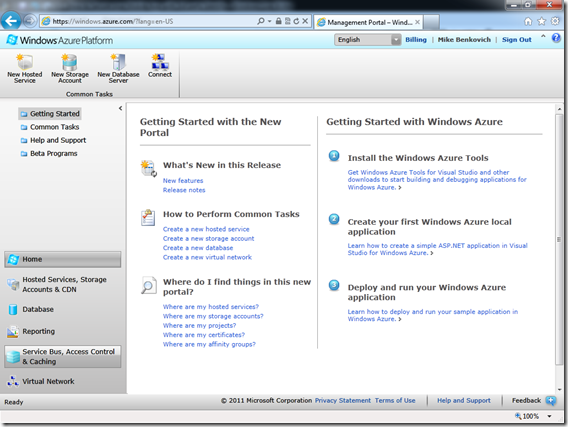
After you’ve got the controls for the client we still need to create a namespace and configure our service to understand our application. This is done from Azure’s Management Portal. Browse to https://windows.azure.com and log in using your Live ID credentials. If you have active subscriptions associated with your ID you’ll see a Silverlight application that looks like below. On the top is a context sensitive ribbon with commonly executed commands, the left side has buttons that will take you to various management parts of the portal. To create and manage the identity stuff click the “Service Bus, Access Control & Caching” button and we’re on our way.
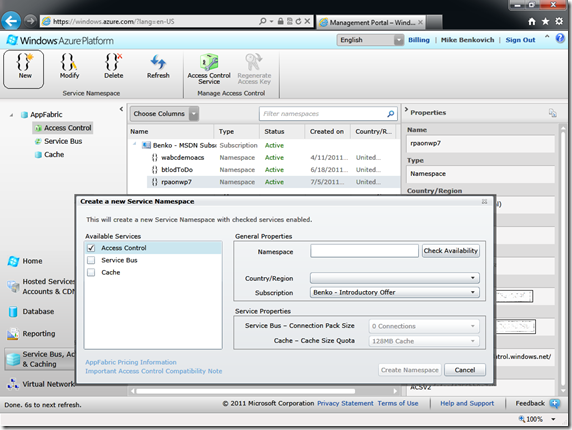
This takes us to a listing of namespaces that we own. In the object tree in the upper part of the left pane I can manage Access Control, Service Bus or Cache. I selected Access Control. Think of a namespace as the unique part of a domain name, usually the first part of the URI that HTTP understands. In my case I’ve created several namespaces, and this part of the application allows me to manage them.
Create a new namespace which will be the location of our services for this exercise. Each namespace must be unique and a button for checking availability will confirm your choice. The other thing to do is to set the country/region to host the service. After creating the namespace, click the little Green dice in the ribbon to open the management page for your service. The management page is actually hosted inside your named space so if I had created a namespace called “benkodemo” the management portal would be https://benkodemo.accesscontrol.windows.net. To access it I need to authenticate with the Live ID I had logged in with. Assuming that’s done all we need to do is to complete the 3 steps to configure ACS including selecting Identity Providers we want to work with, adding info about our application including the deployment URI it will run from and the token format we’re interested in, and then set up rules for how to handle claim requests from the various providers. Since this is a fairly deep topic I’ll refer you to the platform training kits and online documentation instead of repeating it here. Suffice it to say that for my simple example we’ll use the following settings:
1. Select Identity Providers. Add identity providers for Google and Yahoo to the default selection of Live ID. In adding these providers we have the option of including a link to an image to display next to the choice in the identity selector screen.
2. Configure the Relying Party Application. In the Relying Party Application screen we add a unique name, a realm and then select a Token Format for the conversation. I’m building a Windows Phone application, so the SWT format works fine for my purposes. The other key piece of information is the Realm. This is the URI from which requests must originate from and typically is the URL of the site, like https://wabcdemos.cloudapp.net or similar. Since this is a Phone based application we’ll use uri:myDemoApp. This realm will be important when we use the control on the client.
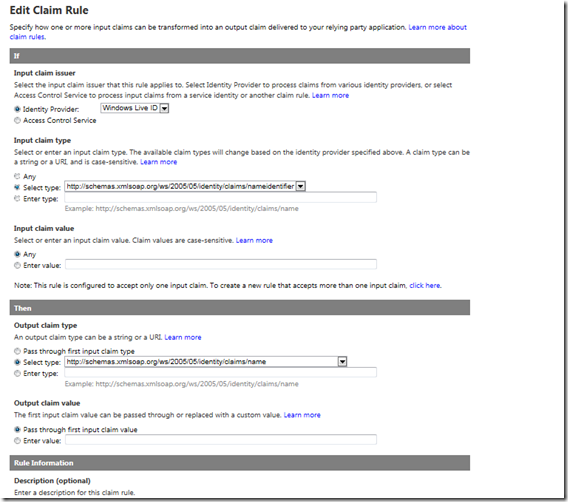
3. Generate Rules. This drives how the claims are processed for each provider of identity. Clicking Generate will populate the set of default handling for the various claims You might notice that unlike Google or Yahoo, Live ID will return just the nameidentifier information, where Google and Yahoo also include additional information about the user including their name and emailaddress. We can add a custom rule for Live ID to copy the nameidentifier to the name claim if we plan on using the name in our application by clicking add, then configuring the rule to copy the nameidentifier data to the name claim.
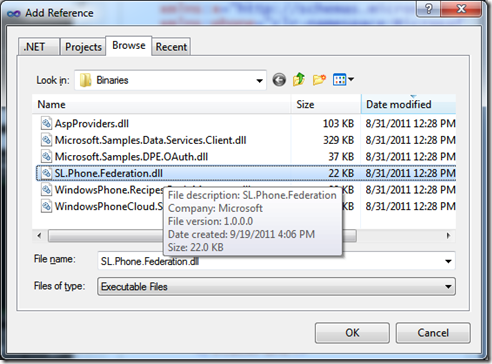
Configure the Phone Application. Now that our ACS services are configured we can return to our client project and create the plumbing necessary to use the identity provided from ACS. For sake of simplicity I will focus just on the client application and dive into the OAuth portion of the conversation on the server in another post. Our example will simply ensure that we can authenticate a user on mobile client and parse the token to see the content. In the Visual Studio Phone solution add a reference to the SL.Federation.Phone assembly, and optionally add the same assembly to your toolbox if you want to use the designer to place and work with the control. I’m pulling mine from the Windows Phone training kit binaries.
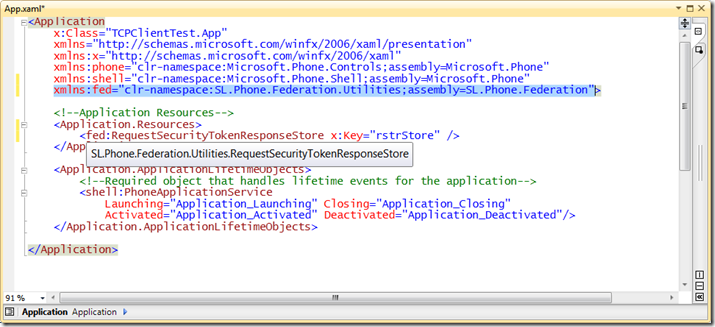
Next add a resource to the App.xaml that can be used anywhere in the application. We add a namespace to the header, then a resource for the RequestSecurityTokenResponseStore called “rstrStore”. This is where we’ll save the response from the ACS conversation.
Wire up the Main Page. Before we build the login page itself we need to add logic that will detect whether identity has been selected by the application and stored in the token “rstrStore”. Typically this is done when the application starts, but you could just as easily wire up an App Bar button or some other UI control to trigger it. The logic that gets added, in my case when the MainPage.xaml is loaded is this:
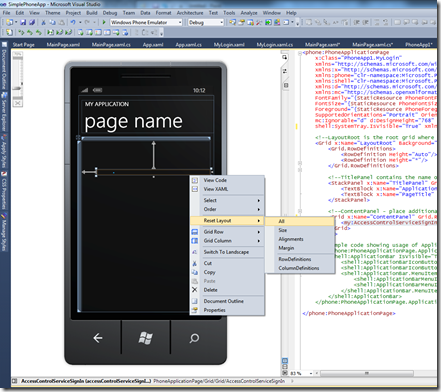
Add Login Page. Next we’ll add a login page, call it MyLogin.xaml, and add the sign in control. When we add the control it’s got margins and other extraneous information, right clicking on it and doing a Reset Layout > All clears these. The result is a page with the user control filling the content grid.
We set the control properties for Realm, ServiceNamespace, and the RequestSecurityTokenReponseStore, then add a Loaded event handler. In the code for the event we’ll add code to get the security token from the service which will invoke the control to prompt the user to select an identity provider. When it’s done we add code to navigate back to the calling page.
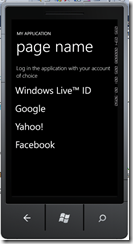
Run. If all you did was create a new project and add this code you’d have a mobile application that will get identity from a provider. If you press F5 to run it you’ll get a screen that looks like below. Selecting an identity provider and using your credentials will take you back to the main page of your application. Next post we’ll talk about how to use that identity to authorize the client to work with data.
