Add a provisioning package in an offline image using DISM
Hi Windows 10 folks!
Another article about provisioning package (and you will see more on my blog in the future) to help you understand better how to use provisioning package. In my previous article, I showed you how to create a provisioning package (PPKG) and how to apply it manually. When you apply manually a PPKG on a running desktop (or from OOBE screen by clicking 5 times the Windows button), you can only apply settings configured in “Runtime Settings” section of WICD.
Today, I’m going to focus on how to apply a PPKG with “Deployment assets” section’s settings.
As you can already read on our official documentation, those “Deployment assets” can only be applied to an offline Windows image. Using WICD, you have 2 choices:
Use WICD console to create a new “Windows image customization” including “Deployment assets” settings. Then you will be able to generate a bootable USB media or a WIM/FFU to deploy your customized image.
Use WICD console to create a new “Provisioning package” including “Deployment assets” settings. Then use the method I explain below to inject your PPKG in an Offline Windows image, which will become a customized image.
Create a provisioning package in WICD
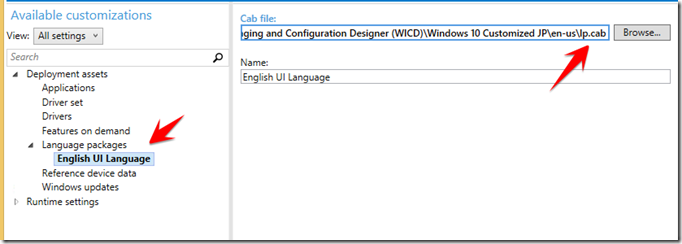
For the test purpose, I created a new PPKG containing only a language pack. Then I just exported the provisioning package (cf. my previous article to see how to export the PPKG)
My PPKG is named “Windows10CustomizedJP.ppkg” (in my example, my base OS is in Japanese so I want to add the English language to it).
Add a PPKG in an Offline Windows image using DISM
First thing you need to do is to copy locally the “install.wim” file from a Windows 10 ISO. And we will do all the operations from a computer with WICD installed on it.
We first create the mount point (“C:\Mount” ) to mount the WIM file by opening a command prompt with admin rights and run:
MKDIR C:\Mount
We can get information about that WIM file by running the following commands.
NOTE: you can skip the cd (change directory) is you’re already working on a Windows 10 machine. If not, you must change directory to use the latest DISM command provided in the Windows ADK 10, which contains parameters related to provisioning packages.
cd "C:\Program Files (x86)\Windows Kits\10\Assessment and Deployment Kit\Deployment Tools\amd64\DISM"
DISM /Get-WimInfo /WimFile:C:\Temp\install.wim
We mount the WIM file.
DISM /Mount-Wim /WimFile:C:\Temp\install.wim /MountDir:c:\mount /index:1
Once the WIM has been mounted, we can inject the provisioning package in it.
DISM /Image=C:\Mount /Add-ProvisioningPackage /PackagePath:C:\temp\Windows10CustomizedJP.ppkg
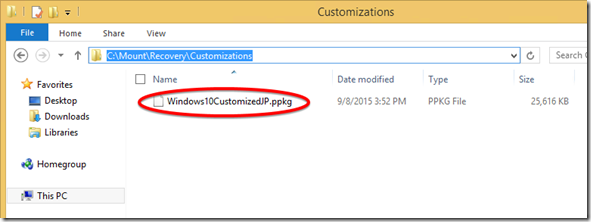
To verify that the PPKG has been correctly added, you can browse “C:\Mount\Recovery\Customizations” path in the mount point and you should find your PPKG. Deleting the PPKG here doesn’t remove applied assets and settings by DISM (see Important note below).
And finish by committing the previous change:
DISM /Unmount-Image /MountDir:C:\Mount /commit
You successfully added a PPK in a offline Windows image!! You can now import your “install.wim” file in ConfigMgr for instance to deploy it to any computers!
FYI: you can also inject a PPKG in an installed image while booting into WinPE. In that case, you won’t have to mount the image, you just need to run the following command:
DISM /Image=C:\ /Add-ProvisioningPackage /PackagePath:C:\temp\Windows10CustomizedJP.ppkg
Important note: Note that DISM doesn't support removing a provisioning package from an offline desktop image in Windows 10. The provisioning packages persisted in C:\Recovery\Customizations folder can be manually removed from an offline image. However, the customization assets and configuration settings already applied to the offline image will not be reverted when the provisioning packages are manually removed from the image.

