Starting Windows Phone Development: Lesson 3 of n – Navigation between Pages and passing Parameters
Before we move on, you need to have a basic understanding of event handling. I went through this in Lesson 1. Please finish it first before moving on.
You can always find the lesson source code attached at the end of the blog post.
As we explained earlier in Lesson 1, Windows Phone applications are made up of XAML pages. So the way you would think about it is the same way you think about a website. Every application will have some sort of a navigation logic. So for example if we have a news application, we would have a main page were the application lands when it launches displaying news categories. You then would need to select a category and then it will display the list of news inside that category and if you tap on a news item, it will display the news details. I guess by now you get the drift ![]()
We will talk in details later during the data binding lesson about templates and capturing selected list items, but for now we will need to navigate between the pages and pass parameters. So lets focus on that. You have my word, by the end of the next lesson where we talk about data binding you will be able to deliver enterprise level applications. Be cool ![]()
So, How does it look like?
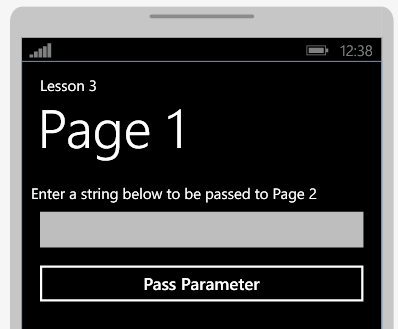
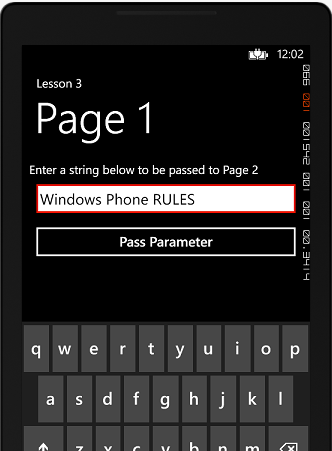
Lets have 2 pages, MainPage labeled as Page1 will accept a text string from you and pass it to Page 2 to be displayed.
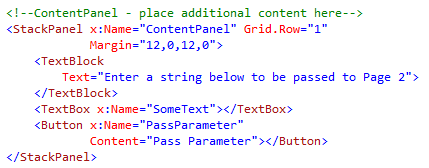
As you guessed, again it’s a StackPanel ![]() , TextBlock for our user message, a TextBox to capture the user string, and a button to navigate to Page 2 passing the string.
, TextBlock for our user message, a TextBox to capture the user string, and a button to navigate to Page 2 passing the string.
Now for Page 2:
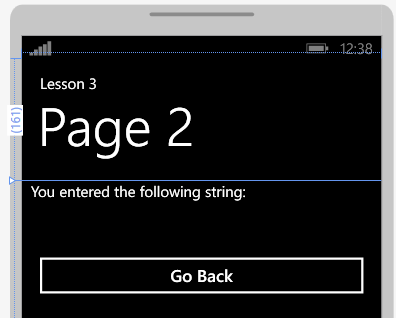
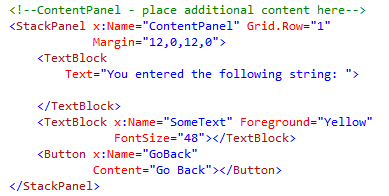
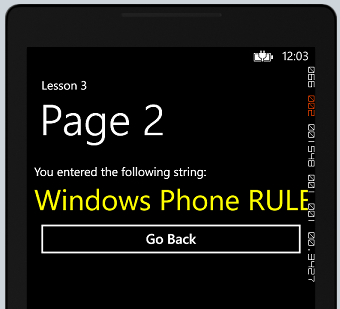
Good guess again, one StackPanel with 2 TextBlocks, one to display our message to the user and another to display the string entered in page 1. I added a button so you tap it will take you back Page 1.
Passing Query String Parameter(s)
On our first page, double click the PassParameter button to create an event handler. To navigate to a new page we use the NavigationService.Navigate function passing to it a URI. Check out below where I simply navigate to page 2:
and then if you want to add the Query String parameters we can do it add hoc like this:
specifying a parameter called UserString and pushing into it the user input from the TextBox. I am a web developer and when I see this you can see me smile ![]() It’s the same process exactly but instead you call Response.Redirect function instead.
It’s the same process exactly but instead you call Response.Redirect function instead.
For me I prefer to use the string.Format function instead because I feel easy around it in adding a good number of parameters and just using curly brackets with index numbers without worrying about string contacts.
So eventually my button code is simple, I just call for Page2.xaml passing the contents of the TextBox in a parameter called UserString.
Retrieving Query String Parameter(s)
Logic should be simple for Page2. on page load we need to capture the Query String parameter and display its content inside the TextBox. To access the parameters we access the NavigationContext.
and finally we set the last event handler to take us back on the Go Back button. For that we used the NavigationService.GoBack function.
Let’s test it out..!
Run the emulator using the F5 key and please be patient until Visual Studio manages to compile, build, and deploy our application. Input some text into the text box and then hit on Pass Parameter.
and here you go with Page 2 ![]()
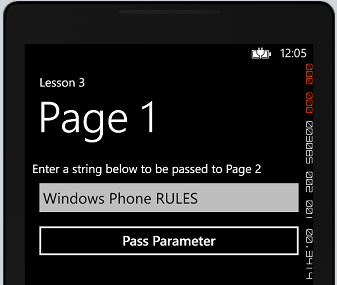
and when I tapped Go Back, it actually took me back again to the first page. Notice how it preserved the string you entered before navigating away from it. But this is a discussion for another lesson.
So to warp it up we use NavigationService.Navigate to navigate between pages. The navigate URI can accept parameters which can be shared with target pages. Finally, we use the NavigationContext to access the passed Query String parameters.
I hoped you enjoyed this lesson ![]()

