PHP ImageMagick on Azure Web Apps
This post is outdated. See alternatives:
- PHP 7 x64 ImageMagick 6.9.3.7 Site Extension. This can be installed through the Azure Portal or the SCM/Kudu > SiteExtensions area.
- https://github.com/snobu/php-imagick-webapps for PHP 7.0 steps.
While this post is outdated, the steps to enable this SiteExtension is still helpful.
Not all versions of the Windows Application are compatible with the PHP Library Versions. Many thanks to Adrian Calinescu for providing version information. He has made a GitHub repo which you can download and install located here: https://github.com/snobu/php-imagick-webapps
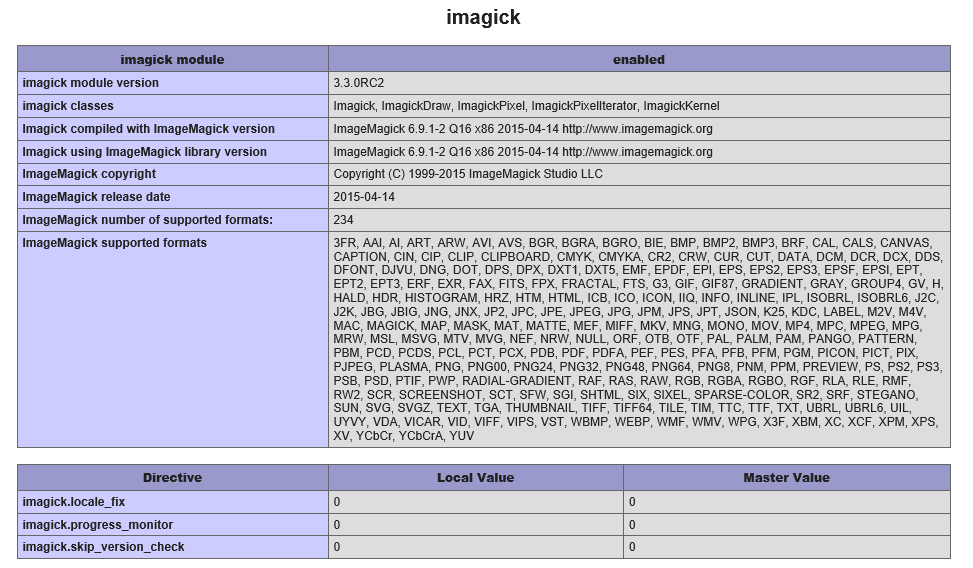
These steps are for PHP v5.6, ImageMagick PHP Library 3.3.0RC2 and ImageMagick Windows Application 6.9.2.7.
| Resource | Link | |
| 1 | ImageMagick 3.3.0RC25.6 Non Thread Safe (NTS) x86 | https://windows.php.net/downloads/pecl/releases/imagick/3.3.0rc2/php_imagick-3.3.0rc2-5.6-nts-vc11-x86.zip |
| 2 | ImageMagick Windows Application 6.9.2.7 | https://www.imagemagick.org/download/binaries/ImageMagick-6.9.2-7-Q16-x86-dll.exe |
Follow these instructions to install ImageMagick on Azure Web Apps.
Download/Install
1. Download the resources above.
2. Install ImageMagick for Windows on your local computer. Uncompress ImageMagick 3.3.0rc2 NTS x86.
DLL’s
3. Create directories on your web server using FTP or SCM (websitename.SCM.azurewebsites.net)
a. Create d:\home\site\coders6.9.2 (will contain coder DLLs from the Windows Application)
b. Create d:\home\site\imagick3.3.0rc2 (will contain DLLs from PHP Imagick Library)
4. Copy DLLs
a. Copy CORE DLLs from C:\Program Files (x86)\ImageMagick-6.9.2-Q16 to your Azure Web App location d:\home\site\coders6.9.2\
b. Copy DLLs from C:\Program Files (x86)\ImageMagick-6.9.2-Q16\modules\coders to d:\home\site\coders6.9.2\
c. Copy ALL FILES from php_imagick-3.3.0rc2-5.6-nts-vc11-x86.zip to d:\home\site\imagick3.3.0rc2\
Environment Configuration
5. Copy d:\local\Config\PHP-5.6.10\php.ini to d:\home\site\php56.ini
Add the following attributes:
extension=d:\home\site\imagick3.3.0rc2\php_imagick.dll
6. Within d:\home\site, create applicationHost.xdt with the contents below:
| <?xml version="1.0"?><configuration xmlns:xdt="https://schemas.microsoft.com/XML-Document-Transform"><system.webServer><fastCgi><application fullPath="D:\Program Files (x86)\PHP\v5.6\php-cgi.exe" xdt:Locator="Match(fullPath)"><environmentVariables><environmentVariable name="PHPRC" xdt:Locator="Match(name)" value="d:\home\site\php56.ini" xdt:Transform="SetAttributes(value)" /></environmentVariables></application></fastCgi><runtime xdt:Transform="InsertIfMissing"><environmentVariables xdt:Transform="InsertIfMissing"><add name="PATH" value="%PATH%d:\home\site\imagick3.3.0rc2\;" xdt:Locator="Match(name)" xdt:Transform="InsertIfMissing" /><add name="MAGICK_HOME" value="d:\home\site\imagick3.3.0rc2\" xdt:Locator="Match(name)" xdt:Transform="InsertIfMissing" /><add name="MAGICK_CODER_MODULE_PATH" value="d:\home\site\coders6.9.2\" xdt:Locator="Match(name)" xdt:Transform="InsertIfMissing" /></environmentVariables></runtime></system.webServer></configuration> |
Verify Installation
7. Restart the server and check phpinfo();
Test ImageMagick
8. Here’s a piece a code snippet which you can use for testing:
|
