Guidance for community vm images not migrating from VM Depot to Azure Marketplace
Since we announced the effort to migrate all Bitnami images to Azure Marketplace a few weeks ago we’ve received fantastic input from customers and the community as we renew efforts to provide trusted technology stacks from the open source ecosystem in Azure Marketplace.
However, we also recognize some publishers might want to continue working with images available in VM Depot today, regardless of whether they are on boarded into Marketplace. For those cases, we have a 3 step solution as outlined below.
Step 1: Download your image from VM Depot account
1. Login to your VM Depot publisher’s account.
2. Click on ‘My Account’ icon (Upper Right Corner)
3. Click on ‘Publish Status’ tab.
This page will display successful or failed publish status of images for all the locations selected at the time of publishing
4. To download the VHD of image from a particular location, click on the name of location. Upon clicking, the VHD starts downloading and is saved on your local machine. Example-To download VHD from ‘East US’ for image ‘Trial Image One’, click on ‘East US’.

If Image is deleted from VM Depot then on click of location you will get the following error.

Step 2: Preparing a new storage location on Azure for your VHD’s
Option 1:
Login to the Azure portal using your subscription credentials and create a new storage account by going to +New -> Data+Storage -> Storage Account and entering the required parameters.
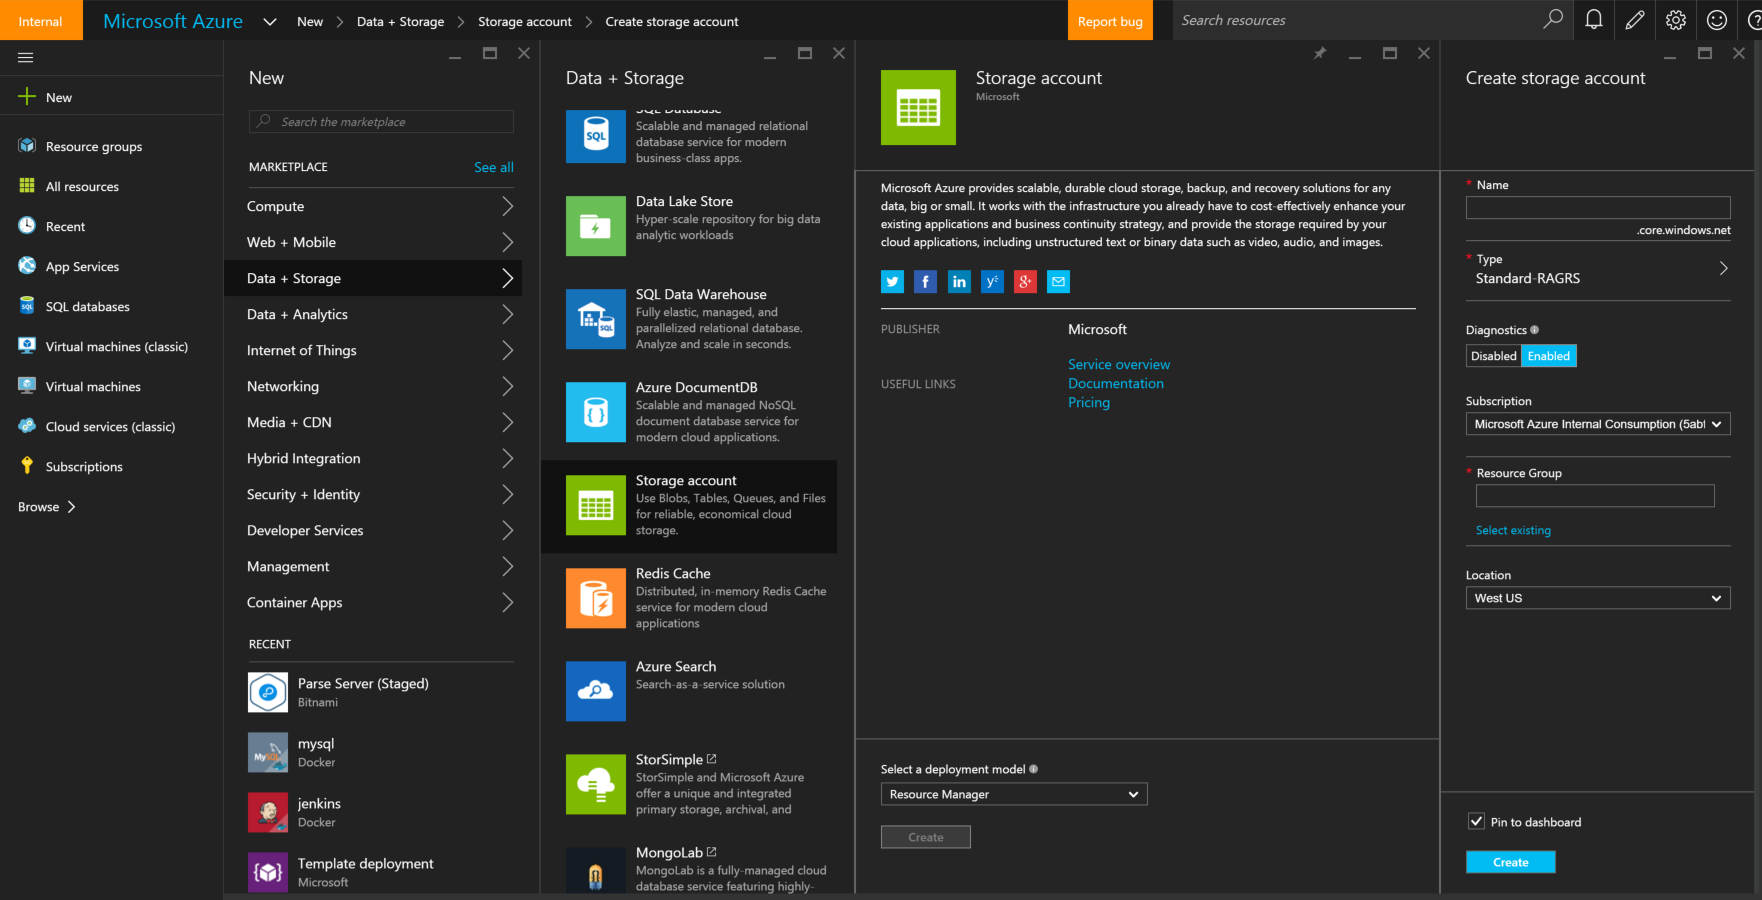
After you create the storage account, copy the URL and primary key and click TBD to create a new blob container. Then use a tool such as Storage Explorer to upload/copy the VHD.
Option 2:
Follow the steps below with the Azure CLI to create a storage account, set primary key, create a container and upload the blob:
$ azure config mode arm
$ azure storage account create <storage-account-name> --resource-group <resource-group-name> --location <location> --type <storage-type>
$ azure storage account keys list <storage-account-name>
$ export KEY={Primary Key from previous step}
$ echo $KEY
$ azure storage container create -a <storage-account-name> -k $KEY <container-name>
$ azure storage blob upload -t page -a <storage-account-name> -k $KEY --container <container-name> <vhd-name.vhd>
vhd-name.vhd –> This is the VHD you downloaded from VM Depot to your local machine in step 1
Once you have gone through the above step, you will have the URI to the vhd that you just uploaded in the following format:
https:// <storage-account-name>.blob.core.windows.net/<container-name> /<vhd-name.vhd>
Save this VHD URL as it will be the URL you can use in the future to continue deploying the particular image you’ve just copied over from VM Depot.
As a reminder, before copying this image over to your subscription, you should thoroughly review the licensing terms of the original image in VM Depot. As a community repository, the images are not provided by Microsoft and no guarantees are provided, explicit or implicit.
Step 3: Using an Azure Resource Manager (ARM) template to deploy to Azure
Once you have a VHD URL in your own subscription, it’s very easy to provision this image using Azure Resource Manager.
In the Azure Quick Start Galley navigate to the “create VM from user image” template, then click on the ‘Deploy to Azure’ button. You will be directed to the Azure Portal where you might need to login if you haven’t already.
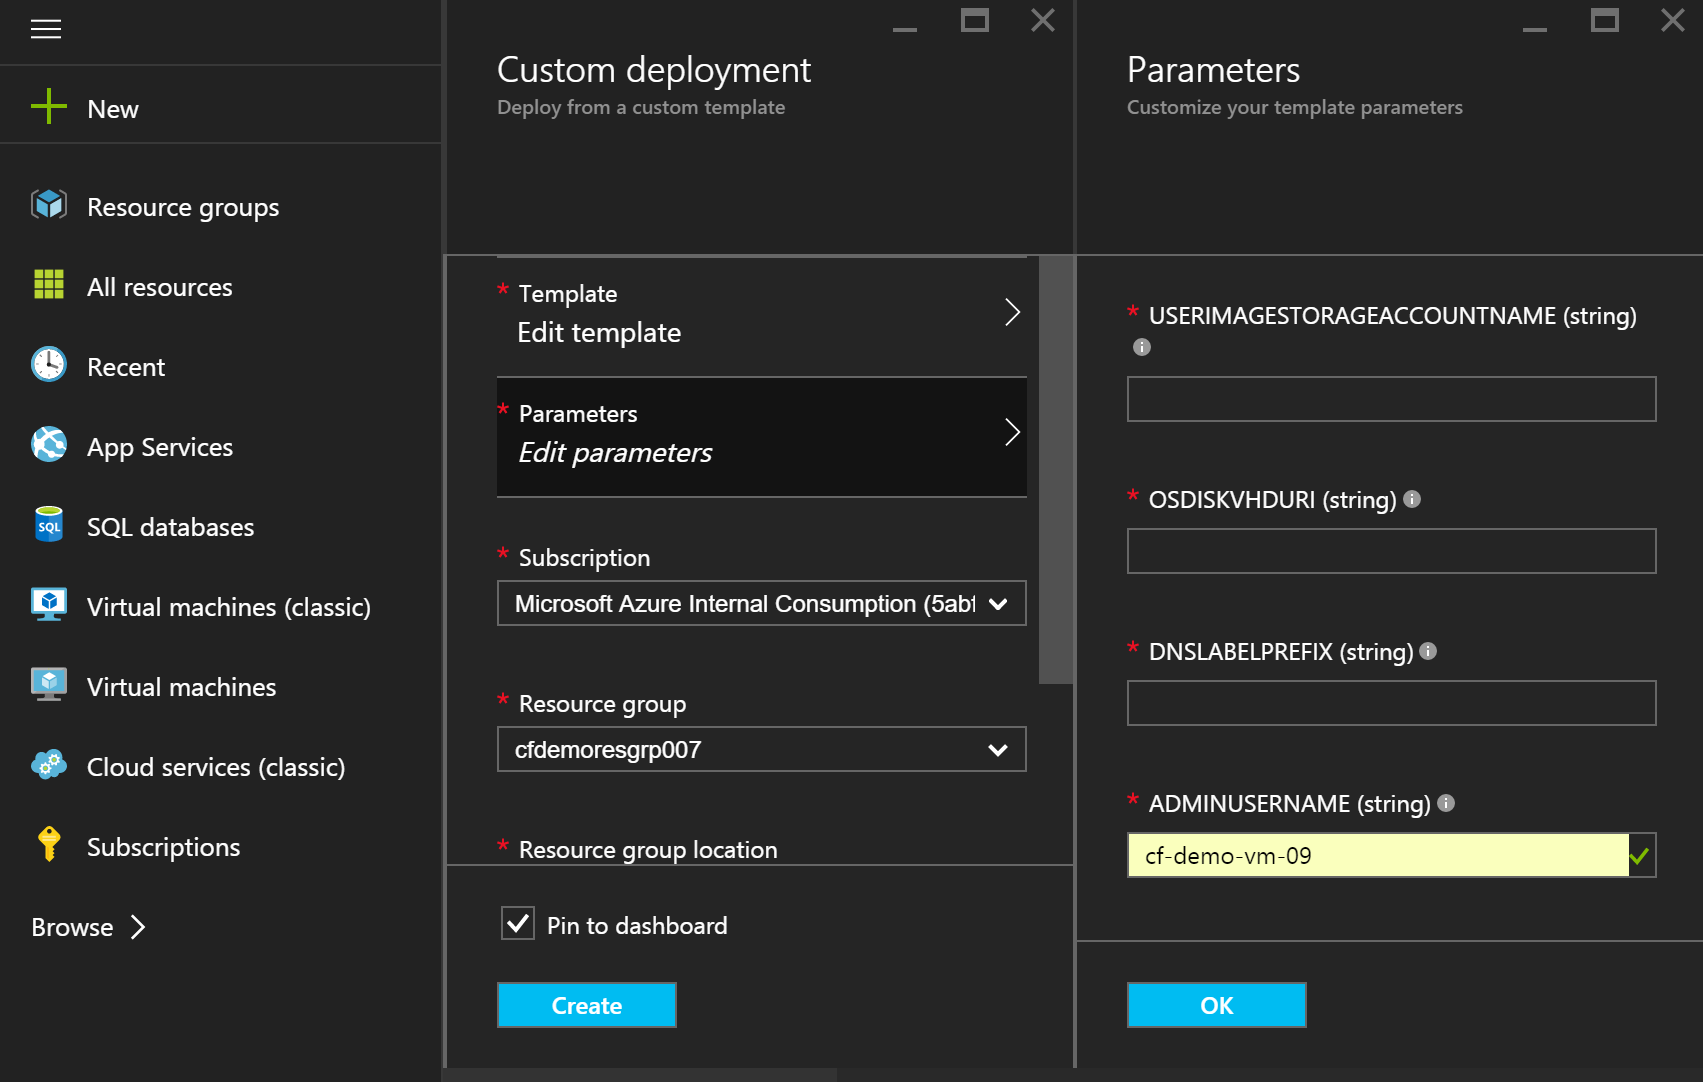
Once in the portal, you’ll see a screen similar to the below where you will need to fill out parameters such as resource group, location and, of course, agree to the legal terms. Click on the ‘create’ button to create the VM.
Once the VM has started, you can SSH into your VM using the public IP address assigned by the template and start working.
With this transition, we renew our commitment to a first-class customer experience through the Azure Marketplace for open-source solutions.