Deploying a NixOS VM on Microsoft Azure
Today we are excited to announce the ability to provision a NixOS VM on Azure. NixOS is a Linux distribution that uses a declarative approach to configure your system. You can read more about NixOS on https://nixos.org/ .
We will use the Azure CLI to provision a NixOS VM.
You can install the latest Azure CLI here
To get started follow the steps outlined in this github repository.
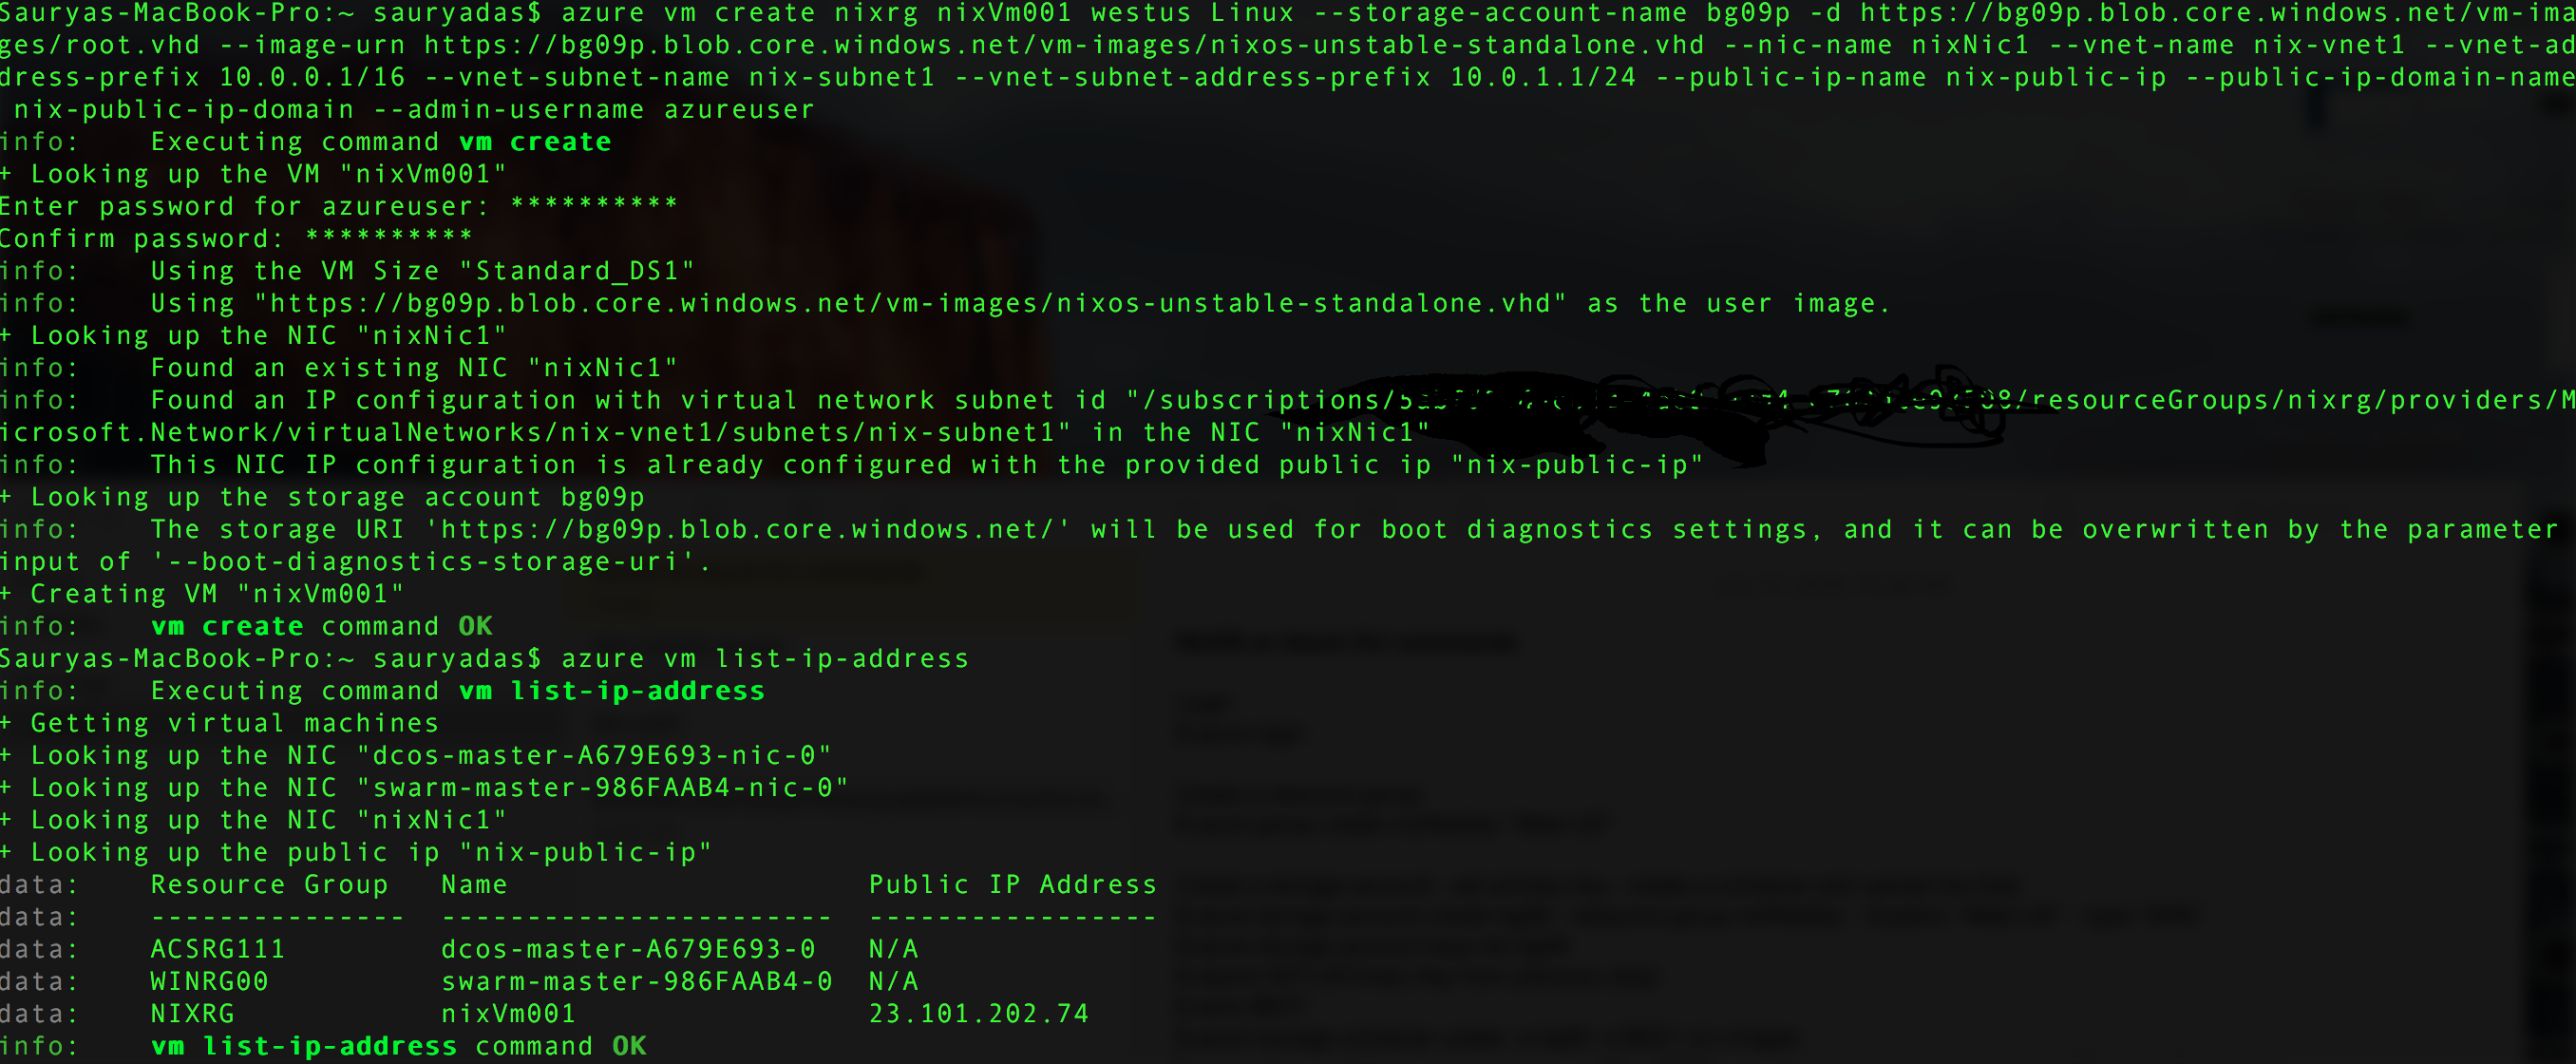
The first step is to create a storage account in Azure and upload the NixOS vhd which can be downloaded here. The VHD is about 2GB in size and if you are on a slow network as I was when I was uploading it at home, it could take up to 10 mins for the upload to complete.
 The URI of the uploaded vhd is of the format https://<storage -account-name>.blob.core.windows.net/<storage-container-name>/<vhd-file-name>.vhd which on my case is https://bg09p.blob.core.windows.net/vm-images/nixos-unstable-standalone.vhd
Once the upload is complete, you can use the $azure vm create command to provision a VM.
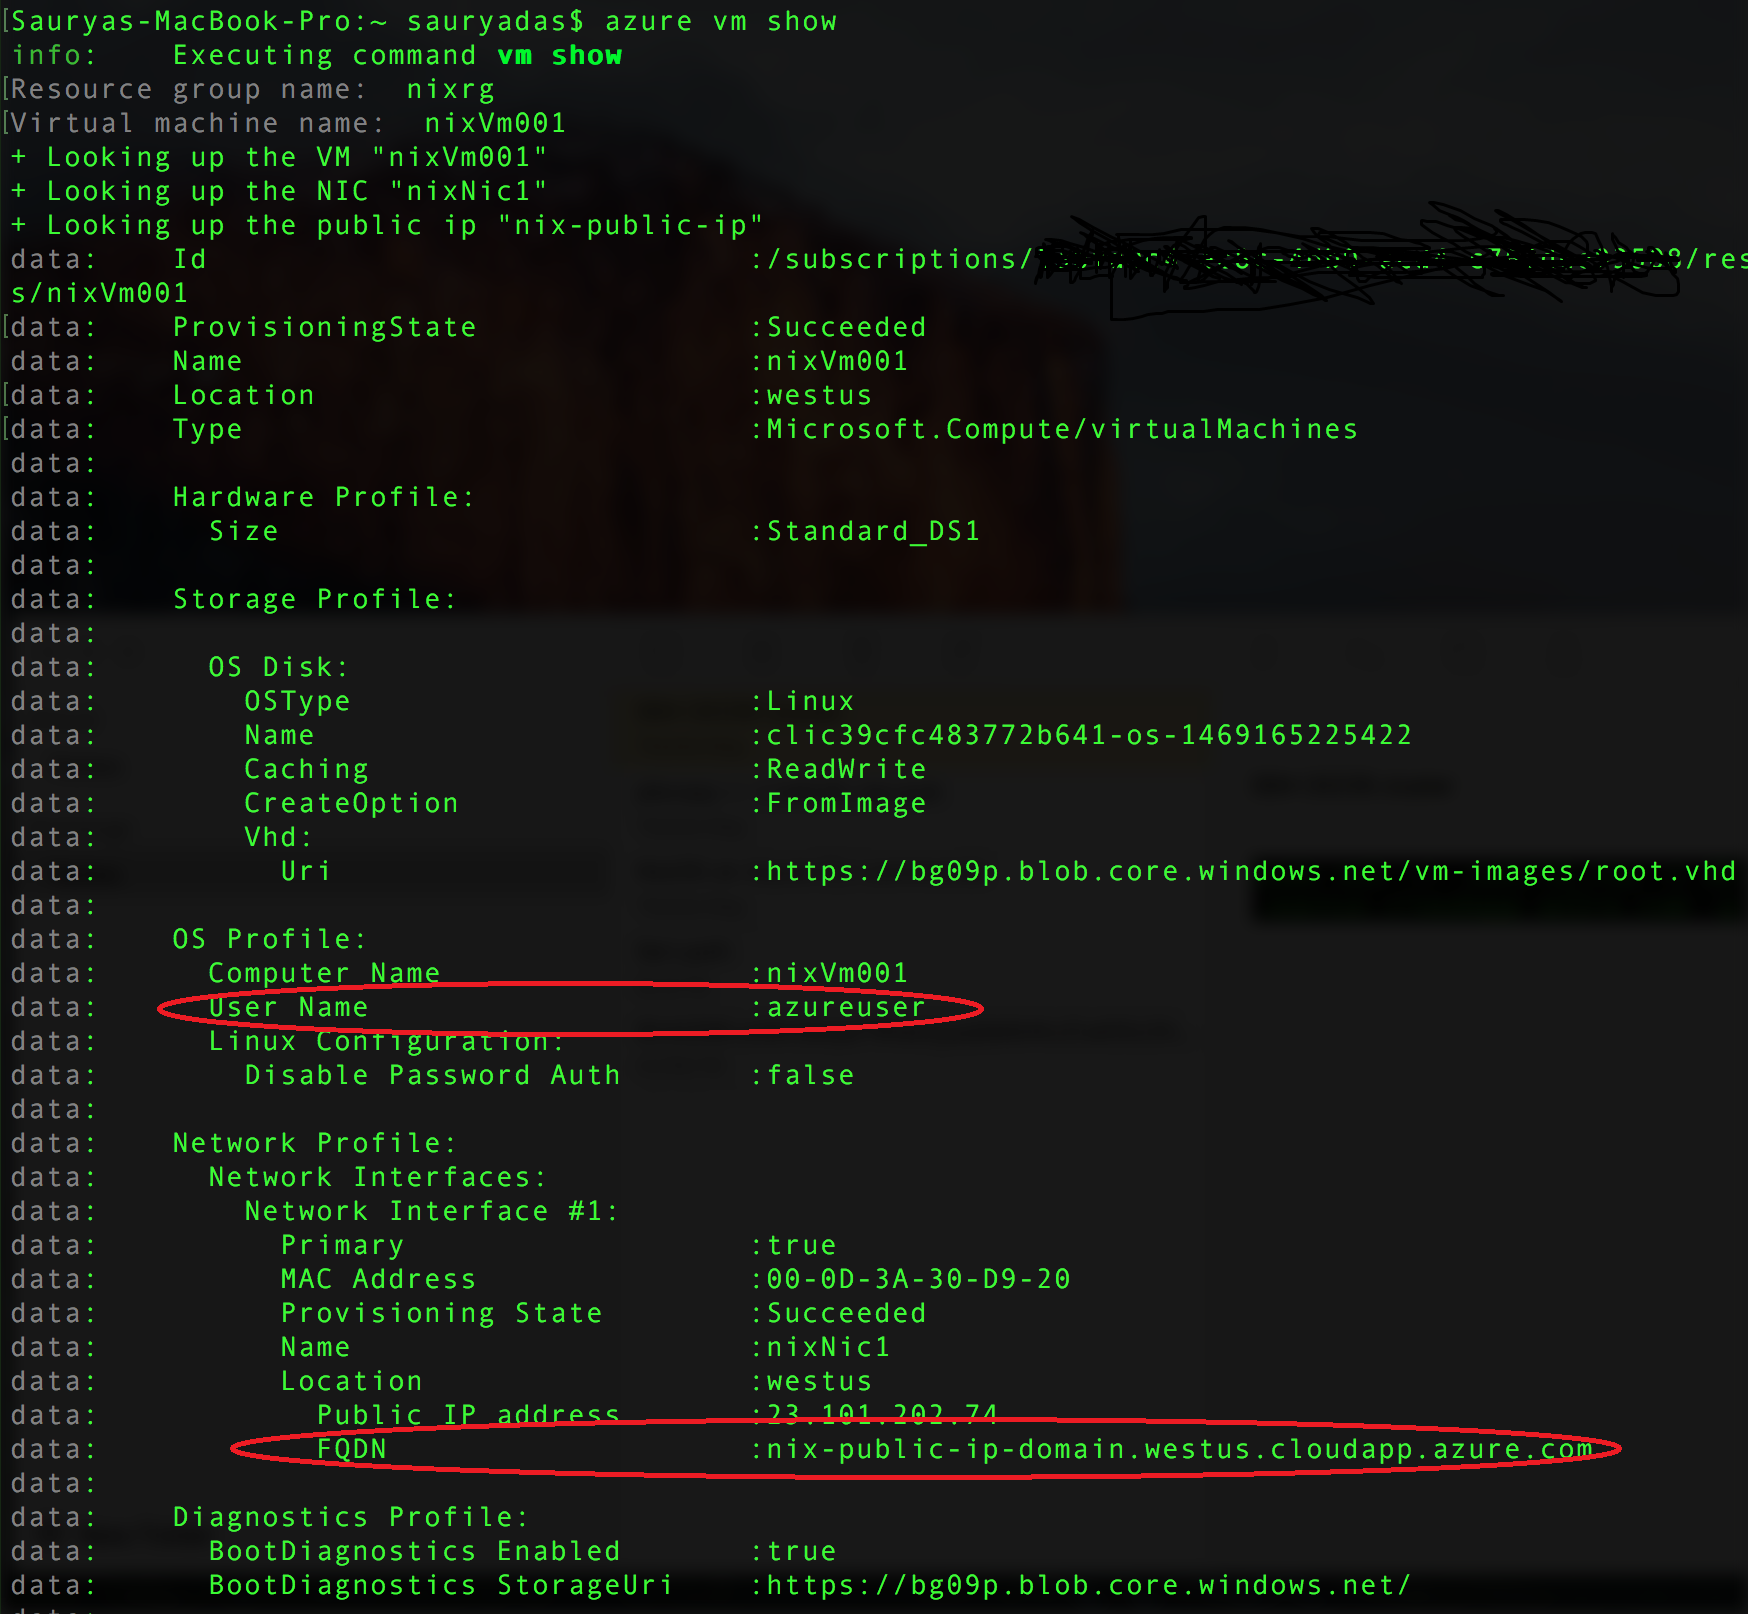
 Once the VM is created, you can view FQDN of the created VM by using the $azure vm show command as shown below.
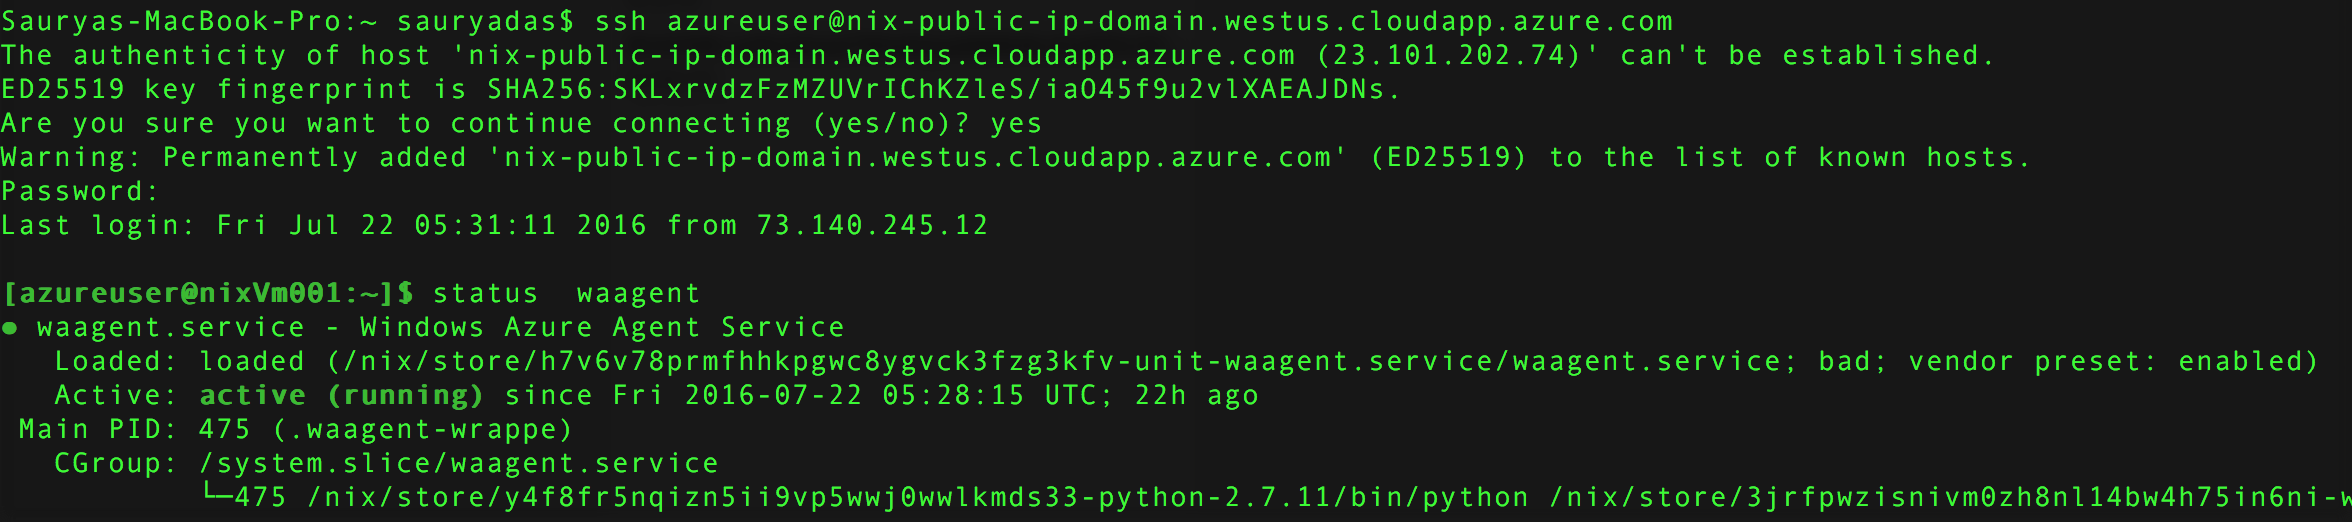
You can the SSH into the machine using the command $ ssh username@FQDN as shown below. Once you are logged in, you can view the status of the agent by typing in $ status waagent as shown below.
This is our first step towards enabling NixOS on Azure and we hope that you will find it useful. Given that this is still in beta, please file any issues here