Assisted Login Using the OAuth Deviceprofile Flow
Have you ever tried to deal with logging in on an input-constrained device, and thought it wasn't as easy as you wanted it to be? (Hence the term "constrained"...) There could be any number of devices where it is either a hassle to enter long passwords, or no option at all for that matter. This could be an IoT device, a Raspberry Pi (with no keyboard attached), or a HoloLens. Eh, isn't the HoloLens able to log in to an app? Well, I just got my clammy hands on a HoloLens, (only on loan, but trying to enjoy it while I can), and while it definitely has impressive inputs touch typing isn't exactly the defining feature. (There is an on-screen keyboard with all the regular pros and cons.)
Mostly I'm just trying to play around with it to see what fun can be had, but of course authentication is something you potentially run into early on and as such it should be on top of anyone's list :) (Actually you're forced to join the HoloLens to Azure AD or your Microsoft account during setup. Which means you can build on that, but I often run into cases where the account I sign into Windows with is not the same I need in a web app.)
Don't worry; there's nothing here that requires a HoloLens to follow along, it just happened to be the more entertaining test vehicle. What we will implement is something that enables us to use a second device to login to the primary device - or assisted login if you will. Let me see.. There's an OAuth flow for that: https://tools.ietf.org/html/draft-ietf-oauth-device-flow-07
Actually, if you have used the Azure CLI you have probably experienced this already; the CLI serves you a code, and off you go the browser before returning to the CLI.
The device profile flow isn't finalized yet, but it has been supported in a preview state in Azure AD for quite a time actually (so if the spec doesn't change you're good). Microsoft has a sample for a console app so we can work from that if we like:
https://azure.microsoft.com/en-us/resources/samples/active-directory-dotnet-deviceprofile/
The sample does not nicely open and compile in my Visual Studio 2017 due to it using the deprecated .xproj format. You can fix things up, but it's probably just as easy to create a new console app from scratch and copy paste the relevant code. I decided to go a slightly different route and create a blank MVC-based web app instead. (Which arguably sounds counterintuitive, but I think it's still a viable use case for some scenarios.)
Before diving into the code let's try to understand the flow we're trying to implement. (Of course you can read the RFC if you prefer the verbose variant.) The short version is that the client will acquire a device code that will be used as an identifier that will be used when doing the actual authentication in a secondary context. While the user is busy typing the url and the username/password combo the client will enter a loop where it polls Azure AD to see if authentication has been completed. If authentication goes through a token will be issued to the requesting client (not the authenticating client). I think this is something better explained with a diagram:
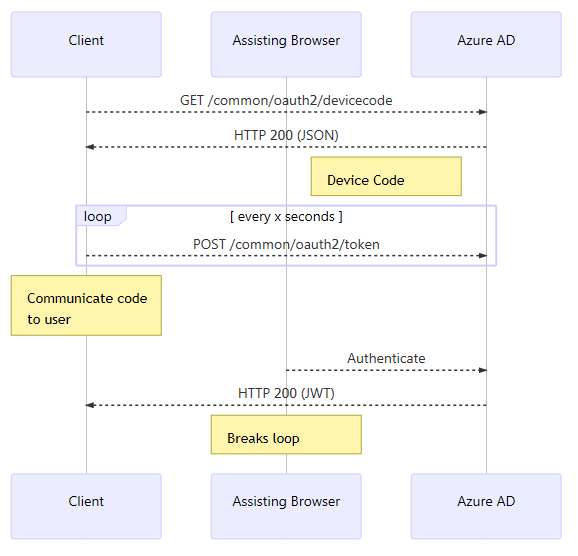
Seems simple enough right? Let's see if we can make this work. I will do an implementation without Microsoft's Azure AD libraries first - just the plain HTTP calls. My code is generic so the only thing you need to insert is a client id which you can get by creating an app registration in AAD. Make sure that you create a native app - this flow will not work for a "web app". (As I have stated before the naming in the Azure portal reflects the most common use cases, not these slightly off ones.)
DeviceCode Flow implementation using HTTP Calls
string ClientId = "guid-from-portal";
string resource = "00000002-0000-0000-c000-000000000000";

public class DCR
{
    public string device_code { get; set; }
    public string message { get; set; }
    public string user_code { get; set; }
    public string interval { get; set; }
    public string expires_in { get; set; }
    public string verification_url { get; set; }
}

public class GenericToken
{
    public string token_type { get; set; }
    public string scope { get; set; }
    public string resource { get; set; }
    public string access_token { get; set; }
    public string refresh_token { get; set; }
    public string id_token { get; set; }
    public string expires_in { get; set; }
}

[HttpGet]
public IActionResult LoginHTTP()
{
    HttpClient client = new HttpClient();
    client.DefaultRequestHeaders.Add("Accept", "application/json");
    string requestUrl = $"https://login.microsoftonline.com/common/oauth2/devicecode?resource={resource}&client_id={ClientId}";

    HttpRequestMessage request = new HttpRequestMessage(HttpMethod.Get, requestUrl);
    try
    {
        HttpResponseMessage response = client.SendAsync(request).Result;
        string responseString = response.Content.ReadAsStringAsync().Result;
        DCR dcr = JsonConvert.DeserializeObject<DCR>(responseString);
        return View(dcr);
    }
    catch (Exception x)
    {
        var msg = x.Message;
    }

    return View();
}

[HttpPost]
public IActionResult LoginHTTP(DCR result)
{
    HttpClient client = new HttpClient();
    client.DefaultRequestHeaders.Add("Accept", "application/json");
    string requestUrl = $"https://login.microsoftonline.com/common/oauth2/token";
    string request_content = $"resource={resource}&client_id={ClientId}&grant_type=device_code&code={result.device_code}";

    var pending = true;
    do
    {
        HttpRequestMessage request = new HttpRequestMessage(HttpMethod.Post, requestUrl);
        try
        {
            request.Content = new StringContent(request_content, Encoding.UTF8, "application/x-www-form-urlencoded");
        }
        catch (Exception x)
        {
            var msg = x.Message;
        }
        HttpResponseMessage response = client.SendAsync(request).Result;
        string responseString = response.Content.ReadAsStringAsync().Result;

        if (response.StatusCode == System.Net.HttpStatusCode.OK)
        {
            GenericToken token = JsonConvert.DeserializeObject<GenericToken>(responseString);
            pending = false;
            ViewBag.jwt = token.id_token;
            return View("MyToken", token);
        }
        Thread.Sleep(5000);
    } while (pending);
    return View();
}
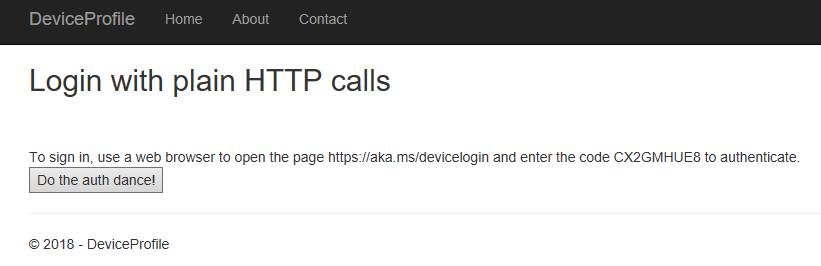
Basically open the view to get a code, do the auth, and press "Submit" afterwards. This will take you to a view parsing out the contents of the token.
We need to see this I believe.
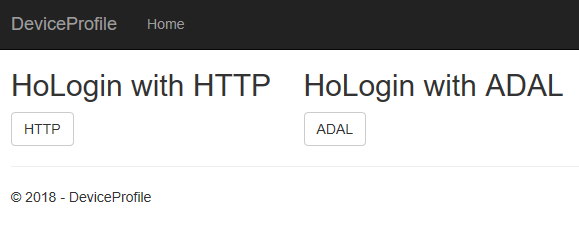
Choose auth method (second implementation below):
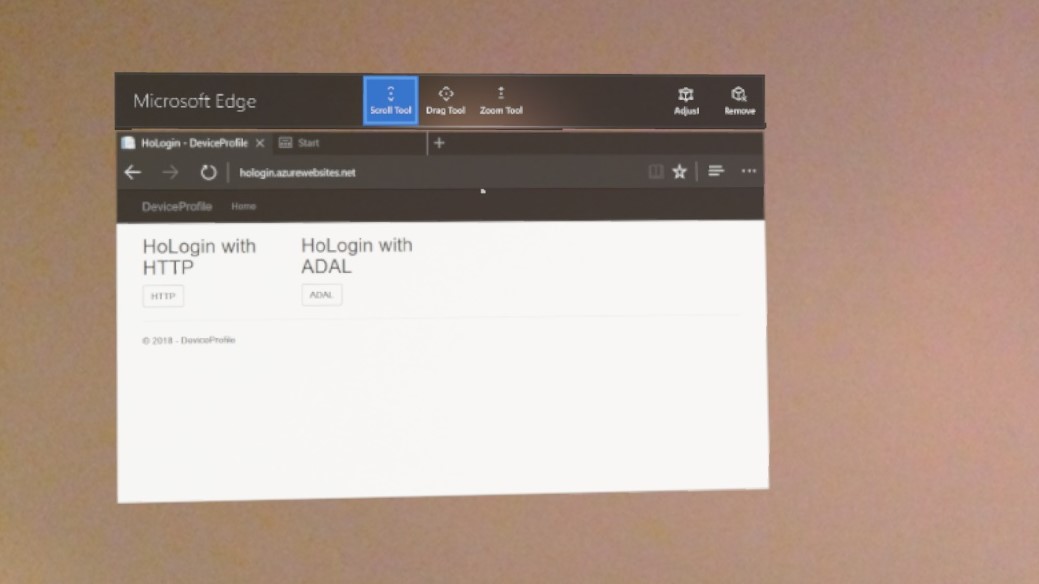
You will be served the code immediately:
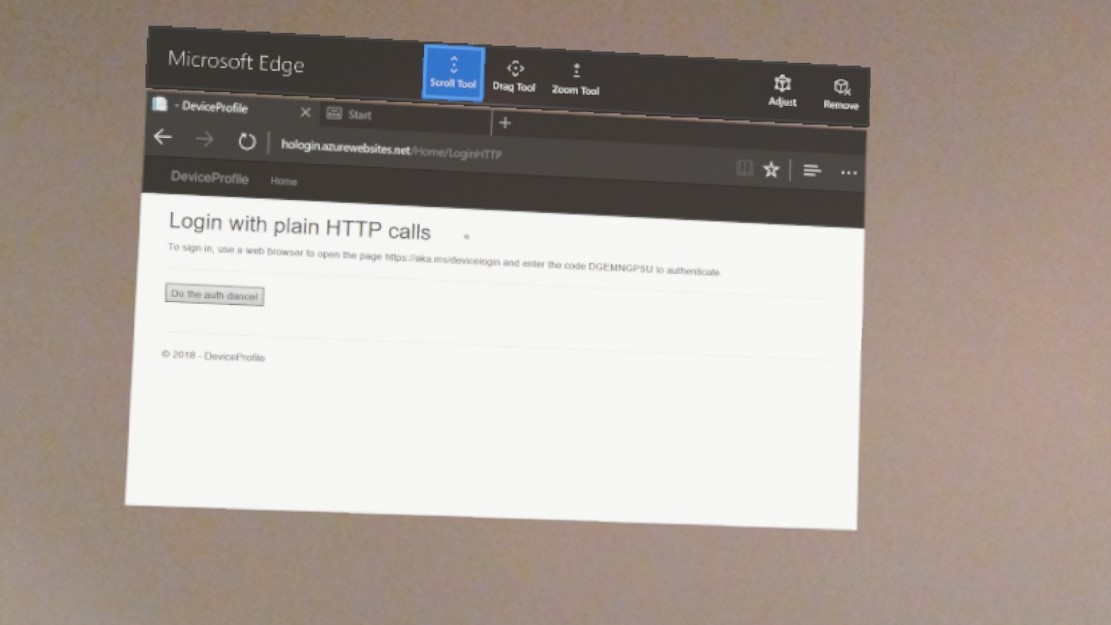
Slightly blurry, I know. I swear it looks better through the glasses, it's just the remote capture which is a bit low-fi. Actually, let's repeat those screenshots capped from a desktop computer :)
On your assisted device/second browser you need to go to https://aka.ms/devicelogin and type the code:
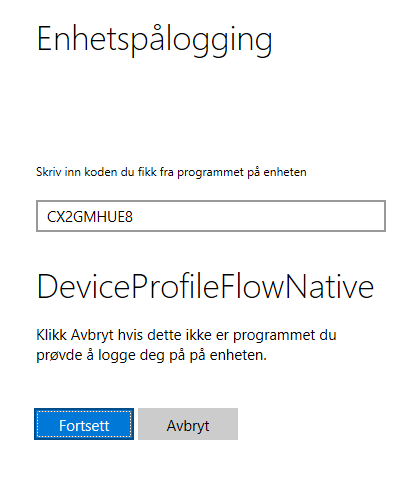
After hitting the button (which you can just as well hit before typing in the code) you will see your token listed out:
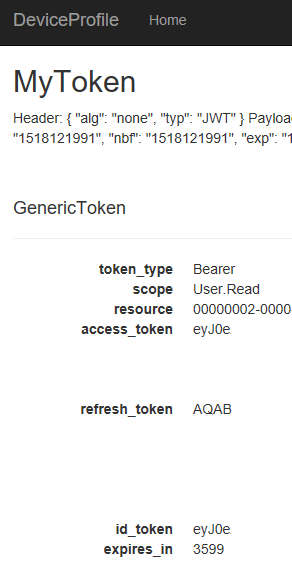
Fair enough right?
Well, we can do an ADAL-based implementation using the same approach as in the Microsoft-supplied sample. This approach doesn't work that nicely with MVC out of the box since the code needs to be communicated to the user while not aborting the request itself. So, let's abuse async to achieve this :)
DeviceCode Flow implementation using ADAL
[HttpGet]
public async Task<IActionResult> LoginADAL()
{
    AuthenticationContext ctx = null;
    ctx = new AuthenticationContext("https://login.microsoftonline.com/common");

    DeviceCodeResult codeResult = ctx.AcquireDeviceCodeAsync(resource, ClientId).Result;
    DCR dcr = new DCR { message = codeResult.Message,
                        device_code = codeResult.DeviceCode,
                        expires_in = codeResult.ExpiresOn.ToString(),
                        interval = codeResult.Interval.ToString(),
                        user_code = codeResult.UserCode,
                        verification_url = codeResult.VerificationUrl };

    //Will run in the background after view has been rendered
    var foo = GetADALToken(codeResult);

    return View(dcr);
}

public async Task<string> GetADALToken(DeviceCodeResult codeResult)
{
    AuthenticationContext ctx = null;
    AuthenticationResult result = null;
    ctx = new AuthenticationContext("https://login.microsoftonline.com/common");
    try
    {
        result = await ctx.AcquireTokenByDeviceCodeAsync(codeResult);
    }
    catch (Exception exc)
    {
        var error = exc.Message;
    }

    return result.IdToken;
}
I don't parse out the token here, but if you set breakpoints you will notice that it will break in the helper function after the view has been loaded.
Due to the way MVC passes info back and forth between views and controllers I´m not actually displaying the token or in other ways showing that things went through outside debug mode. I would recommend plugging in SignalR or something like that to make this slightly more dynamic.
Where you go next is dependent on what you want to do. Since you have the token you can easily call out to APIs and what not with that directly. The "normal" approach in a web app is to place it in a cookie, and use that for controllers with the [Authorize] attribute. ADAL will attempt to store the token in a token cache which you can also use in other methods. This crosses over into a different territory (authorization) with setting up an AuthN/AuthZ pipeline in startup.cs which isn't the point in this article. I have briefly taken a look at the pipeline in .NET Core 2 before:
https://blogs.msdn.microsoft.com/azuredev/2017/10/17/working-with-identity-in-net-core-2-0/
It is not a complete treatment, so I guess this means we still have thing to write up at a later point in time; in the meantime I will have to try some non-auth stuff on the HoloLens :)