Securing Your Azure Logic Apps Part 1: Secure access to the trigger
I think Azure Logic Apps is a great way to implement scalable integrations in the Cloud. It comes with over 100 connectors for integrating applications and data in the cloud and on-premises. You can now choose to use the Logic App designer or create your apps from Visual Studio, call Azure Functions from inside of your Logic App, easily scale up and down, and all this for a fair price. I truly believe this is going to be the future of Enterprise Integration and when I get the chance, I’m using them in all my client projects.
But how can you make these applications secure? There are a couple of ways you can achieve this. You can:
- Secure access to the trigger (this post)
- Secure your Logic App using API Management – Access Restriction Policies
- Secure your Logic App with Azure Active Directory using Azure API Management
- Secure your Logic App using API Management - Validate JWT Access Restriction Policy
And in this first post, I will show you how to secure the access to the trigger of the Logic App.
Setting up the sample solution
For this, I am going to create a Logic App Solution in Visual Studio. For more information about the prerequisites and how to create such a solution, follow the steps described here. You have to install the Azure Logic Apps Tools for Visual Studio 2017 as well.
This app does nothing more than respond to an HTTP request and then sending an email to my own email address using my Outlook.com account. If you don’t have a Outlook.com or Hotmail account, you can use Gmail as well.
So, create a new project in Visual Studio and in the Solution Explorer, right click the LogicApp.json file and select Open with Logic App Designer. 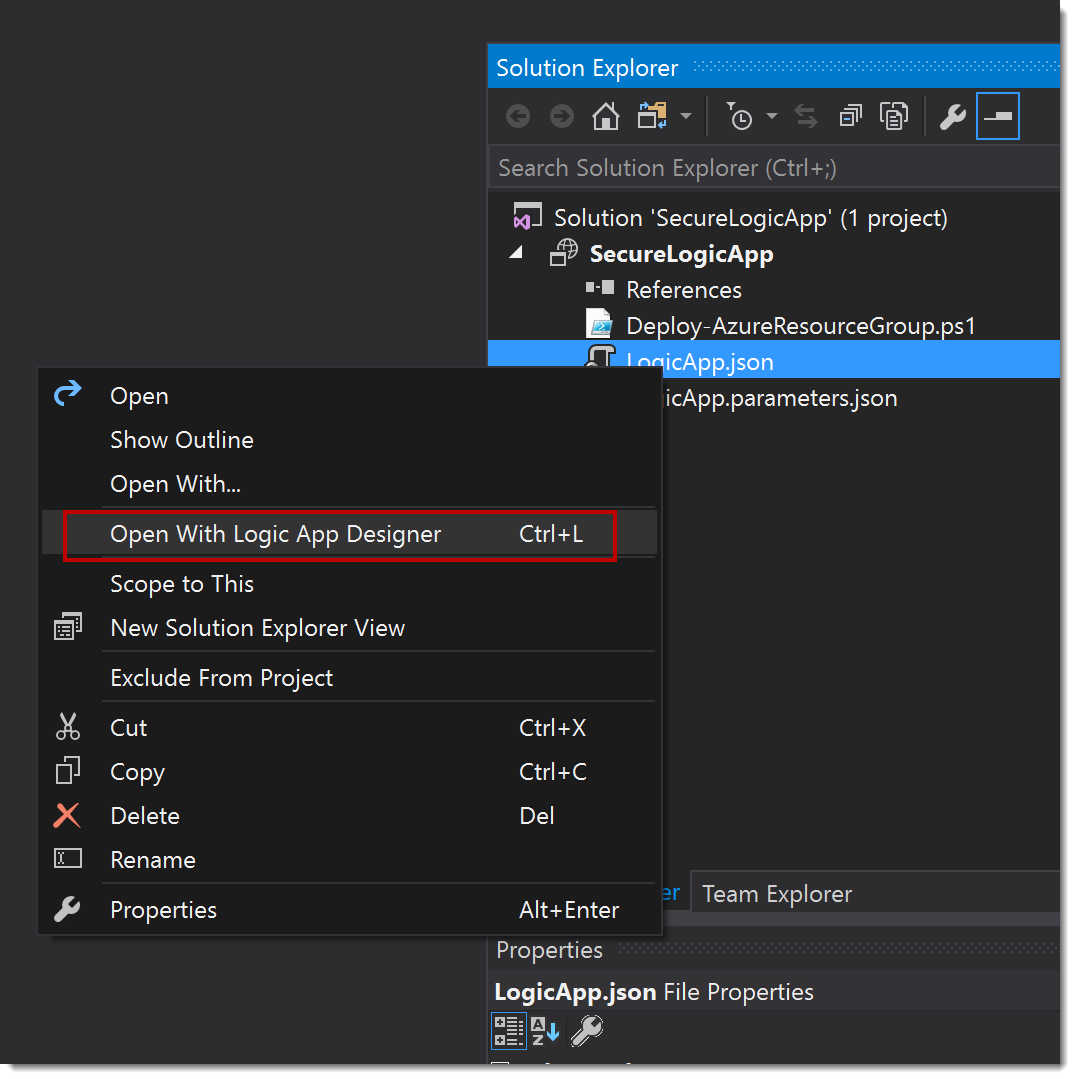
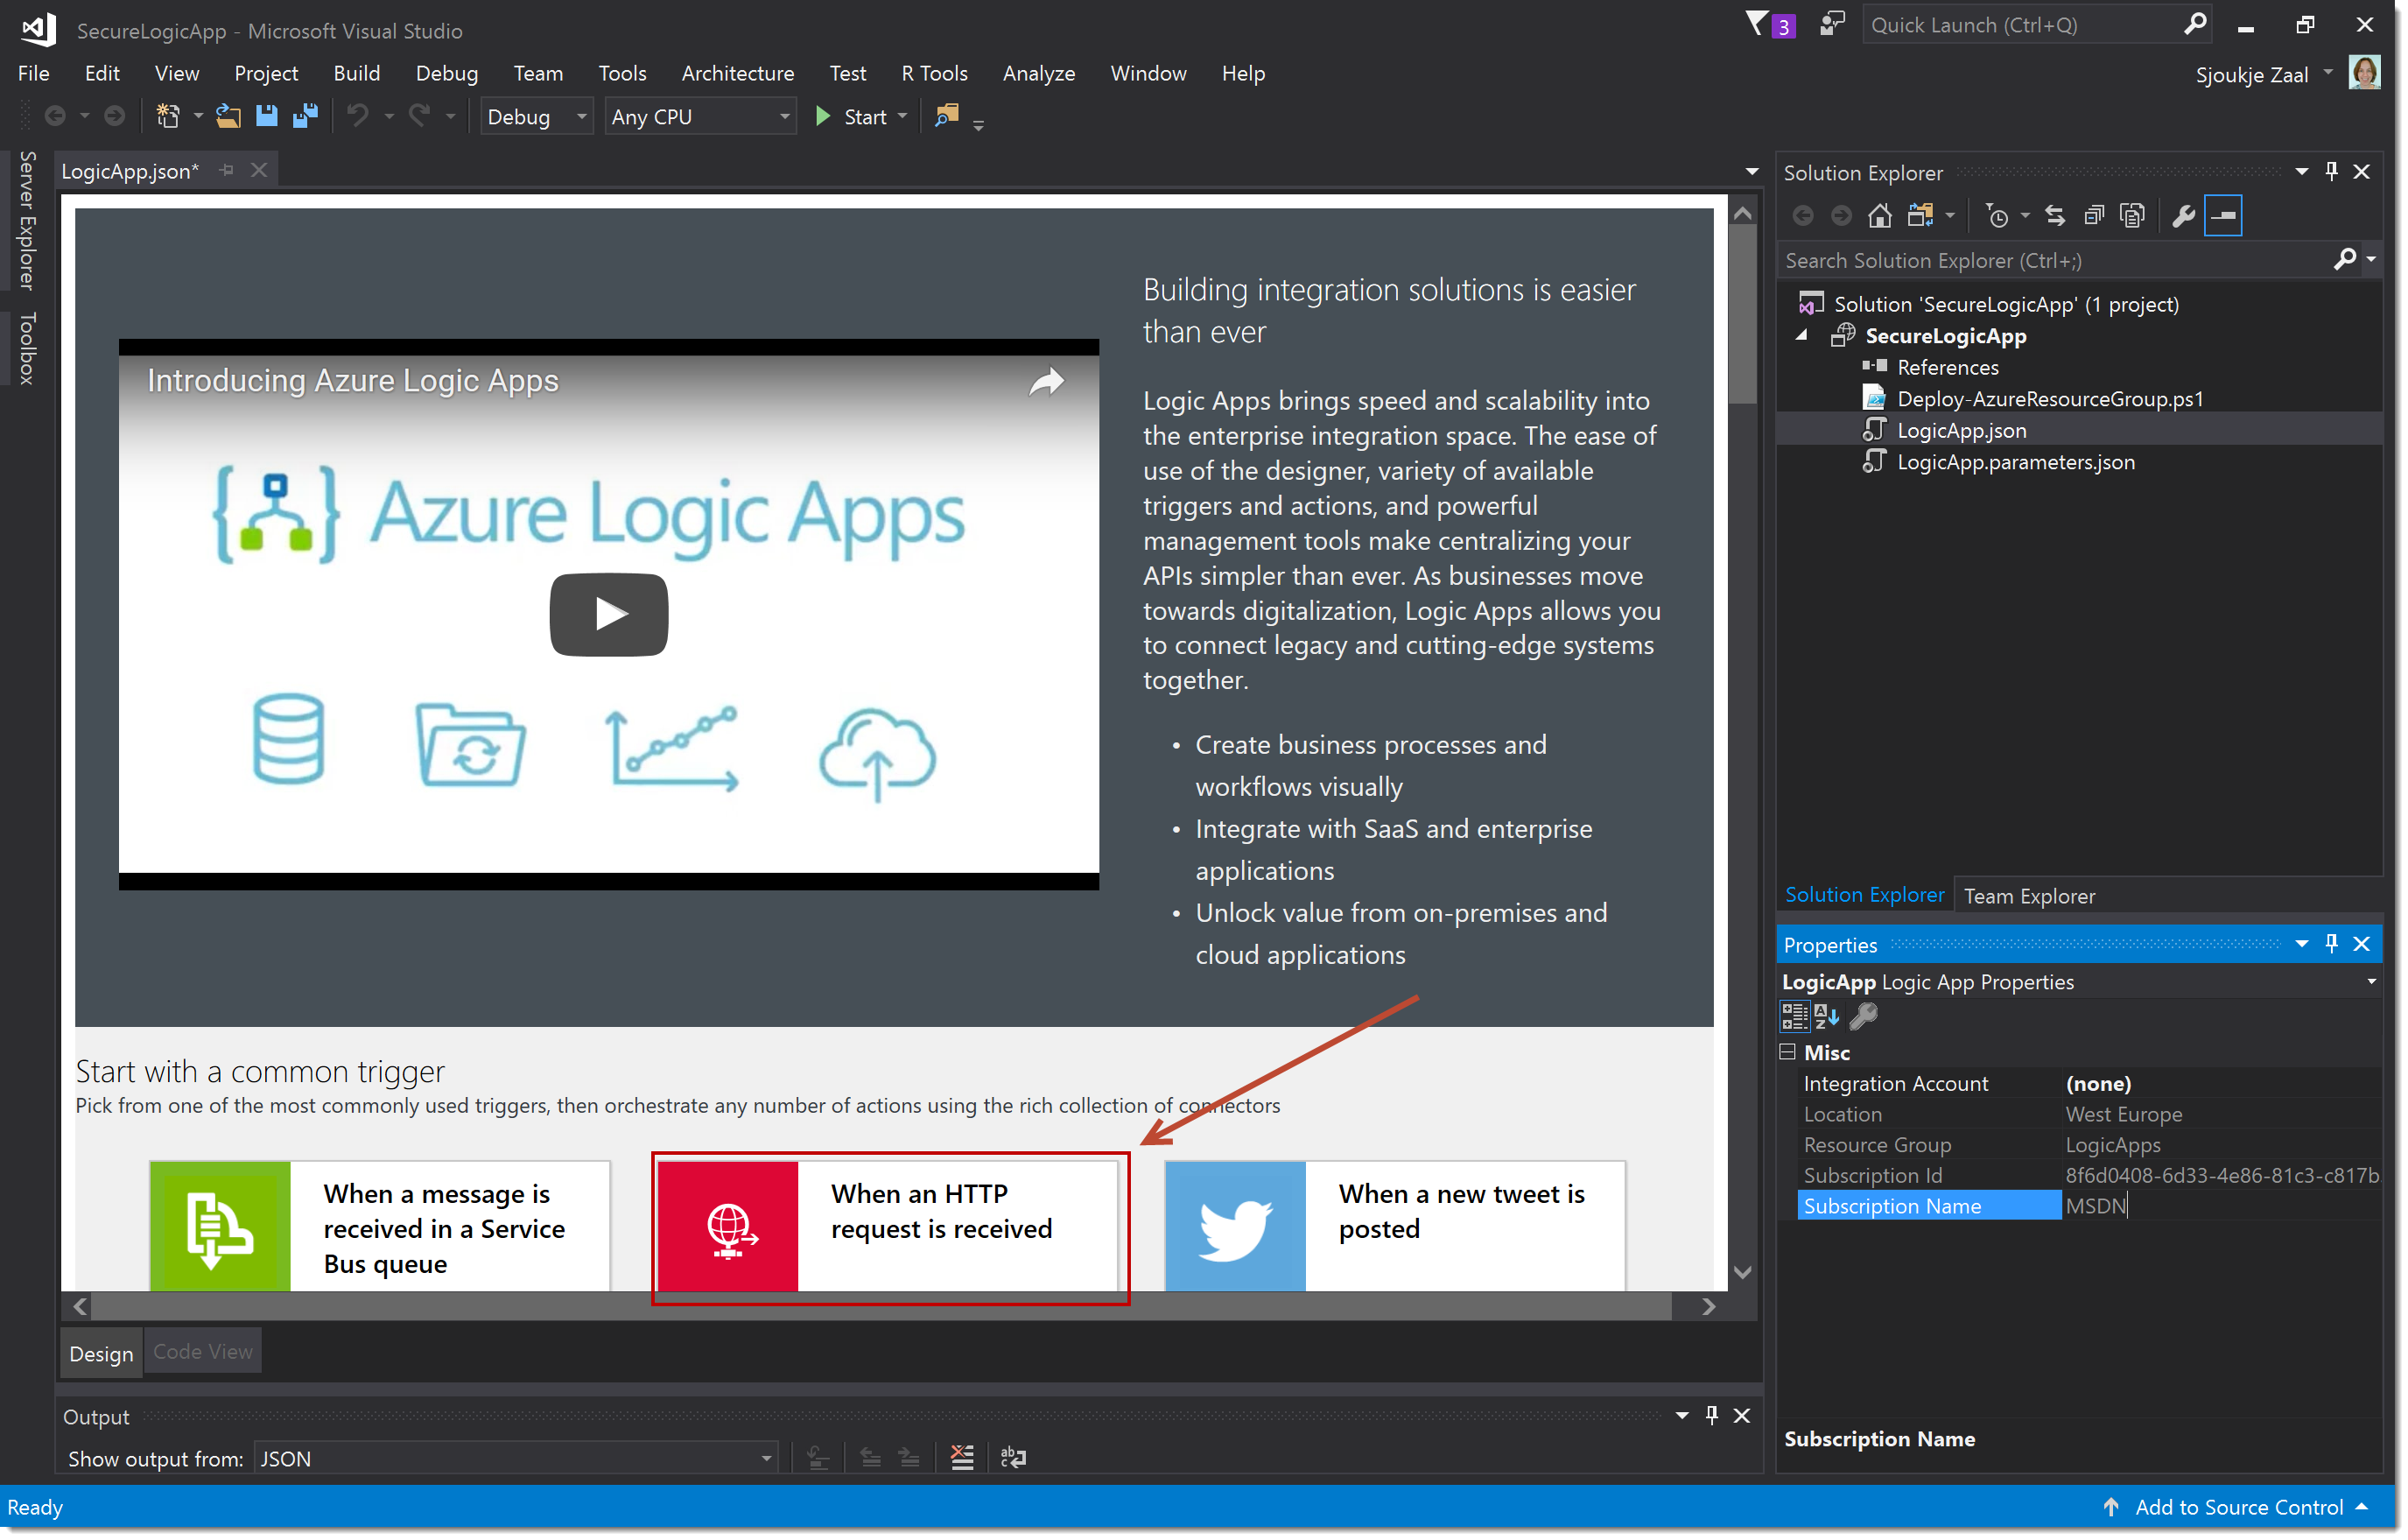
Select your Azure subscription and the Resource Group in the next widget screen. The Logic App designer is opened in Visual Studio after clicking OK (How cool is that!).
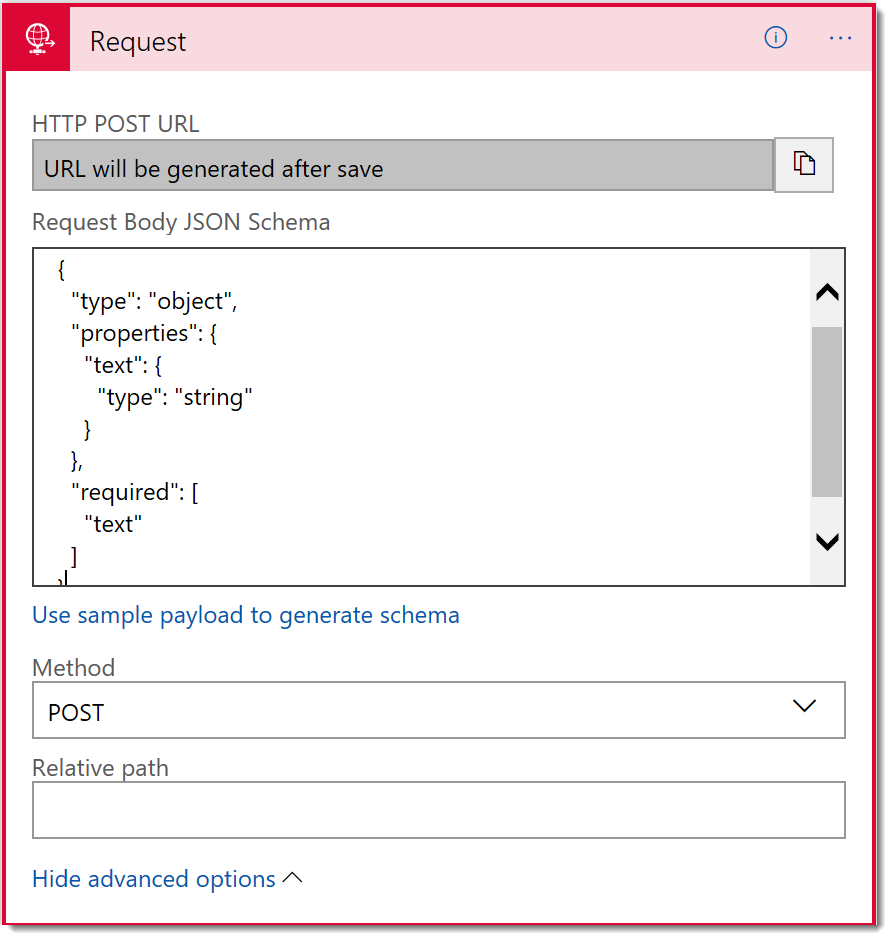
Select the HTTP Trigger, this will be added to the design canvas. Click on the action and fill in the below JSON request body:
[sourcecode]
{
"type": "object",
"properties": {
"text": {
"type": "string"
}
},
"required": ["text"]
}
Click the advanced option body and select POST from the Method dropdownlist. The request action will look the below image:
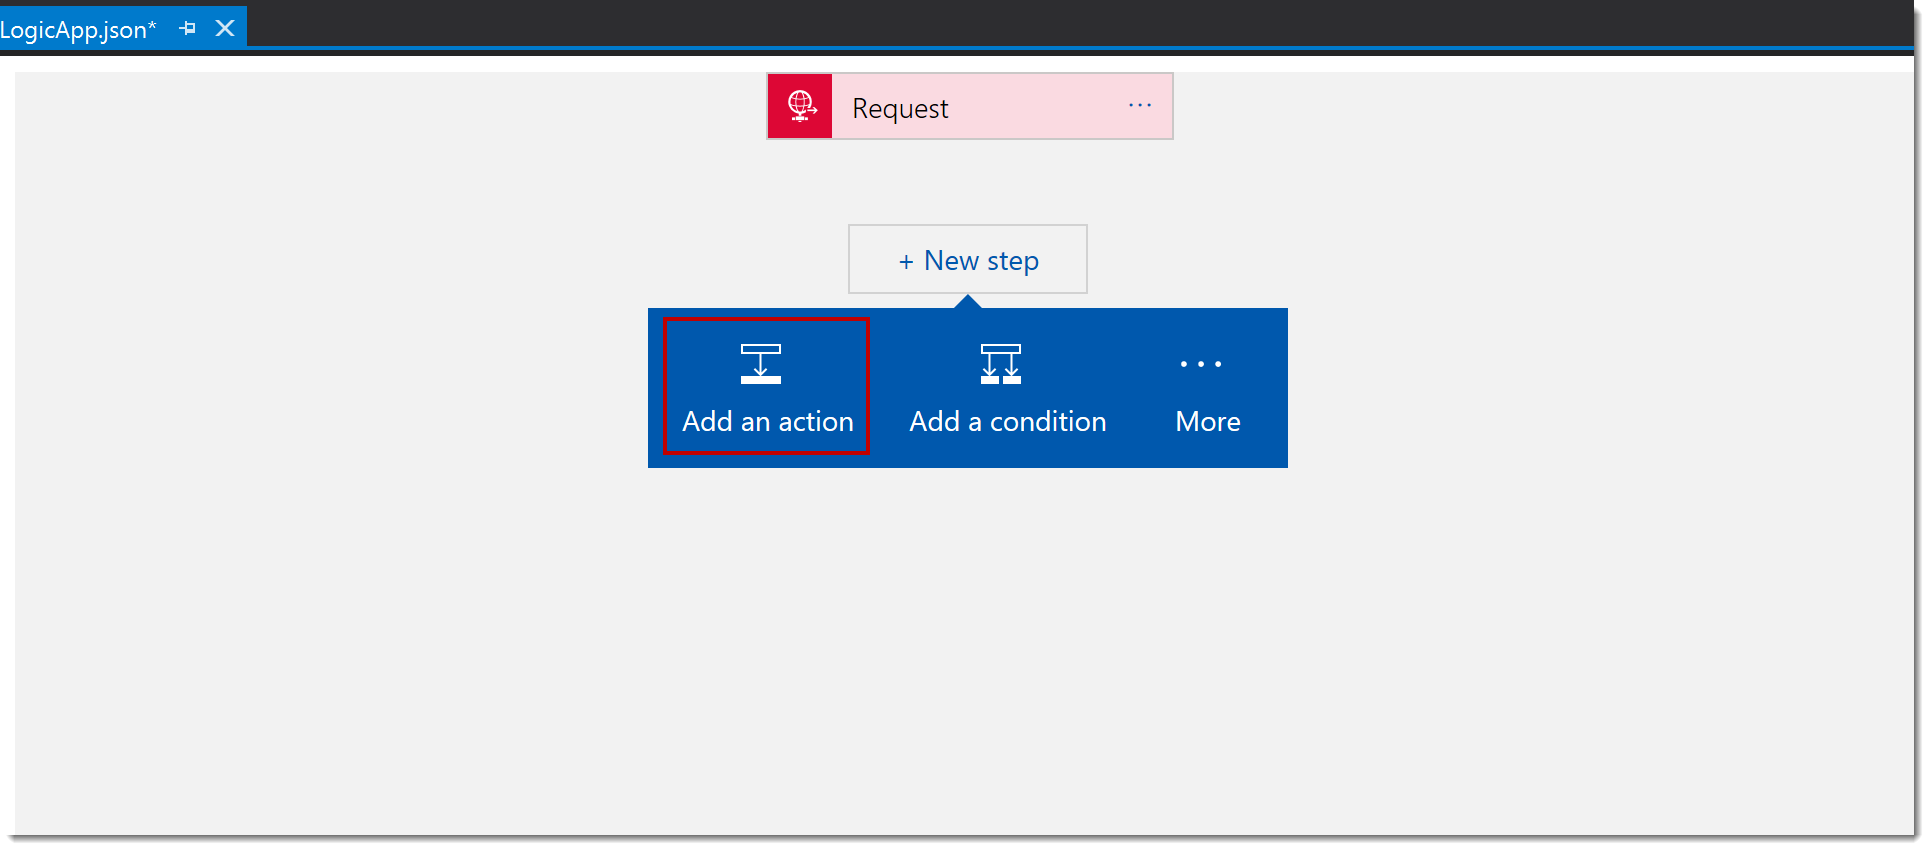
Click the Next Step button, and then Add an action.
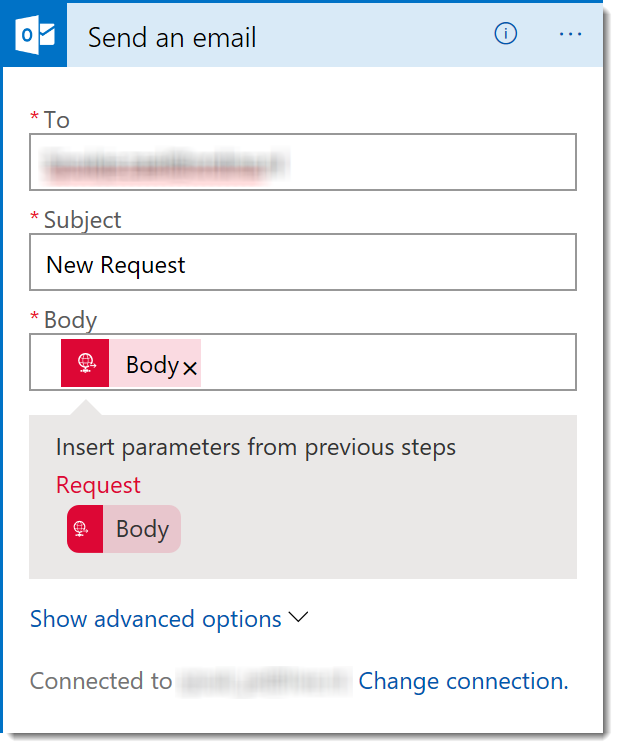
In the Search Box type, Outlook.com (or Gmail) and select the Outlook.com connector.
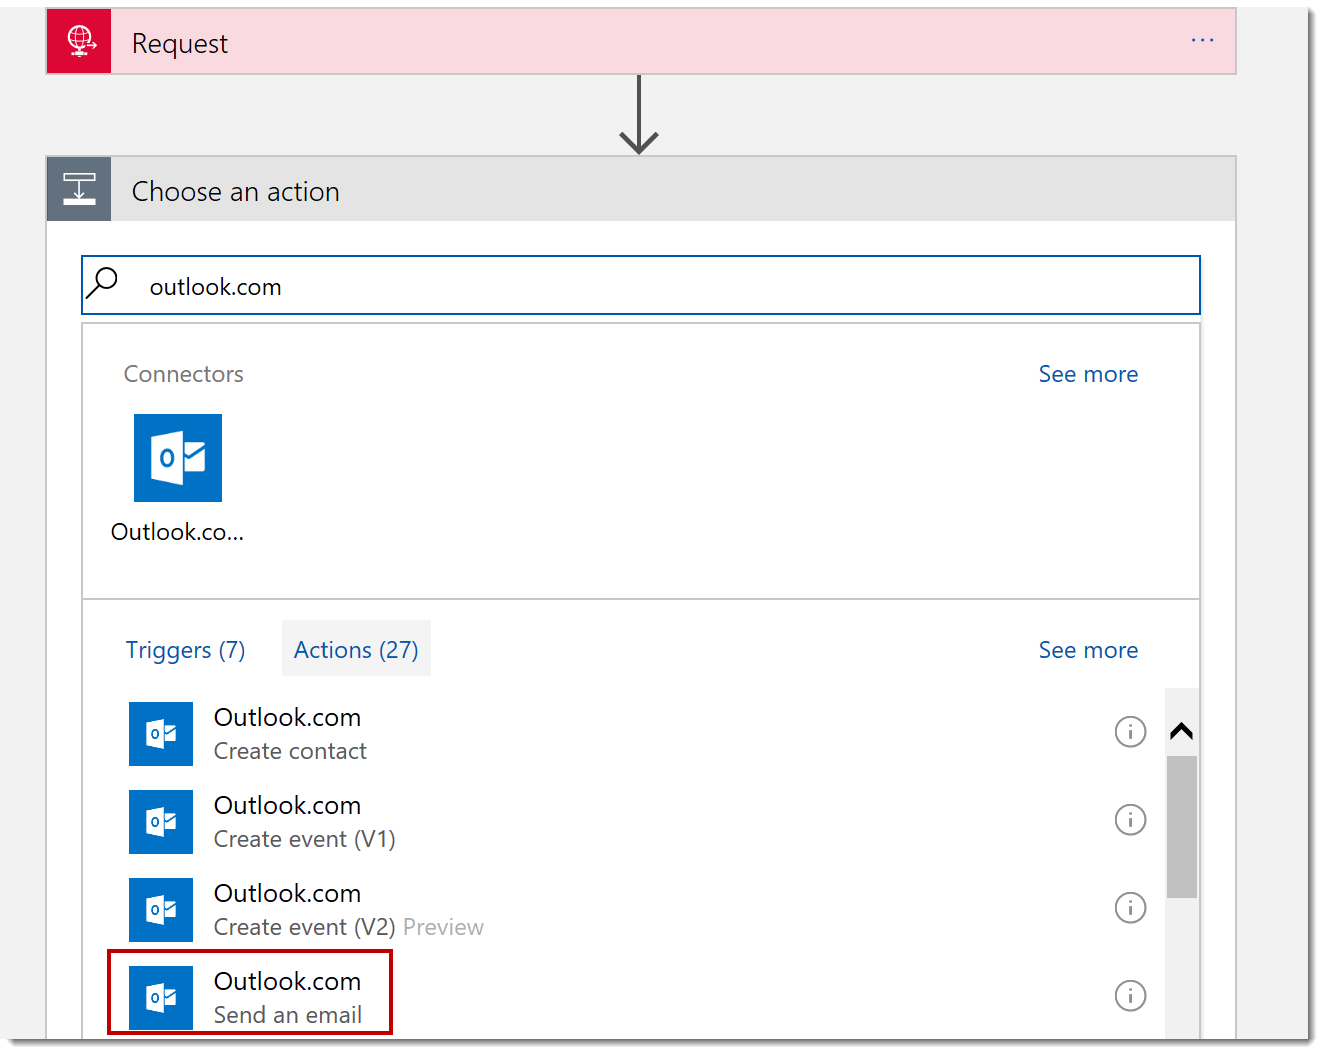
The Connector is added to the canvas. Fill in your credentials, and fill in a receiver email address, a subject and body. As a body, I’ve selected the body from the request.
The sample application is now ready. Right Click the project in the Solution Explorer and click Deploy --> New. Fill in the correct Resource Group information in the wizard, which is opened and click Deploy.
Secure Access to the Trigger
This sample logic app fires on a HTTP Request (this can be a Webhook as well). You can restrict access to the app, so that only authorized clients can fire the logic app. All requests into a logic app are encrypted and secured via SSL.
Every Logic App request endpoint includes a Shared Access Signature (SAS) as part of the URL, like https://prod-13.westeurope.logic.azure.com:443/workflows/<logic app id>/triggers/manual/paths/invoke?api-version=2016-06-01&sp=%2Ftriggers%2Fmanual%2Frun&sv=1.0&sig=xTG65EBWRwxxQXyqRUn7MDjbc4KFDm_Q-R6v9zOvmVU . The URL contains the following:
- sp: Permissions are specified here.
- sv: this is the version used to generate.
- sig: this is used for authenticating the trigger.
The Signature (sig) is generated using a SHA256 algorithm with a secret key on all the URL paths and properties. The secret key is never exposed and published, and your Logic App only accepts triggers that contain a valid signature created with the secret key.
Regenerating an Access Key
When deployed from Visual Studio, there is already an SAS generated automatically. If you want to regenerate the Access Key, take the following steps:
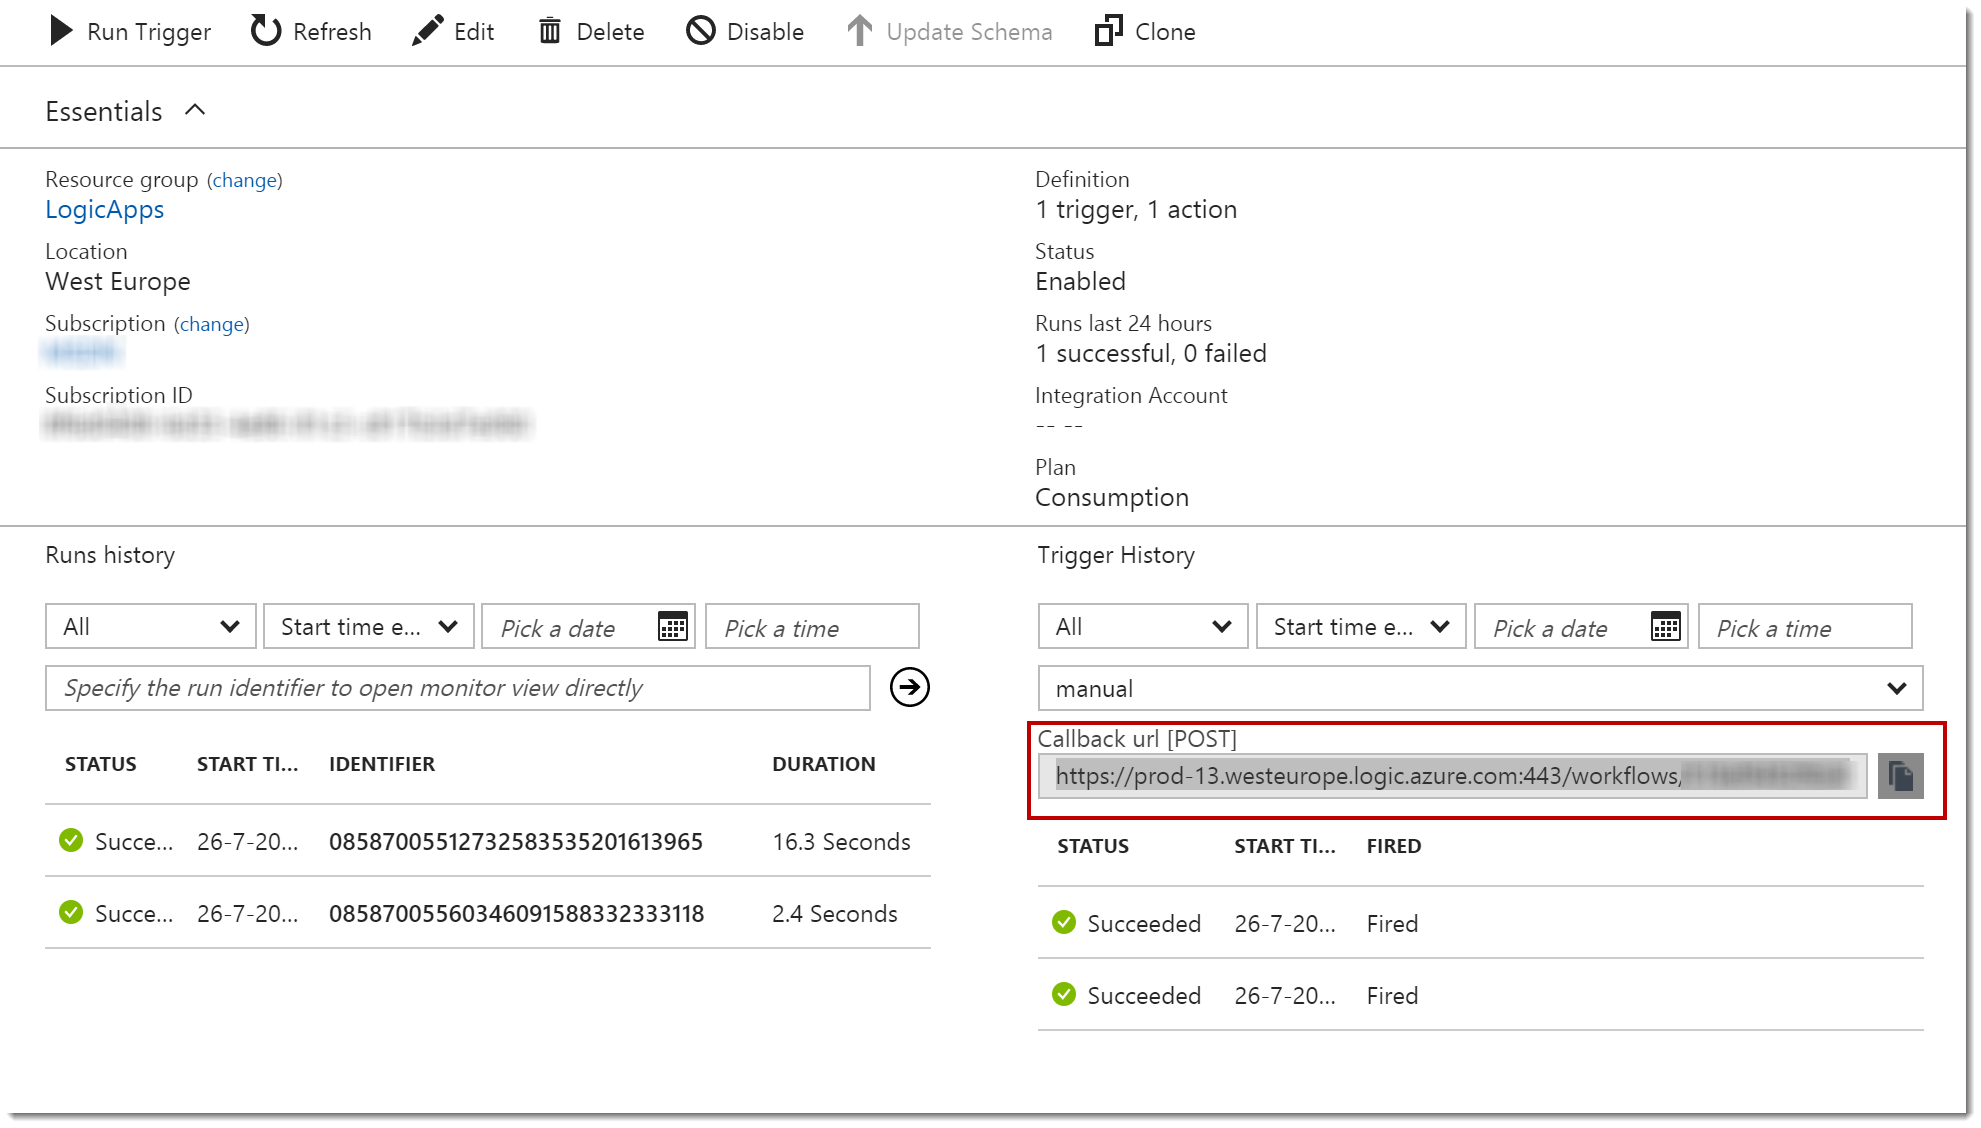
Navigate to the Azure Portal and open the Logic App which is deployed from Visual Studio earlier. Click the Access Keys menu item under Settings. In here you can regenerate the Access Key, as shown in the image below.

After generating the key, you can obtain the URL including the newly generated SAS from the Overview page under Callback url (POST) .
Callback URLs with an expiration date
You can also create Callback URLs with an expiration date. This way you can restrict your app for a certain timeframe.
You first need to create a App Service Principal in Azure, to add to the header of the POST request. I created this using the Azure Cloud Shell (Preview). To do this, open the Azure Portal and click on the Azure Cloud Shell item. Add the following code to the Cloud Shell to create the Service Principal:
[sourcecode]
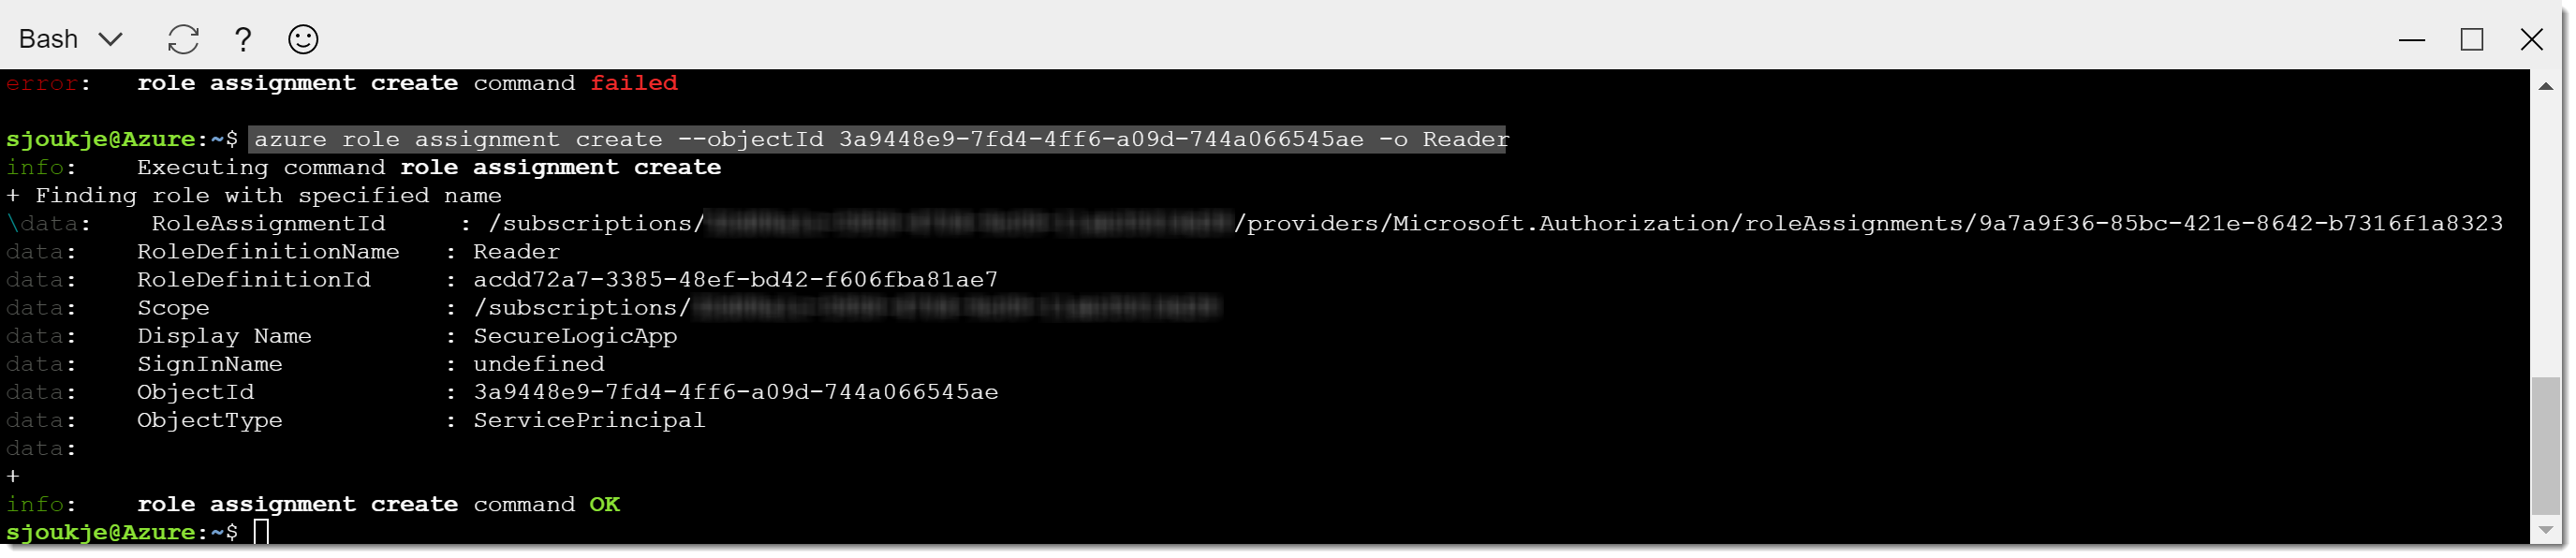
azure ad sp create -n SecureLogicApp -p "test"

As you can see in the Cloud Shell, the Service Principal is created. Copy the Object Id from the Shell to the clipboard, and type the below code into the Cloud Shell:
[sourcecode]
azure role assignment create --objectId 3a9448e9-7fd4-4ff6-a09d-744a066545ae -o Reader
You now have granted the service principal permissions on your subscription and you have added the service principal to the Reader role, which grants permission to read all resources in the subscription.
To add an expiration date to the trigger of the Logic App, open the LogicApp.json in code view in Visual Studio. Locate the triggers section and add the following to it inside the schema section:
[sourcecode]
"NotAfter": "2017-07-26T11:00:00.511Z",
Adjust the date and time to your needs. The triggers section will now look like below:
[sourcecode]
"triggers": {
"manual": {
"type": "Request",
"kind": "Http",
"inputs": {
"schema": {
"NotAfter": "2017-07-26T11:00:00.511Z",
"type": "object",
"properties": {
"text": {
"type": "string"
}
},
"required": [
"text"
]
},
"method": "POST"
}
}
},
Now, redeploy the project to Azure.
Note: If you call the API from Postman, don't forget to add the Authorization token to the header.
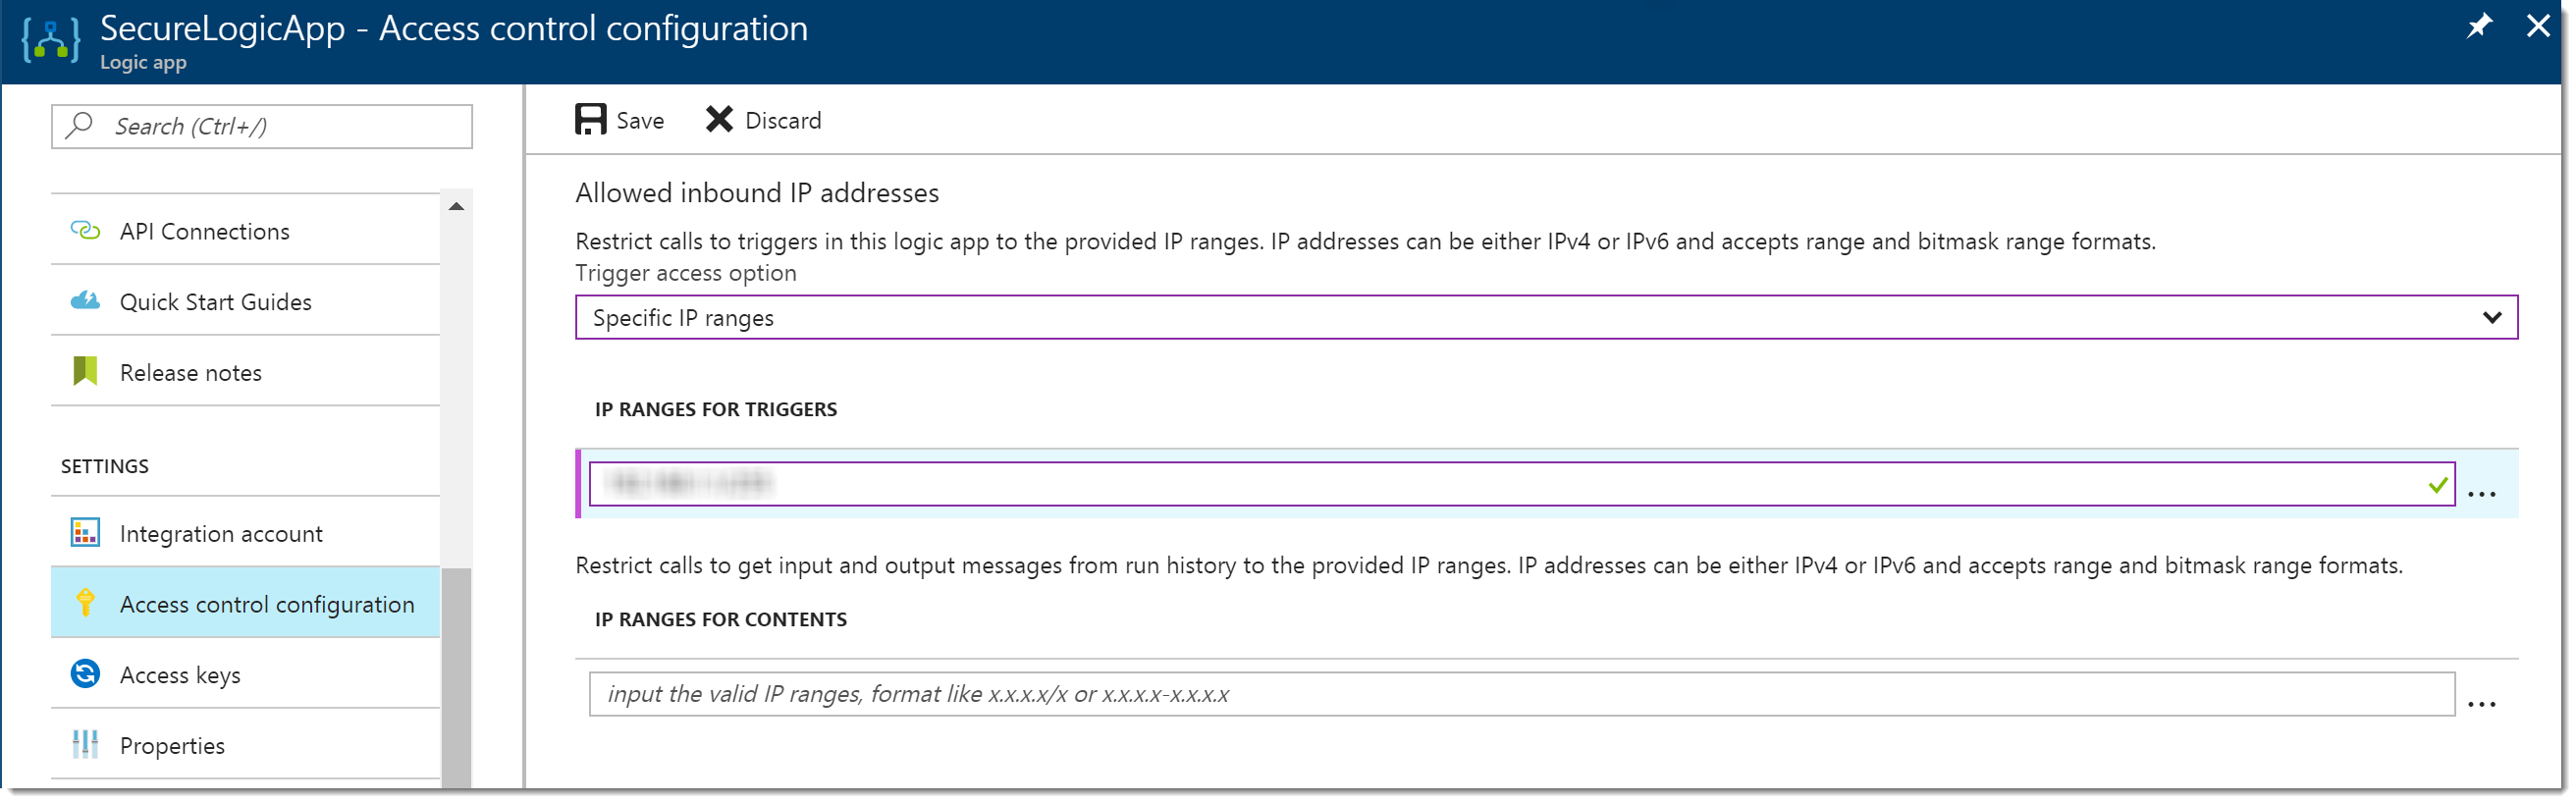
Restrict incoming IP addresses
In addition to the Shared Access Signature, you can restrict calling a Logic App only from specific clients, like from a certain IP address or range of IP addresses.
This setting can be configured from the Azure Portal or from Visual Studio.
Inside the Azure Portal, from the settings menu of the Logic App select Access Control Configuration, and select Specific IP Ranges from the dropdown. Here, provide the IP address or range addresses and click the Save button:
Conclusion
When you are using Azure Logic Applications in a production environment you want to secure them as best as possible. However, there are multiple ways to secure your Logic Apps. In this post, I've described how security can be applied to the Trigger level of the Logic App. In the next post, I will give more details about securing your Logic App using API Management.
-Sjoukje