Using ADFS as an Identity Provider for Azure AD B2C
Using Azure AD B2C with "regular" Azure AD enabled some new and useful scenarios. Let's take logins further along the same track while we are at it. To not repeat myself I will assume you have at least skimmed through the previous article:
https://blogs.msdn.microsoft.com/azuredev/2017/05/30/azure-ad-b2c-kicking-it-up-a-notch-with-support-for-aad-as-idp/
The integration between B2C and AAD is done through the support of the OpenID Connect protocol (building on top of OAuth). In some cases AAD might not be the OpenID Connect provider you want/need - so it should be possible to hook up other providers as well right?
Yes, it should. Being a recognized standard that would be one of the main selling points. I'm not going to show how to integrate B2C with everything out there though, but I thought I could have a crack at bringing good old ADFS to the game.
Why ADFS? Aren't we all about the cloud? Yes, in general I prefer to stick with Azure AD, but there's still times when I want to use my on-prem infrastructure. Perhaps you're using custom MultiFactor Authentication Adapters in ADFS or something. (https://github.com/ahelland/ADFSMFAAdapters) It's besides the point really - you have an Identity Provider, and you want to use it :)
Note that this only works with ADFS 4.0 (Windows Server 2016). While 2012 R2 supports OAuth, the OpenID Connect support was added in 2016.
But if ADFS 4.0 supports OpenID Connect - why do we go through B2C, could we not skip that? Yes, you can skip B2C, and integrate directly with ADFS. This walkthrough rather ties into taking the integration logic out of your app, and making it a configuration thing server side instead. So, the same way you can integrate directly with Azure AD without B2C, you can use ADFS without B2C. If you have scenarios where you need to support both ADFS and AAD however, B2C makes that easier.
If you want to integrate directly I have a separate guide for that: https://aadguide.azurewebsites.net/adfs2016/preface/
So, how do we go about making this work? We need to step through a couple steps in the right order:
- Configure ADFS.
- Create a new IdP config for B2C.
- Modify the B2C app registration to support web apps (if you want to test a web app that is).
If you already have the Windows Universal app from my last article you can reuse that if you like. You shouldn´t need any code changes, and can just hit "run" once you have done the config pieces.
If you want to do something else, like I wanted to, you can for instance base yourself on the same official sample that I did for building a .NET Core Web App:
https://github.com/Azure-Samples/active-directory-b2c-dotnetcore-webapp
It´s a fairly clean sample so apart from filling in some specifics related to your B2C tenant it should be easy to get running. (As in, you don´t have to go through ten files, change a bunch of lines, or have a deep understanding of things to be able to compile.)
Let's not get ahead of ourselves though - we need to start on the ADFS Server. I'll assume you have one such server installed, and generally working already. (Man what a hassle I had sorting out the SSL certificates on my new box. But I digress - that´s enough material for a post of its own. I may or may not write that post at a later point in time.)
A thing to be aware of if you have a lab setup with ADFS is that it needs to be available externally. Normally when you develop/test against ADFS you only need a line of sight between your dev box and the ADFS server even if the app taking advantage of it is hosted in Azure. Federation works by issuing redirects so only the client actually talks to ADFS. However, since AAD B2C needs to read the configuration, and handle redirects independently of the client, ADFS needs to be available over the Internet and have a line of sight.
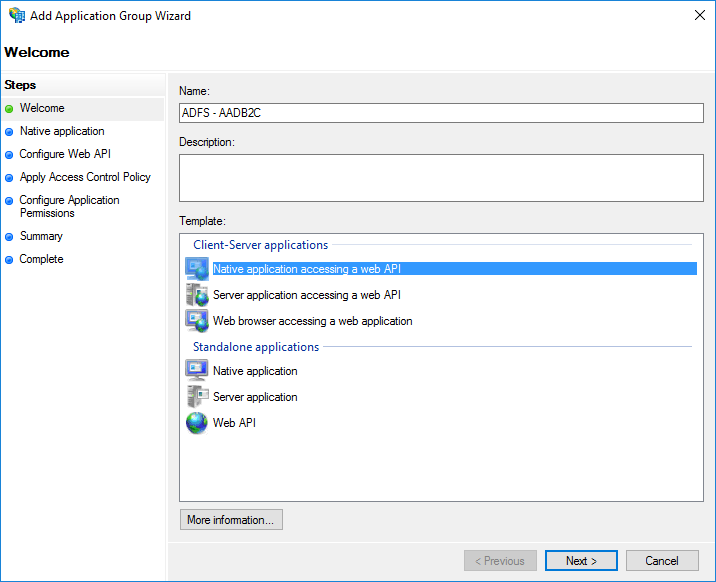
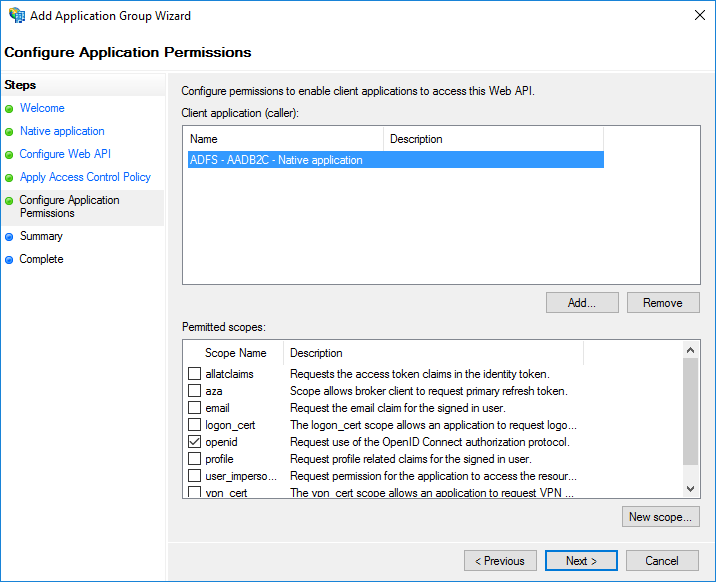
Find "Application Groups" in the ADFS console, right-click, and choose to "Add Application Group". Choose a name, and select "Native application accessing a web API". Hit "Next".
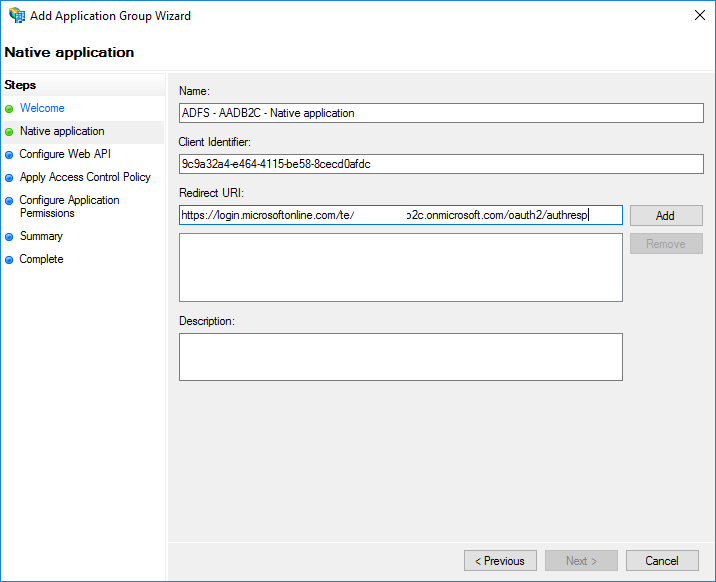
Take note of the client id (you will need this in the B2C portal). The redirect URI should be:
https://login.microsoftonline.com/te/{tenantname}.onmicrosoft.com/oauth2/authresp
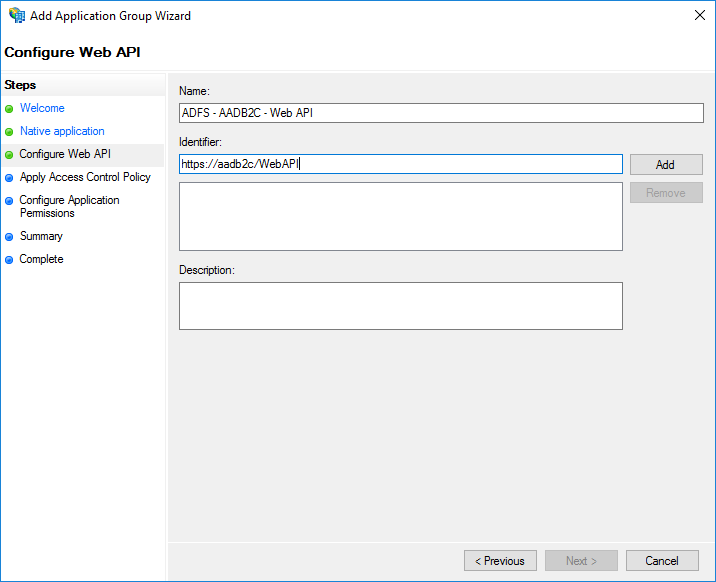
Choose something unique for the identifier.
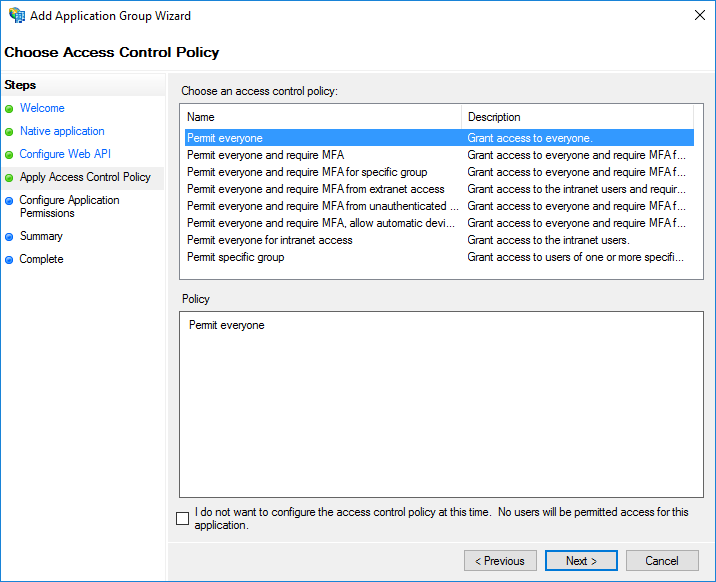
"Permit everyone" works for now.
Make sure "openid" is checked. Hit Next, review, and finish.
Next you need to head over to your favorite text editor to edit the B2C_1A_TrustFrameworkExtensions.xml file. (If you're following the naming from the starter pack used for setting up custom policies.) I basically copied the AAD ClaimsProvider, and made some minor edits.
<ClaimsProvider>
    <Domain>ADFS</Domain>
    <DisplayName>Login using ADFS</DisplayName>
    <TechnicalProfiles>
    <TechnicalProfile Id="ADFSProfile">
        <DisplayName>Contoso ADFS</DisplayName>
        <Description>Login with your Contoso account</Description>
        <Protocol Name="OpenIdConnect" />
        <OutputTokenFormat>JWT</OutputTokenFormat>
        <Metadata>
        <Item Key="METADATA">https://login.contoso.com/adfs/.well-known/openid-configuration</Item>
        <Item Key="ProviderName">https://login.contoso.com/adfs</Item>
        <Item Key="client_id">adfs-client-id</Item>
        <Item Key="IdTokenAudience">adfs-client-id</Item>
        <Item Key="response_types">id_token</Item>
        <Item Key="UsePolicyInRedirectUri">false</Item>
        </Metadata>
        <OutputClaims>
        <OutputClaim ClaimTypeReferenceId="socialIdpUserId" PartnerClaimType="sub" />
        <OutputClaim ClaimTypeReferenceId="tenantId" PartnerClaimType="tid" />
        <OutputClaim ClaimTypeReferenceId="givenName" PartnerClaimType="given_name" />
        <OutputClaim ClaimTypeReferenceId="surName" PartnerClaimType="family_name" />
        <OutputClaim ClaimTypeReferenceId="displayName" PartnerClaimType="name" />
        <OutputClaim ClaimTypeReferenceId="authenticationSource" DefaultValue="contosoAuthentication" />
        <OutputClaim ClaimTypeReferenceId="identityProvider" DefaultValue="ContosoADFS" />
        </OutputClaims>
        <OutputClaimsTransformations>
        <OutputClaimsTransformation ReferenceId="CreateRandomUPNUserName" />
        <OutputClaimsTransformation ReferenceId="CreateUserPrincipalName" />
        <OutputClaimsTransformation ReferenceId="CreateAlternativeSecurityId" />
        <OutputClaimsTransformation ReferenceId="CreateSubjectClaimFromAlternativeSecurityId" />
        </OutputClaimsTransformations>
        <UseTechnicalProfileForSessionManagement ReferenceId="SM-Noop" />
    </TechnicalProfile>
    </TechnicalProfiles>
</ClaimsProvider>
Things to note:
- Make sure "METADATA" and "ProviderName" point to your ADFS instance. And make sure it's a valid SSL cert and all those things.
- "client_id" and "IdTokenAudience" are identical and contains the value from the app you created on the ADFS server.
- "socialIdpUserId" needs to be changed to a value you get from ADFS as a claim. I used sub as the id, but you could use upn if you like. Main thing; it needs to be a unique value that doesn't change. (Which technically is a recommendation to not use the upn since that might change.)
You should also update your user journeys to reference this new claims provider:
<OrchestrationStep Order="2" Type="ClaimsExchange">
    <Preconditions>
    <Precondition Type="ClaimsExist" ExecuteActionsIf="true">
        <Value>objectId</Value>
        <Action>SkipThisOrchestrationStep</Action>
    </Precondition>
    </Preconditions>
    <ClaimsExchanges>
    <!--<ClaimsExchange Id="FacebookExchange" TechnicalProfileReferenceId="Facebook-OAUTH" />-->
    <!--<ClaimsExchange Id="SignUpWithLogonEmailExchange" TechnicalProfileReferenceId="LocalAccountSignUpWithLogonEmail" />-->
    <ClaimsExchange Id="ContosoExchange" TechnicalProfileReferenceId="AADProfile" />
    <ClaimsExchange Id="ADFSExchange" TechnicalProfileReferenceId="ADFSProfile" />
    </ClaimsExchanges>
</OrchestrationStep>
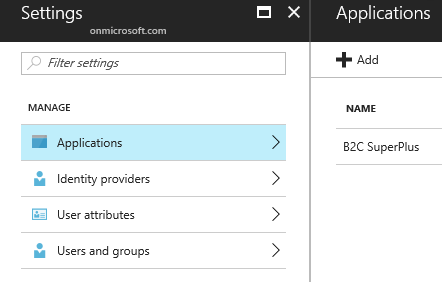
Then you need to make a minor edit on the B2C portal. Locate the B2C app (which I have called "B2C SuperPlus" in my tenant):
Switch "Web App / Web API" to "Yes", and add a reply URL for your app:
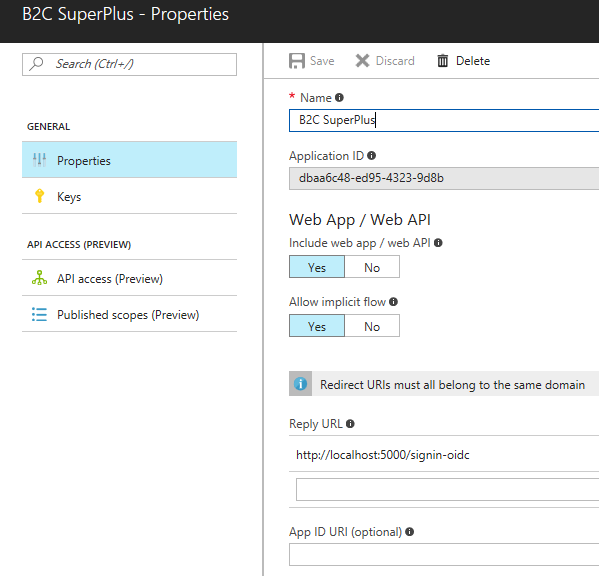
Note - this is not related to the setting on the ADFS server. This is between B2C and your app.
Back in our web app we change things accordingly:
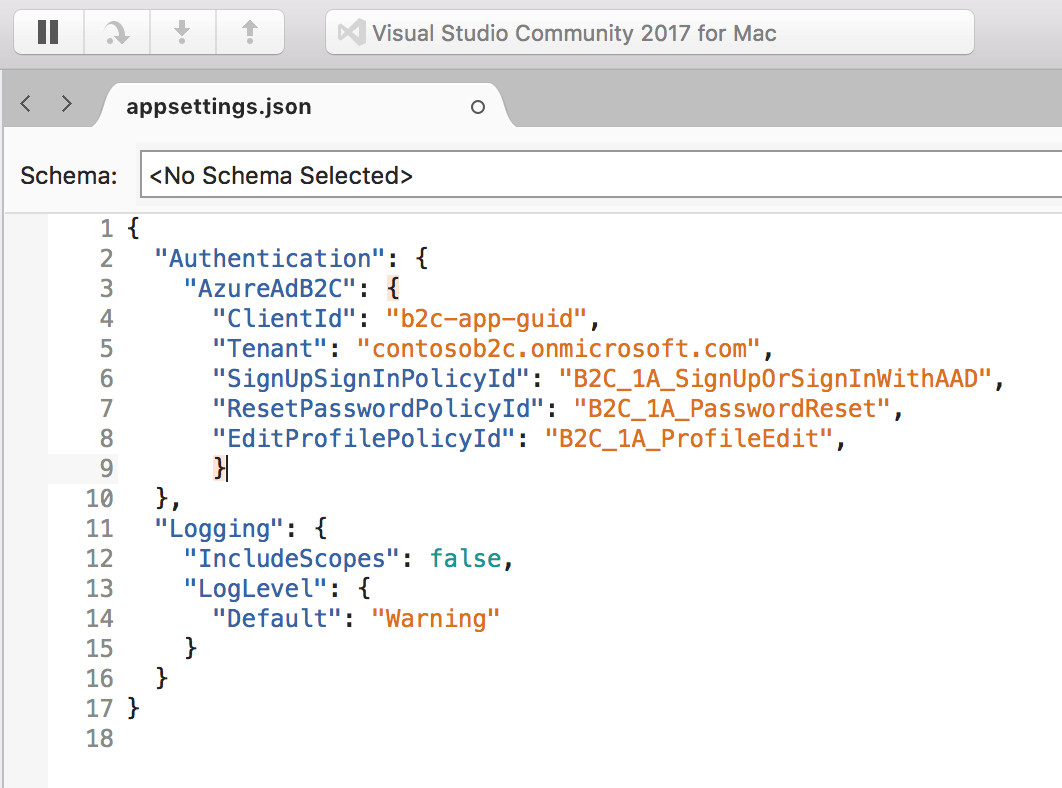
Yes, I am running it on a Mac just for the fun of it, but of course it´s the same if you happen to use Windows (where I usually do my coding) :)
Do remember that the client id here is the one for the B2C registration; it is not related to the ids you created on the ADFS server.
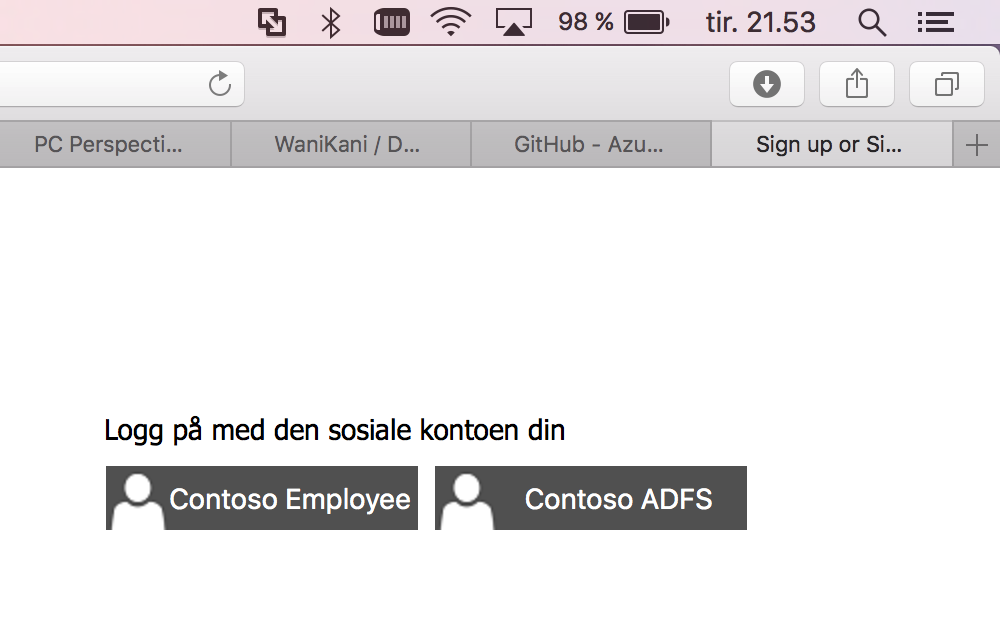
I cleaned up the selection of Identity Providers, so running the app you can see I now get to choose between my AAD or my ADFS instance. (B2C without any social IdPs - oh, the irony.) Since I am running AAD Connect in my setup the credentials are the same, but this is of no concern to the app. (Btw: this means that you can of course run this kind of "dual identity stack" without issues.)
Some closing remarks. If you assemble things incorrectly, and it fails somewhere between the Idp and B2C you may see generic error messages that aren´t really all that helpful.
I highly recommend checking out /en-us/azure/active-directory-b2c/active-directory-b2c-troubleshoot-custom for the details on how to enable Application Insights to collect the logs. It´s not like the error will reveal itself in a matter of seconds, but diving into the logs might give a hint to something you´ve missed. (Took me a little tinkering to sort out my misconfigured claim this way, but I eventually realized what I was doing wrong.)