4 ways of adding your application to Azure Active Directory
When you are developing apps for Azure or Office 365, there comes a time that the app needs to be added to Azure Active Directory for authentication. There is written a lot about the manual approach of doing this. But maybe there are other ways to do this, and maybe can we do this even quicker?
In this article, I’m going to show four different ways of adding your application to Azure AD. I will cover both manually as programmatically and provide some examples on how to do this. Let’s start with the easiest one, directly from Visual Studio.
Visual Studio
The easiest option is to register your application from within Visual Studio. Take the following steps to do this.
Open Visual Studio and create a new application. Create an ASP.Net Web Application and choose the MVC template in the project creation wizard. Click the Change Authentication button.

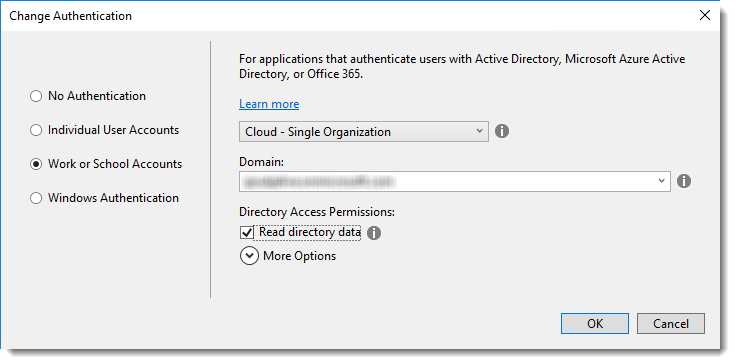
On the next screen, there are four different options. But if you want to use Azure AD for authentication, you have to choose Work and School Accounts.
Next, you have to provide the tenant information. Select Cloud – Single Organization, pick the tenant where you want to add your app and select Read Directory Data. Click Ok. And again, click OK.
The application is created for you and added to Azure AD with permissions to access Azure AD for authentication purposes and reading user information.
Open the web.config and you will see the below Azure AD related entries added to the AppSetttings:
<appSettings>
    <add key="ida:ClientId" value="e0ea5425-740f-4108-b384-c365a48a32fa" />
    <add key="ida:AADInstance" value="https://login.microsoftonline.com/" />
    <add key="ida:ClientSecret" value="--your-client-secret--" />
    <add key="ida:Domain" value="--your-domain.onmicrosoft.com--" />
    <add key="ida:TenantId" value="233f4bcb-abf8-402b-989f-57d6500ed422" />
    <add key="ida:PostLogoutRedirectUri" value="https://localhost:44358/" />
  </appSettings>
Below, a brief explanation of the AppSettings items:
ida:ClientId: The ClientId from an OAuth 2.0 perspective.
ida:AADInstance: The base URL of the authorization server (this is always https://login.microsoftonline.com).
ida:ClientSecret: The shared secret of the app.
ida:Domain: The Azure AD reference domain name.
ida:TenantId: The tenant Id, which can be concatenated to the ida:AADInstance.
ida:PostLogoutRedirectUri: The URL to which the browsers will be redirected after logout.
If you now press F5, the application is started and you will be asked to fill in your Azure credentials. Accept the App permissions by clicking the Accept button.

You can log in to the Azure Portal and check the settings which are created for your App by Visual Studio. In the permission tab, you can also see the permissions you’ve granted in the above step. If you want to give your application additional permissions, you can set them in here.
Manually
Next is adding the App manually to Azure AD.
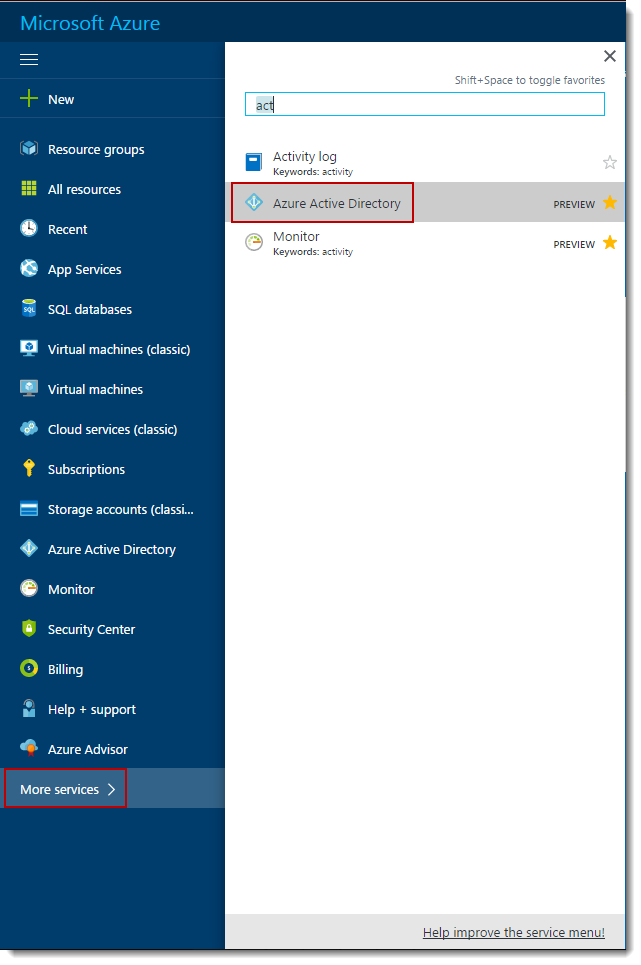
Open the Azure Portal and navigate to your active directory. We are using the new Azure portal for this. Azure AD is in preview there (if you want to use the “Old” Azure Portal, you can take a look at the steps provided by Andreas in his post: Azure AD Developer Tips and Tricks – Part 3). Select “More Services” at the bottom of the menu and then “Azure Active Directory”.
It will open up the AD of the selected tenant by default. If you have access to multiple tenants and want to select another one, click your profile button at the top right side of the screen. Here you can select a different directory.
Click App Registrations at the left and then click the Add button.
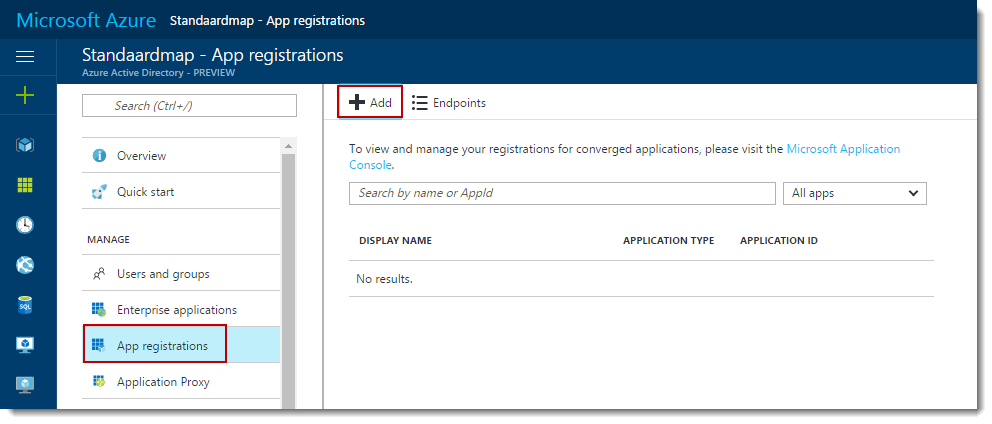
The App registration wizard is opened. Fill in a name for your app. Choose an application type. You have to choose between a Web app /API or a native application. The former defines an application that has a web-based UI. The latter defines a native one, like for instance a tablet or phone application. For now, choose Web app / API.
For the Sign-On URL, you can fill in the exact same URL that was filled in automatically by Visual Studio in the previous section. In my case, this is: https://localhost:44358/ . Azure AD will not send tokens to URL’s that aren’t registered.
I personally find this setting quite confusing because when you enter complete nonsense in there, the authentication still works. But you can think of this as the URL where the whole sign-in process starts. That will be the app URL. If a user is not signed in, he or she then will be send to login.windows.net. So, after you have deployed your application for production to Azure, you can change this URL to the production URL.

Click create to add the Application.
PowerShell
Adding your application using PowerShell is very easy and results in only a couple of lines of code:
Login-AzureRmAccount
Select-AzureRmSubscription -TenantId "your-tenant-id"

New-AzureRmADApplication -DisplayName "AppAddedWithPS" -HomePage "https://localhost:44358/" -IdentifierUris "https://your-tenant-url/6958490c-21ae-4885-804c-f03b3add87ad"
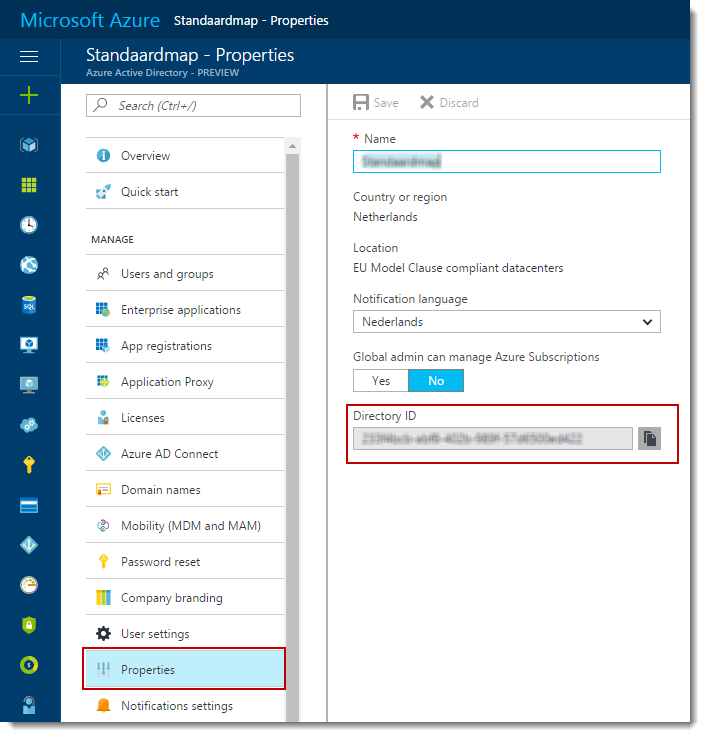
First login with your Azure credentials. This is done by calling the Login-AzureRmAccount method. Second, select the Azure AD tenant by calling the Select-AzureRmSubscription and passing it the TenantId (you can find this inside the Azure Portal under Properties:
The Select-AzureRmSubscription method is not mandatory. If you don’t add this, the default Azure AD tenant will be selected. So, if have only one tenant bound to your subscription, you can remove this from your script.
The third line calling the New-AzureRmADApplication creats the application inside your Azure AD. Below an explanation of the used parameters:
DisplayName: The name of your application.
HomePage: The homepage of your application (I think this is a much better name than Sign-On URL, which is used in the portal.
IdentifierUris: This is the App Id. Out-of-the box Azure AD uses the tenant URL followed by a Guid.
When you execute this script, the application is created in Azure AD.
Graph API
The last approach is creating the application by using the Graph API. The Graph API is an OData 4.0 compliant REST API that provides programmatic access to directory objects in Azure AD.
We do this by leveraging the Graph Explorer.
Open your browser and go to https://graphexplorer.azurewebsites.net . You can login using your Azure credentials. One thing to note is that you have to use a school or work account to login.
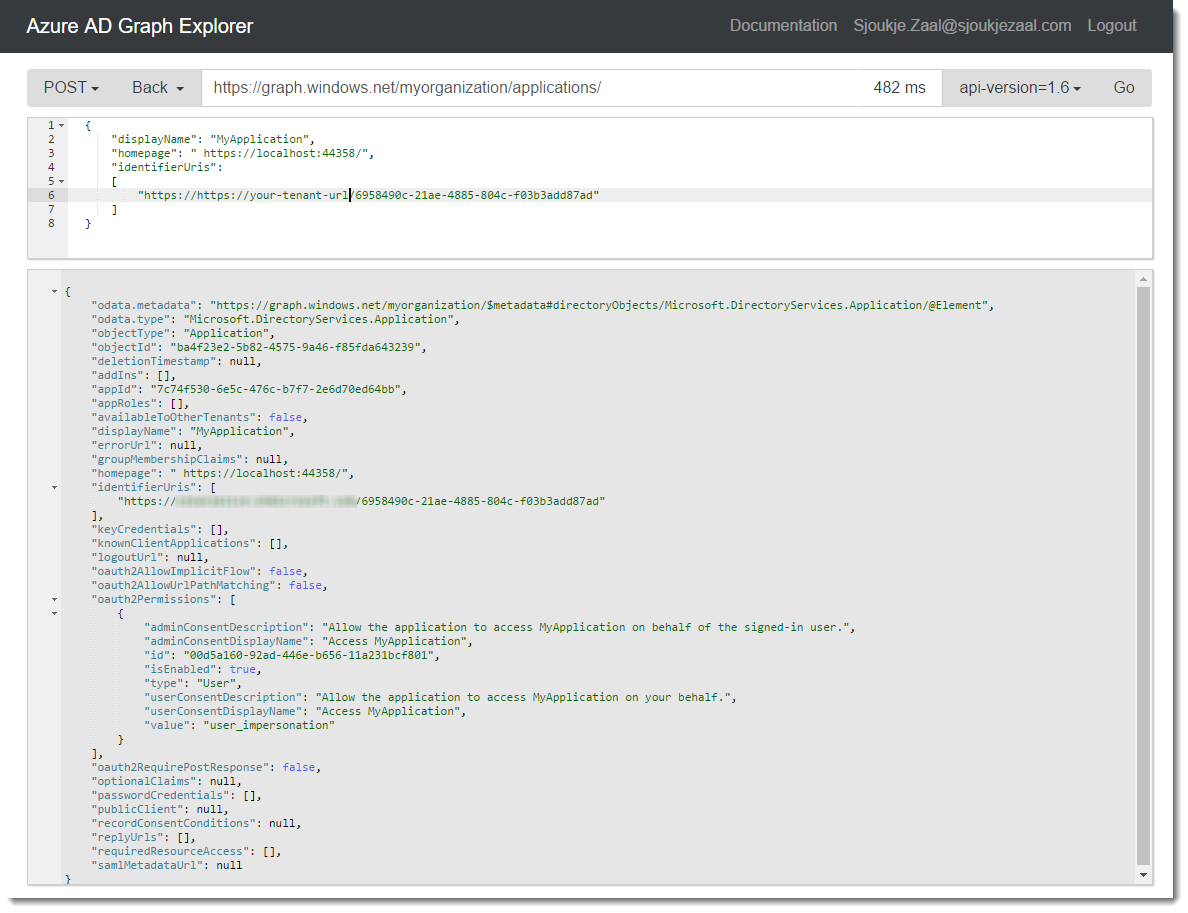
When navigated to the Graph Explorer set the method to POST and type the following to the query field:
https://graph.windows.net/myorganization/applications/
in the body field add the following:
{

"displayName": "MyApplication",

"homepage": " https://localhost:44358/",

"identifierUris":

[

"https://https://your-tenant-url/6958490c-21ae-4885-804c-f03b3add87ad"

]

}
Click the Go button. Your application is created in Azure AD.