Visual Studio Team Services – Creating a build pipeline (Part 5)
In part 1 a basic Azure Web App website was built and deployed using VSTS Build and Part 2 illustrated how additional files could be included when building a web project. Part 3 demonstrated how Gulp could be added to the VSTS Build pipeline. In part 4 Load Testing was added to the build pipeline. This post will explore adding slots to help smooth the build process and limit downtime.
Slots
A powerful feature that Azure Web Apps provides is the ability to use slots. A slot can be viewed as another instance of the website and can enhance the build pipeline by providing a convenient way to limit downtime and disruption by allowing the changes to be verified before making the changes live as well as ensuring the website has been warmed up. Another benefit of using slots is the ability to swap back to a previous deployment if a fault is detected after the site been released.
In our example pipeline, we will define the slot and use our defined load tests to verify the site before performing the swap.
References
Defining a slot
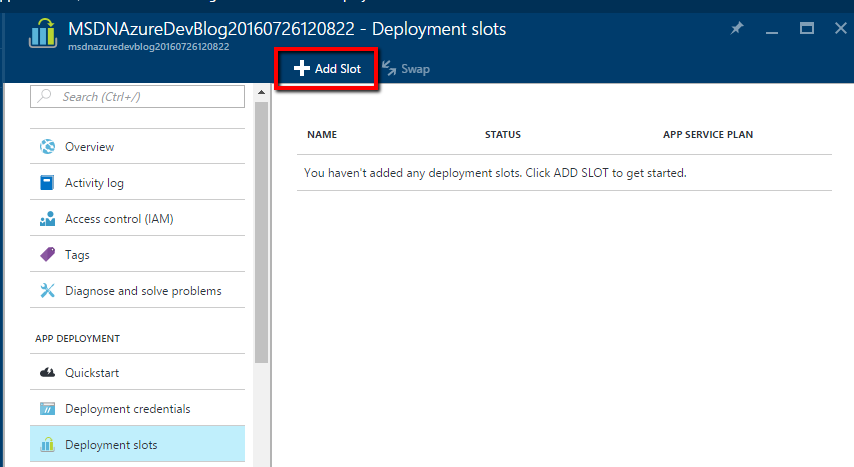
When viewing the Azure Web App in the portal, Deployment Slots are located in settings. Here the ability to add a new slot or swap existing slots is available.
When constructing a slot a unique name and whether to duplicate the configuration or not can be specified.
Note: the name is appended to the name of the website like so: https://websitename-staging.azurewebsites.net/ 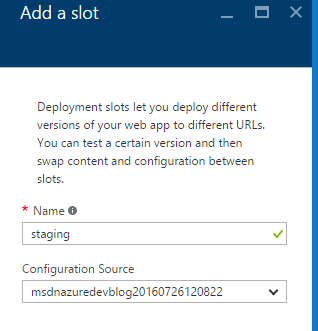
Slot Application Settings
Another important thing to point out is how application settings are handled. When a slot is swapped, all application settings are also swapped unless they are marked as a slot setting as shown below:
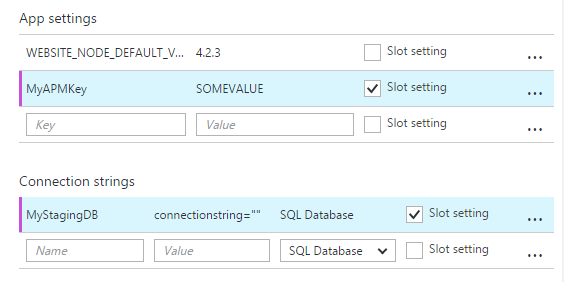
This could be used to maintain a separate database connection or different keys for the staging environment.
References
Build pipeline
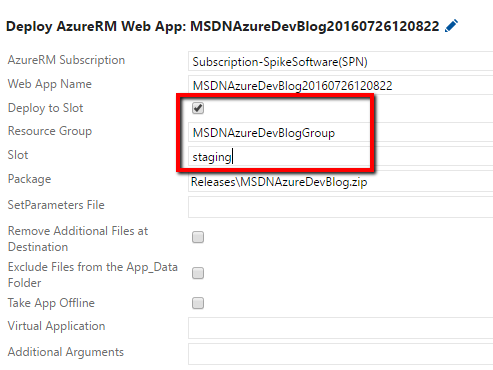
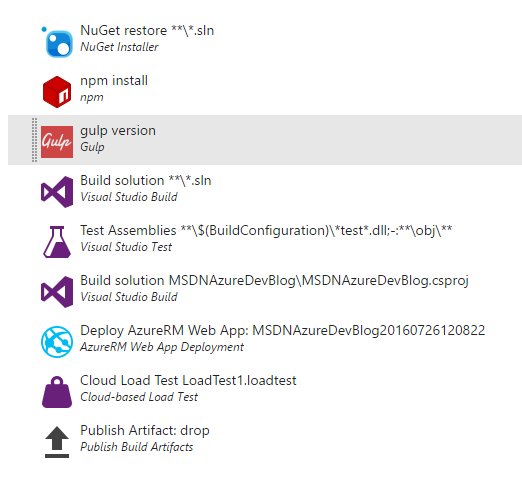
Updating the build pipeline to deploy to the new staging slot can be specified in the Deploy AzureRM Web App step as follows:
Load Testing
The change will then deploy the website to the new slot but our load testing will still be pointing to the main web app and not the staging slot. There are many ways to update the load test to handle this. The simplest would be to update the webtest to instead point to the staging slot url. The second takes a bit more effort but provides the benefit of being able to use the same webtest against multiple websites. This involves promoting the webtest url as a parameter and setting this in our load test definition.
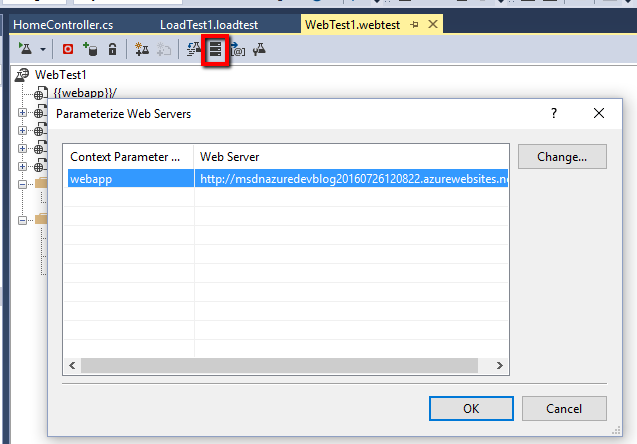
The first step is to parameterize the web servers which detects the called web servers and creates corresponding context parameters. In the image below I renamed the generated context parameter to webapp:
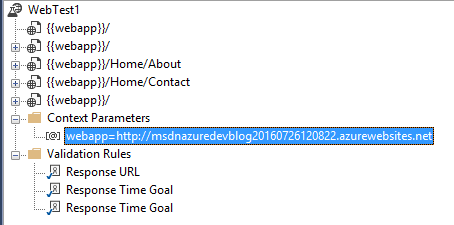
The following shows the webapp parameter in the webtest file. Note how all the urls have been parameterized:
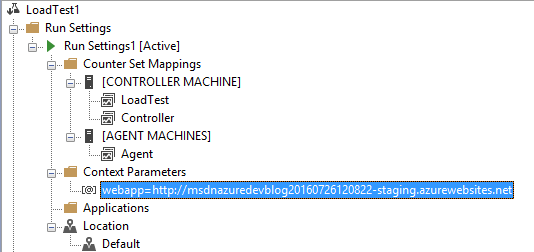
The next step requires adding a new context parameter to the load test.
Note: in more complex load tests, some care is required when naming the parameters to avoid name collision when referencing multiple webtests in a single load test unless this was the intention. For example, a single parameter for the url to be tested that is defined in all webtest definitions.
As the test project is part of our codebase, a check-in of the latest changes will cause a new build with the parameterized load test.
References:
Swapping Slots
Our build pipeline now deploys to a staging slot and in order to make the changes visible on the main url, a swap is required. After reviewing the staging website, this can be done manually by using Swap on the App Service.

It is also possible to perform the swap in the build process and one approach using powershell is explained well in Switch deployments in Azure web apps.
References:
Conclusion
In summary, the build pipeline has been set to continuously deliver changes to a staging website including running necessary Gulp tasks and unit tests. The deployment has been validated using VSTS Load Testing.
Hopefully this provides a helpful introduction to different aspects of the build process and how they can be pulled together to provide a consistent and more reliable approach to software delivery. There are many tasks and aspects that were not covered so please comment if there is a particular feature or item that you would like to be covered or expanded upon. Also please post any references to sources that provide more detail to VSTS Build.
Cheers!