Ask Learn
Preview
Ask Learn is an AI assistant that can answer questions, clarify concepts, and define terms using trusted Microsoft documentation.
Please sign in to use Ask Learn.
Sign inThis browser is no longer supported.
Upgrade to Microsoft Edge to take advantage of the latest features, security updates, and technical support.
Note
Access to this page requires authorization. You can try signing in or changing directories.
Access to this page requires authorization. You can try changing directories.
This material has been added to a full eBook, Kubernetes Objects on Microsoft Azure.
This post covers getting started with local development using Kubernetes. It will cover configurations, tools, and common troubleshooting. For an overview of this blog series, use this introductory post.
In a typical development scenario, developers start on their local machines before deploying to a remote cluster, most likely in cloud. This post covers setting up a local Kubernetes development environment.
To run Kubernetes locally, one needs to install Minikube. It runs a single node Kubernetes cluster on a developer machine/laptop. Kubernetes has the following three dependencies for setting up a local development environment:
On a Windows 10 local development platform, Hyper-V comes pre-installed and can be turned on as a Windows feature (see Figure 1).

Figure 1. Turning Hyper-V on.
Apart from using the Windows 10 Hyper-V feature, it's possible to use VirtualBox as a hypervisor.
For development platforms other than Windows 10, use one of the hypervisors listed here.
The remainder of this post will use Hyper-V as the hypervisor.
In order to use Hyper-V as hypervisor, the additional step of setting up a Virtual Switch is needed. To set up Virtual Switch, follow these instructions –:
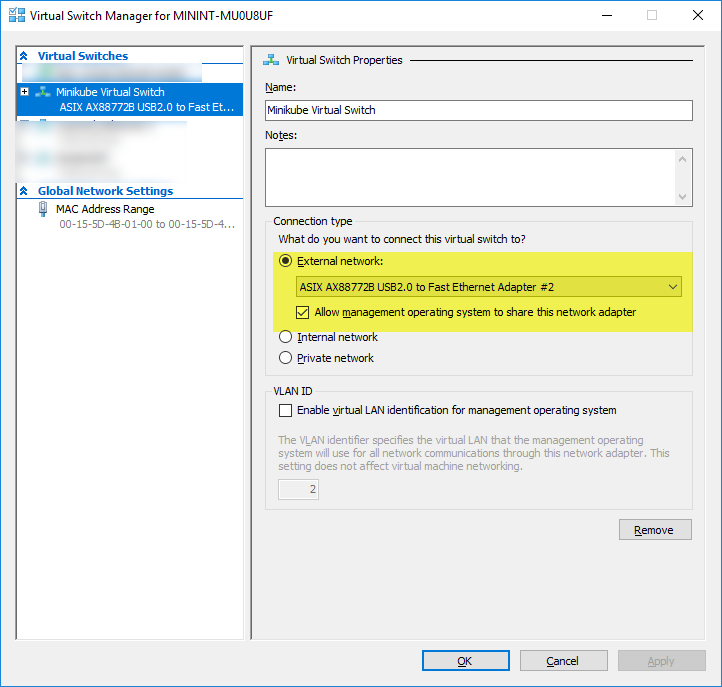
Figure 2: Ensuring the checkbox is selected.
Installing kubectl involves copying the EXE file from here to C:\ (see Figure 3), and then setting it as an environment variable (see Figure 4).
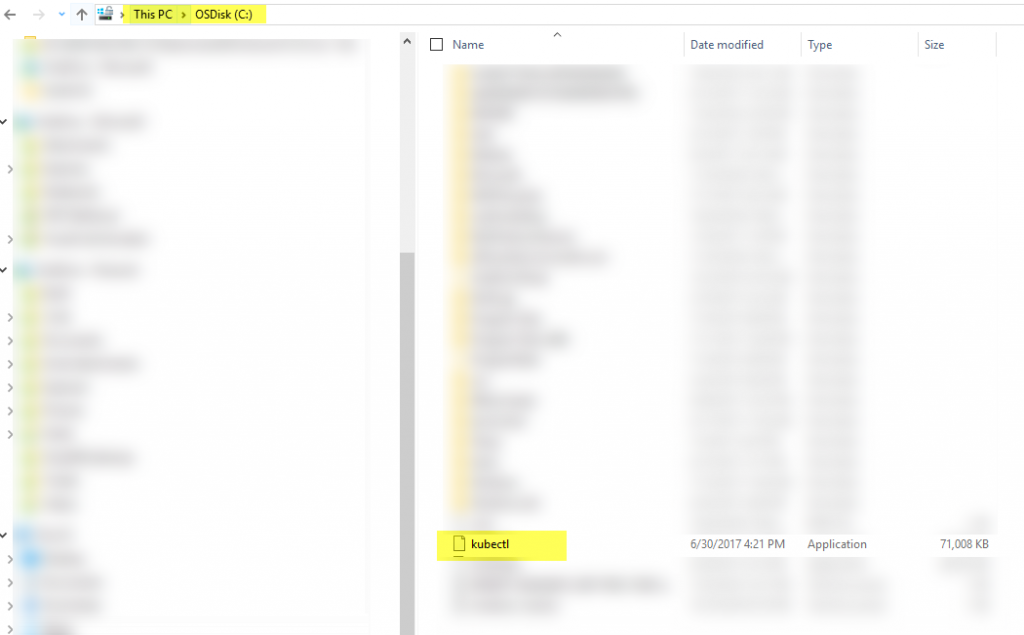
Figure 3. Copying the kubectl EXE file to your C drive. 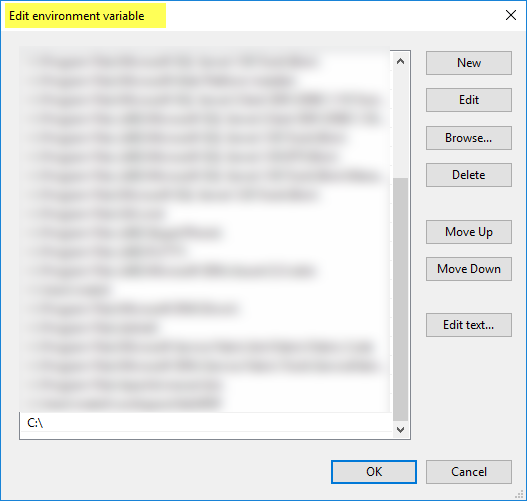
Figure 4. Setting the file as an environment variable.
Just like kubectl, setting up Minikube (EXE) involves copying the latest Minikube executable from here, renaming the downloaded EXE file to minikube.exe, and adding its path in the system environment variables. In this case, I downloaded and renamed the Minikube file at the same location (C:\) as the kubectl file.
It is easy to verify an installation by running the following two commands. (Figure 5 shows the command is for Minikube, and Figure 6 shows the command for kubectl.)

Figure 5. Running the Minikube command. 
Figure 6. Running the kubectl command.
If there is no cluster set up (which won't be for the first time!), ignore the error at Server Version. Next, run the command in Figure 7 to verify the latest version of Kubernetes that is available for installation.
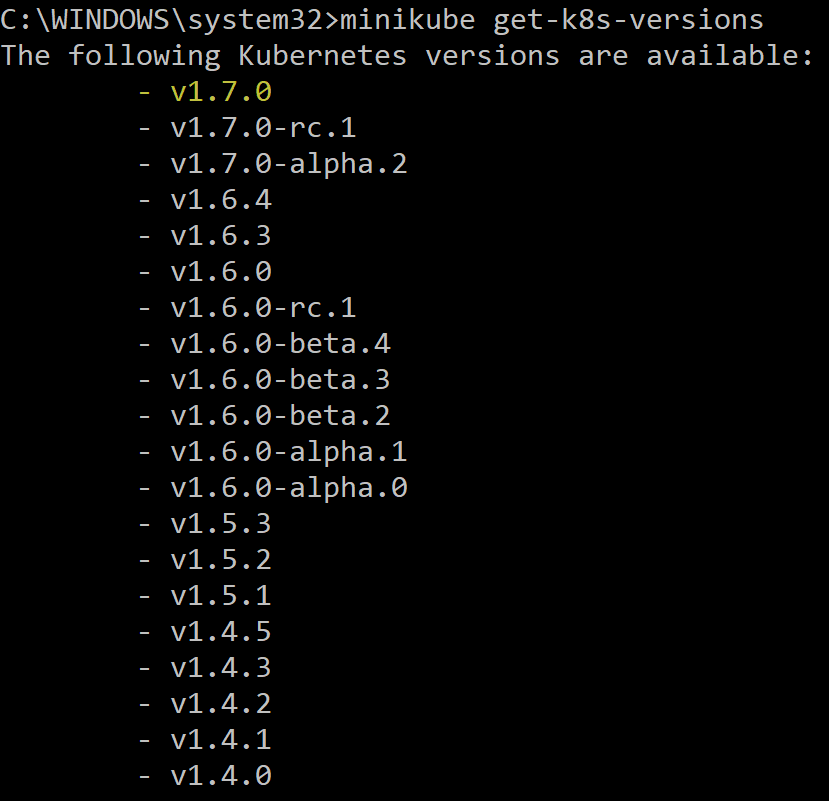
Figure 7. Verifying the latest version of Kubernetes.
In this example, the latest Kubernetes version available for installation is V1.7.0.
To start a 1-node Kubernetes cluster using Minikube, use command in Figure 8.

Figure 8. Using Minikube to starting a 1-note Kubernetes cluster.
Note: It uses the prerequisites set up above (especially Hyper-V and Virtual Switch).
After a while, the message in Figure 9 should appear.

Figure 9. The verification message.
Verify the Minikube status by running the command in Figure 10.

Figure 10. Verifying the Minikube status.
Run the two commands in Figure 11 to verify kubectl as well.


Figure 11. Verifying the kubectl status.
If there are deployment issues, follow these steps:
When running Minikube, use the command in Figure 12 to access its dashboard.

Figure 12. Accessing the dashboard.
A browser window showing the Kubernetes dashboard opens (see Figure 13).
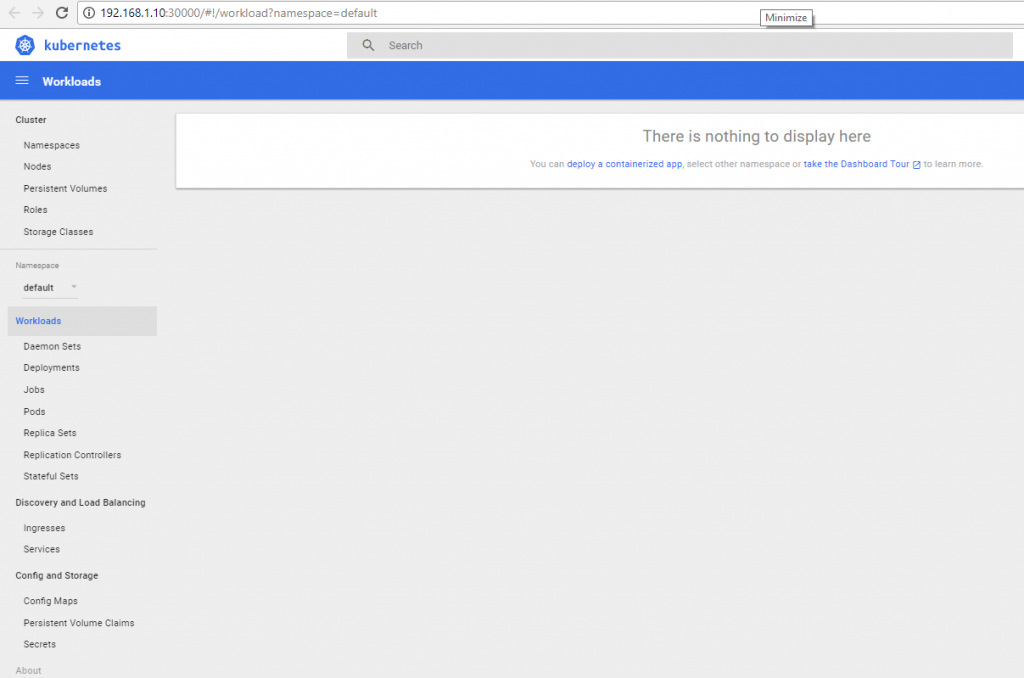
Figure 13. The Kubernetes dashboard.
My next post will cover setting up a Kubernetes cluster in Azure.
Ask Learn is an AI assistant that can answer questions, clarify concepts, and define terms using trusted Microsoft documentation.
Please sign in to use Ask Learn.
Sign in