Tips for a successful submission to Windows Azure App Gallery
Windows Azure provides users with a hub of OSS Web applications like Wordpress, Joomla , Dotnetnuke and many more . This is the Windows Azure Application Gallery. Here are a few tips for a successful submission to Windows Azure Application Gallery:
1. Understand the Principles and Guidelines
The most important thing is to read and understand the Azure App Gallery principles. Make sure your application meets the requirements to be part of the Azure Application Gallery.
If you have questions about the guidelines, please contact appgal@microsoft.com and the team can help you clarify your questions.
2. Building a package for Gallery
The next step is to build a web-deployable application package for your application. Every package must have a manifest.xml and a parameters.xml along with the application content in a ZIP compressed archive.
Manifest.xml : This file provides the information about
- The ACLs needed by your application files and folders
- Database SQL scripts that need to run when deploying the application
- Rename or move files in your application
Parameters.xml : This files contains
- Matches ACLs set in the Manifest file which allow the deployment tool used in the App Gallery installation workflow on Azure to set the correct files and/or folder permissions
- Database related parameters if your application supports a database
- User –defined parameters that are specific to your application
Here is an article that will guide you through the process of building a package for your application: Package an Application for the Windows Web Application Gallery
3. Test your application for Azure Application Gallery
I recommend testing your application for Azure Application Gallery before submission to make the submission to live process successful with the first submitted package.
a. Install dependencies for testing the application.
Use Web Platform Installer to install all these dependencies:
- Web deploy v3.0
- SQL Server or SQL Express (If your application requires it)
- MySQL (If your application uses a MySQL database )
b. Setup a Windows Azure account if you don’t one :
If you don’t already have an account for Windows Azure, you can setup a free trial account that is available for 90 days or you can sign up for an Azure subscription based on the plans available. If you already have a Windows Azure account you can use the existing account.
c. Create a Website for your application using the Azure Management Portal
Login to https://manage.windowsazure.com and create a new site either with
- Custom Create Option : This option creates a site with a database (SQL Azure or MySQL )
- Quick Site Option : This option creates a site without a database
Choose the appropriate option that is appropriate for your application. Once the site is created, click on the site to access its Dashboard. Now download the Publish Profile
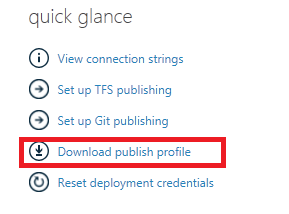
Open the file in any text editor. Here is a sample :
<publishProfile profileName="myazuresite - Web Deploy" publishMethod="MSDeploy" publishUrl="waws-prod-001.publish.azurewebsites.windows.net:443" msdeploySite="myazuresite" userName="$myazuresite" userPWD="7nbQc4ngW" destinationAppUrl="https://myazuresite.azurewebsites.net" SQLServerDBConnectionString="" mySQLDBConnectionString="Database=SiteA3nnQoL6k0;Data Source=us-cdbr-azure-west-b.cleardb.com;User Id=b00ea5f73c603a;Password=somePassword" hostingProviderForumLink="" controlPanelLink="https://windows.azure.com">
d. Build a SetParameters File for deploying your application
You can name this file as you would name a filename, but for the sake of this article let’s say the file is called SetParameters.xml .
This is a sample of the SetParameters.xml file for a Wordpress Package. You can see the parameters.xml file from the web deployable package here .
 <parameters>
<setParameter name="AppPath" value="myazuresite" />
<setParameter name="DbServer" value="us-cdbr-azure-west-b.cleardb.com" />
<setParameter name="DbName” value="SiteA3nnQoL6k0" />
<setParameter name="DbUsername" value="b00ea5f73c603a" />
<setParameter name="DbPassword" value="somePassword" />
<setParameter name="DbAdminUsername" value="b00ea5f73c603a" />
<setParameter name="DbAdminPassword" value="somePassword" />
</parameters>
Note #
- The name attribute for each <setParameter> in the SetParameters file must match a parameter in the parameters.xml file present in web deployable package
- The value attribute for each <setParameter> in the SetParameters file must be set.
- If your application requires Database information, enter the database information of your remote database here. In the above example , I have used a remote MySQL database and enter the information in this file
- SetACL parameters should not be included in setparameters.xml file
- Add a setparameter for any user define parameters in the parameters.xml file of your ZIP package
e. Run Web Deploy Command Line
Open Command Prompt with elevated privileges and run msdeploy.exe to publish the application to Azure site you just created.
Usage:
Msdeploy.exe –verb:sync –source:package=<pathToLocalZip> -dest:auto,computername=”<publisherURLwithHttpsAndPortOr8172>/msdeploy.axd?site=<remoteSiteName>”,username=<publishingUserName>,password=<publisherPwd>,authtype=basic - setParamFile:<pathToLocalSetParamFile>
Example:
C:\Program Files\IIS\Microsoft Web Deploy V3>Msdeploy.exe -verb:sync -source:package="c:\packages\MyApplication.zip" -dest:auto,computername='https://waws-prod-001.publish.azurewebsites.windows.net:443/msdeploy.axd?site=myazuresite',username='$myazuresite',password='7nbQc4ngW',authtype=basic -setParamFile:"c:\setparameters.xml"
Once your application package has been successfully deployed to Azure site. Browse the Site URL and to verify if the application was successfully deployed. If there are any issues for example the parameters values did not get replaced correctly, then fix the regular expressions and make sure the scope of the file is correct. Make the required package changes and try again till the deployment is successful.
f. Test Application Runtime on Azure
Test your application thoroughly to make sure the application’s features are not affected on Azure and it works on our Production environment.
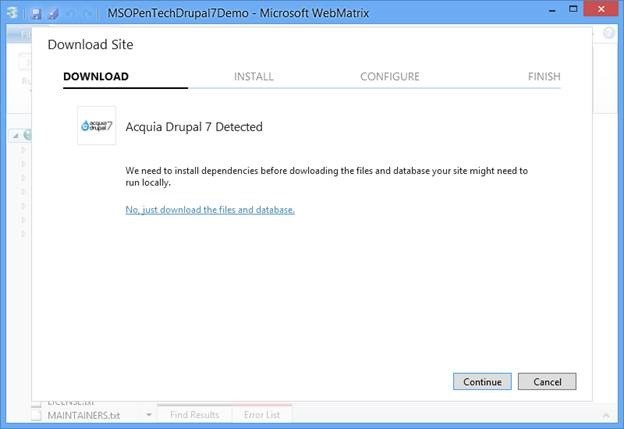
g. Download your application using Web Matrix
Access your Azure site’s dashboard, and click on the Web Matrix button. This should open your application in Web Matrix and Web Matrix will detect your application when downloading the content of your site. For example, if your azure site is an Acquia Drupal Site; then Web Matrix will inform you that “Acquia Drupal site was detected “and will request you to continue setting up Acquia Drupal local site on Web Matrix as well as installing dependencies for Acquia Drupal.
If your application is currently not in the Web Matrix Web App Gallery, then your application will be installed as a Generic Application. This is by design.
Run your local site that was created in this step on Web Matrix and test your application to make sure the state of the application is maintained compared to the Azure Website
h. Publish your application back to Azure Website
In WebMatrix, click Publish button from the Home ribbon to display the Publish Preview dialog box for the web site. Click on Continue to publish the content of your application to the Azure Website. Once this is completed, browse the Azure website URL to see if the application was published successfully.
4. Submit your application for Windows Azure Application Gallery
You can submit your application here . If your application is currently not part of the Azure Gallery , please do send an email to <appgal@microsoft.com> informing them that you want to be part of the Azure Application Gallery .