Custom Azure RBAC roles and how to extend existing role definition’s scope

Azure Role-Based Access Control (RBAC) enables fine-grained access management for Azure resources. Using RBAC, you can grant only the amount of access that users need to perform their jobs. This is considered a best practice for managing resources in Azure.
**Please note: This post includes PowerShell scripts. To learn more about how to use Azure PowerShell scripts check this post here.
Sometimes you will find that none of the built-in roles meet your specific access needs. That’s when you can create a custom role. Custom roles can be created using Azure PowerShell, Azure Command-Line Interface (CLI), and the REST API. There is no UI option using the portal at the time of writing this post unfortunately.
Just like built-in roles, custom roles can be assigned to users, groups, and applications at subscription, resource group, and resource scopes. Custom roles are stored in an Azure AD tenant and can be shared across all subscriptions that use that tenant as the Azure AD directory for the subscription.
To create a custom role, you need to define the role in JSON format.
The definition consists of three main sections
- Role identifying information (Name, description …etc.)
- Included/Excluded actions
- Scope
Here is an example of a role definition JSON
 {
   "Name": "Virtual Machine Manager",
   "Description": "Can restart virtual machines that can be view only.",
   "Actions": [
      "Microsoft.Compute/virtualMachines/start/action",
      "Microsoft.Compute/virtualMachines/restart/action"
   ],
   "NotActions": [
   ],
   "AssignableScopes": [
      "/subscriptions/FFBBA206-76CF-42CE-B97E-0CD948BACB69",
      "/subscriptions/FFBBA206-76CF-42CE-B97E-0CD948BACB69"
   ]
}
In the above role definition, we allow the action or starting and restarting a VM. Note that this custom role will not be useful to the assigned user/group unless it’s the user/group already has read access on VM resources via a different role. We chose to let this permission be handled on a separate role intentionally.
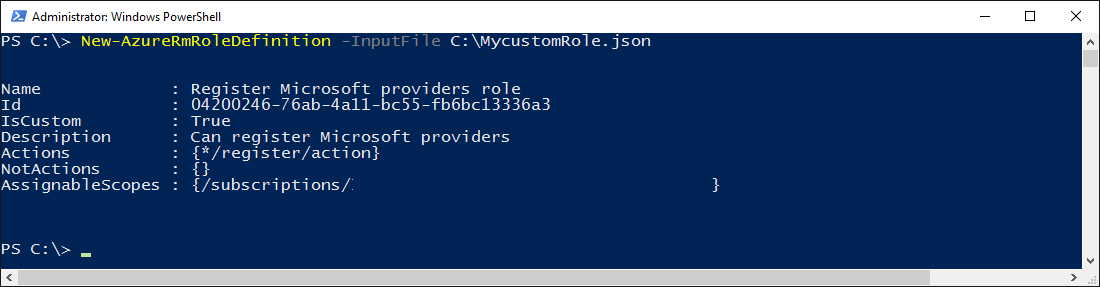
The next step is to save the above definition in a file ‘MycustomRole.json’ then execute the following PowerShell command to add the custom role definition:
New-AzureRmRoleDefinition -InputFile C:\MycustomRole.json
Now you can go to the portal and assign this custom role to users or security groups as follows:

To delete an existing custom role, run the following command:
Remove-AzureRmRoleDefinition -Id ROLE_DEFINITION_ID
Or
Remove-AzureRmRoleDefinition -Name "ROLE_DEFINITION_Name"
** You need to make sure that there are not users/groups assigned to that role before you attempt to delete the role or you will get an error.
Sometimes you create a custom role and you find out that you need to extend the scope of the role to include more subscriptions or resource groups that has been created after the custom role has been created.
To achieve that following the steps:
First, load the desired role definition in a variable either by Name or ID
Add the new scopes you would like to add (repeat this step as needed)
Update the role definition in the cloud with the changes you just did (submit changes)
 $role = Get-AzureRmRoleDefinition -Name "ROLE_DEFINITION_NAME"
$role.AssignableScopes.Add("/subscriptions/NEW_SUBSCRIPTION_ID_GOES_HERE")   ##[[Repeat this step to add all the subscriptions you want to add]]
Set-AzureRmRoleDefinition -Role $role