How to scale out Dynamics 365 for Finance and Operations on-premises
How to scale out Dynamics 365 for Finance and Operations on-premises
In this post I’m going to explain how to scale out Dynamics 365 for Finance and Operations on-premises by adding new VMs to your instance.
Overview
The process is quite straight forward and Service Fabric is going to do the remaining jobs once a new node added to Service Fabric Cluster. In this post, I’m going to showcase it by adding a new AOS node to an existing Dynamics 365 for Finance and Operations 7.3 with Platform Update 12 on-premises instance. Basically, the procedure is as follows.
- Update Dynamics 365 for Finance and Operations on-premises configurations for new AOS node
- Setup new AOS machine for Dynamics 365 for Finance and Operations on-premises
- Add new AOS machine as an AOS node in Service Fabric Cluster
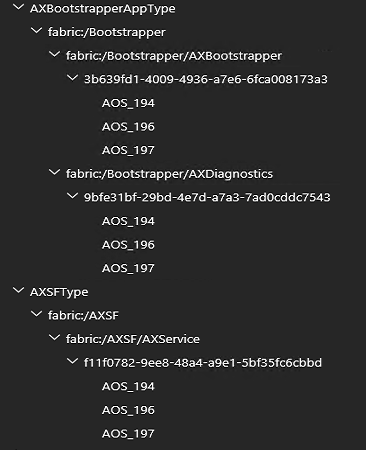
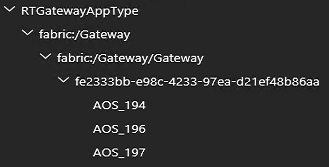
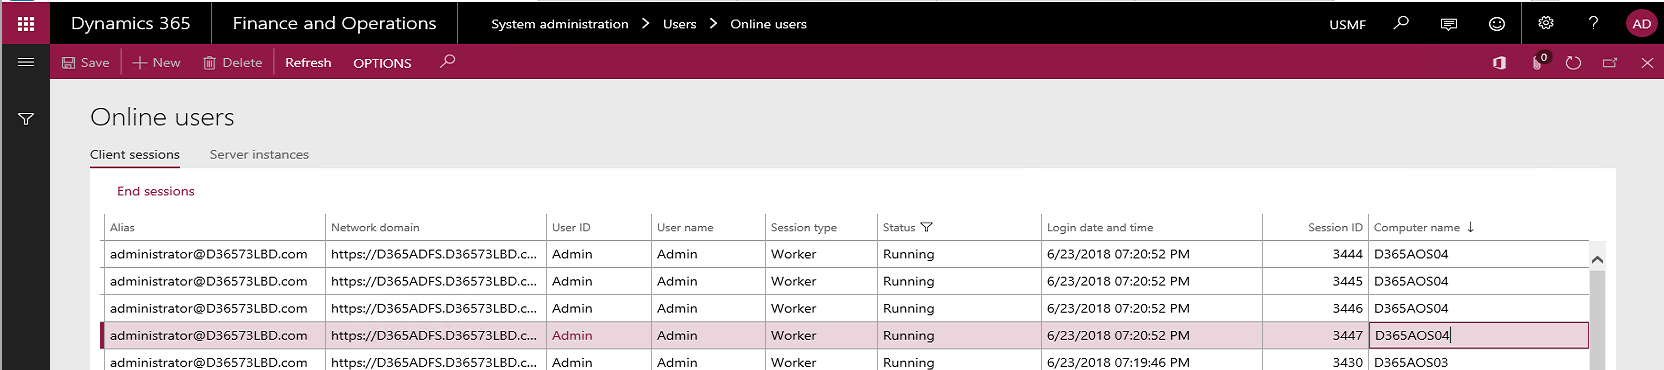
- Verify new AOS node is functional
Prerequisites
- New AOS machine must fulfill the system requirements documented in here
- Basic configurations on new AOS machine like join domain, IP assignment, enable File and printer sharing… are done
Procedures
Update Dynamics 365 for Finance and Operations on-premises configurations for new AOS node
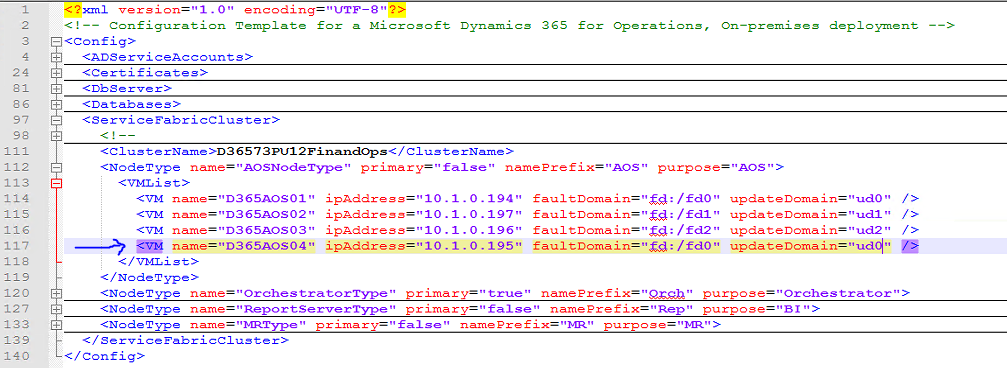
- Update ConfigTemplate to include new AOS node. For detailed instructions, please refer to documentation in here.
a. Identify which fault and upgrade domain new AOS node will belong to
b. Update AOSNodeType section to include new AOS machine

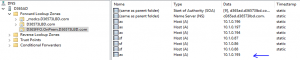
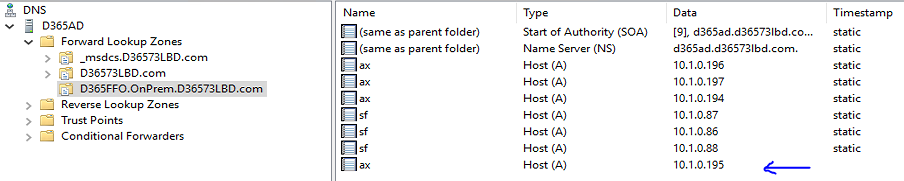
- Add A record for new AOS node in DNS Zone for Dynamics 365 for Finance and Operations on-premises. For detailed instructions, please refer to documentation in here.
- Run cmdlet
Update-D365FOGMSAAccountsto update Grouped Service Accounts. For detailed instructions, please refer to documentation in here.

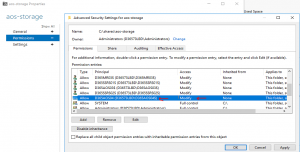
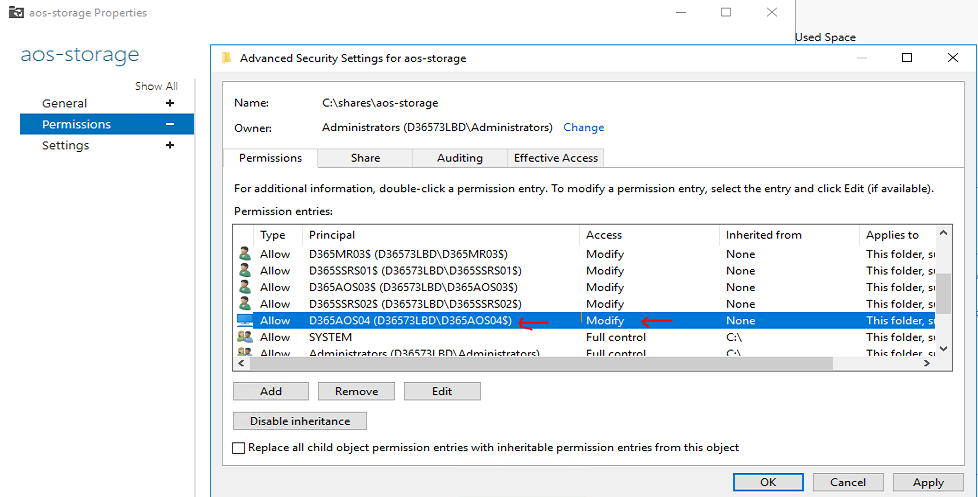
- Grant Modified permission of file share aos-storage to new AOS machine. For detailed instructions, please refer to documentation in here.

Setup new AOS machine for Dynamics 365 for Finance and Operations on-premises
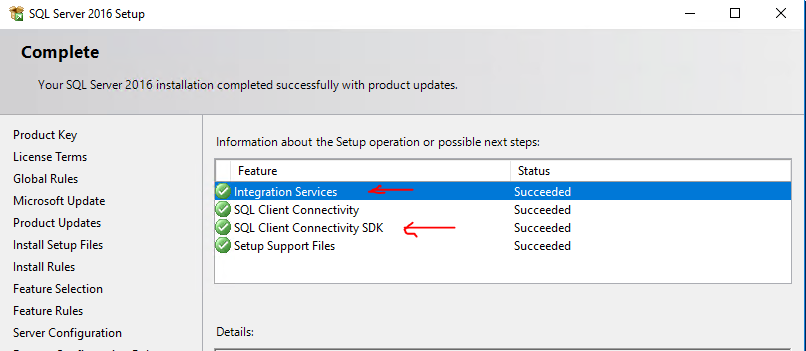
- Install prerequisites. For detailed instructions, please refer to documentation in here
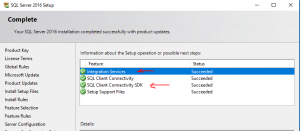
- a. Integration Services
- b. SQL Client Connectivity SDK
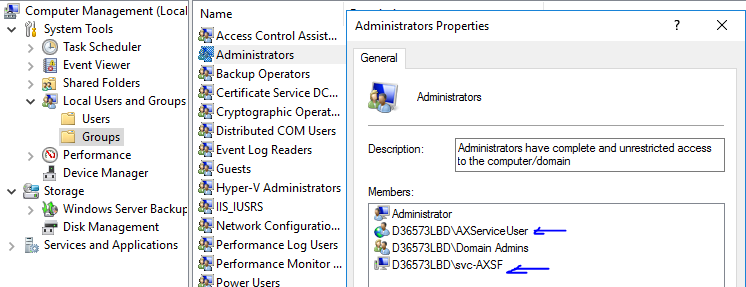
- Add gMSA svc-AXSF$ and domain user AxServiceUser to local administrators group

- Setup VM. For detailed instructions, please refer to documentation in here.D365FFO-LBDNOTE: D365FFO-LBD folder is generated by cmdlet
Export-Scripts.ps1when deploy Dynamics 365 for Finance and Operations on-premises per document in hereConfigure-PreReqs.ps1``.\Add-GMSAOnVM.ps1``.\Import-PfxFiles.ps1``.\Set-CertificateAcls.ps1 - a. Copy
- folder from an existing AOS machine, then run below steps in powershell as an administrator from D365FFO-LBD folder
- b. Run
- to install pre-req softwares on new AOS machine
- c. Run below cmdlets to complete pre-reqs on new AOS machine
- Run
Test-D365FOConfiguration.ps1to verify all setup is done correctly on new AOS machine - Install ADFS certificate and SQL Server certificateTrusted Root Certification AuthoritiesLocal MachineTrusted Root Certification AuthoritiesLocal Machine

- a. Install ADFS SSL certificate to
- of
- store
- b. Install SQL Server (the .cer file) in
- of
- store

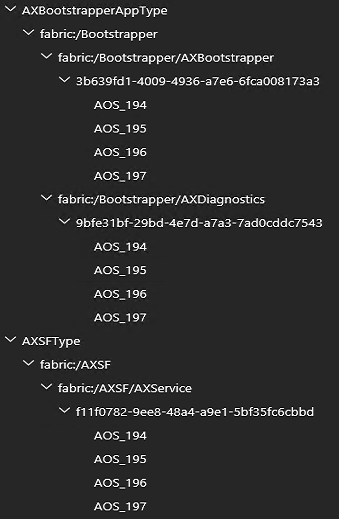
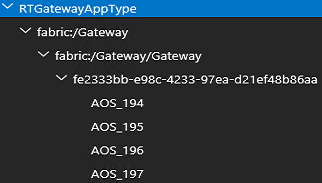
Add new AOS machine as an AOS node in Service Fabric Cluster
- The full instructions about how to add or remove a node in a existing Service Fabric Cluster could be found in here. Below steps are performed in new AOS machine.
- Download, unblock and unzip the same version of standalone package for Service Fabric for Window Server for existing Server Fabric Cluster
- Run Powershell with elevated privileges, and navigate to the location of the unzipped package in above step
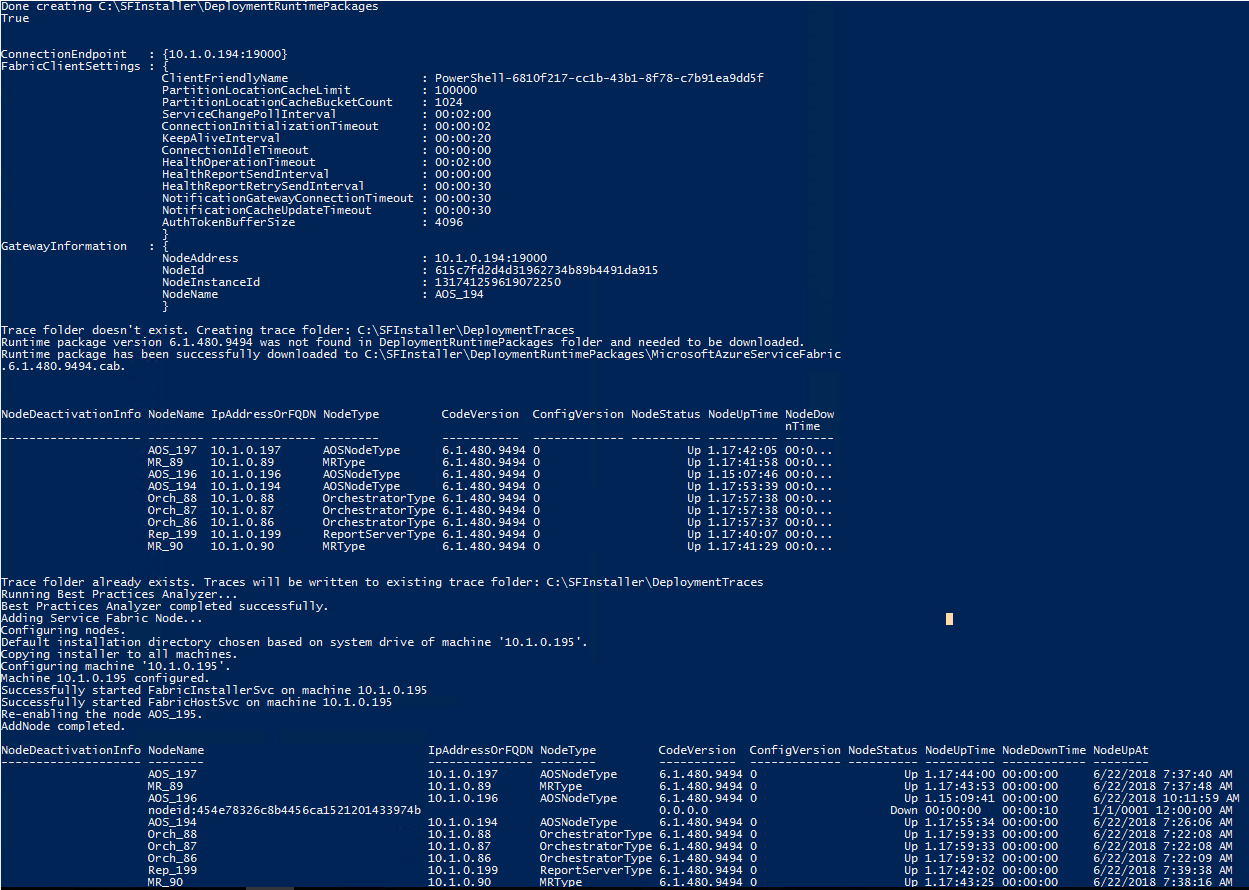
- Run below cmdlet to add new AOS machine as an AOS node in Service Fabric cluster
.\AddNode.ps1 -NodeName <AOSNodeName> -NodeType AOSNodeType -NodeIPAddressorFQDN <NewNodeFQDNorIP> -ExistingClientConnectionEndpoint <ExistingNodeFQDNorIP> :19000 -UpgradeDomain <UpgradeDomain> -FaultDomain <FaultDomain> -AcceptEULA -X509Credential -ServerCertThumbprint <ServiceFabricServerSSLThumbprint> -StoreLocation LocalMachine -StoreName My -FindValueThumbprint <ServiceFabricClientThumbprint>AOSNodeName – Node name of a Service Fabric Cluster. Refer to configuration file or Service Fabric Cluster explorer to see how existing AOS nodes namedAOSNodeType – the node type of new node isNewNodeFQDNorIP – FQDN or IP of new nodeExistingNodeFQDNorIP – FQDN or IP of an existing nodeUpgradeDomain – upgrade domain specified in ConfigTemplate for new nodeFaultDomain – fault domain specified in ConfigTemplate for new nodeServiceFabricServerSSLThumbprint – thumbprint of Service Fabric server certificate, star.d365ffo.onprem.contoso.comServiceFabricClientThumbprint – thumbprint of Service Fabric client certificate, client.d365ffo.onprem.contoso.comLocal Machine, My – where certificates installedNOTEAddNode.ps1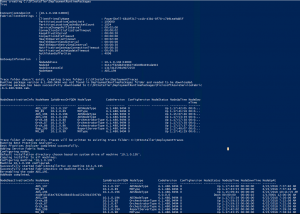
- Note the following elements in above cmdlet
- : Internet access is required as
- script will download Service Fabric runtime package
- Once new node added, set anti-virus exclusions to exclude Service Fabric directories and processes
- Get and edit existing Service Fabric Configuration once new node synced
$ClusterName= "<ExistingNodeFQDNorIP>:19000"``$certCN ="<ServiceFabricServerCertificateCommonName>"Connect-serviceFabricCluster -ConnectionEndpoint $ClusterName -KeepAliveIntervalInSec 10 -X509Credential -ServerCommonName $certCN -FindType FindBySubjectName -FindValue $certCN -StoreLocation LocalMachine -StoreName MyExistingNodeFQDNorIP – FQDN or IP of an existing nodeServiceFabricServerCertificateCommonName – common name of Service Fabric Server certificate, *.d365ffo.onprem.contoso.comLocal Machine, My – where certificate installedGet-ServiceFabricClusterConfigurationClusterConfigurationVersionWindowsIdentities EnableTelemetry
 FabricClusterAutoupgradeEnabled
- a. Run below cmdlet to connect to Service Fabriccluster
- Note the following element in above cmdlet
- b. Run cmdlet
- and save output as a JSON file
- c. Update
- with new version number in JSON file
- d. Remove
- section from JSON file
- e. Remove
- f. Remove
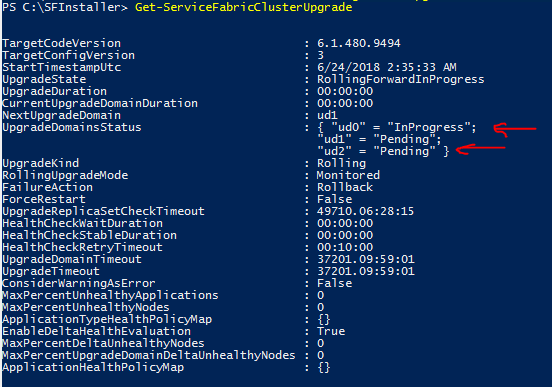
- Start Service Fabric configuration upgrade
Start-ServiceFabricClusterConfigurationUpgrade -ClusterConfigPath <Path to Configuration File>``Get-ServiceFabricClusterUpgrade
- a. Run below cmdlet to start Service Fabric configuration upgrade
- ;
- b. Run below cmdlet to monitor upgrade progress