Solving SSL Certificate expiration problem with an existing Windows Azure Application
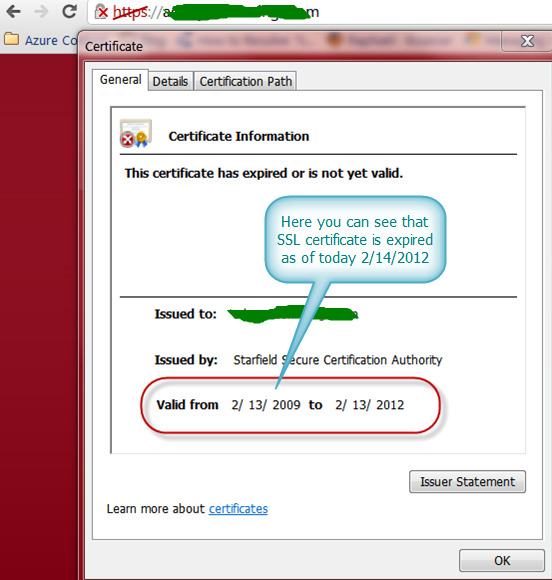
Recently I was working on an issue where the SSL certificate was expired and due to it, the user were warned to not to use site. The certificate expiration was visible as below:
In this situation the following steps should be taken to get this problem resolved:
- Get the new SSL certificate from the Certification Authority for the same domain, by using a machine which has IIS to generate the CRI and submit the CRI to CA so you can get certificate chain (root cert, intermediate cert and domain cert). This is mostly done on a Windows Server machine with IIS on which the domain specific website exists.
- Install the SSL certificate chain on development machine and export the PFX
- Upload the PFX at Windows Azure Management Portal in Service Certificate section
- Add correct certificate thumb ID to your Windows Azure application endpoint
- Repackage Windows Azure application and update it on portal
What if you don’t have access to any of that, Windows Server machine, Visual Studio, previous website etc. To make the problem little more complicated what if the application owner have no access to original Visual Studio application project or CSPKG/CSCFG” because the application was completed by someone else who is nowhere to found.
So if you don’t have anything just a Windows 7 machine, you still can work out this issue as below:
- Enable IIS in your Windows 7 machine
- Use IIS to generate CRI for your domain by entering correct domain specific details for your application
- Get the CRI and submit to your “Certification Authority” and received the certificates (root certificate, intermediate certificates and domain certificates). This could be CRT, P7B files etc.
- Now in IIS, import the certificates in “Server Certificate” section at root of the IIS. You can provide the CRT/P7B files and it will be accepted.
- Once certificate is imported in IIS, you can see it listed in the “Server Certificate” list
- Verify that you have all 3 root certificate, intermediate certificates and domain certificates linked together to your domain certificate
- Now u can install the domain certificate just by use the certificate install option within the certificate
- Now you can also export the domain certificate to PFX, by selecting “export the private key” option in certificate export wizard. Enter the password to protect the private key. This will give you a PFX file for your domain certificate which includes the full certificate chain.
- Now take the PFX and upload to Windows Azure Management Portal in Service Certificate section
- Verify that you have all 3 (root certificate, intermediate certificates and domain certificates) available at the portal and get the domain certificate thumbprint ID.
- Now Edit the Service Configuration file on Portal to replace old expired certificate Thumb ID to new PFX certificate Thumb ID.
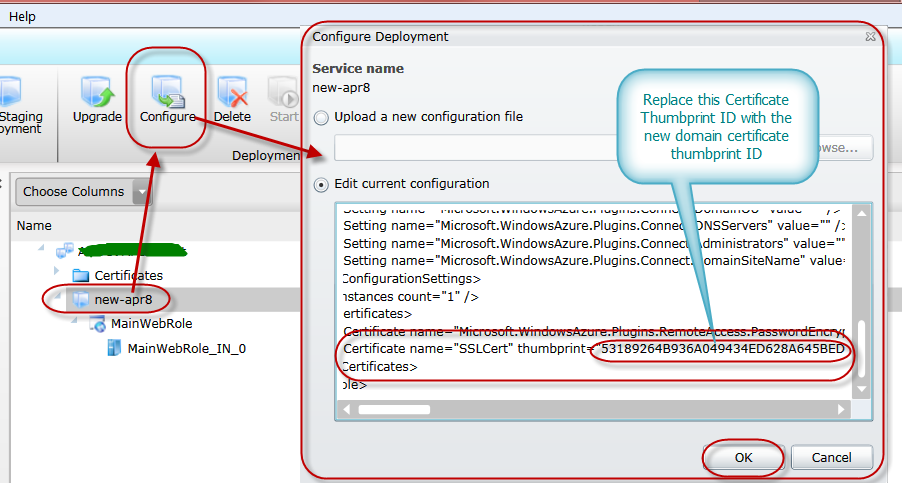
Once configuration update is completed you will see your SSL related problem is resolved.