Windows Azure and Visual Studio LightSwitch 2011 - Part 2/3 : Publishing LightSwitch Application to Windows Azure using LightSwitch Publish Wizard
In this section we will use the application "AzureLightSwitchWebRole" created in first part of this blog (link below) and "Publish" to Windows Azure using LightSwitch Publish Wizard
Creating Windows Azure Service for LightSwitch Application:
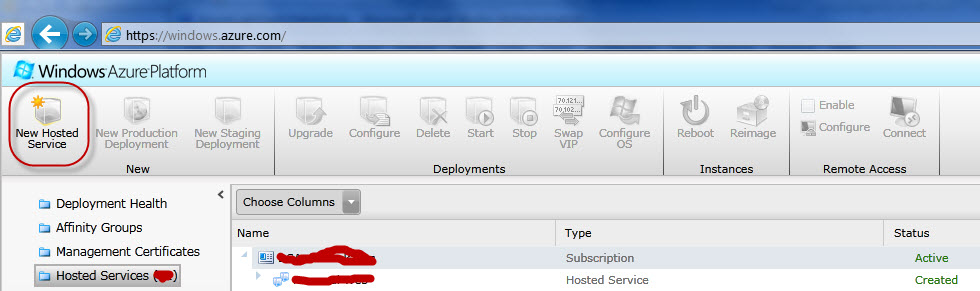
Before we go further and start using LightSwitch Azure Deploy wizard, let visit to "Windows Azure Management Portal" and create an empty hosted service for our application. Open "Windows Azure Management Portal (https://windows.azure.com)".
First create a new hosted service using "New Hosted Service" selection as below:
Then enter the following Hosted Service Information (or you can choose your own name but please remember later) and be sure to select "Deploy Option" as "Do Not Deploy":
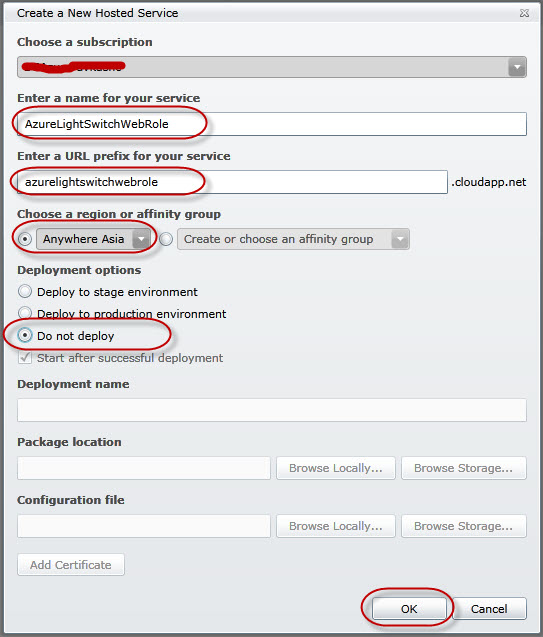
Above I have created a new hosted service names as "azurelightswitchwebrole". Please wait to verify that your service is created without any glitch.
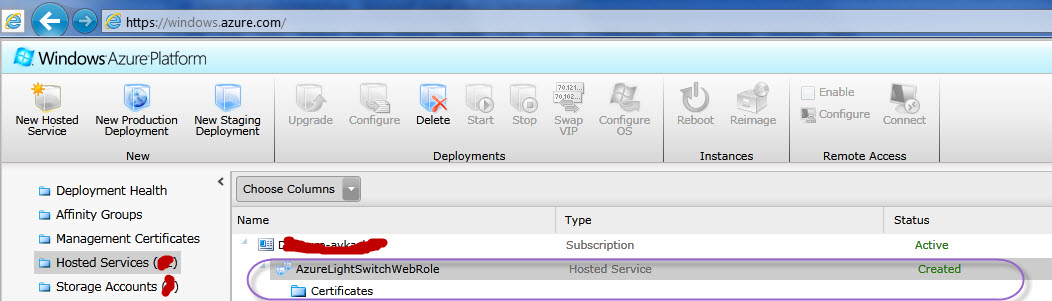
That's good. We have created an empty "Hosted Service" names "azurelightswitchwebrole" successfully.
Visual Studio LightSwitch 2011 Application Deployment to Windows Azure:
Please set your application to "Release" mode and then open you application property and select Publish Option as below:
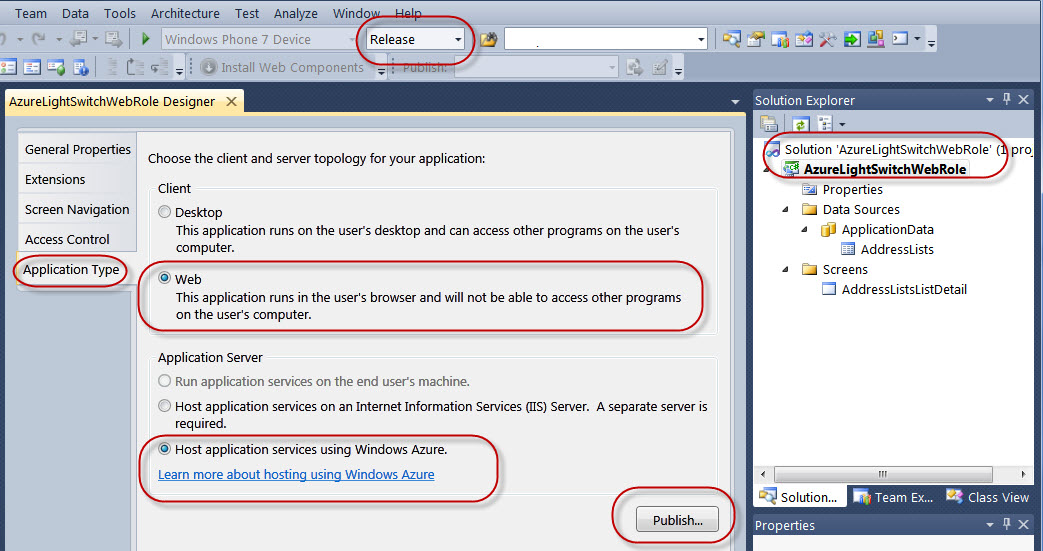
Once you will select "Publish" option in above dialog, you will see "LightSwitch Publish Application Wizard" opens as below:
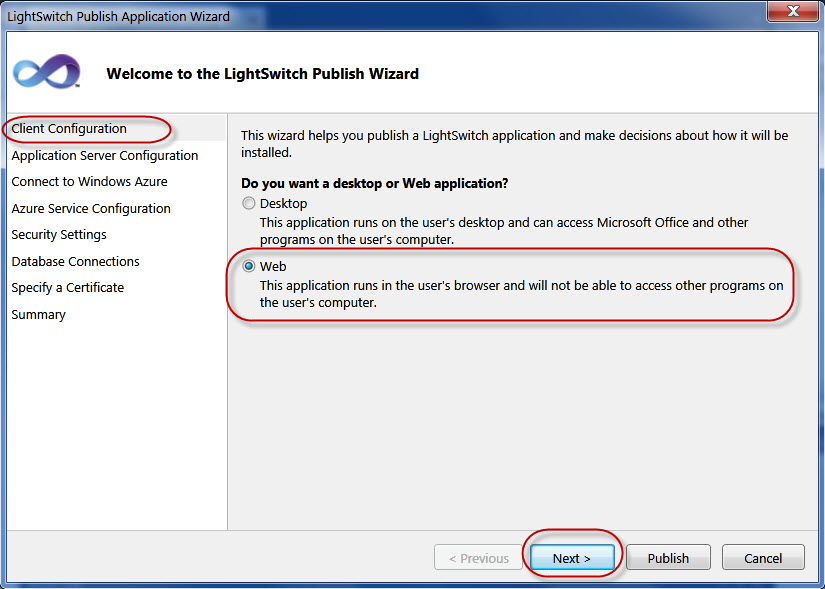
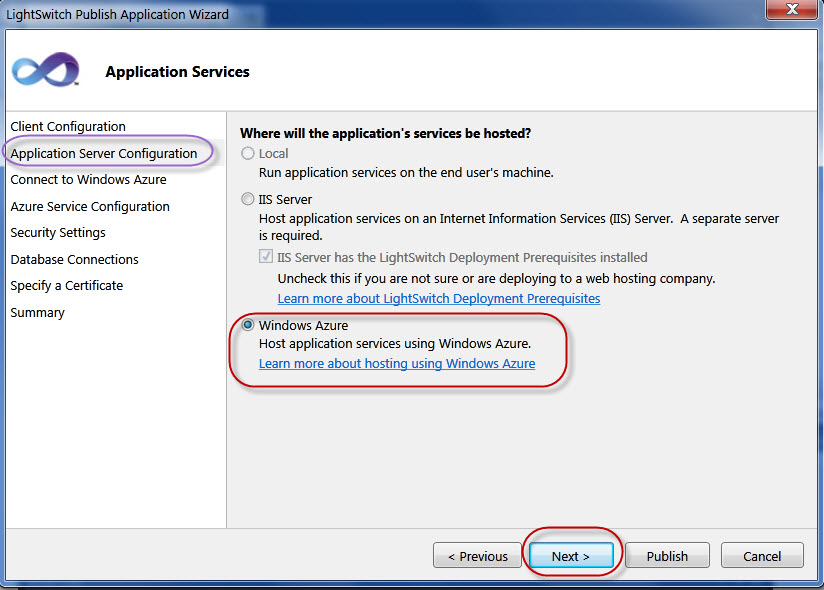
Please select "Web" as your application type and then select "Next" to proceed. You will see now "Application Server Configuration" settings as below in which please select "Windows Azure" as Hosting option and select "Next":
Once you will go next wizard screen, you will see that now we are dealing with Windows Azure settings here. You will need an active Windows Azure account details to further proceed. Now you are at "Connect to Windows Azure" screen as below:
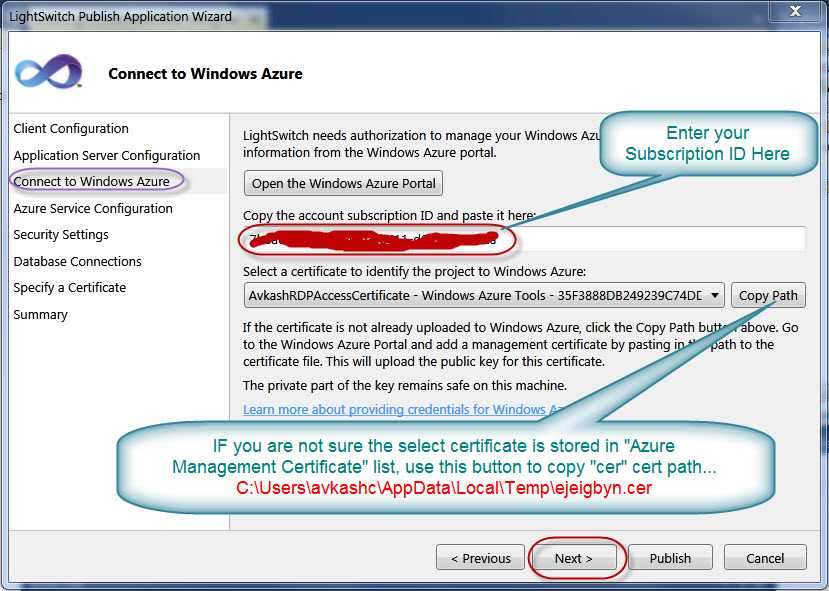
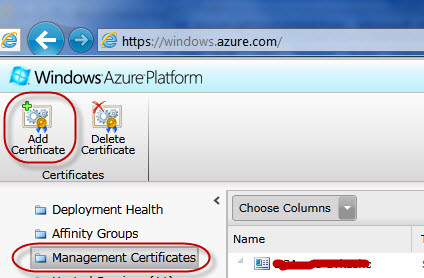
In the above screen, please enter your "Subscription ID" and then select a certificate which is already stored in "Windows Azure Management Certificate" section. If you are not sure selected certificate is located in Windows Azure or not, you can use "Copy Path" button to select the temp CER certificate location and then use Windows Azure Management Portal to upload this certificate.
Note: The following screen shot will show you, where this certificate should be uploaded in your Windows Azure Management Portal:
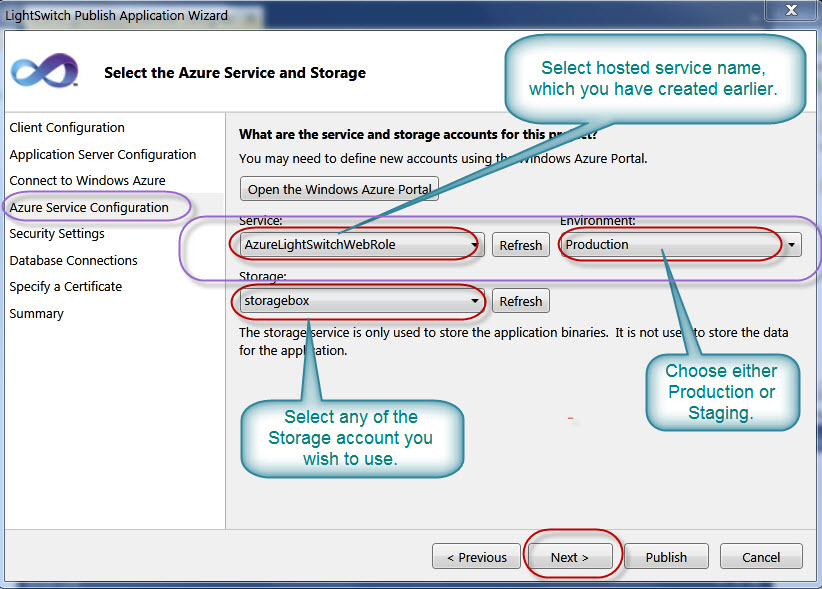
Once you passed "Connect to Windows Azure" screen above you will see the following "Azure Service Configuration" screen in which you will select Azure Service Name which you have created above in step 1.
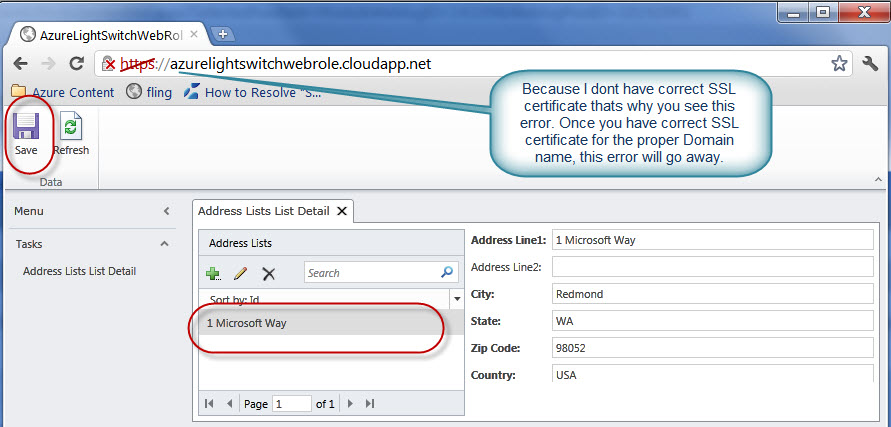
Once you passed above "Azure Service Configuration" screen you will see "Security Settings" screen which is designed to add HTTPS endpoint to your application. Once you will add correct SSL certificate which is issued to your domain, you will be able to get https://www.yourservicename.com endpoint working.
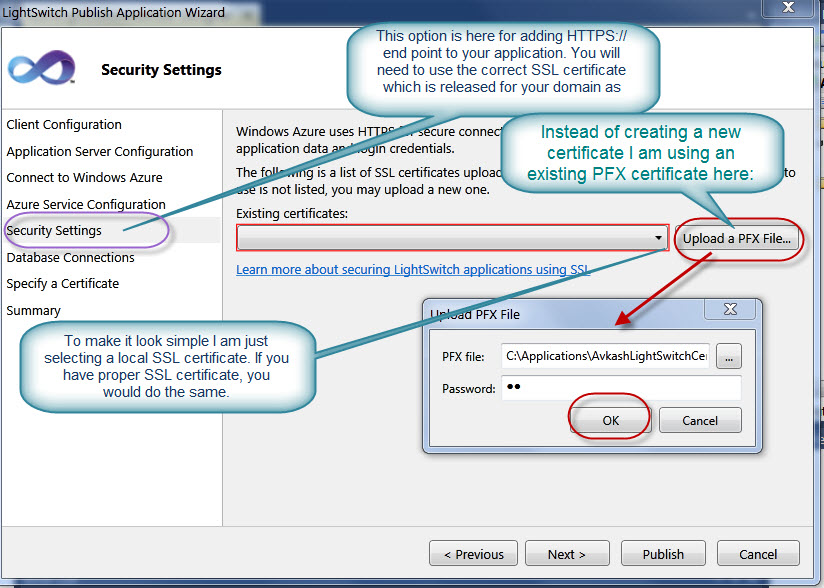
Note: If you will use wrong SSL certificate in above step, you will get warning while accessing your application. You will see those error in my case at the end of this blog as I am using just any SSL certificate here.
Once you passed above "Security Settings" screen, you will jump to next wizard screen as "Database Connections". As your application will run on Windows Azure, you will need to connect this application to a certain database. You can configure your application to connect with any on-premise database however here I will use SQL Azure. The "Database Connections" screen needs the following info:

Note: Please remember the following here:
- Please be sure to add proper Database settings above because during application publish process, this DB configuration will be used to setup table details and if there is any problem, your publish process will break.
- Please be sure to add your local development machine IP Address in the SQL Azure firewall access rule because during publish, this IP address will be used to configure your database.
- Please try to use "Test Connection" option above which will return an error related with IP Address, and you can use this IP address to add into SQL Azure Firewall.
Once you passed above "Database Connections" screen you can go to next step "Specify a Certificate", which is used to sign your XAP file. In my case I have used the same PFX to sign my XAP file. Because my LightSwitch application will run as SilverLight application in Azure, so you can sign your XAP file for further protection. This is good option because your XAP will run on client side so setting this option is good security practice.
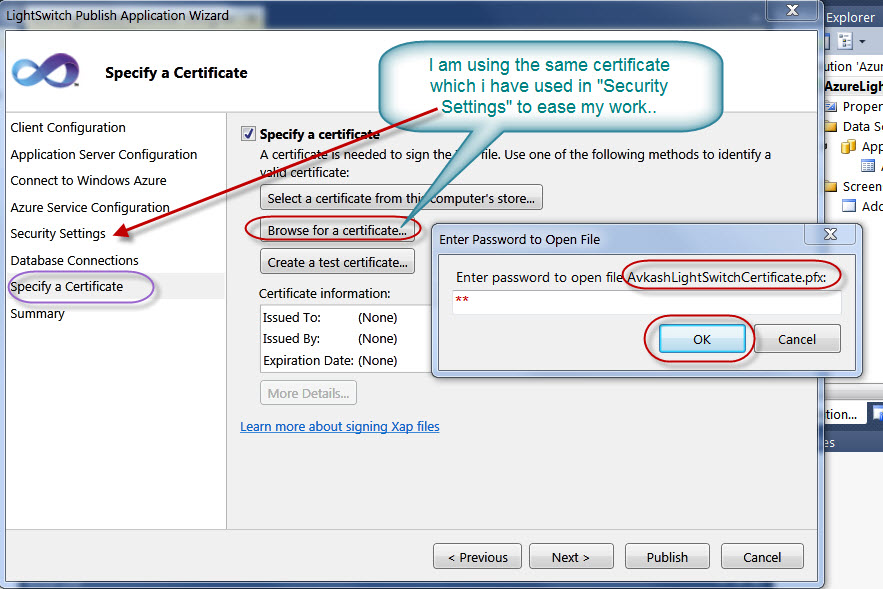
If you decide to not to use XAP signing step, you can bypass this step by un-checking "Specify a certificate" check box.

Once you passed above "Specify a Certificate" screen you are almost ready to start the actual publish step. Please select "Next" to see the summary as below:
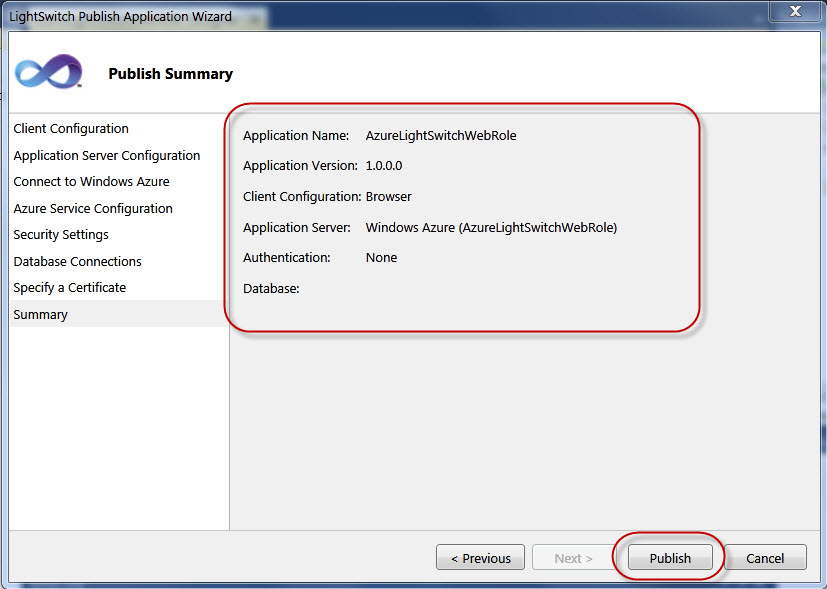
Now you can start publishing just by using "Publish" option above. In your Visual Studio IDE you will see the publish progress as below:

Now if you see your Windows Azure Management Portal you will see a new Package is being process as below:

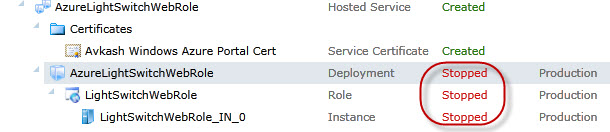
It is possible that you will see your service is stopped state as below and if it is the case, you can start it using "Start" option in Windows Azure Management Portal:
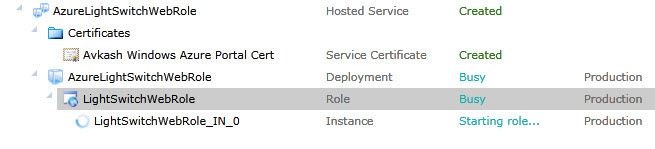
Once service is started you will see some more progress as below:
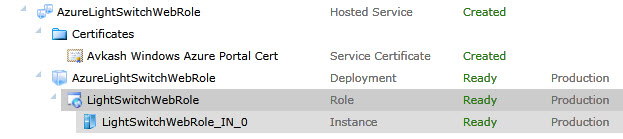
Once all goes well you will see service ready status as below:
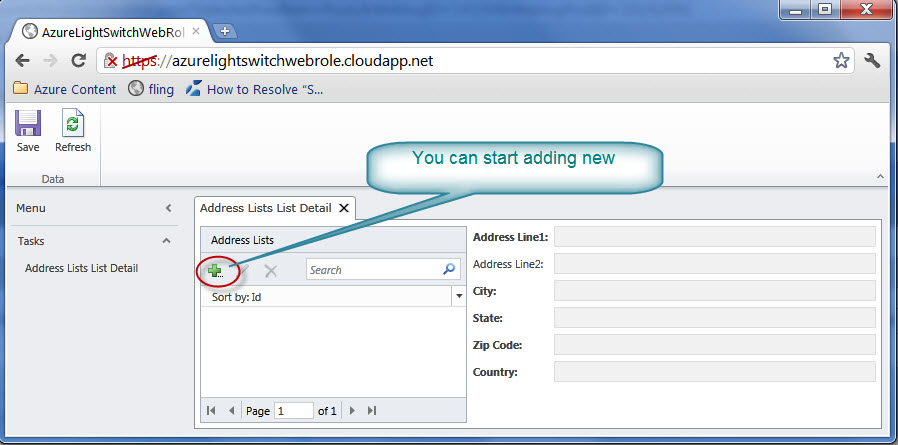
Now you can launch your application using the proper URL. In my case my service name is "AzureLightSwitchWebRole" so I can use https://azurelightswitchwebrole.cloudapp.net or https://azurelightswitchwebrole.cloudapp.net URL to test the application as below:
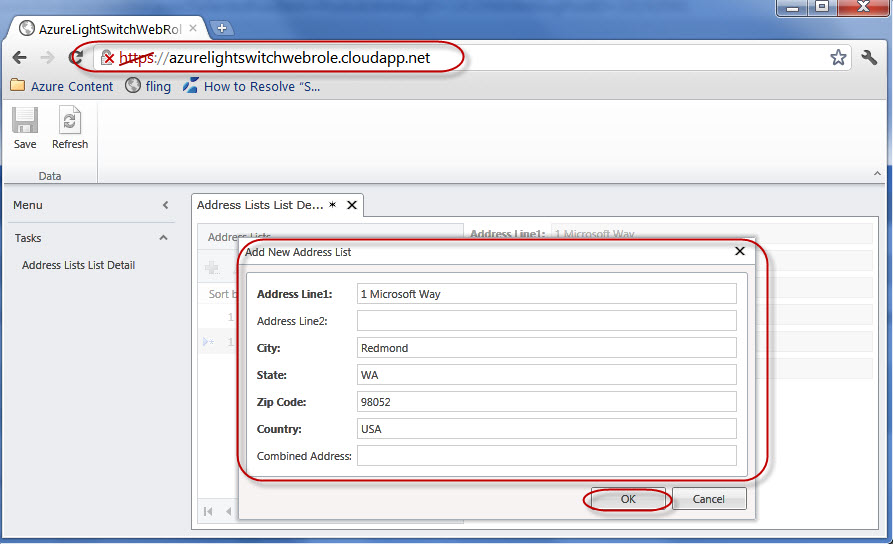
I have also tested that once I close the browser and open later the items are saved. This proved the database connection is working as expected as well as this simple application.