Hosting Silverlight PivotViewer control in Windows Azure Web Role
If you decide to host Silverlight PivotViewer control in Windows Azure ASP.NET web role, here are the instructions:
Tools:
Install
Silverlight PivotViewer SDK:
-
https://www.silverlight.net/learn/pivotviewer/
Microsoft Live Labs Pivot Tools:
-
https://research.microsoft.com/en-us/downloads/dd4a479f-92d6-496f-867d-666c87fbaada/default.aspx
Prebuild Pivot content:
For
example let's assume that you already have pivot hosted at some other site as:
-
https://galaxiespivot.cloudapp.net/ClientBin/galaxies.cxml
-
https://xpert360.net/MIX11/MIX11.cxml
You
can verify that the pivot does work fine in Live Labs Pivot Viewer:
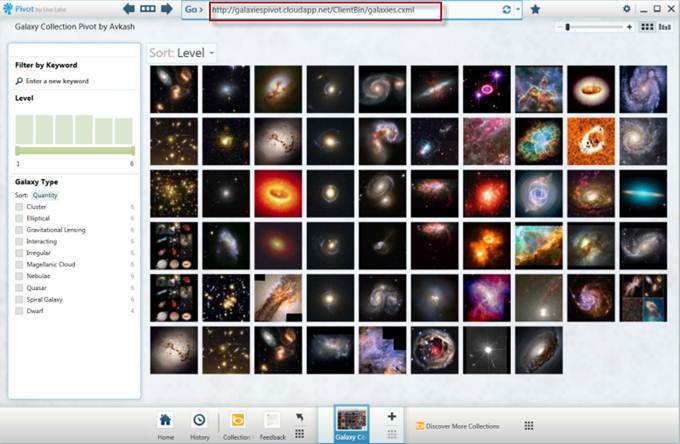
The following steps with help
you to call a Hosted Pivot URL within Silverlight application to run in Windows
Azure:
1.
Create ASP.NET Web
Role
2.
Add a new
Silverlight Application to the application and integrated with Web Role created
in step #1
3.
In the Silverlight
Application add the following references:
a.
System.Windows.Pivot
b.
System.Windows.Pivot.Model
c.
System.Windows.Pivot.SharedUI
d.
System.Windows.Pivot.StringResources
e.
System.Windows.Pivot.Utilities
4.
In the Mainpage.xaml
add the following highlighted code:
<UserControl x:Class="PivotSilverlightApp.MainPage" xmlns="https://schemas.microsoft.com/winfx/2006/xaml/presentation" xmlns:x="https://schemas.microsoft.com/winfx/2006/xaml" xmlns:d="https://schemas.microsoft.com/expression/blend/2008" xmlns:mc="https://schemas.openxmlformats.org/markup-compatibility/2006" xmlns:local="clr-namespace:System.Windows.Pivot;assembly=System.Windows.Pivot" mc:Ignorable="d" d:DesignHeight="300" d:DesignWidth="400">
<Grid x:Name="LayoutRoot" Background="White"> <local:PivotViewer x:Name="pvWidgets" /> </Grid> </UserControl> |
5.
In the
MainPage.xaml.cs please add the highlighted code as below:
namespace PivotSilverlightApp { public partial class MainPage : UserControl { public MainPage() { InitializeComponent(); //pvWidgets.LoadCollection("https://xpert360.net/MIX11/MIX11.cxml",null); pvWidgets.LoadCollection("https://galaxiespivot.cloudapp.net/ClientBin/galaxies.cxml", string.Empty); // Add Hosted Pivot Uri above to launch in Cloud with Silverlight } } } |
6.
Now check the Web
Role and Silverlight application in "Browser" that it is working.
7.
Now Check the Web
Role in compute Emulator and verify it is working fine.
8.
Now Let's work in
Web Role to remove other contents which are not necessary (you sure can keep it
if you wish):
a.
Remove App_data
folder
b.
Remove Account
Folder
c.
Remove Scripts
Folder
d.
Remove Styles Folder
e.
Remove Global.asax
f.
Remove About.aspx
and About.aspx.cs
g.
Remove Site.Master
collection
9.
Remove the following
from the web.config and add the highlighted lines:
<?xml version="1.0"?> <configuration>
<system.web> <compilation debug="true" targetFramework="4.0" />
</system.web>
<system.webServer> <staticContent> <mimeMap fileExtension=".cxml" mimeType="text/xml" /> <mimeMap fileExtension=".dzc" mimeType="text/xml" /> <mimeMap fileExtension=".dzi" mimeType="text/xml" /> </staticContent> </system.webServer> </configuration> |
10.
Add a XML file name clientaccesspolicy.xml to
the Web Role and insert the following content:
<access-policy> <cross-domain-access> <policy> <allow-from http-request-headers="SOAPAction"> <domain uri="*"/> </allow-from> <grant-to> <resource path="/" include-subpaths="true"/> </grant-to> </policy> </cross-domain-access> </access-policy> |
11.
Test the Application
in the Compute Emulator
12.
When test is done
successfully, please package the application and deploy in Azure.
I have the site running at : https://galaxiespivot.cloudapp.net/