How to develop and deploy ActiveX Control using ATL
Create ATL ActiveX Control
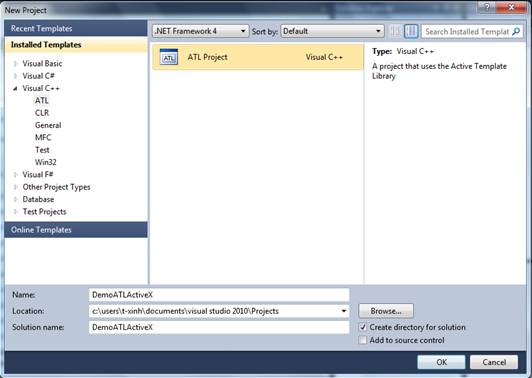
1. In “Visual Studio 2010”, create a new “ATL Project” with Visual C++, which named “DemoATLActiveX” in this project.
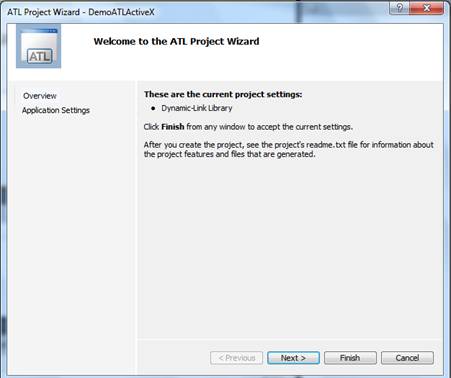
2. Here comes the “ATL Project Wizard” page. Click “Next”.
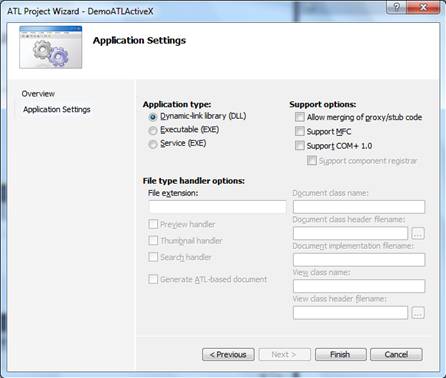
3. Select “Dynamic-link library (DLL) ” as Application type. Click “Finish”.
To add an object or a control using the ATL Control Wizard
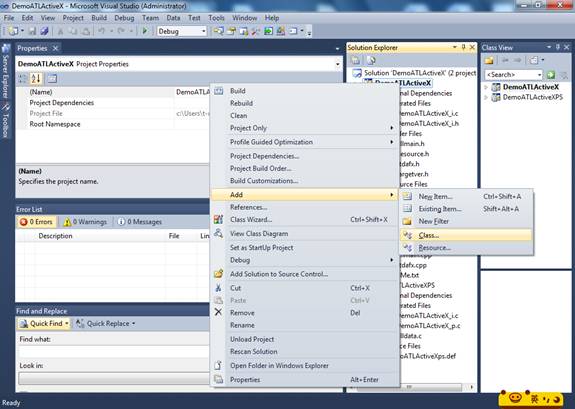
1. Right click “DemoATLActiveX”, click “Add”--> “Class” and choose “ATL Control” , click “Add”.
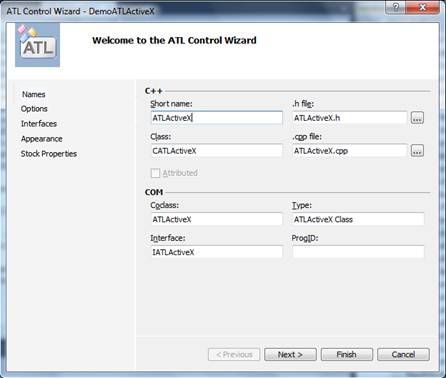
2. Input your ATL control name in the following page, and then click “Next”.
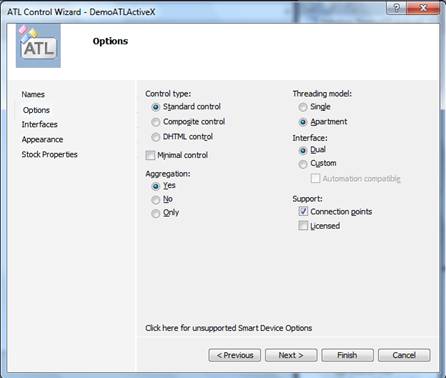
3. In the “Option” page, all these values are the default options as the following picture. But if you have events to supply to a control’s container, you should select “Connection points”. More details about these options, please read here.
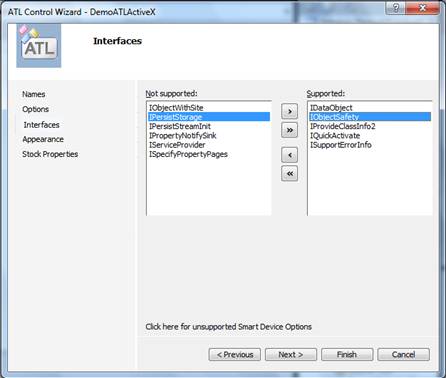
4. Add interfaces your ActiveX Control may support. In this project ,we add “IObjectSafety” interface into it since we should mark ActiveX Control as safe
for scripting and initialization. Click “Next”.
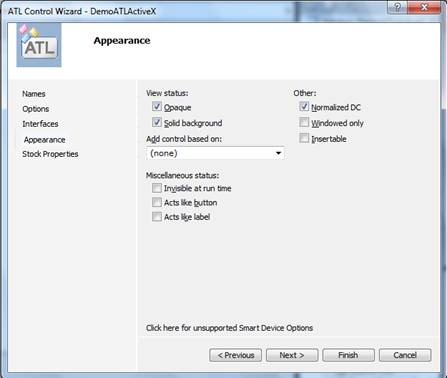
5. Choose Appearance about your ActiveX Control. All the options are default values, and then click “Next”.
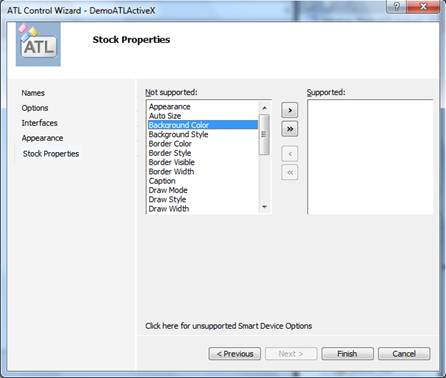
6. Choose Stock Properties as below, which indicates the available properties that are Supported or Not Supported for the control. Click “Finish” to end this wizard.
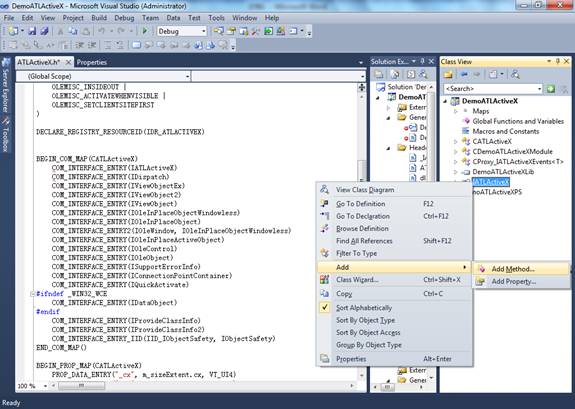
7. Right click “IATLActiveX” interface to add method.
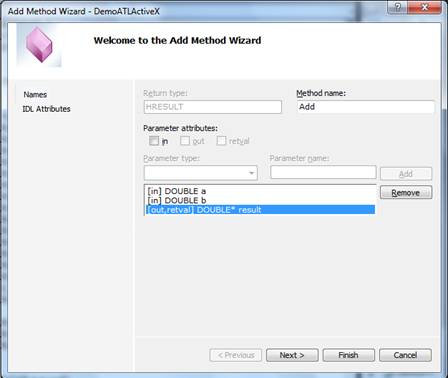
8. Here comes the “Add Method Wizard”. We add three parameters in “Add” function, two of which are “IN” type, the third is “OUT” type. Click “Finish” finally.
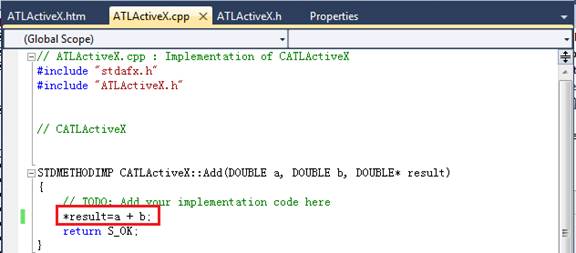
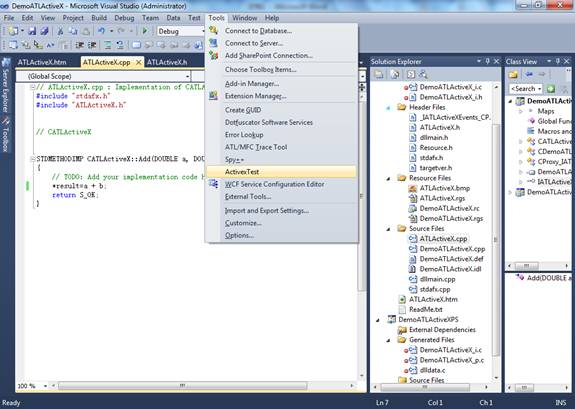
9. Open ATLActiveX.cpp file to edit your implementation code. Here we add a simple expression: *result=a+b;
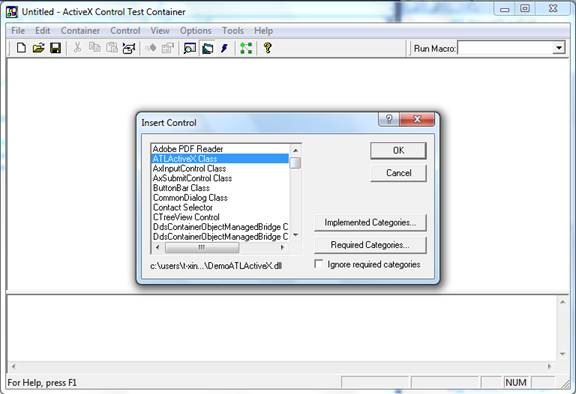
10. Click “Tools”-->”ActiveX Test” to open ActiveX Control Test Container, then insert “ATLActiveX Class” control to test. Click “OK”.
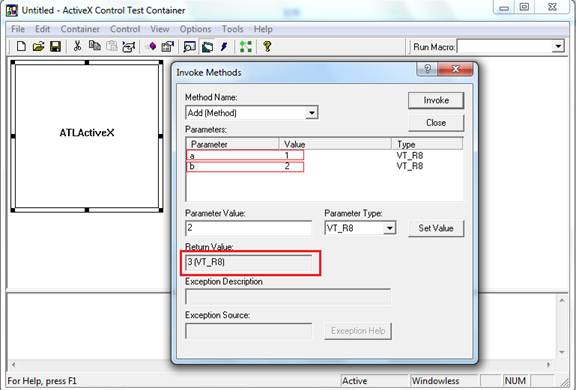
11. Click “Control” -->”Invoke Methods” in the tool bar on ActiveX Control Container. Here we select “Add() ” method to have a test. You may input Parameter Value and click “Invoke” to get the Return Value as below.
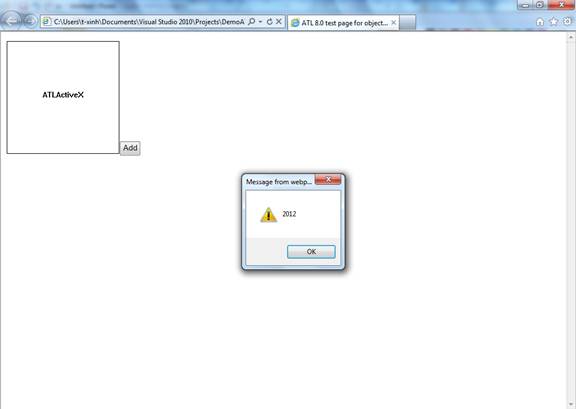
12. Since .htm file will be added into ATL ActiveX Control project after this project is created, now it’s time to modify .htm file to have a test in browser.
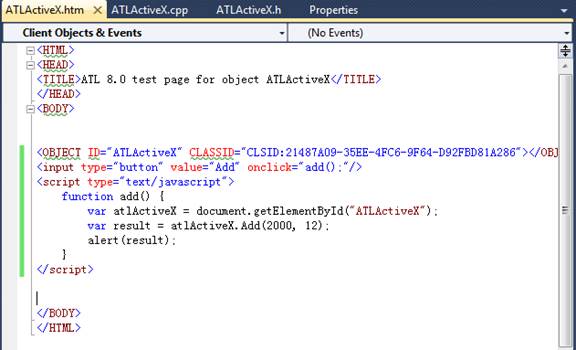
13. After you click “Add” button, you’ll get an alert dialog shows as below picture, which means you’ve created an ActiveX Control successfully.
Building a Safe ActiveX Control
By default, ATL ActiveX controls are not marked as Safe for Scripting and Safe for Initialization.You can easily add support for marking the control safe for scriptable clients by implementing the IObjectSafety interface. This is done by deriving your control from the default ATL implementation, IObjectSafetyImpl. You can use two methods to mark a control as safe for scripting clients:
- Make appropriate entries directly in the System Registry.
- Implement the IObjectSafety interface.
Make appropriate entries directly in the System Registry
Add the entries to the registry to mark the control as 'safe for scripting' and 'safe to initialize'.
[HKEY_CLASSES_ROOT\CLSID\21487A09-35EE-4FC6-9F64-D92FBD81A286\Implemented Categories]
[HKEY_CLASSES_ROOT\CLSID\21487A09-35EE-4FC6-9F64-D92FBD81A286\Implemented Categories\{7DD95802-9882-11CF-9FA9-00AA006C42C4}]
[HKEY_CLASSES_ROOT\CLSID\21487A09-35EE-4FC6-9F64-D92FBD81A286\Implemented Categories\{7DD95801-9882-11CF-9FA9-00AA006C42C4}]
Building a signed ActiveX Control
To use your control on web pages, it is very convenient to distribute it as a .cab (cabinet file). This is a compressed archive - the classic use is to put the .cabfile on a web server, and refer to it from web pages that host the control. Internet Explorer is smart enough to download and install the control if it is not already installed on the client machine, and to selectively update any files that are newer in the .cab file. Microsoft provides CABARC.EXEfor creating and editing .cabfiles.
Creating a .cab package
This section describes creating CAB files for distributing ATL controls over the Internet. To create a CAB file:
1. Create an INF file.
2. Run the CABARC utility.
Creating an INF file
[Version]
signature="$CHICAGO$"
AdvancedINF=2.0
[Add.Code]
DemoATLActiveX.dll=DemoATLActiveX.dll
[DemoATLActiveX.dll]
File-win32-x86=thiscab
clsid={21487A09-35EE-4FC6-9F64-D92FBD81A286}
FileVersion=1,0,0,0
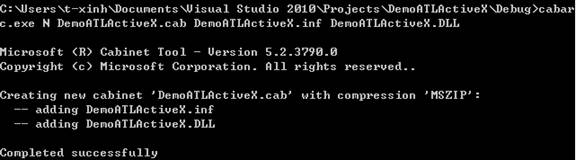
Run the CABARC utility
Code signing tools
Microsoft provides code signing tools as part of the "Microsoft .NET Framework Software Development Kit (SDK) 1.1". To download the SDK, visit the following Microsoft website: .NET Framework SDK Version 1.1. After you install the SDK, you will be able to find the code signing files in the following location on your PC: " \Program Files\Microsoft.NET\SDK\v1.1\Bin". From the many files found in the above BIN directory, the following are of interest to us:
- signcode.exe
- makecert.exe
- cert2spc.exe
- chktrust.exe
- signtool.exe
Signing a CAB file
When downloading an unsigned program, the browser result in annoying error messages complaining that it is an unsigned or unsafe control. You can use a test certificate to sign your code:
Using a test certificate
Before you start with the process, it is highly recommended that you create a "Test certificate" and use it to sign your program as a test run. A program signed by this certificate must not be distributed on the net. Use the following steps to sign and validate the .cab file:
1. Type the following at a command prompt to create a private key file,DemoATLActiveX .pvk.

The file created in this step, DemoATLActiveX .cer, is used to create a .spc file. Type the password in the dialog box.
2. Create a .spc file from the certificate file with the correct password. To do so, type the following line at a command prompt:

3. Use the key information to sign the .cab file:

Validate a CAB file
Follow this procedure to validate a .cab file:
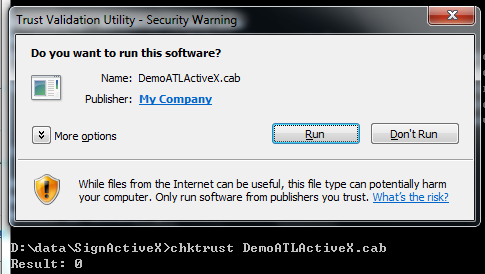
Using SIGNTOOL
Run chktrust.EXE to verify the signing: (Result: 0 means succeed)
Embedding a signed CAB file on a web page
<OBJECT ID="ATLActiveX" CLASSID="CLSID:21487A09-35EE-4FC6-9F64-D92FBD81A286"
CODEBASE ="DemoATLActiveX.cab#version=1,0,0,1"
></OBJECT>
Now you can browse the web page to have a test. You’ll find that the ActiveX control will be downloaded silently.
References:
A Complete Scriptable ActiveX Web Control Tutorial Using ATL
https://www.codeproject.com/KB/atl/ScriptableActiveX.aspx
Creating an ATL Project
https://msdn.microsoft.com/en-us/library/035x3kbh(v=VS.80).aspx
Signing and Checking Code with Authenticode
https://msdn.microsoft.com/en-us/library/ms537364(v=vs.85).aspx
How To IObjectSafety Marks ATL Controls Safefor Initializing
https://support.microsoft.com/kb/168371
Safe Initialization and Scripting for ActiveX Controls
https://msdn.microsoft.com/en-us/library/aa751977(v=vs.85).aspx
Regards,
ZhiXing Lv From APGC DSI Team