Managing Connections in PowerPivot
[This article was contributed by the SQL Azure team.]
A good friend of mine that analyzes databases with business intelligence for a living has told me that the majority of his job is knowing the data. PowerPivot makes it very easy to add additional tables, and bring together multiple data sources –allowing you to discover your data as you build reports. This article will discuss how to manage your connections to SQL Azure from PowerPivot, add additional tables, and build relationships.
After creating the initial connection (which I blogged about here), I always find myself needing to add tables, manage inner database relationships and bring in other data sources. One of the reasons is that once I correlate the data into a PowerPivot report, I realize that I want to generate another variation of that report that requires an additional lookup table or relationship.
A lot of business intelligence is taking two dissimilar data points and relating them in a manner that brings new insight into your data. Typically, these data points are inner related via a network of tables and relationships, which need to be brought into PowerPivot; this might take several trips to the table selection dialog to get right. Being able to access this dialog again is critical to success with PowerPivot.
Finding Your Connection
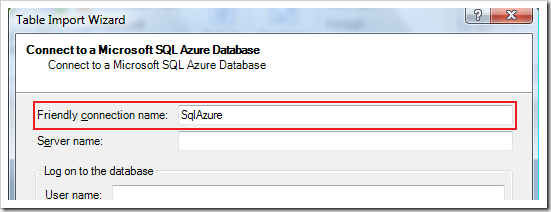
Follow my previous blog post about how to create a connection, and notice that where you enter the server name, login information and password, you are also allowed to name your connection with a friendly name. Each connection must have a unique friendly name in the Excel workbook.
After you have selected your tables, and they have been imported to the Excel workbook, you can access this connection again to download more tables. Using the same connection again to access the same database is a much better idea than going through and building a new connection, it conserves resources in the workbook, and allows PowerPivot to figure out relationships between the tables.
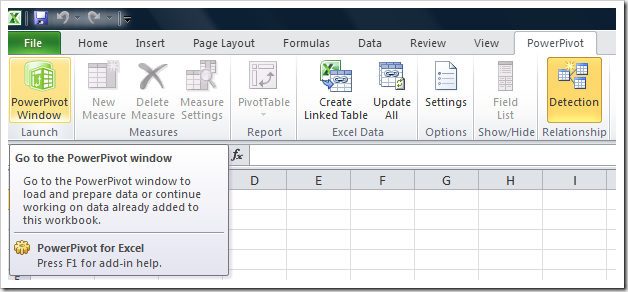
To find access existing connections open the PowerPivot Window
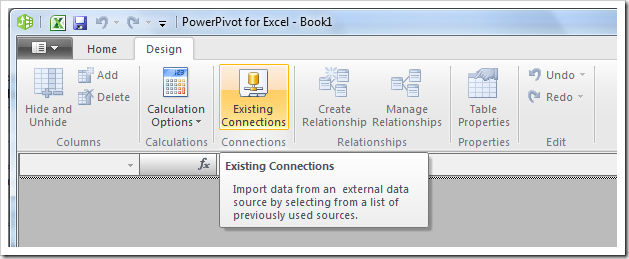
Once the PowerPivot window appears, select the second ribbon bar called Design and look for the Existing Connections button.
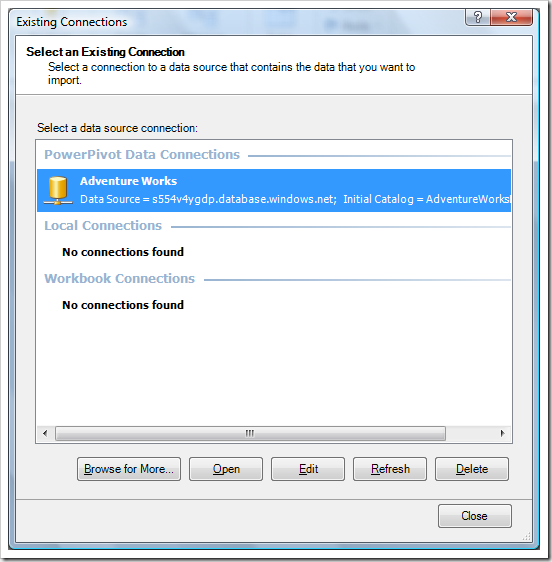
This will bring up the Existing Connections dialog; in the screen shot below you can see the connection to the Adventure Works database on SQL Azure, with the friendly name of Adventure Works.
Double clicking on the connection will open it allowing you to select more tables to download.
Building Relationships
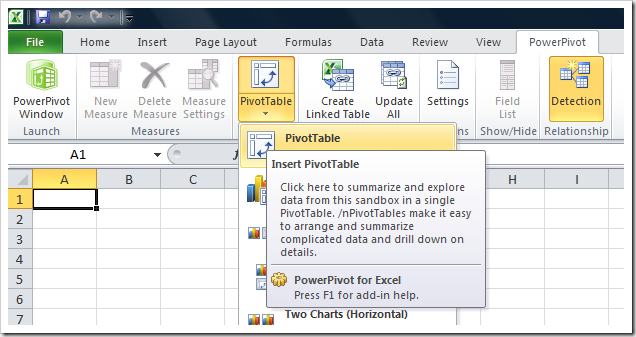
Once you have your tables imported, you can build PivotTables. To do this you close the PowerPivot Window and return to the Excel workbook. In the PowerPivot ribbon choose the PivotTable button and PivotTable.
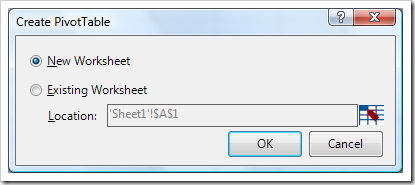
The Create PivotTable modal dialog will appear; here I like to choose New Worksheet.
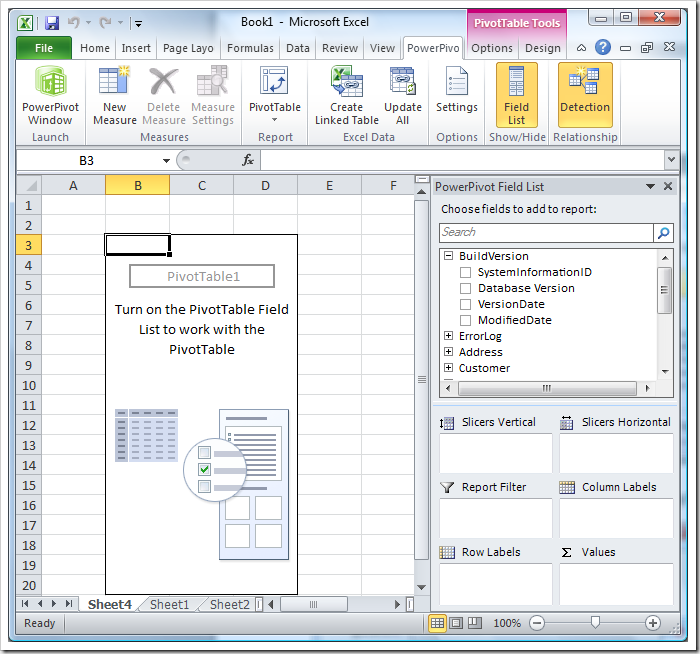
A new worksheet is created with a embedded PivotTable, and the very handy PowerPivot Field List window is docked on the right.
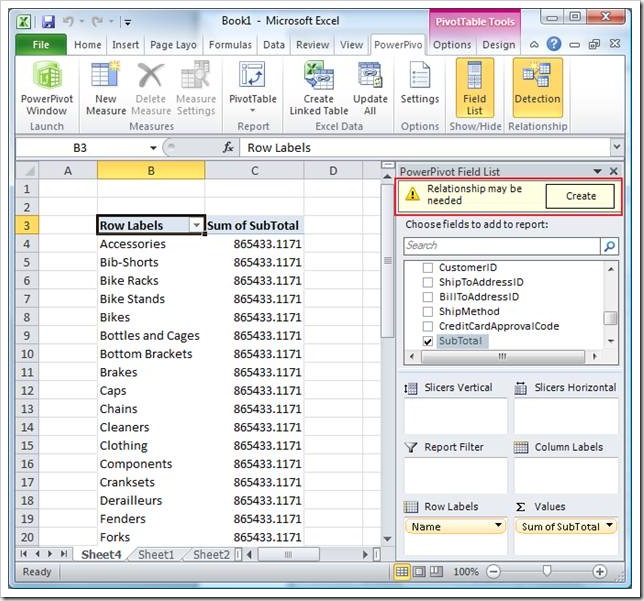
Since I am using the Adventure Works database I want to compare the sales figures to the product categories to see what category is selling best. I first choose the Name column from the ProductCategory table. Then I choose the SubTotal column from the SalesHeader table. Because the two columns are in different tables, PowerPivot needs to figure out how to relate the two data points. Without the relationships PowerPivot combines all the rows for the sum of the subtotal without taking into consideration the category (this can be seen in the screenshot below).
To help you the docked PowerPivot Field List window displays a warning message that says: “Relationship may be needed”. If you click on the Create button, it will retrieve the foreign key relationships from SQL Azure and collate the tables download into the workbook. In the example above this will break down the subtotals into individual categories.
Sometimes, PowerPivot will not find the relationships between your tables correctly – for some complicated schemas it cannot parse them. In this case you can add the relationships by hand, using the PowerPivot Window. Here is how:
1) In the PowerPivot ribbon bar, choose PowerPivot Window
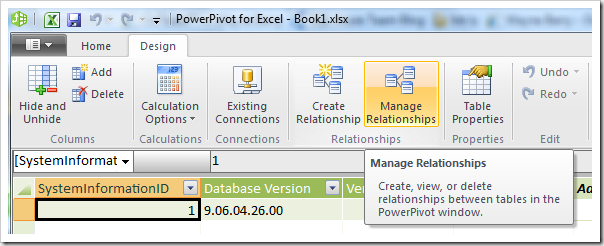
2) The second ribbon bar called Design, choose Manage Relationships
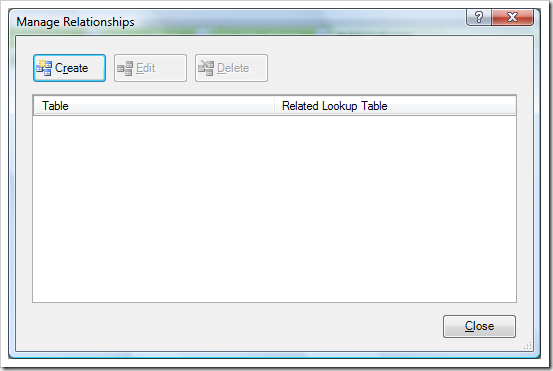
3) This will bring up the Manage Relationship dialog. Here you can create and delete relationships that were not discovered.
Summary
To be successful with PowerPivot take what you know about your data and use it to import the correct tables and establish the relationships need to generate your PivotTables for your reporting.
Do you have questions, concerns, comments? Post them below and we will try to address them.
