Windows Workflow Foundation - WF Migration Kit CTP 2 Released
Update
We’re happy to announce that CTP 2 version of WF Migration Kit has been released to CodePlex, please refer to our CodePlex page for more information. The new State Machine activity for WF 4 is released with the .NET Framework 4 Platform Update 1 in April, 2011. In our CTP 2 release, we’ve added the support of State Machine migration.
If you already have CTP 1 installed, the CTP 2 installation will remove CTP 1 version on your machine.
Introduction
The WF Migration Kit helps users migrate WF3 (System.Workflow) artifacts to WF4 (System.Activities). The high level goal is to migrate workflow definitions and declarative conditions, but not code (such as workflow code-beside methods). Some WF3 workflows will be fully migratable to WF4, while others will be partially migratable and will require manual editing to complete the migration to WF4.
The WF Migration Kit provides an API as well as a command line executable tool, which is a wrapper around the API. Migrators are included for some, but not all, of the WF3 out-of-box activities. The WF Migration Kit offers an extensibility point so that custom activity migrators can be developed by third parties.
Activity migrators are provided for the following WF3 activities:
- Delay
- Throw
- Terminate
- Send, Receive
- CallExternalMethod, HandleExternalEvent (requires ExternalDataExchangeMapping information)
- Sequence, SequentialWorkflow
- IfElse, IfElseBranch
- While
- Parallel
- Listen
- Replicator
- TransactionScope
- CancellationHandler, FaultHandlers, FaultHandler
- StateMachineWorkflow, State, StateInitialization, StateFinalization, SetState, EventDriven
The WF Migration Kit CTP runs on top of the Visual Studio 2010 and .NET Framework 4, which can be found here. Please note that the Client Profile of the .NET Framework 4 is not sufficient since it does not contain the WF3 assemblies. State Machine migration requires .NET Framework 4 Platform Update 1, which can be found here.
The WF Migration Kit is also available via NuGet.
State Machine Migration
Now let’s take a look at how WF Migration Kit can help us with State Machine migration. Please download WF Migration Kit CTP 2 Samples.zip from our CodePlex page.
The overall steps of State Machine migration includes:
- Either download and install WF Migration Kit CTP 2 Setup.msi from CodePlex, or download WFMigrationKit package from NuGet.
- Execute migration on the legacy workflow project: DelayStateMachine3.
- Port migrated activities to the new workflow project: DelayStateMachine4.
Installation
You can download and install WF Migration Kit CTP 2 Setup.msi from CodePlex, or download WFMigrationKit package from NuGet.
Download and install WF Migration Kit CTP 2 Setup.msi from CodePlex.
- Visit WF Migration Kit homepage on CodePlex.
- Download WF Migration Kit CTP 2 Setup.msi from the page.
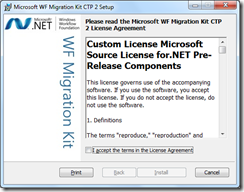
- Install WF Migration Kit CTP 2.
The WF Migration Kit is installed in the %ProgramFiles%\Microsoft WF Migration Kit\CTP 2\ folder or %ProgramFiles(x86)%\Microsoft WF Migration Kit\CTP 2\ for 64-bit operating system.
Download WFMigrationKit package from NuGet.
- Download NuGet Package Manager, and install.
- Open a project in Microsoft Visual Studio 2010
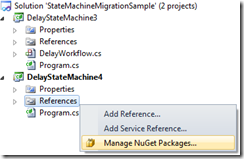
- Right click on References and choose Manage NuGet Packages.
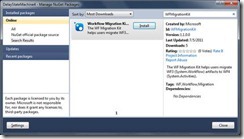
- In the Online tab search for WFMigrationKit. Click on Install button to download the package.
- Close the dialog, open a Command Prompt window and change to the package tools directory. e.g:
cd WF Migration Kit CTP 2 Samples\StateMachineMigrationSamples\Begin\packages\WFMigrationKit.1.1.0.0\tools
Test migration on the legacy workflow project: DelayStateMachine3.
- Compile the DelayStateMachine3 project, which produces an executable DelayStateMachine3.exe.
- Copy DelayStateMachine3.exe to the installation directory (or package tools directory for NuGet) which contains WFMigrator.exe and Microsoft.Workflow.Migration.dll.
- Execute the following command in the previously opened Command Prompt:
WFMigrator DelayStateMachine3.exe
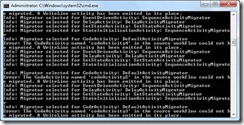
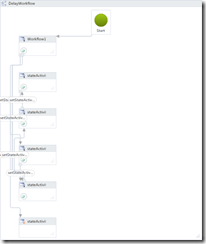
A DelayWorkflow.xaml file has been generated in the current working directory. The migration completes with information indicating actions required to manually solve custom code activities not migrated during the execution.
Port migrated activities to the new workflow project: DelayStateMachine4.
- Use Microsoft Visual Studio to add the DelayWorkflow.xaml file generated earlier to DelayStateMachine4 project.
- Open DelayWorkflow.xaml.
- Adjust the design canvas as you need.
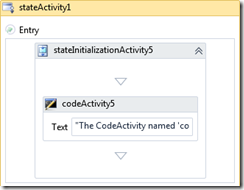
- Inspect WriteLine activities which have been emitted in places of custom code activities, and develop corresponding WF 4 activities for a manual migration.
- Verify workflow behaviors after migration.
Feedback
You’re always welcome to send us your thoughts on WF Migration Kit, and please let us know how we can do it better. You can leave feedback
- Here on the blog comments
- Open an Issue at wf.CodePlex.com
Thanks!
