[セミナーフォローアップ] 7/21 Windows Phone アプリケーション開発実践 通信編
本日、セミナーで登壇しました。内容を整理したいと思います。
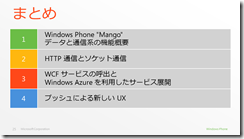
Windows Phone “Mango”のデータと通信の機能を
利用したアプリケーション開発をテーマとしたセッションです。
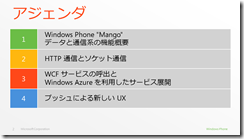
4つのパートに分けて紹介します。
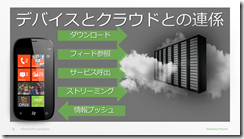
Windows Phone の通信機能を利用すれば、
クラウドと連係したアプリケーションを開発できます。
典型的なシナリオである、ファイルダウンロード、
RSS/ATOMフィードの読み込み、Webサービスの呼び出し、
メディア再生、プッシュを使ったサービス側からの
データ転送を活用しましょう。
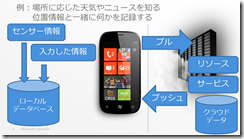
Windows Phoneに内蔵しているセンサーの情報を
ローカルデータベースに記録し、必要に応じて、
クラウド側に送信することができます。
プッシュ通知をトリガーとして、Windows Phoneから
クラウドのサービスを呼び出せば、場所に応じた
情報をタイムリーに利用できるアプリケーションを
開発できます。
まずは、機能の概要から。
(簡単に紹介するはずでしたが、イベントではちょっと
スローペースな感じとなりました。)
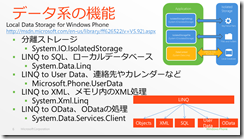
データ系の機能として、重要なポイントは、
アプリケーションのデータは分離ストレージに記録することです。
Windows Phone “Mango”では、単なるファイルの読み書きだけではなく、
ローカルデータベースをLINQ to SQLで利用できます。
連絡先やカレンダーは読み取り専用アクセスです。
LINQ to XML、LINQ to ODataもあるので、Webリソースをうまく活用できます。
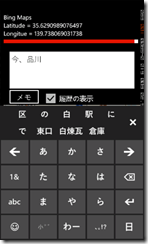
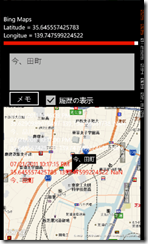
デモ #1: ロケーションデータとメモを記録するローカルデータベース
いろんな応用が可能だと思います。
Windows Phone SDK 7.1 Beta 2から
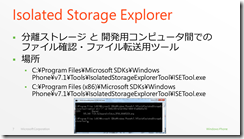
分離ストレージエクスプローラーが付属しています。
コマンドラインツールとなっています。
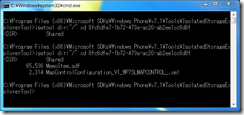
デモ #2: 先のデモアプリケーションの分離ストレージを見る
Windows Phoneのセミナーとしては、非常に地味なデモですが、
今後、アプリケーション開発の参考にしてください。
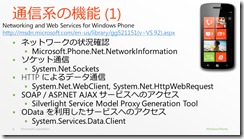
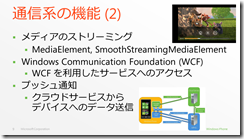
通信系の機能です。
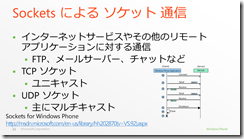
ネットワークの状況確認やソケット通信も
利用できます。
Windows Phoneのソケット通信は、Listenメソッドを持っていないのと、
非同期による通信なので、ご注意ください。
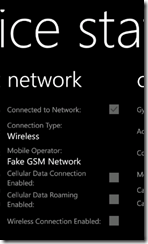
デモ #3: ネットワークの状況確認
Mango Training CourseのDevice Status (C:\MangoTrainingCourse\Labs\DeviceStatus\Source\End)を紹介しました。
メディアのストリーミングを利用できます。
WCFやプッシュは後のパートで。
デモ #4: Microsoft Media Platform : Player Frameworkを利用したスムーズストリーミング
IIS Media Services 4.0に接続してデモを行いました。
ストリーミングについては、Silverlight大全の4.4章を参考にしてください。
(ここまでに25分経過…、ちょっとスローペースでした)
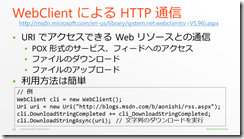
HTTP 通信と ソケット通信を紹介しました。
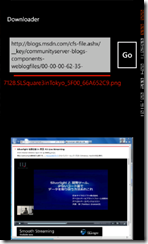
デモ #5: 画像ファイルのダウンロードと分離ストレージからの画像表示
private void DrawFromIsoStore()
{
fileName = listFiles.SelectedValue.ToString();
using (var store = IsolatedStorageFile.GetUserStoreForApplication())
{
// ファイルを読み込む
var fs = new IsolatedStorageFileStream(fileName, FileMode.Open, store);
WriteableBitmap myBitmap = PictureDecoder.DecodeJpeg(fs);
myImage.Source = myBitmap;
fs.Close();
}
}
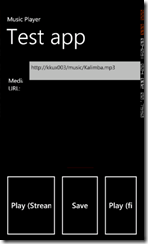
デモ #6: 音楽ファイルのダウンロードと分離ストレージからの音楽再生
void PlayFromTheFile()
{
using (var store = IsolatedStorageFile.GetUserStoreForApplication())
{
// ファイルを読み込む
var fs = new IsolatedStorageFileStream(fileName, FileMode.Open, store);
myME.SetSource(fs);
}
}
※ Music + Videoハブ への統合方法みたいなセッションも今後行いたいです。
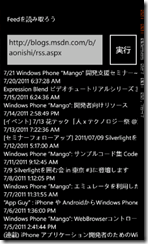
デモ #7: スクラッチからのRSSリーダーの作成
いつもは、タイトル一覧だけでとどめているのですが、
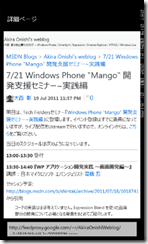
せっかくなので、ソースの記事をWebBrowserコントロールで
表示するところまで実装しました。
皆さんもスクラッチから試してみてはいかがでしょうか。
MainPage.xaml
<phone:PhoneApplicationPage
x:Class="FeedReader01.MainPage"
xmlns="https://schemas.microsoft.com/winfx/2006/xaml/presentation"
xmlns:x="https://schemas.microsoft.com/winfx/2006/xaml"
xmlns:phone="clr-namespace:Microsoft.Phone.Controls;assembly=Microsoft.Phone"
xmlns:shell="clr-namespace:Microsoft.Phone.Shell;assembly=Microsoft.Phone"
xmlns:d="https://schemas.microsoft.com/expression/blend/2008"
xmlns:mc="https://schemas.openxmlformats.org/markup-compatibility/2006"
mc:Ignorable="d" d:DesignWidth="480" d:DesignHeight="768"
FontFamily="{StaticResource PhoneFontFamilyNormal}"
FontSize="{StaticResource PhoneFontSizeNormal}"
Foreground="{StaticResource PhoneForegroundBrush}"
SupportedOrientations="Portrait" Orientation="Portrait"
shell:SystemTray.IsVisible="True">
<phone:PhoneApplicationPage.Resources>
<DataTemplate x:Key="SyndicationItemTemplate">
<StackPanel Width="447">
<TextBlock Text="{Binding Title.Text}"/>
<TextBlock TextWrapping="Wrap" Text="{Binding PublishDate.DateTime, Mode=OneWay}"/>
</StackPanel>
</DataTemplate>
</phone:PhoneApplicationPage.Resources>
<!--LayoutRoot は、すべてのページ コンテンツが配置されるルート グリッドです-->
<Grid x:Name="LayoutRoot" Background="Transparent" d:DataContext="{d:DesignData /SampleData/SyndicationFeedSampleData.xaml}">
<Grid.RowDefinitions>
<RowDefinition Height="Auto"/>
<RowDefinition Height="*"/>
</Grid.RowDefinitions>
<!--TitlePanel は、アプリケーション名とページ タイトルを格納します-->
<StackPanel x:Name="TitlePanel" Grid.Row="0" Margin="12,17,0,28">
<TextBlock x:Name="ApplicationTitle" Text="Feedを読み取ろう" Style="{StaticResource PhoneTextNormalStyle}"/>
</StackPanel>
<!--ContentPanel - 追加コンテンツをここに入力します-->
<Grid x:Name="ContentPanel" Grid.Row="1" Margin="12,0,12,0">
<Grid.ColumnDefinitions>
<ColumnDefinition Width="342*" />
<ColumnDefinition Width="114*" />
</Grid.ColumnDefinitions>
<Grid.RowDefinitions>
<RowDefinition Height="124*" />
<RowDefinition Height="572*" />
</Grid.RowDefinitions>
<TextBox Name="txtURL" Text="https://blogs.msdn.com/b/aonishi/rss.aspx" TextWrapping="Wrap" />
<Button Content="実行" Grid.Column="1" Name="btnExecute" Click="btnExecute_Click" />
<ListBox x:Name="lstResult" ItemTemplate="{StaticResource SyndicationItemTemplate}" ItemsSource="{Binding Items}" Grid.Row="1" Grid.ColumnSpan="2" DoubleTap="ListBox_DoubleTap"/>
</Grid>
</Grid>
</phone:PhoneApplicationPage>
MainPage.xaml.cs
using System;
using System.Net;
using System.Windows;
using Microsoft.Phone.Controls;
using System.IO;
using System.Xml;
using System.ServiceModel.Syndication;
namespace FeedReader01
{
public partial class MainPage : PhoneApplicationPage
{
// コンストラクター
public MainPage()
{
InitializeComponent();
}
private void btnExecute_Click(object sender, RoutedEventArgs e)
{
WebClient cli = new WebClient();
Uri u;
if (!Uri.TryCreate(txtURL.Text, UriKind.Absolute, out u)){
MessageBox.Show("指定されたURLに問題があります");
return;
}
cli.DownloadStringCompleted += (s, ea) =>
{
if (ea.Error != null)
{
MessageBox.Show("通信エラー発生:" + ea.Error.Message);
return;
}
//txtResult.Text = ea.Result;
StringReader sr = new StringReader(ea.Result);
XmlReader xr = XmlReader.Create(sr);
SyndicationFeed sf = SyndicationFeed.Load(xr);
this.DataContext = sf;
};
cli.DownloadStringAsync(u);
}
private void ListBox_DoubleTap(object sender, System.Windows.Input.GestureEventArgs e)
{
SyndicationItem i = (SyndicationItem)lstResult.SelectedValue;
NavigationService.Navigate(new Uri("/Detail.xaml?u="+i.Links[0].Uri.ToString(), UriKind.Relative));
}
}
}
Detail.xaml
<phone:PhoneApplicationPage
xmlns="https://schemas.microsoft.com/winfx/2006/xaml/presentation"
xmlns:x="https://schemas.microsoft.com/winfx/2006/xaml"
xmlns:phone="clr-namespace:Microsoft.Phone.Controls;assembly=Microsoft.Phone"
xmlns:shell="clr-namespace:Microsoft.Phone.Shell;assembly=Microsoft.Phone"
xmlns:d="https://schemas.microsoft.com/expression/blend/2008"
xmlns:mc="https://schemas.openxmlformats.org/markup-compatibility/2006"
mc:Ignorable="d" d:DesignWidth="480" d:DesignHeight="768"
x:Class="FeedReader01.Detail"
FontFamily="{StaticResource PhoneFontFamilyNormal}"
FontSize="{StaticResource PhoneFontSizeNormal}"
Foreground="{StaticResource PhoneForegroundBrush}"
Orientation="Portrait"
shell:SystemTray.IsVisible="True">
<!--LayoutRoot は、すべてのページ コンテンツが配置されるルート グリッドです-->
<Grid x:Name="LayoutRoot" Background="Transparent">
<Grid.RowDefinitions>
<RowDefinition Height="Auto"/>
<RowDefinition Height="*"/>
</Grid.RowDefinitions>
<!--TitlePanel には、アプリケーションの名前とページ タイトルが含まれています。-->
<StackPanel x:Name="TitlePanel" Grid.Row="0" Margin="12,17,0,28">
<TextBlock x:Name="ApplicationTitle" Text="詳細ページ" Style="{StaticResource PhoneTextNormalStyle}"/>
</StackPanel>
<!--ContentPanel - 追加のコンテンツを配置します-->
<Grid x:Name="ContentPanel" Grid.Row="1" Margin="12,0,12,0">
<Grid.RowDefinitions>
<RowDefinition Height="0.896*"/>
<RowDefinition Height="0.104*"/>
</Grid.RowDefinitions>
<TextBox x:Name="txtURL" Grid.Row="1" TextWrapping="Wrap" Text="TextBox" FontSize="16"/>
<phone:WebBrowser x:Name="wb"/>
</Grid>
</Grid>
</phone:PhoneApplicationPage>
Detail.xaml.cs
using System;
using Microsoft.Phone.Controls;
namespace FeedReader01
{
public partial class Detail : PhoneApplicationPage
{
public Detail()
{
InitializeComponent();
}
protected override void OnNavigatedTo(System.Windows.Navigation.NavigationEventArgs e)
{
base.OnNavigatedTo(e);
string url;
if (NavigationContext.QueryString.TryGetValue("u", out url))
{
txtURL.Text = url;
wb.Navigate(new Uri(url));
}
}
}
}
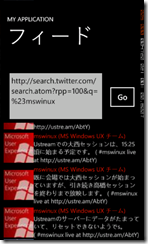
デモ #8: ATOMフィードの応用から Twitterの検索
ATOMフィードをTwitterのSearch APIで取得して、
StringReader sr = new StringReader(ea.Result);
XmlReader xr = XmlReader.Create(sr);
SyndicationFeed sf = SyndicationFeed.Load(xr);
this.DataContext = sf;
この4行で処理できるわけですが、ListBoxの
ItemTemplateを工夫すると、画像を含めて表示できます。
詳細は、Windows Phone “Mango”: RSS/Atomフィード読み込みを応用してTwitter検索につなげる方法を参考にしてください。(何度もやっているので、もう飽きた、と言われそうです。。。)
ソケット通信ですが、デスクトップやサーバー向けの.NET Frameworkの
サブセットとなっているので、外部からの着信を待つことはできません。
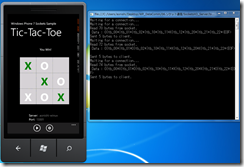
デモ #9: Code Samples にある Tic Tac Toe
サンプルを実行したら、ホスト名とポート13001を設定して、ゲーム開始です。
負けることはないでしょう(^_^)
(残り20分くらいになり。。。)
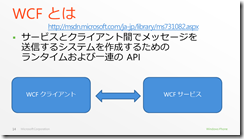
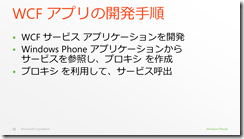
WCFは.NET Frameworkを使ってサービスを作って呼び出すのに便利なライブラリです。
Windows Phone のアプリケーションからWCFサービスを呼び出せます。
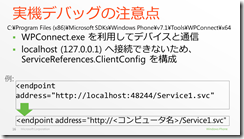
USBケーブルでWindows Phoneを開発用のコンピュータに接続し、実機デバッグできますが、localhost という名前を解決できないので、注意が必要です。
WPConnectを利用すると、Zuneクライアントで接続した時よりも実機デバッグが楽になります。
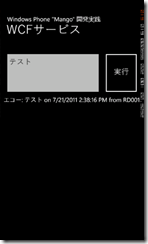
デモ #10: WCFサービスを作り、Windows Phoneアプリケーション から接続
スクラッチからのデモで、Windows PhoneアプリケーションとWCFサービスを作り、実機デバッグを含めてご紹介しました。
WCFサービスのコード (ASP.NETの空のアプリケーションテンプレートを利用し、Silverlight対応WCFサービスを作りました)
EchoService.svc.cs
using System;
using System.ServiceModel;
using System.ServiceModel.Activation;
namespace WCFService
{
[ServiceContract(Namespace = "")]
[SilverlightFaultBehavior]
[AspNetCompatibilityRequirements(RequirementsMode = AspNetCompatibilityRequirementsMode.Allowed)]
public class EchoService
{
[OperationContract]
public string DoWork(string param)
{
string result = string.Format("エコー: {0} on {1} from {2}", param, DateTime.Now, Environment.MachineName);
return result;
}
// 追加の操作をここに追加して、[OperationContract] とマークしてください
}
}
Windows Phoneアプリケーションのコード:
MainPage.xaml
<phone:PhoneApplicationPage
x:Class="WCFEcho.MainPage"
xmlns="https://schemas.microsoft.com/winfx/2006/xaml/presentation"
xmlns:x="https://schemas.microsoft.com/winfx/2006/xaml"
xmlns:phone="clr-namespace:Microsoft.Phone.Controls;assembly=Microsoft.Phone"
xmlns:shell="clr-namespace:Microsoft.Phone.Shell;assembly=Microsoft.Phone"
xmlns:d="https://schemas.microsoft.com/expression/blend/2008"
xmlns:mc="https://schemas.openxmlformats.org/markup-compatibility/2006"
mc:Ignorable="d" d:DesignWidth="480" d:DesignHeight="768"
FontFamily="{StaticResource PhoneFontFamilyNormal}"
FontSize="{StaticResource PhoneFontSizeNormal}"
Foreground="{StaticResource PhoneForegroundBrush}"
SupportedOrientations="PortraitOrLandscape" Orientation="Portrait"
shell:SystemTray.IsVisible="True">
<!--LayoutRoot は、すべてのページ コンテンツが配置されるルート グリッドです-->
<Grid x:Name="LayoutRoot" Background="Transparent">
<Grid.RowDefinitions>
<RowDefinition Height="Auto"/>
<RowDefinition Height="*"/>
</Grid.RowDefinitions>
<!--TitlePanel は、アプリケーション名とページ タイトルを格納します-->
<StackPanel x:Name="TitlePanel" Grid.Row="0" Margin="12,17,0,28">
<TextBlock x:Name="ApplicationTitle" Text="Windows Phone "Mango" 開発実践" Style="{StaticResource PhoneTextNormalStyle}"/>
<TextBlock x:Name="PageTitle" Text="WCFサービス" Margin="9,-7,0,0" Style="{StaticResource PhoneTextTitle1Style}" FontFamily="Yu Gothic" FontSize="40" />
</StackPanel>
<!--ContentPanel - 追加コンテンツをここに入力します-->
<Grid x:Name="ContentPanel" Grid.Row="1" Margin="12,0,12,0">
<Grid.ColumnDefinitions>
<ColumnDefinition Width="329*" />
<ColumnDefinition Width="127*" />
</Grid.ColumnDefinitions>
<Grid.RowDefinitions>
<RowDefinition Height="150*" />
<RowDefinition Height="482*" />
</Grid.RowDefinitions>
<TextBox Name="txtInput" Text="TextBox" FontFamily="Yu Gothic" />
<Button Content="実行" Grid.Column="1" Name="button1" FontFamily="Yu Gothic" Click="button1_Click" />
<ListBox Grid.ColumnSpan="2" Grid.Row="1" Name="lstResults" />
</Grid>
</Grid>
<!--ApplicationBar の使用法を示すサンプル コード-->
<!--<phone:PhoneApplicationPage.ApplicationBar>
<shell:ApplicationBar IsVisible="True" IsMenuEnabled="True">
<shell:ApplicationBarIconButton IconUri="/Images/appbar_button1.png" Text="Button 1"/>
<shell:ApplicationBarIconButton IconUri="/Images/appbar_button2.png" Text="Button 2"/>
<shell:ApplicationBar.MenuItems>
<shell:ApplicationBarMenuItem Text="MenuItem 1"/>
<shell:ApplicationBarMenuItem Text="MenuItem 2"/>
</shell:ApplicationBar.MenuItems>
</shell:ApplicationBar>
</phone:PhoneApplicationPage.ApplicationBar>-->
</phone:PhoneApplicationPage>
MainPage.xaml.cs
using System.Windows;
using Microsoft.Phone.Controls;
namespace WCFEcho
{
public partial class MainPage : PhoneApplicationPage
{
// コンストラクター
public MainPage()
{
InitializeComponent();
}
private void button1_Click(object sender, RoutedEventArgs e)
{
cloud.EchoServiceClient cli = new cloud.EchoServiceClient();
cli.DoWorkCompleted += (s,ea) => {
if (ea.Error != null)
{
MessageBox.Show("通信エラーが発生しました:"+ea.Error.Message);
return;
}
lstResults.Items.Add(ea.Result);
};
cli.DoWorkAsync(txtInput.Text);
}
}
}
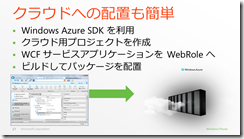
Windows Azureを利用すると、WCFアプリケーションを短時間でインターネットに展開できます。
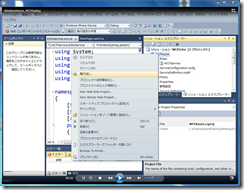
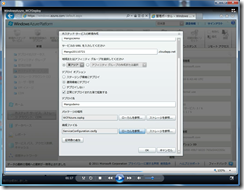
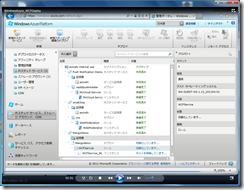
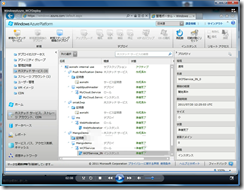
デモ #11: WCFサービスをWindows Azureへ対応させ、Windows Azureへ展開
※ 時間短縮のため、ビデオでご紹介しました。
デモ #12: Windows Azureに展開したサービスへの接続
先のデモで作ったアプリケーションのServiceReferences.ClientConfigのendpointを変更して、クラウドにホストしたサービスを呼び出しました。
Windows Azureを活用するために、Windows Azure Toolkit for Windows Phoneが公開されています。ストレージやアクセスコントロールを利用される場合に参考にしてください。
最後はプッシュです。
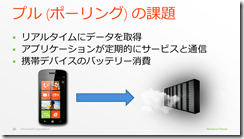
リアルタイムにクラウドへアクセスすると、バッテリー消費の課題が浮上します。
常時、電源に接続されているPC環境とは別の視点でクラウドとの連係を考えましょう。
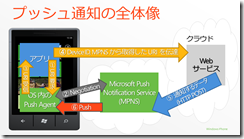
マイクロソフトは、Windows Phone用にプッシュ通知サービスを提供しています。
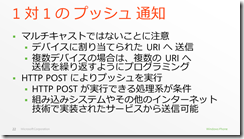
利用料金はかかりません。アプリケーションに対して、通知用のURIを取得し、外部からそのURIへHTTP POSTします。
プッシュ通知は、通知用URI単位なので、ユニキャストになります。
例: 100台への通知は、100回のHTTP POST実行になります。
HTTP POSTが実行できる処理系であれば、プッシュ通知を送れます。
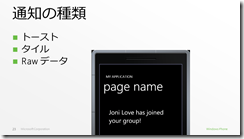
通知は3種類です。
詳細は、MSDNのPush Notifications for Windows Phoneを参考にしてください。
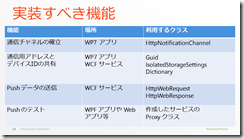
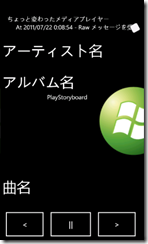
デモ #13: クラウド経由でリモートコントロールするメディアプレイヤー
“Mango”デバイス3台を使ってデモを行いました。1台がリモコン。2台はPush通知を受け取るデバイスとして。Push通知のSLAは定義されていないので、それぞれのデバイス到達する時間が若干異なる様子をお見せできました。
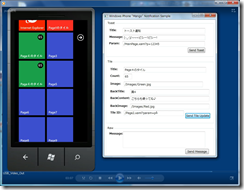
デモ #14: マルチライブタイルとプッシュ
Windows Phone “Mango”からは、セカンダリータイルを作れます。
数の制限は無いようですが、1つのセカンダリータイルを生成すると、アプリケーションが終了するので、不用意にたくさんのタイルが作られることはありません。
タイルの生成例を示します。ShellTile.Createメソッドで指定するURIはユニークにしてください。これが、タイル通知を行う場合のタイルのIDとなります。
private static StandardTileData CreateTile(string Name)
{
StandardTileData initialData = new StandardTileData
{
BackgroundImage = new Uri("/Images/Blue.jpg", UriKind.Relative),
Title = Name,
BackContent = "No updates yet",
BackTitle = " ",
}; return initialData;
}
private void btnMultiTile_Click(object sender, RoutedEventArgs e)
{
StandardTileData initialData = CreateTile("Page1");
ShellTile.Create(new Uri("/MainPage.xaml?param=p1", UriKind.Relative), initialData);
}
private void btnMultiTile2_Click(object sender, RoutedEventArgs e)
{
StandardTileData initialData = CreateTile("Page2");
ShellTile.Create(new Uri("/Page2.xaml?param=p2", UriKind.Relative), initialData);
}
※ デモを詰め込みすぎて、7分オーバーでした・・・、ごめんなさい。
皆さんの参考になれば、幸いです。
