Designing the Coded UI Test Builder
The Coded UI test interface has undergone a redesign in Beta2 to make it easier and more intuitive. While designing this UI, we went through a common dilemma – do we need this to be a guided flow or a choice of operations, all available in parallel? So, is this a wizard or a toolbar?
The basic flows are:
- Record method > Generate code > Repeat > Add control > Add assertion > Generate code
- (Generate code from MTR strip before) > Add control > Add assertion > Repeat > Generate code
- Add control > Repeat > Generate code : for folks that will write code on the controls added instead of recording
Additional flows focusing on incremental ops were many. Primary among those were:
- Edit the UI elements to rename or delete them
- Add additional assertions to pre-existing controls
A wizard would give ample guidance on when to hit the red button, when to drop the cross hair etc. creating a nice little workflow. But it would also constrain the user to one or two of the new flows above. Incremental flows were becoming tedious with the wizard. Plus the wizard was taking up significant space on the desktop contesting with the app under test.
A stack bar would allow the user to choose from the options available to create the shortest desirable workflow. But it was also confusing to first time users on how to use the builder. We have tried to address that through tooltips and detailed walkthroughs, that should hopefully help.
So, the stack bar now appears at the bottom of the screen with a large tooltip that draws the user’s attention to itself:
Users can choose to record actions through the red button or choose to drag and drop the cross hair icon to capture controls. The last button is for the eventual action of generating code.
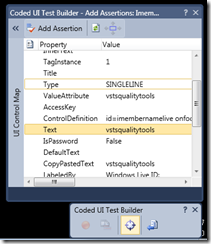
On dropping the cross-hair on a control of your choice, the UI Control Locator comes up listing the properties of the control along with the navigate bar and a button that lets you add assertion on the chosen property.
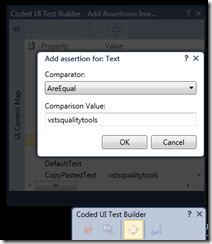
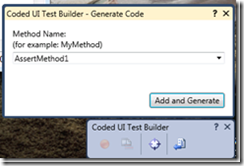
Once you choose a property, you can hit the add assertion button to see the dialog where you can choose the comparator and the value to compare with. the generate code dialog comes up:
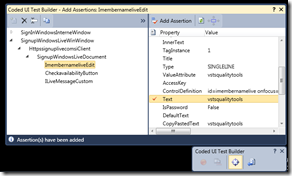
The UI map is available for viewing in the expand bar to the left of the props window. It’s a bit like the collapsible calendar in Outlook. Click on the expand button and you can see the list of controls available in the UI Map – this consists of all the UI elements you have acted upon in either recording or adding assertions.
Once you are done with recording actions and adding assertions, hit generate code and that will complete the operation by emitting code into VS.


