Silverlight Web Part in SharePoint
Having looked at Silverlight in Office client, I thought I’d round out the exercise by looking at Silverlight in Office server. It turns out that lots of people have looked at this before, and I relied heavily on information from several other people’s blog posts (see below), the Silverlight Blueprint for Sharepoint, and Steve Fox and Paul Stubbs’s new book.
To host a Silverlight app in SharePoint, you’ll need the Silverlight Tools for Visual Studio 2008 sp1, which you can download for free here. You’ll also want the VS2008 Extensions for WSS 3.0 v1.3 – the latest Feb2009 CTP is available here. Make sure you read the release notes for this CTP: in particular, VSeWSS 1.3 now includes a web service that needs to run as a member of the local Administrators group – this is not done automatically on install (quite rightly), so you must set it up manually.
There are 3.5 main steps in this exercise:
· Create the Silverlight application.
· Put the Silverlight application somewhere on the server so that it is accessible from SharePoint.
· Create a web part to host the Silverlight application (this is in 2 sub-steps).
Step 1, create the Silverlight application in VS. I called my example SilverlightCoffee. Put some simple control on the page. In my example, I used a TextBlock, and I’ve set the initial content and Foreground color, plus an event handler for the MouseLeftButtonUp event.
<TextBlock x:Name="coffeeText"
FontFamily="Calibri"
FontSize="80"
FontWeight="Bold"
Foreground="#ff402010"
MouseLeftButtonUp="CoffeeText_MouseLeftButtonUp">
espresso
</TextBlock>
Add the implementation for the event handler in the Page.xaml.cs. I’ve set things up so that when you click the mouse over the app, the text and color change:
public partial class Page : UserControl
{
private bool isEspresso = true;
private SolidColorBrush latteBrush;
private SolidColorBrush espressoBrush;
public Page()
{
InitializeComponent();
latteBrush = new SolidColorBrush(
Color.FromArgb(0xff, 0xc0, 0x90, 0x50));
espressoBrush = new SolidColorBrush(
Color.FromArgb(0xff, 0x40, 0x20, 0x10));
}
private void CoffeeText_MouseLeftButtonUp(
object sender, MouseButtonEventArgs e)
{
if (isEspresso)
{
coffeeText.Text = "latte";
coffeeText.Foreground = latteBrush;
}
else
{
coffeeText.Text = "espresso";
coffeeText.Foreground = espressoBrush;
}
isEspresso = !isEspresso;
}
}
Build and test the Silverlight app. By default, VS will give you both a TestPage.html for testing the app in a client browser, and a SilverlightXXXTestPage.html/aspx for testing it in a web server/client browser mode.
Step 2, put the Silverlight app somewhere where SharePoint can find it. One way to do this is to create a document library on your SharePoint site to hold Silverlight applications. You can name this whatever you like, but from the code below you can see that I’ve named mine “XAPs”. Upload the Silverlight XAP to this library. You should create this document library at whatever site level makes sense on your server. For example, https://MyServer/sites/Contoso/XAPs. Note: this isn’t the only way to do this – as an alternative to using a document library, you could use IIS Manager to create a virtual directory under your SharePoint web site, map it to a physical directory, and put the XAP there instead. This approach is described in Phil Wicklund’s excellent series of posts here.
Step 3.1, create a SharePoint Web Part to host the Silverlight app. There are 2 ways to do this:
· Use one of the standard SharePoint web parts, and customize it.
· Create a completely new custom web part, using Visual Studio.
Let’s try the first approach – we’ll do the second later. Before this will work, you need to install the System.Web.Silverlight.dll from the Silverlight SDK\Libraries\Server folder to the GAC, so that SharePoint can find it. Then, go to your home page (or any page on your site), drop down the Site Actions listbox, and select Edit Page. When the page is in edit mode, click on any of the ‘Add a Web Part’ links. From the Add Web Parts dialog, find the Content Editor Web Part, check the box next to it, and click Add. Inside the CEWP, you’ll see a link to open the tool pane. Click this link, and then in the tool pane, click the Source Editor button.
Now copy the <div> for the Silverlight host control from the TestPage.html that VS generates for you for the Silverlight application project (you’ll find this in the bin\debug folder). Paste this into the Source Editor window. You need to make 3 changes to this HTML: specify explicit pixel values for the width and height of the Silverlight control; specify the same width and height for the Silverlight application within the control; and specify the full path to the XAP:
<div id="silverlightControlHost">
<object data="data:application/x-silverlight,"
type="application/x-silverlight-2" width="400px"height="120px" >
<param name="source"
value = "https://MyServer/sites/Contoso/XAPs/SilverlightCoffee.xap"
<param name="onerror" value="onSilverlightError" />
<param name="background" value="white" />
<param name="minRuntimeVersion" value="2.0.31005.0" />
<param name="autoUpgrade" value="true" />
<a href="https://go.microsoft.com/fwlink/?LinkID=124807"
style="text-decoration: none;">
<img src="https://go.microsoft.com/fwlink/?LinkId=108181"
alt="Get Microsoft Silverlight" style="border-style: none"/>
</a>
</object>
<iframe style='visibility:hidden;height:0;width:0;border:0px'>
</iframe>
</div>
Then exit edit mode, and click the Silverlight web part to make sure it is working, and you’re done.
Step 3.2, the second way to host the Silverlight app in a web part is to create a completely new custom web part in Visual Studio. To do this, create a SharePoint Web Part project in VS, adding it to the current solution. If you’re prompted for a trust level decision, select Partial Trust (deploy to Bin). When the project is created, rename the WebPart1 folder to something more meaningful (eg, ‘SlWebPart’) – renaming the folder should give you the option to rename all occurrences of WebPart1, including in filenames such as SlWebPart.cs. Add a reference to System.Web.Extensions and System.Web.Silverlight, and a using statement for System.Web.UI.SilverlightControls.
In the SlWebPart.cs, implement the CreateChildControls override to instantiate a Silverlight control, and set its Source property to your Silverlight XAP. Note that using SPContext requires security permissions to access the SharePoint OM, which involves additional configuration. I found some information about this on Ryan McIntyre’s blog here, but I’ve kept my example simple by specifying the fully-qualified absolute path to my Silverlight XAP.
protected override void CreateChildControls()
{
base.CreateChildControls();
Silverlight sl = new Silverlight();
sl.ID = "SlCoffee";
//sl.Source = SPContext.Current.Site.Url+"/XAPs/SilverlightCoffee.xap";
sl.Source = "https://MyServer/sites/Contoso/XAPs/SilverlightCoffee.xap";
sl.Width = new Unit(400);
sl.Height = new Unit(120);
Controls.Add(sl);
}
Also override the OnLoad method to make sure we have a ScriptManager: in a SharePoint context, there should be a ScriptManager by default, so we only need to create one if there isn’t one already attached to the page.
protected override void OnLoad(EventArgs e)
{
base.OnLoad(e);
ScriptManager sm = ScriptManager.GetCurrent(this.Page);
if (sm == null)
{
sm = new ScriptManager();
Controls.AddAt(0, sm);
}
}
Double-check the properties for the web part project: specifically, make sure the Debug Start Action is set to start the browser with an appropriate URL. By default, this is https://localhost/, and this is often ok – but you should set it to the URL for whatever site you want the feature available on, which is not necessarily your top-level site. For example, https://MyServer/sites/Contoso/. Build the project. Then go to the Build menu and select Deploy Solution. This will deploy the web part to your SharePoint server, and activate it for the specified site.
Next, you need to make a host of changes to the web.config for your site. I found a detailed list of these changes on Phil Jirsa’s blog here, and a related video on a post by Patrick Tisseghem (thanks and RIP) here.
Finally, use your new web part on a page on your SharePoint server. Again, this requires you to install the System.Web.Silverlight.dll from the Silverlight SDK to the GAC (if you haven’t already done so). Then, go to any page on the site where this feature was deployed/activated, drop down the Site Actions listbox, and select Edit Page. When the page is in edit mode, click on any of the ‘Add a Web Part’ links. From the Add Web Parts dialog, find your SlWebPart and check the box. Then exit edit mode, and click the Silverlight web part to make sure it is working.
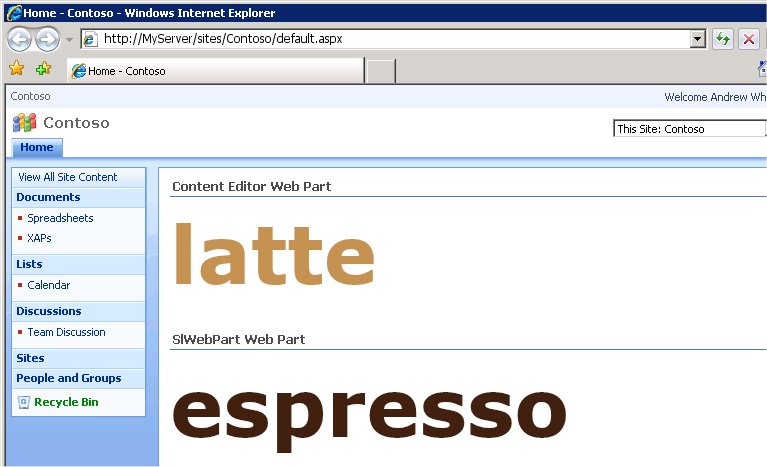
The screenshot below shows the results of both web part hosting techniques: