ActiveX Controls in VSTO Solutions
In the past, before it became strategically acceptable to build Office-based solutions in managed code, it was common for people to build such solutions using pure COM technologies. They built native COM add-ins, using C/C++, or they built document-level customizations using VB and VBA. In some scenarios – typically doc-level – the solutions made heavy use of ActiveX controls. Typically, the solution used both standard and custom ActiveX controls, often on the document surface – and (rather less commonly) in the ISmartDocument-based document actions pane.
Now that VSTO has emerged as the preferred technology for building Office-based solutions, it is common for people to use managed custom UserControls (either Windows Forms-based or, increasingly, WPF-based) in their solutions.
However, some of the native ActiveX controls used in earlier systems are still very relevant and useful to the requirements of newer solutions. Plus, it’s not always practicable (or, sometimes, even possible) to rewrite your native ActiveX controls as new managed UserControls. One obvious technique to resolve this is, instead, to wrap the native controls in managed UserControls.
What follows is an example (obviously very simplified) of one way to do this. I’ll create a VSTO doc-level solution, and add two custom UserControls, each one wrapping a native ActiveX control. I’ll put one of these on the document surface, and the other on the doc-level ActionsPane.
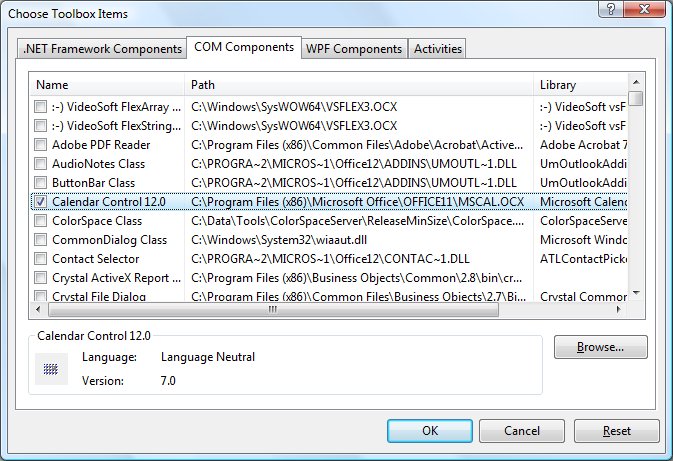
First, create a new VSTO Word 2007 doc-level project. Then, add a new UserControl, called ManagedMSCal. When this opens in the designer, right-click in the Toolbox and select Choose Items. In the Choose Toolbox Items dialog, select the COM tab, and then check the box next to Calendar Control 12.0. This is a native ActiveX control in the DLL MSCal.ocx:
Importing this will generate two interop assemblies:
ú Interop.MSACal.dll – this is the CLR proxy for COM types, that is the conventional interop assembly which is the managed equivalent of the COM type library.
ú AxInterop.MSACal.dll – this is Windows Forms proxy for the ActiveX control. It defines a class AxCalendar which derives from System.Windows.Forms.AxHost.
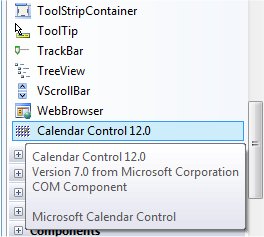
You’ll also notice that the Calendar Control is now available in the Toolbox:
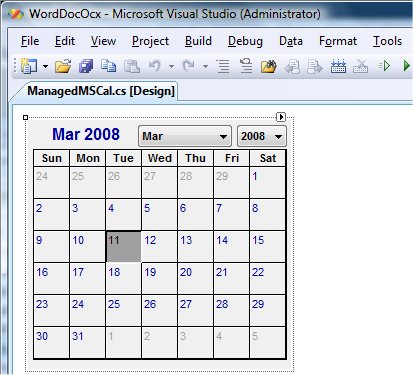
You can treat this like any other control in the Toolbox, and drag-drop it onto the UserControl design surface:
Set its Dock property to Full, and its Modifiers property to Public – this last is a lazy short-cut to allow us to expose the inner AxCalendar object as a publicly accessible member of the wrapper ManagedMSCal control. This will generate a new field in the hidden part of the UserControl partial class:
public AxMSACAL.AxCalendar axCalendar1;
Next, in the ThisDocument class, declare an instance of the ManagedMSCal wrapper UserControl as a private field in the class:
private ManagedMSCal managedMSCal;
In the ThisDocument_Startup method, instantiate the control, and sink its AfterUpdate event – we’ll get this event when the user clicks a different date in the calendar. Then, add the control to the ActionsPane:
private void ThisDocument_Startup(object sender, System.EventArgs e)
{
managedMSCal = new ManagedMSCal();
managedMSCal.axCalendar1.AfterUpdate +=
new EventHandler(axCalendar1_AfterUpdate);
this.ActionsPane.Controls.Add(managedMSCal);
}
In the AfterUpdate event handler, insert a paragraph at the end of the document, and then insert the selected date:
void axCalendar1_AfterUpdate(object sender, EventArgs e)
{
this.Content.InsertParagraphAfter();
this.Content.InsertAfter(
this.managedMSCal.axCalendar1.Value.ToString());
}
At this point, you can build and test. The wrapped ActiveX control will appear in (the managed UserControl in) the doc-level ActionsPane. When the user clicks a date in the calendar, that date is inserted into the document.
Next, add another custom UserControl, called ManagedSlider. As before, right-click the Toolbox, select the COM tab, and choose the Microsoft Slider Control v6.0 – this is in MSComCtl.ocx. As before, drag-drop it from the Toolbox onto the UserControl design surface. Set its Dock property to Full, its Modifiers property to Public, its Min property to 1, and its Max property to 100. This will generate a new field in the hidden part of the UserControl partial class:
public Axmscomctl.AxSlider axSlider1;
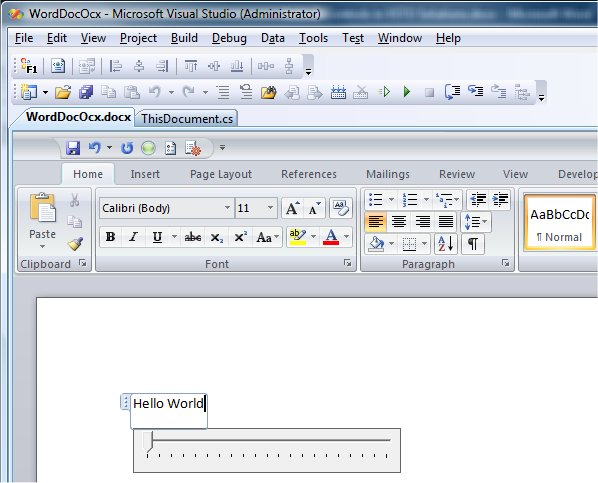
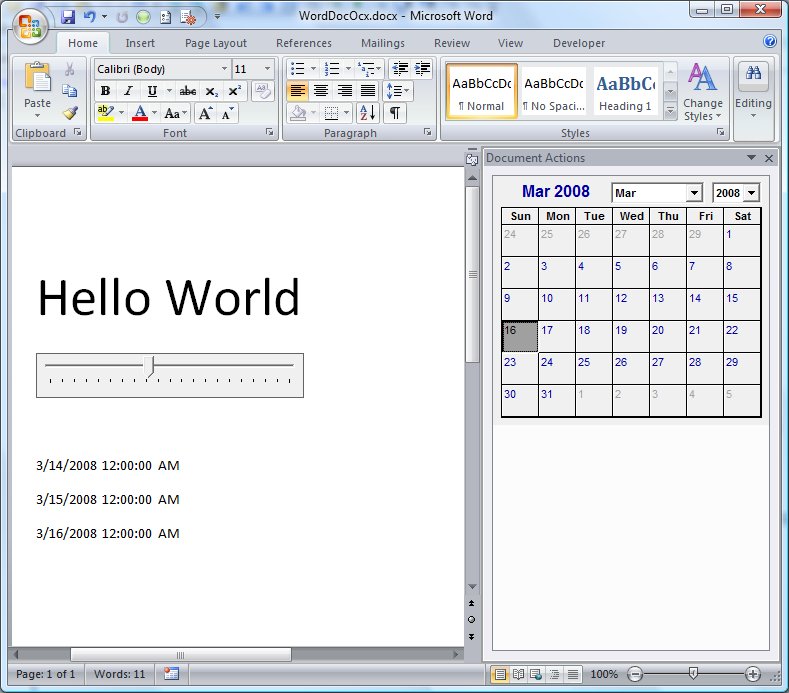
Now open the document in the designer in Visual Studio. From the Word Developer tab, select a RichText content control, and drop it onto the document. In the content control, type in the text “Hello World”. Then drag-drop the ManagedSlider control from the Toolbox onto the document surface:
This will generate two corresponding fields in the hidden part of the partial ThisDocument class:
internal Microsoft.Office.Tools.Word.RichTextContentControl richTextContentControl1;
internal WordDocOcx_ManagedSlider wordDocOcx_ManagedSlider1;
Update the ThisDocument_Startup method to sink the Scroll event on the wrapped AxSlider object. Handle this event by setting the font size of the text in the Rich Text content control to the value of the slider:
private void ThisDocument_Startup(object sender, System.EventArgs e)
{
managedMSCal = new ManagedMSCal();
managedMSCal.axCalendar1.AfterUpdate +=
new EventHandler(axCalendar1_AfterUpdate);
this.ActionsPane.Controls.Add(managedMSCal);
this.wordDocOcx_ManagedSlider1.axSlider1.Scroll +=
new EventHandler(axSlider1_Scroll);
}
void axSlider1_Scroll(object sender, EventArgs e)
{
this.richTextContentControl1.Range.Font.Size =
this.wordDocOcx_ManagedSlider1.axSlider1.Value;
}
Build and test:
Over time, many people will move wholesale to pure managed development, typically using VSTO. Some people will find it more appropriate to stick with native code, COM and ActiveX controls. For the people in the middle, who want some sensible transition plan, wrapping existing ActiveX controls in managed UserControls is a reasonable approach.