Hello world, with Knockout JS and ASP.NET MVC 4!
I heard about Knockout a few months ago, but never gave it a proper try – at least not with ASP.NET MVC. You’ll enjoy the ViewModel pattern if you don’t want to have any code on your View – be it JS or CS! You can have a clean markup and a separate most part of the code that might be required to make it work. You’ll probably relate to it the best if you have some experience working with a XAML based UI technology (WPF/SL/Windows 8), but that’s not a prerequisite.
I played around a bit with the Knockout tutorials which gave a fair idea of how to go about using it.
However, it was difficult to find a “hello world” sample for using Knockout with ASP.NET MVC 4 which was simple enough to follow.
Here is my shot at it!
I’m using ASP.NET Web API along with MVC 4 and Knockout to write a simple program that reads some data from the server and posts new data back to the server which will be persisted on a database.
If you haven’t installed ASP.NET MVC 4, you can do so from here. You can install ASP.NET MVC 4 with VS 2010 too, so really – give it a try!
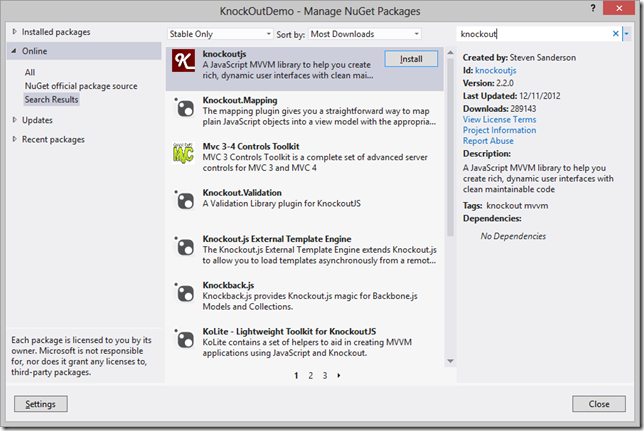
Once you have ASP.NET MVC 4 installed, create a new project and select “Internet application”. One of the things you’ll notice is it adds a number of NuGet packages by default. One of them is KnockoutJS.
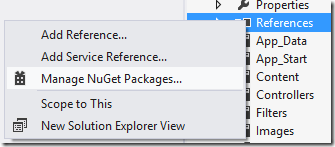
If you’d rather start with an “Empty application”, you can add this package using the “Manage NuGet Packages” option when you right-click on the references.
Now that we have Knockout, let’s start!
Here’s what we’ll do:
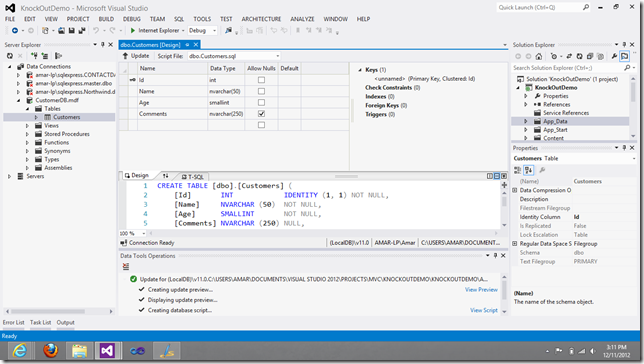
- Create a simple database with just 1 table.
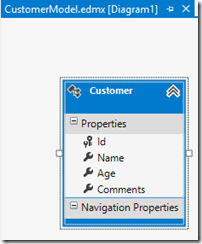
- Create an EF model for this database.
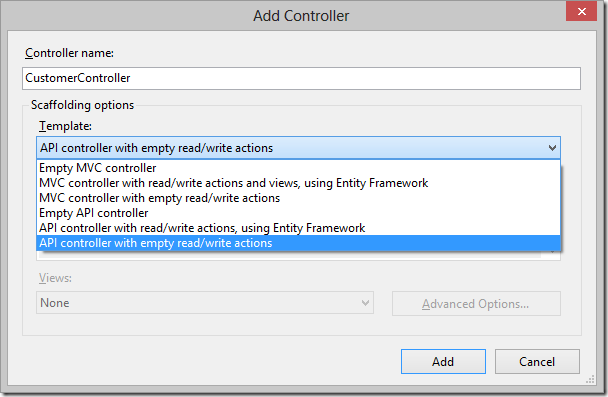
- Create a Web API controller to expose HTTP services which serves/accepts data.
- Consume these HTTP services from the MVC views (Razor pages, although it could just be HTML pages too)
- Create a partial control for displaying data we get from the service
- Create a partial control for creating a new item and posting it to the service.
We’ll create the 2 partial views, but host it in a single razor page that will be served as a result of an action. This is to demonstrate how we can set the “data context” of individual HTML nodes with Knockout, so that’ll be fun!
Create a simple database
I don’t need to say much about this I guess.
Create an EF model
Once we have the EF model created, let’s add a couple of static methods to make it easier to talk to the model:
namespace KnockOutDemo.Models
{
public class CustomerRepository
{
public static IEnumerable<Customer> GetCustomers()
{
var myDB = new CustomerDBEntities();
var query = from cust in myDB.Customers
select cust;
return query.ToList();
}
public static void InsertCustomer(Customer cust)
{
var myDB = new CustomerDBEntities();
myDB.Customers.Add(cust);
myDB.SaveChanges();
}
}
}
Create a Web API controller to expose HTTP services which serves/accepts data
Let’s add the following code to get started with Get and Post methods:
public class CustomerController : ApiController
{
// GET api/customer
public IEnumerable<Customer> Get()
{
var cust = CustomerRepository.GetCustomers();
return cust.ToList();
}
// GET api/customer/5
public Customer Get(int id)
{
return CustomerRepository.GetCustomers().Where((c) => c.Id == id).FirstOrDefault();
}
// POST api/customer
public HttpResponseMessage Post(Customer value)
{
CustomerRepository.InsertCustomer(value);
var response = Request.CreateResponse<Customer>(HttpStatusCode.Created, value);
string uri = Url.Link("DefaultApi", new { id = value.Id });
response.Headers.Location = new Uri(uri);
return response;
}
}
Consume these HTTP services from the MVC views
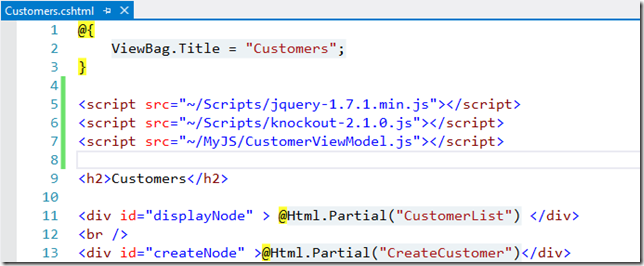
Let’s add a View page to the Home folder called Customers, which basically acts as a shell. We’ll have a couple of place holders in this view which will host a partial view for displaying a list of customers and another partial view for letting the user create a new customer.
Also create an appropriate action method in the HomeController.cs file:
public ActionResult Customers()
{
return View();
}
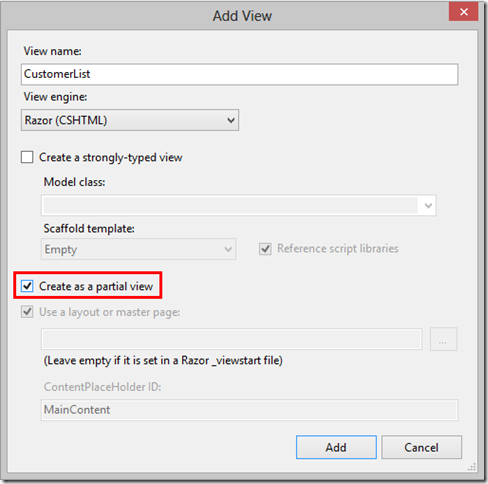
Now, let’s add the 2 partial views – CustomerList and CreateCustomer. I have created these in the Shared folder, but could’ve done so in the Home folder as well.
These would basically be blank cshtml pages.
Add this markup to the CustomerList.cshtml page:
1: <table >
2: <thead>
3: <tr>
4: <th>Id</th>
5: <th>Name</th>
6: <th>Age</th>
7: <th>Comments</th>
8: </tr>
9: </thead>
10: <tbody data-bind="foreach: customers" >
11: <tr>
12: <td data-bind="text: Id"></td>
13: <td data-bind="text: Name"></td>
14: <td data-bind="text: Age"></td>
15: <td data-bind="text: Comments"></td>
16: </tr>
17: </tbody>
18: </table>
19: <br />
20: <input type="button" id="btnGetCustomers" value="Get Customers" data-bind="click: getCustomers" />
Notice the markup on line 10, line 20 and lines 12 through 15. We are using a new attribute: data-bind.
In the line 10, we’re mentioning a foreach on the “customers” collection (that we just assume will be present at runtime), and for each of those customers, we generate a row in the table.
Lines 12-15 bind the properties of each customer to the text attribute of the td.
Similarly, we’re binding the “click” event of input to call the getCustomers method (again we assume this will be present at runtime). You can set multiple bindings too within a data-bind expression, but we’ll not get into that right now.
I’d like to emphasize on the fact that the markup over here is just markup – no code.
Add this markup to the CreateCustomer.cshtml page:
1: <table>
2: <tr>
3: <td>Name</td>
4: <td> <input type="text" data-bind="value: Name" /> </td>
5: </tr>
6: <tr>
7: <td>Age</td>
8: <td><input type="text" data-bind="value: Age" /> </td>
9: </tr>
10: <tr>
11: <td>Comments</td>
12: <td><input type="text" data-bind="value: Comments" /></td>
13: </tr>
14: </table>
15:
16: <input type="button" value="Add" data-bind="click: addCustomer" />
We follow the same approach as earlier here.
At this point, we have the View ready and the HTTP service is up and running.
Let’s create the ViewModel and see how we can bring all of this together!
From the two partial views, it’s clear that we can use two ViewModels – one for creating a customer (and therefore, a customer object) and another one for listing all the customers (something that holds a collection of customers).
To get started, create a folder in the project, say MyJS, and add a new .js file:
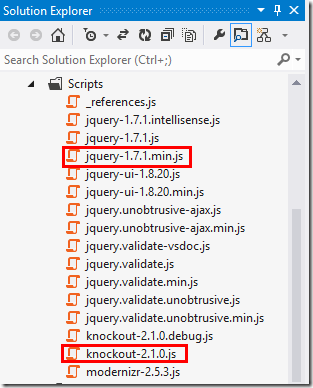
Drag and drop the jquery script and knockoutjs scripts to this the CustomerViewModel.js file in the editor.
This only helps us with the intellisense, we’ll have to reference the jQuery and KnockoutJS files later in the view.
Next, add this code to the CustomerViewModel.js file:
1: function customer(id, name, age, comments) {
2: var self = this;
3:
4: self.Id = id;
5: self.Name = name;
6: self.Age = age,
7: self.Comments = comments;
8:
9: self.addCustomer = function () {
10: $.ajax({
11: url: "/api/customer/",
12: type: 'post',
13: data: ko.toJSON(this),
14: contentType: 'application/json',
15: success: function (result) {
16: }
17: });
18: }
19: }
Although we’re creating a function here, you can think of this as something similar to creating a ViewModel class with XAML.
With the customer object, we have the 4 properties that we have bound to from our UI. Since we’re going to use this as the ViewModel for the CreateCustomer partial view, we are also going to create a function called addCustomer which does a POST to the HTTP service we created earlier. The data that we’re posting is conveniently obtained by using the ko.toJSON() method.
Similarly, create the ViewModel that we can use to contain the list of all customers. For a lack of better name, I just called it customerVM!
Add the following code to the CustomerViewModel.js file:
1: function customerVM() {
2: var self = this;
3: self.customers = ko.observableArray([]);
4: self.getCustomers = function () {
5: self.customers.removeAll();
6: $.getJSON("/api/customer/", function (data) {
7: $.each(data, function (key, val) {
8: self.customers.push(new customer(val.Id, val.Name, val.Age, val.Comments));
9: });
10: });
11: };
12: }
On line 3, we are creating a list (array) of customers, but notice that this is not a simple array. It’s an observableArray from the Knockout library! Which means, any changes to this array will result in automatic notifications to any UI elements that are bound to it! (You can compare this with an ObservableCollection from the C# world)
The rest is fairly self explanatory – we’re doing a getJSON call to the HTTP service and getting the list of all customers and populating the customers observableArray. This is collection that we bound to in the CustomerList.cshtml’s tbody tag: <tbody data-bind="foreach: customers">
The only thing pending now is to somehow connect these ViewModels with the Views. Kinda like setting the DataContext of the UI elements if you are from the XAML world.
We can do this using the ko.applyBindings() method. We can either just specify the ViewModel for the entire view or set the ViewModel to a specific node in the DOM.
In our case, we’ll specify the ViewModels for each of the partial views, by specifying the Id’s of the div tags that we used in the Customers.cshtml file.
Add the following code to the CustomerViewModel.js file:
$(document).ready(function () {
ko.applyBindings(new customerVM(), document.getElementById('displayNode'));
ko.applyBindings(new customer(), document.getElementById('createNode'));
});
Now, we can just reference the js files (CustomerViewModel.js, jQuery and Knockout) in the Customers.cshtml file.
Alternatively, you can use the bundling feature that comes with ASP.NET MVC 4!
Go to the App_Start folder and open the BundleConfig.cs file.
Add the following code:
bundles.Add(new ScriptBundle("~/bundles/myBundle").Include(
"~/Scripts/jquery-{version}.js",
"~/Scripts/knockout-2.1.0.js",
"~/MyJS/CustomerViewModel.js"));
We can now refer to all the three js files with the handle: “~/bundles/myBundle”
Let’s head back to the Customers.cshtml file and delete the references to the three scripts we added earlier, and replace it with this line:
@Scripts.Render("~/bundles/myBundle")
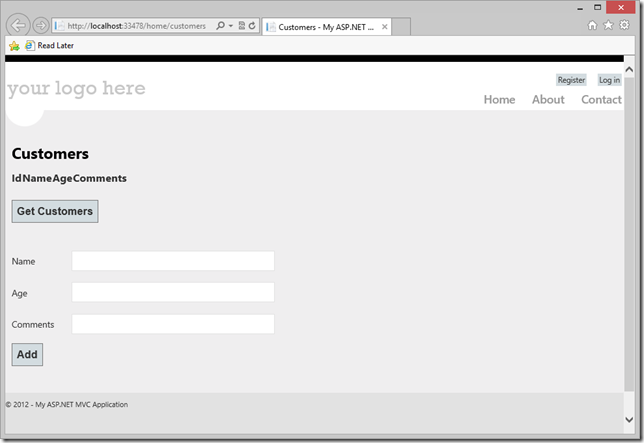
And that’s about it! We should be good to go. Run the app and key in “home/customers” in the address bar.
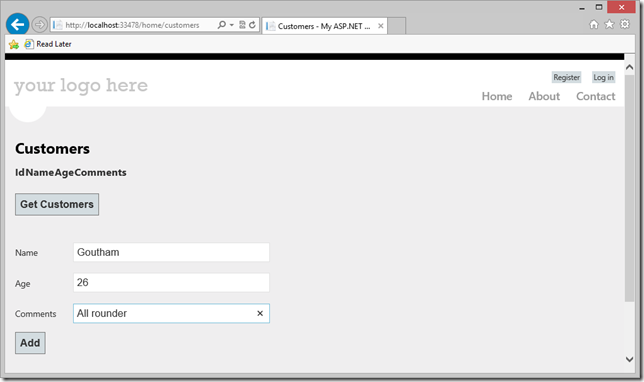
Let’s add a few customers:
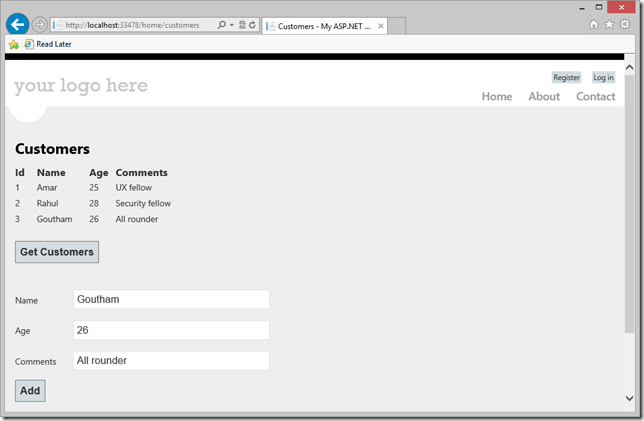
And get the list of customers:
Show me the codez!
You can download the complete sample from here.
Further reading
Thanks for reading!
Amar
PS: You can follow me on twitter at “_amarnit”, where I share some quick tips/learning at times!


