Ask Learn
Preview
Ask Learn is an AI assistant that can answer questions, clarify concepts, and define terms using trusted Microsoft documentation.
Please sign in to use Ask Learn.
Sign inThis browser is no longer supported.
Upgrade to Microsoft Edge to take advantage of the latest features, security updates, and technical support.
Note
Access to this page requires authorization. You can try signing in or changing directories.
Access to this page requires authorization. You can try changing directories.
| My Take on an Azure Open Source Cross-Platform DevOps Toolkit–Part 1 | Click Here |
| My Take on an Azure Open Source Cross-Platform DevOps Toolkit–Part 2 | Click Here |
| My Take on an Azure Open Source Cross-Platform DevOps Toolkit–Part 3 | Click Here |
| My Take on an Azure Open Source Cross-Platform DevOps Toolkit–Part 4 | Click Here |
| My Take on an Azure Open Source Cross-Platform DevOps Toolkit–Part 5 | Click Here |
| My Take on an Azure Open Source Cross-Platform DevOps Toolkit–Part 6 | Click Here |
| My Take on an Azure Open Source Cross-Platform DevOps Toolkit–Part 7 | Click Here |
| My Take on an Azure Open Source Cross-Platform DevOps Toolkit–Part 8 | Click Here |
| My Take on an Azure Open Source Cross-Platform DevOps Toolkit–Part 9 | Click Here |
| My Take on an Azure Open Source Cross-Platform DevOps Toolkit–Part 10 | Click Here |
| My Take on an Azure Open Source Cross-Platform DevOps Toolkit–Part 11 | Click Here |
| My Take on an Azure Open Source Cross-Platform DevOps Toolkit–Part 12 | Click Here |
By the end of this post we will have succeeded in accomplishing the first three steps of the pipeline.
Here is where we are:
So we will now wrap up the code that interacts with MySQL. This code is used throughout the pipeline to track and display state.
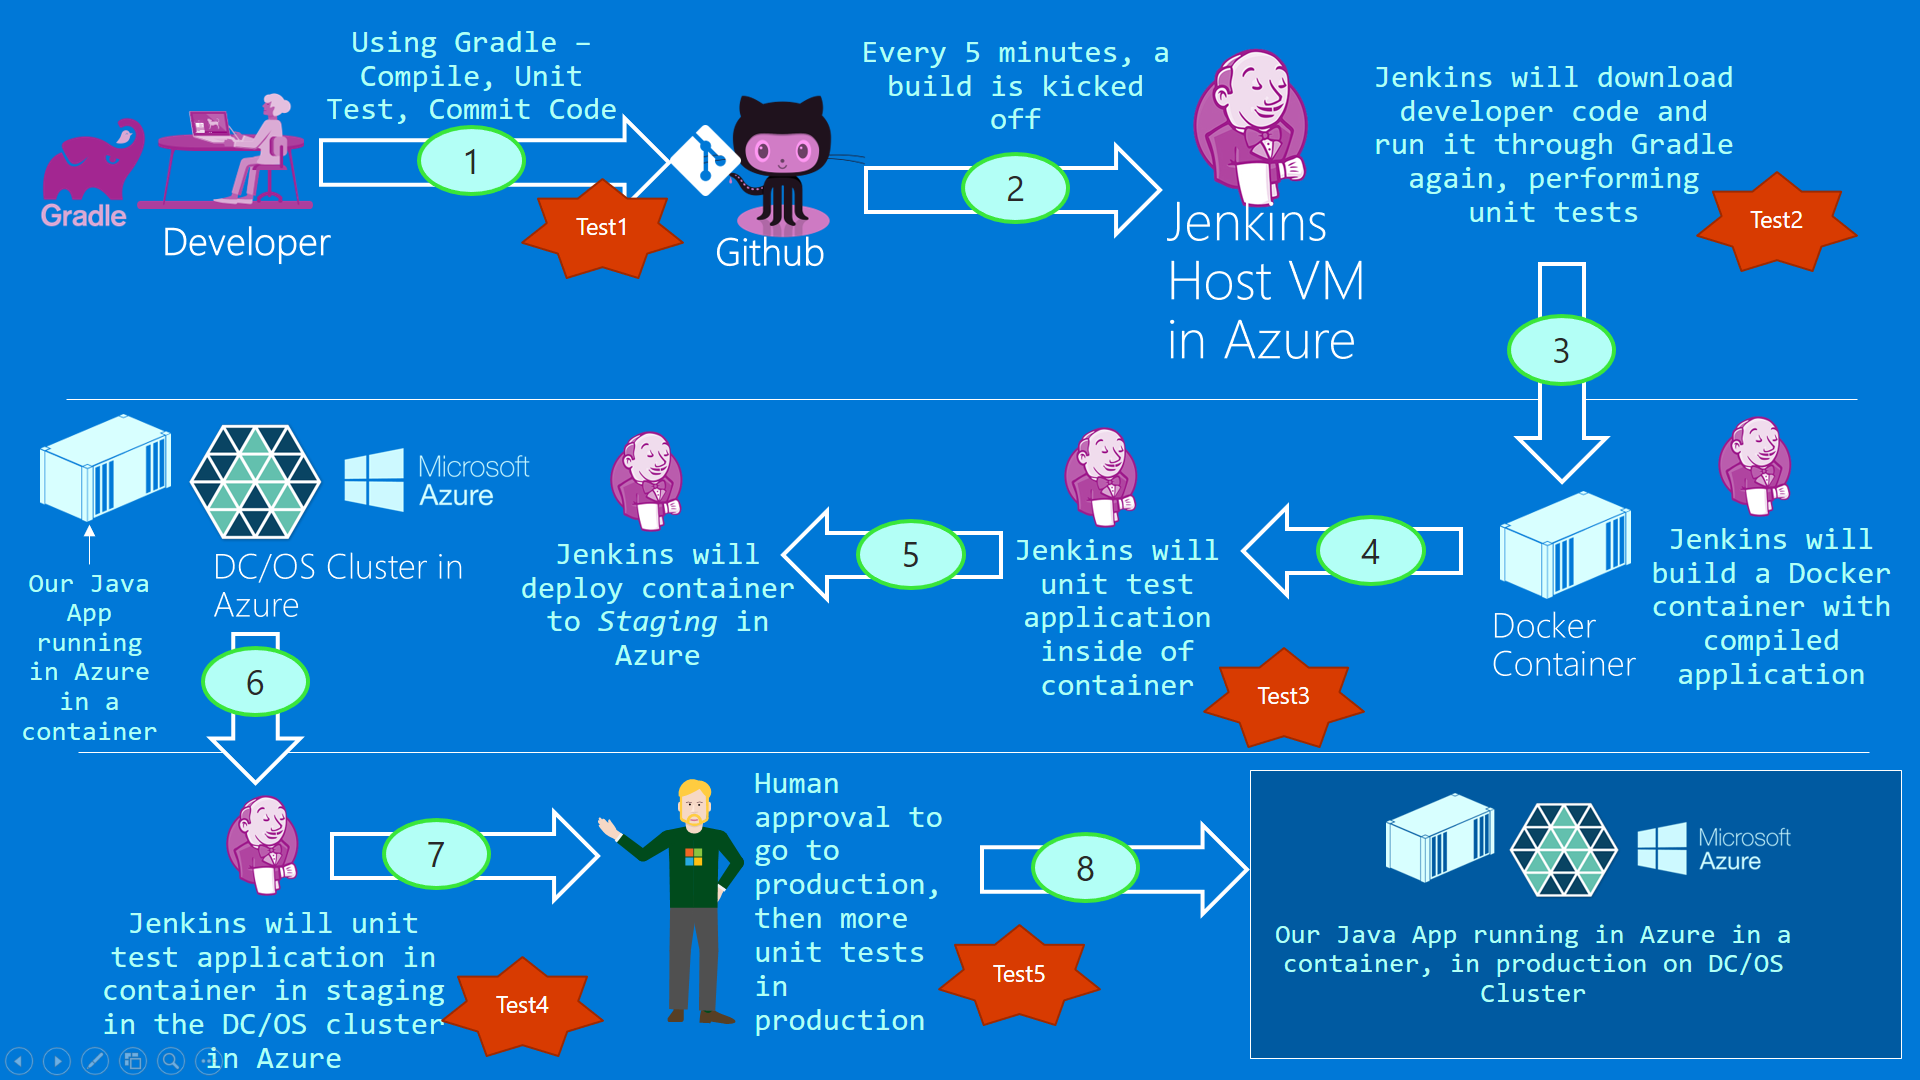
If you look at the diagram below, you will note that all the states are numbered. And every one of those states is reading from and writing to the MySQL database to reflect the current status of pipeline execution. It is important that we track pipeline state throughout the process.


Figure 1: The big picture
Explaining the code
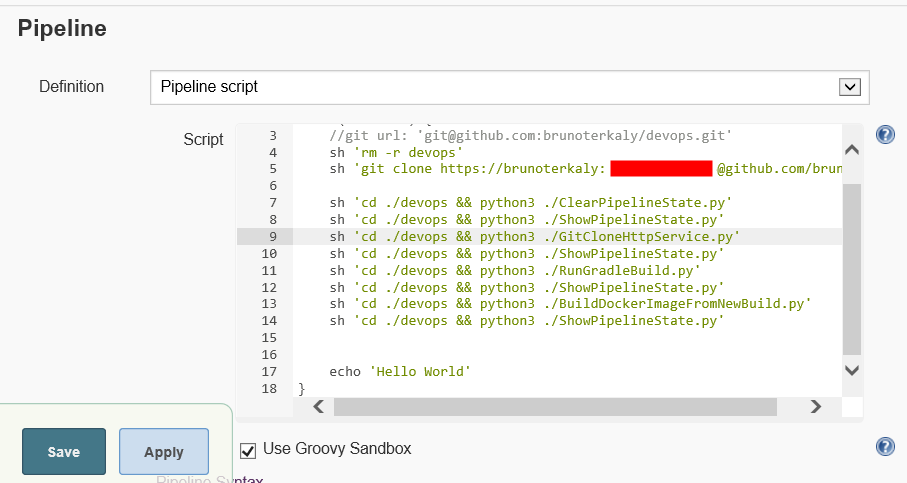
Notice in the image below that in lines 14 to 17 we update the messages table in our Jenkins database. Notice that we send false to indicate that no errors were found and true indicate that errors were found.
What we need to do next is too show you the code that represents lines 15 to 17. It is a Python script called InsertPipelineState.py
There are a few important things to notice about this python script:
Figure 2: How state management is maintained from within steps in the pipeline
There should be little mystery about what the code does below. We simply passing in a message on the boolean that represents whether or not we found an error.
Figure 3: InsertPipelineState.py - code that inserts pipeline execution state into a persistent store
So congratulations to make it all the way up to Step 3 in Figure 1. Subsequent steps will not take as long because we have already laid out the groundwork in this post and the previous one to illustrate how we would store persistent state as the pipeline executes.
Ask Learn is an AI assistant that can answer questions, clarify concepts, and define terms using trusted Microsoft documentation.
Please sign in to use Ask Learn.
Sign in