How To: Obtain SWT Security Token From Windows Azure AppFabric ACS In WPF Application Using WebBrowser Control
This post assumes you have completed steps outlined in Displaying List Of Identity Providers (IdP’s) For Windows Azure AppFabric ACS Namespace In WPF Application
In this post I will show how to obtain SWT token from Windows Azure AppFabric Access Control Service (ACS) in WPF application using WebBrowser control when federating with Internet Identity Providers (IdP’s) such as Live ID, Google, Facebook, Yahoo!, or Open ID identity providers. The SWT token can then be used when communicating with RESTful WCF service that requires issued SWT token for authentication purposes.
If you are interested to obtain SWT token from ACS when ACS manages service credentials (vs. Internet IdP’s) using Service Identities refer to the following article - WCF (REST) Service With Federated Authentication.
Summary of steps
- Step 1 – Add WebBrowser And Other Controls To Your WPF Application
- Step 2 – Configure The WebBrowser Control For Interaction Between Its Contents And The WPF Application
- Step 3 – Test Your Solution
Step 1 – Add WebBrowser And Other Controls To Your WPF Application
To add controls to your WPF application
From the toolbox drag TextBox control and place it beneath ListBox control on the Grid. This is not required and it will be used for visualization purposes only. This is where you will see the selected IdP’s sign in URL.
Double click on the ListBox control. It should open listBox1_SelectionChanged event handler in MainWindow.xaml.cs file for editing.
Paste the following code as the event handler implementation. Clicking on different IdP’s in the ListBox will show sign in URL related to the selected IdP.
string idpUrl = ((IdpInfo)e.AddedItems[0]).LoginUrl;
textBox1.Text = idpUrl;From the toolbox drag WebBrowser control on the Grid next to the ListBox. This is where the IdP’s sign in web form will display.
From the toolbox drag another Button control on the Grid and place it above the WebBrowser control. Clicking on the button will trigger the WebBrowser control navigate to the sign in URL of the selected IdP. Double click on the button to open button2_Click event handler in the MainWindow.xaml.cs file for editing.
Paste the following code as the button2_Click event handler’s implementation. Remember I am using textBox1for visualization purposes only and it is not required.
webBrowser1.Navigate(textBox1.Text);
From the toolbox drag another TextBox control on the grid and place it beneath all other controls. Resize it to accommodate large amount of text. It will display acquired SWT token. This is not required and it is used for visualization purposes only. Configure its TextWrapping property to WrapWithOverflow.
Step 2 – Configure The WebBrowser Control For Interaction Between Its Contents And The WPF Application
To configure the WebBrowser control for interaction between its contents and the WPF application
The code here is based on what’s outlined in How does WPF WebBrowser Control handle window.external.notify()?.
Open MainWindow.xaml markup for editing by double clicking on it in the Solution Explorer.
Add the following attribute to the WebBrowsercontrol markup:
Loaded="webBrowser1_Loaded"
Add related event handler to the MainWindow class in MainWindow.xaml.csfile
private void webBrowser1_Loaded(object sender, RoutedEventArgs e)
{
((WebBrowser)sender).ObjectForScripting = new HtmlInteropClass();
}Add related class to the MainWindow.xaml.csfile or in its own file added to the solution with the following implementation:
[System.Runtime.InteropServices.ComVisibleAttribute(true)]
public class HtmlInteropClass
{
public void Notify(string token)
{
((MainWindow)Application.Current.MainWindow).textBox2.Text = token;}
}The Notify method will be called by a script hosted in a web page generated by ACS upon successful authentication with selected IdP.
Compile the solution to make sure there are no compilation errors.
Step 3 – Test Your Solution
To test your solution
Run your solution by pressing F5.
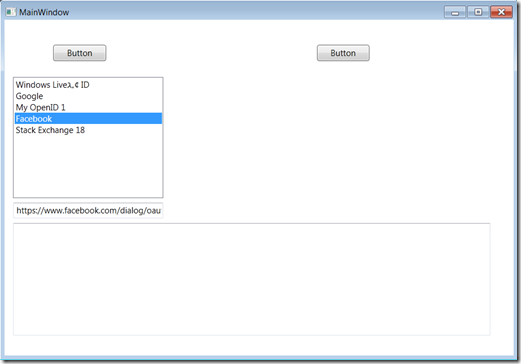
Click on the button above the ListBox. The ListBox should be populated with the configured IdP’s. Click on the IdP’s in the ListBox. Their related sign in URL’s should appear in the TextBox under the ListBoxwith IdP’s. Here is how mine looks:
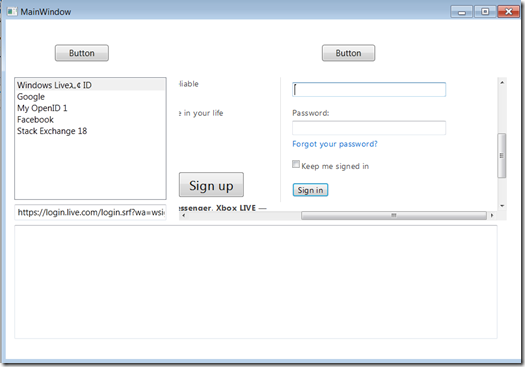
Click on the other Button on the right to load sign in page related to the selected IdP. Here is how it looks when loading Live ID sign in page:
Provide your credentials to the sign in web form and click Sing in button in it.
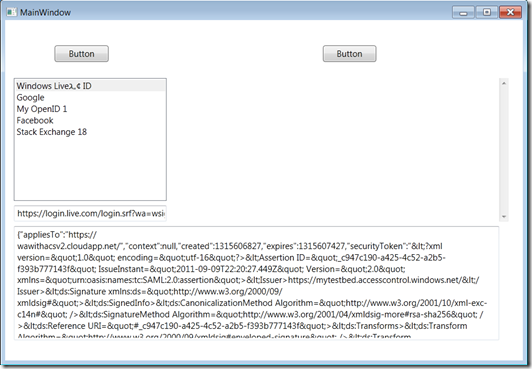
Upon successful authentication you should see the contents of the SWT token received from ACS. Here is mine:
Do the same with other IdP’s where you have active account.
Next you can use the token to submit to your RESTful WCF service and then validate it at the RESTful WCF service end. For the details on how to do it consult the following steps in How To: Authenticate to a REST WCF Service Deployed to Windows Azure Using ACS:
- Step 3 - Implement Code That Validates the SWT Token at the REST WCF Service
- Step 4 – Implement a Client That Requests The SWT Token From ACS and Forwards It To The REST WCF Service


