Application Lifecycle Management Part 5 of 5
Agile Project Management
This is the fifth blog on Application Lifecycle Management series. This part will mainly focus on Agile Project Management aspect of the ALM process. For the past few days, I have been blogging about Application Lifecycle Management, you can read the previous posts:
Application Lifecycle Management Part 1 of 5
Application Lifecycle Management Part 2 of 5
Application Lifecycle Management Part 3 of 5
Application Lifecycle Management Part 4 of 5
Agile Project Management
How are common project phases, like defining requirements, creating the design, and development, organized into frameworks? As an example, we’ll take a brief look at the rational unified process (RUP), which consists of the following four phases:
- Inception phase-Developing the core idea. By reviewing and confirming the core business drivers, the product feasibility is established and the project scope defined.
- Elaboration phase-Defining the majority of use cases and system architecture. This is where risks are identified and a schedule is set up.
- Construction phase-Implementing a system that fulfills the requirements necessary to enter the transition phase.
- Transition Phase-Ensuring all requirements are met to satisfy the stakeholders. Besides completing the software, documentation is also created. Often this phase starts with a beta release and ends with software retrospective.
RUP is a common iterative framework, and it has been successfully used in both small and large scale development efforts.
This approach is valid for all kinds of development processes. Agile projects go through these common project phases as well, in incremental and iterative way by defining requirements, designing the solution, implementing the requirements and testing the solution. For more information on agile, you can read the Agile Manifesto.
Scrum is an iterative and incremental agile framework for developing and sustaining complex products. The Scrum Guide contains the definition of Scrum. Scrum can also be used as a complete process framework. It offers a flexible skeleton that open enough to accommodate changes that will occur during the development of software.
In this post, we shall look at how Visual Studio 2012 and Team Foundation Service can help you quickly plan, manage and track work across your entire team. We shall see how to track the flow of work during the course of an iteration. We shall use our fictional company called TailSpinToys as a backdrop for the scenarios we cover. TailSpinToys is a brick and motor shop that currently sells model airplane and would like to have an online store to supplement in-store sales.
We will describe a number of scenarios that involve the development team (up to 5 members). These scenarios are based on a scrum that contains coders, testers, a product owner, a Scrum Master and other stakeholders and uses Visual Studio 2012 and Team Foundation Service to manage its source code, run builds, test its Web site and plan and track the whole product.
Let’s get started!
Working with the Product Backlog
We will use Team Foundation Service to manage the product backlog, create work items, break product backlog into tasks and assign tasks to team members. This new backlog features will enable you to easily do all this work and keep track of work progress.
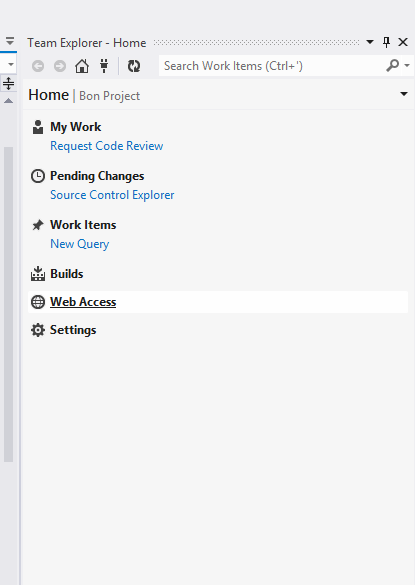
First, launch the web access from Team Explorer or browse to Web Access as shown below.
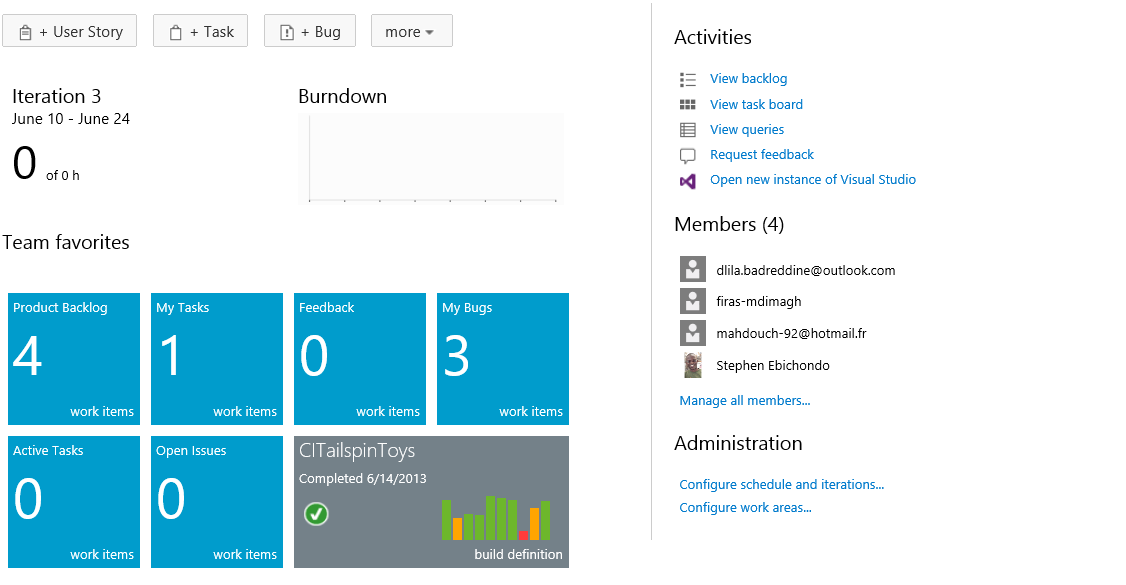
As you can see from the figure below, the home view of the Tailspin Toys project provides a high level summary of the current iteration (Iteration 3) including team workload versus capacity, burndown of tasks over time and team favorites, which can include a configurable assortment of work item queries, build definitions and version control paths. In addition, there are links to create new work items and bugs, view the backlog and task board, initiate requests for feedback and so on.
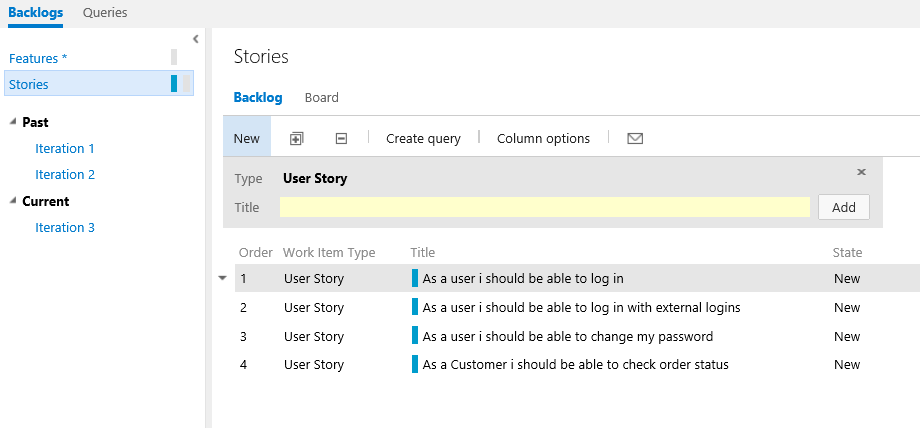
The product backlog can be reviewed by selecting the View Backlog link under Activities, which displays the backlog shown below. The product backlog contains items or bugs that have not yet been assigned and committed to an iteration. These items represent product background item stories that will eventually be broken down into smaller tasks for the team to take on. The current iteration shown in the tree on the left side is Iteration 3. Team Foundation Service uses the current date and time to determine the current iteration.
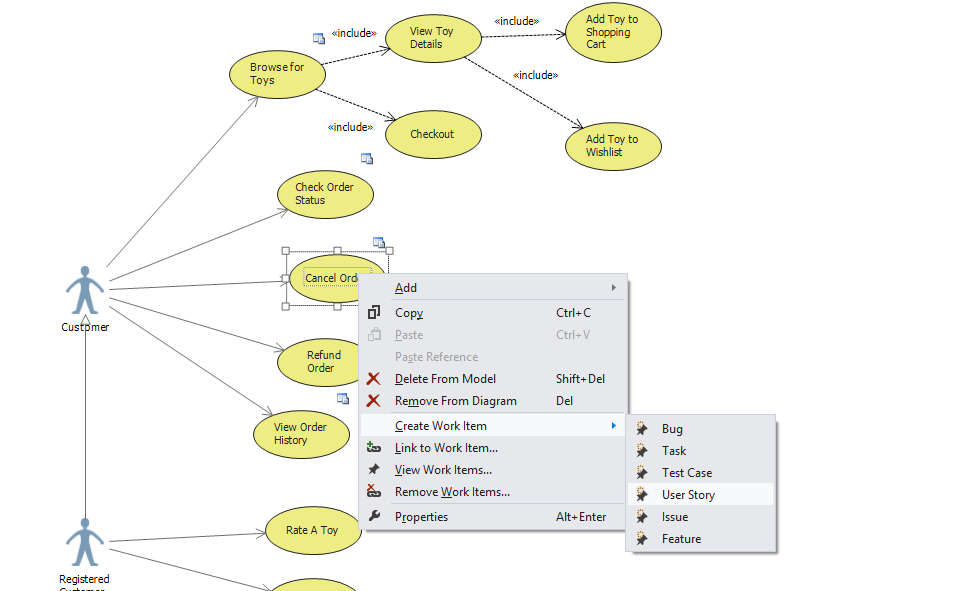
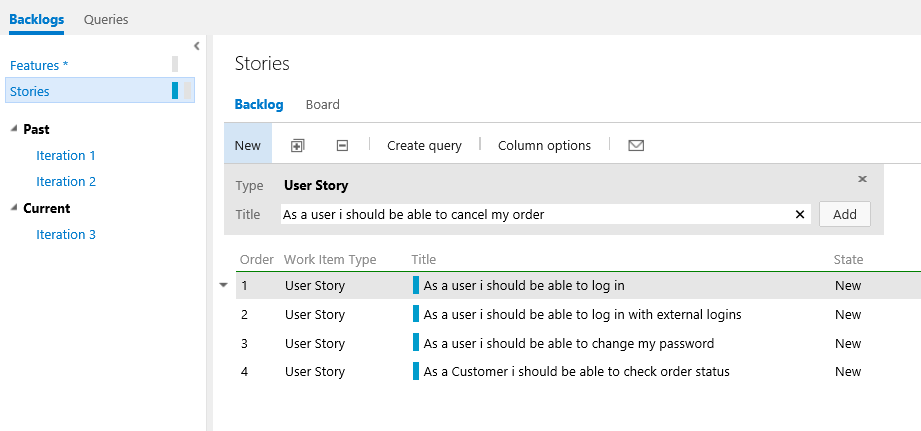
Suppose we wanted to capture a new requirement (Cancel Order) which would allow the user to cancel an order they have placed on Tailspin Toys online store, we could do it in two ways:
From Customer Use Case Diagram in Visual Studio, we would right click and create a new user story as shown below.
From Team Foundation Service click on New and Add the user story. New work items are inserted at the top of the list, we can therefore move it to a lower position depending on its priority by dragging it into place.

Now it’s time to assign the new backlog item to the product owner (yours truly) and record an initial estimate of expected effort. First you need to select the user story for edit as shown below.
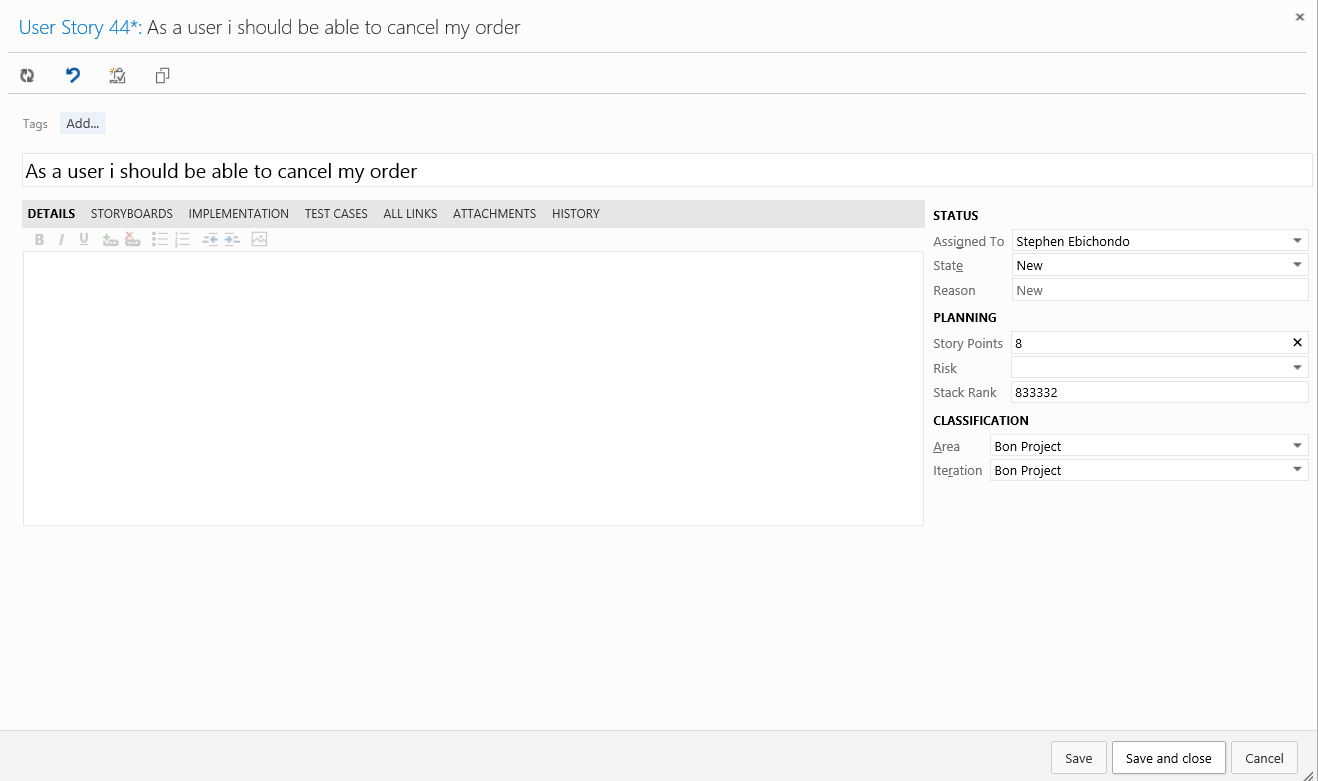
Why 8? Each team can choose to define the Effort value as they see fit, using a unit of story points or the number of sodas required. The point here is that this measure is a relative value with respect to other work items. Work will be broken down into hours later. Note: A popular planning approach that helps to eliminate groupthink and considers input from all team members is known as planning poker. You can read more about it at https://en.wikipedia.org/wiki/Planning_poker.
You can assign the new user story to the current iteration, by dragging it as shown below.
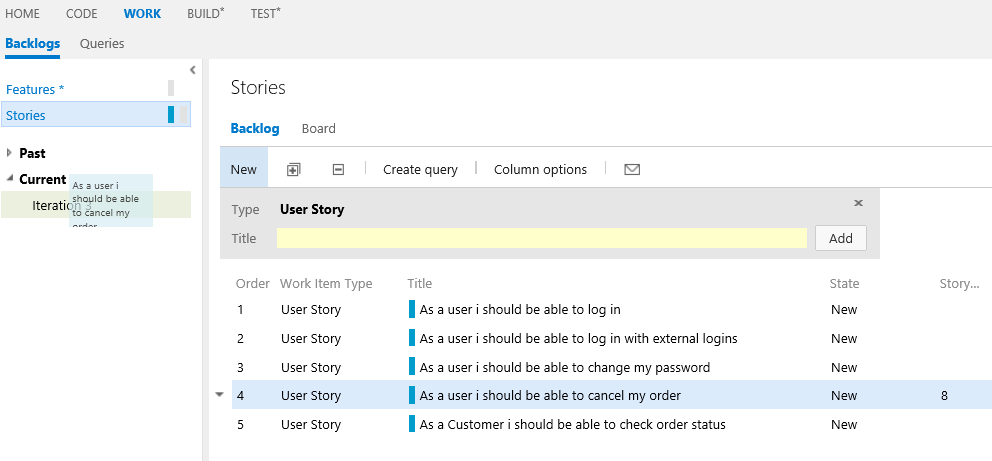
Note: If you are a Scrum purist, you are probably cringing at the fact that we just added new work to a midflight iteration. While this is something you might never do in the real world, this shortcut is taken for the purposes of this blog to simplify the workflow and still show you all the aspects of the new project management interface. Look at the Iteration Path column for the new user story to be sure that it was assigned to Iteration 3 as expected. This user story will remain on the product backlog until the team commits to taking it on.
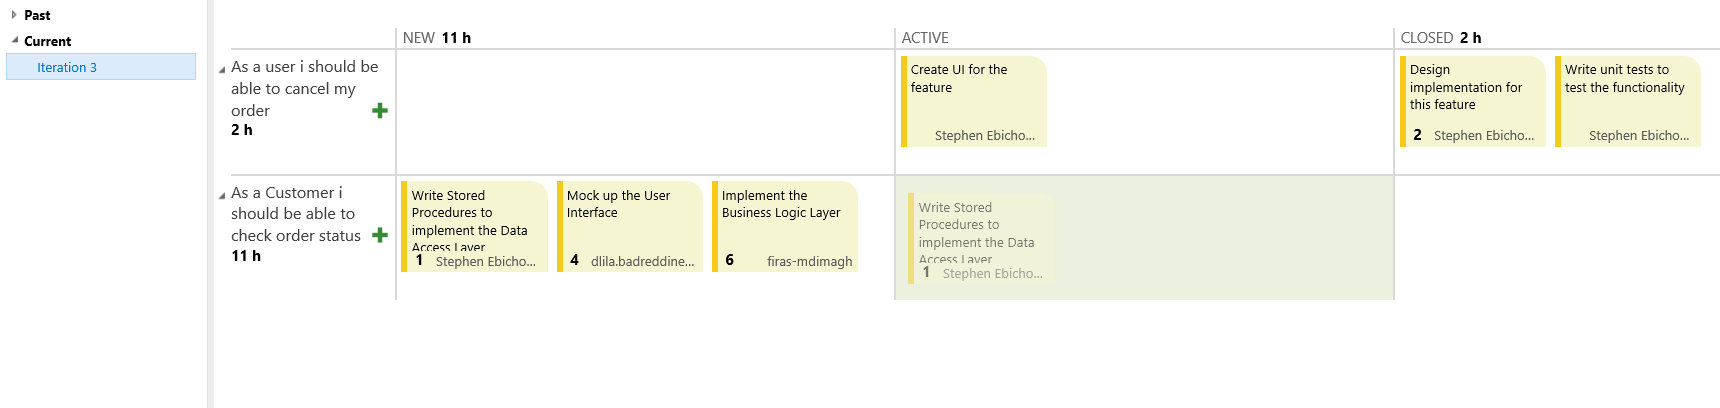
Now click the Iteration 3 in the list of available iterations. This iteration shows all user stories and associated tasks assigned to the selected iteration, regardless of state, as shown below.
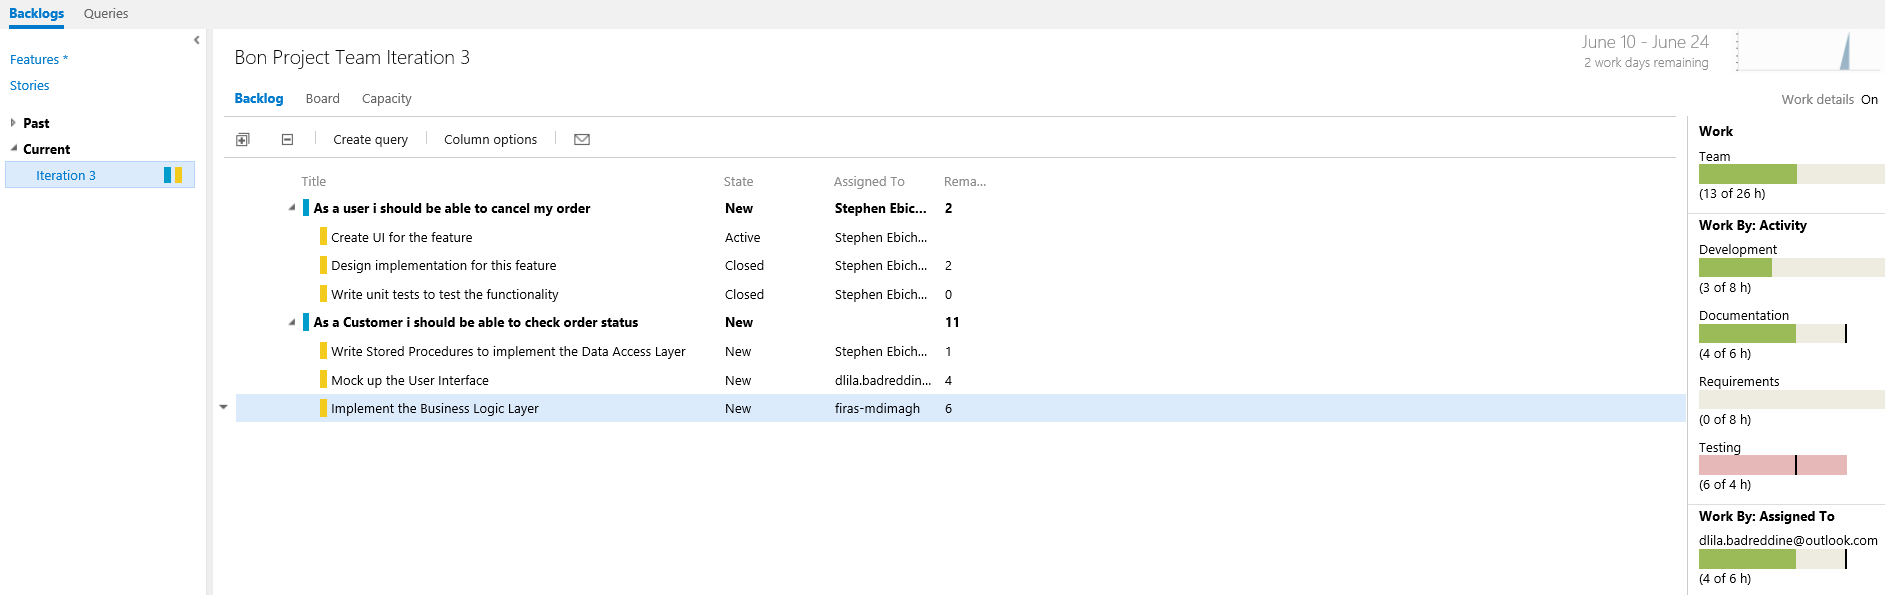
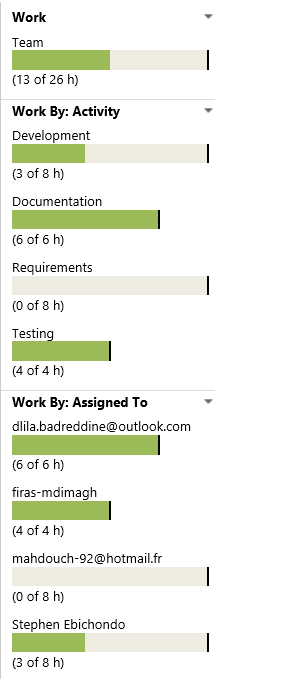
At a glance, we can see that the current iteration runs from June 10 to June 24, with two working days remaining. Just to the right of the current iteration date range, in the upper-right corner, there is a small graph showing the burndown of the remaining work. Also locate the overall Work bar (just under the graph). This shows how close to capacity we are for the current iteration based on the total of the remaining work for the tasks in this iteration and based on the total capacity for the team. It looks like we are okay for now, but we still have not broken the new user story into tasks for the team yet.
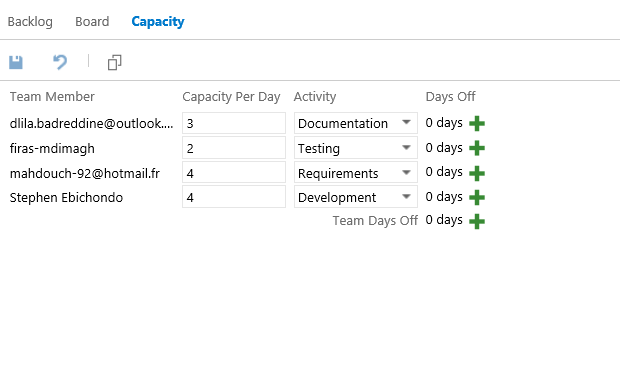
The Capacity view allows us to specify the number of hours per day that each team member will be working on this project, as well as days off per team member and overall team days off. These capacity settings apply to the current iteration. Use the Activity column
to describe the disciplines that each team member specializes in. This provides you with another view across your team’s capacity to determine whether, for example, you have enough people working on documentation to meet the demands for this iteration. For now, leave the capacity settings unmodified, as shown below.
Now assume that we are meeting as a team to commit to the new product backlog item story and break it up into tasks. Drag the new work item to the ACTIVE column. Once the team commits to the work, the item is moved from the product backlog.
Now the decision has been made to proceed with committing to the new work item. Let’s return to the Iteration 3 backlog view and add a new task that will become a child task of the user story and will be used to help describe the implementation details required to
complete this user story as shown below.
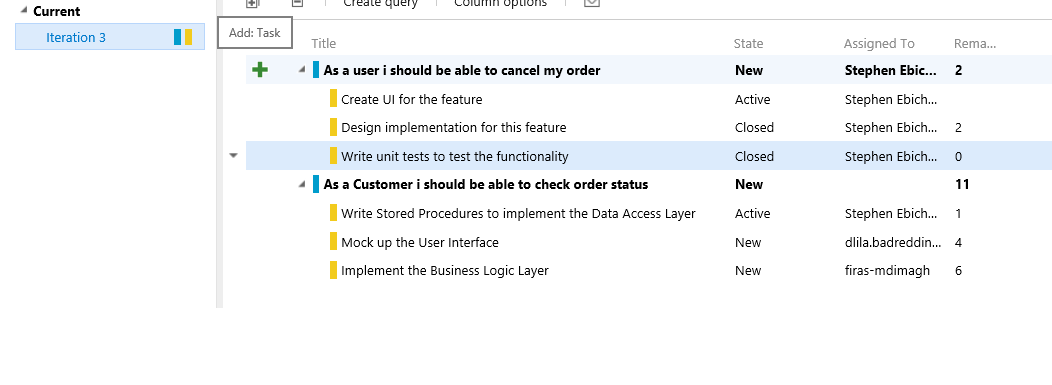
We shall create another task “Document the functionality” and assign it to dlila. The estimation of this task is 2 hours, and this value is entered in the Remaining Work Field.
Note that the new tasks are added as children of the product backlog item story and that some of the work effort bar graphs have now turned red. This indicates that we have too much work assigned to the team based on its available capacity.
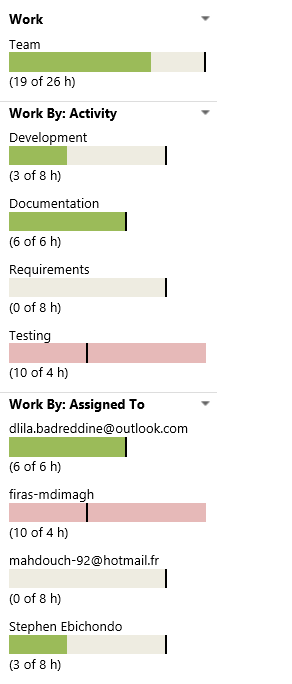
It looks like the last user story in this sprint is a sizable one, and it has not been started yet, so this could be a good candidate to reschedule for a future iteration so that the team can get back on track given its additional workload. Drag the last user story, titled “As a customer I should be able to Refund my order” to Iteration 4 on the left side of the window.

Now look at the overall work bar once again to make sure it is green. This means that we are well within the current team capacity, as shown below.
Lastly
I hope this is has been a useful series on how an integrated Application Lifecycle Management approach can lead to protection of your software assets, improved code reuse, better requirements traceability, cleaner code and improved test results. With a high level of
automation, seamless integration and service-orientation you shall be well on your way to successful projects and better team awareness.
Happy coding!