Routing using Bing Maps for Windows Store Apps
One of the most common tasks carried out by online maps users is taking an address and returning its equivalent coordinates as a location on the map. So when you simply type a location, like “Kampala”, on the Bing maps search bar, the underlying process takes your address and translate it into coordinates. This is what is known as geocoding.
Assuming then you take two addresses, let’s say Kampala and Nairobi, and query the map on how to get from Kampala, in Uganda, to Nairobi in Kenya, then the underlying process is what is known as routing.
In this blog post, we are going to look at how to calculate the route for two given locations for a Windows Store app using the Bing Maps REST services. But let us track back a little bit and talk about REST. Bing Maps provides a Representational State Transfer interface for accessing a collection of resources by using a URL and the HTTP GET and POST methods, same as you would with a classic web service. Have a look at this link for more on the Bing Maps REST services.
Our Windows Store App ...
- Create a new Windows Store application; we shall be using C# for the code behind.
- We then add a few libraries to help us with the serialization of the Bing Maps REST services. You can simply add the class file BingMapsRESTServices.cs in the demo project attached on this blog post.
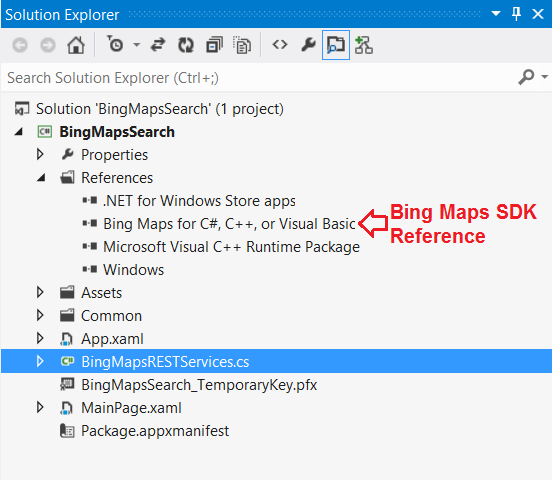
- Add the Bing Maps SDK references under Bing Maps for C#, C++ and Visual Basic.
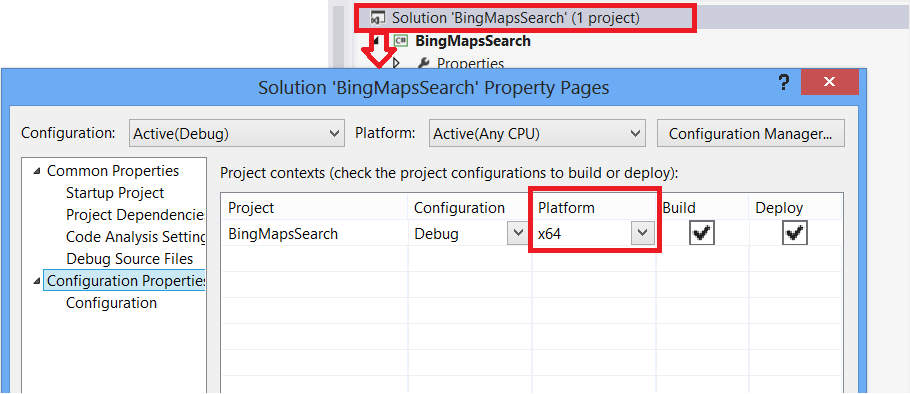
Keep in mind the fact that the SDK is platform specific; you will therefore need to specify your development platform under Solution->Properties->Configuration
Our UI …
Ideally, we need 2 textboxes to hold the source and destination respectively; a button which, when clicked, gets us the route on Bing maps;
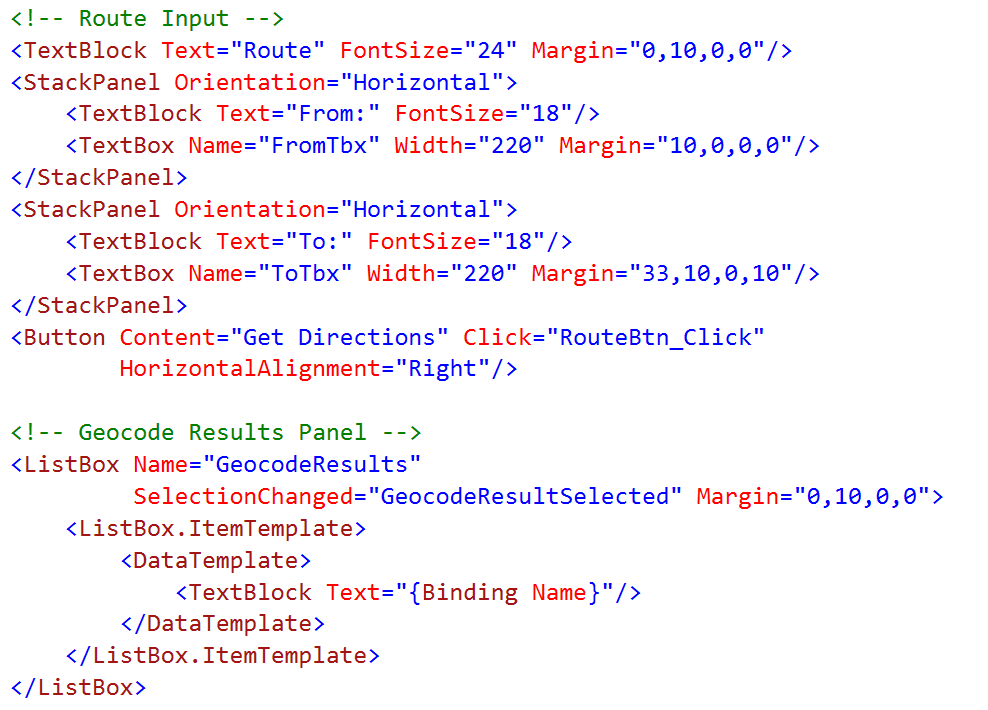
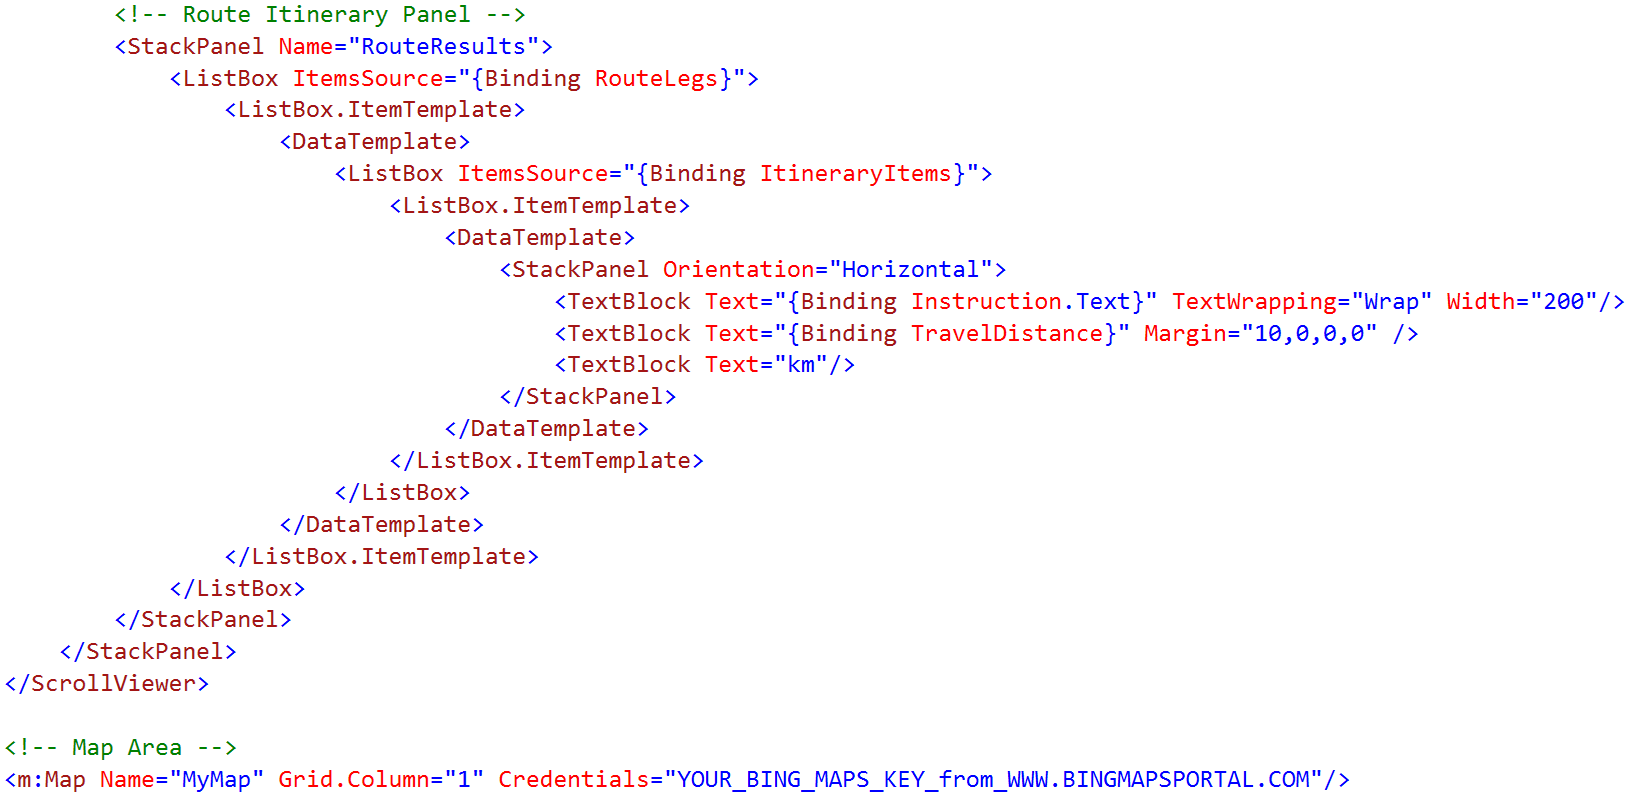
... a geocode results panel; a route itinerary panel; and finally a map that shows the actual route from start to destination.
We do all this on our XAML MainPage (the full project code is attached on this blog post)
Of particular interest to us is the Map control area; remember to include the Bing Maps key you got from www.bingmapsportal.com
Under the hood
So let’s have a look at the routing logic.
- When we click on “Get Directions”, we first validate that the source and destination are valid locations, else we raise a message dialog.
- We then create the URL to get the driving route between the two locations and then pass this URL to our GetResponse method. (The Response class is a data contract defined in our BingMapsRESTServices.cs library class).

When the service responds, we display the route line on the map as follows:

We then display the route itinerary items in a ListBox in the side panel.

We are now ready to run our application and see the displayed route from Kampala to Nairobi. Our application appears as below:

(The full project is attached on this blog post)
To get you up and running on Bing Maps for Windows Store Apps, have a look at this great Bing Maps Training Kit hosted at codeplex.