MVC + Code-First + Azure Part 2: Deployment
The information in this post is out of date.
Visit msdn.com/data/ef for the latest information on current and past releases of EF.
In the previous article, you learned how to create a basic MVC application using Code First. In the second and final section you will learn how to prepare and deploy your application to Windows Azure using Visual Studio.
Deploying to Windows Azure
Preparing Application
Having tested our app locally, it is time to set up Azure to deploy our app. Although this process may seem long, all the steps except for deployment only have to be done once per application.
First thing we must do before deploying is ensure our project has access to all of the assemblies we are referencing. Windows Azure machines run .NET 4.0, so we have to copy any new assemblies we may be using. We do this by going to the Solution Explorer on Visual Studio, expanding the References folder. Now we right click on EntityFramework and select Properties from the Context UI. Next, on the properties window, we set Copy Local equal to ‘True’.
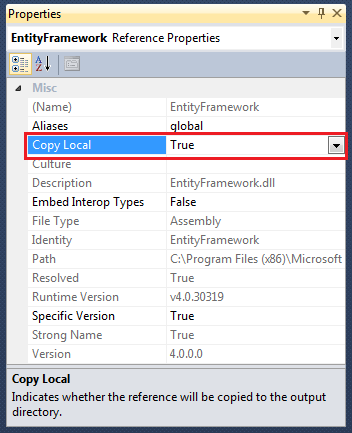
Repeat this process for:
· Microsoft.WindowsAzure.Diagnostics
· Microsoft.WindowsAzure.StorageClient
· System.ComponentModel.DataAnnotations
· System.Web.Mvc
· System.Web.Routing
New Storage Account
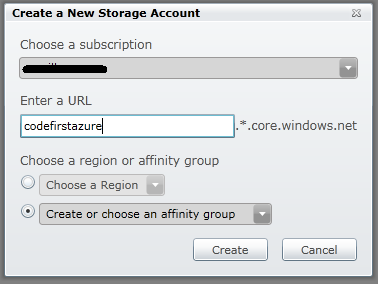
We need to create a storage account through the Management Portal. Go to the ‘Hosted Services, Storage Accounts, & CDN’ section, and click on Storage Accounts. Select New Storage Account on the Ribbon, and on the dialog box enter a URL name. Make this name unique for your app. In this example we will use codefirstazure.
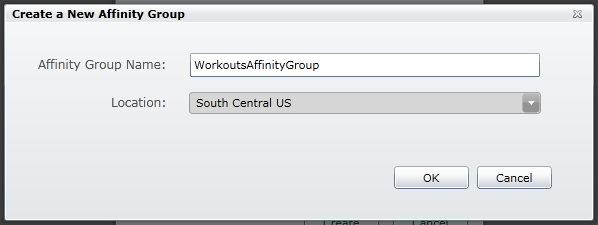
Now create an affinity group. We do this so that both, the storage account and the hosted service reside within the same data center, which is good for application performance. Name the Affinity Group WorkoutsAffinityGroup, and select a location near you.
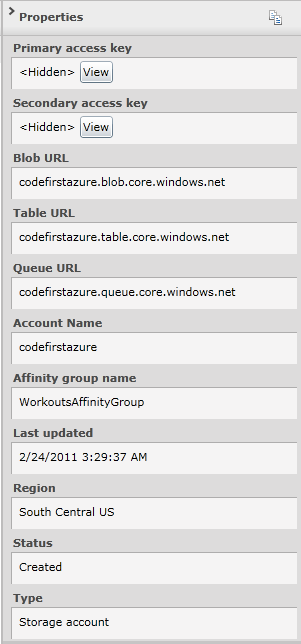
Note the properties pane contains some information about the storage account. We will use some of this information later to deploy our application.
New Hosted Service
Creating Hosted Service
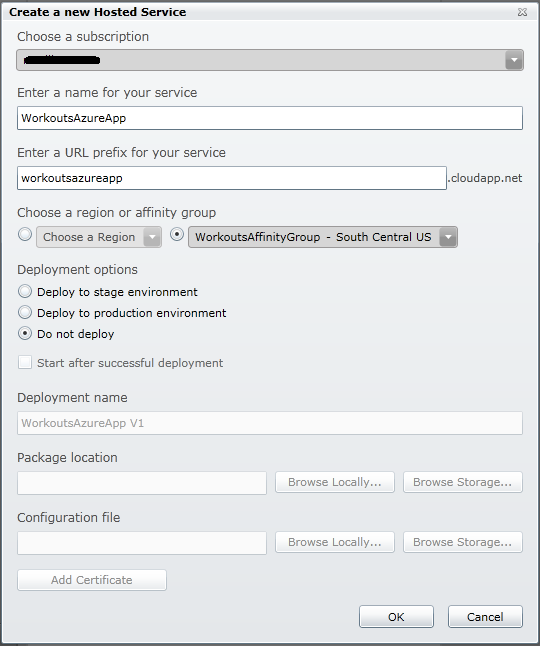
On the azure portal, click on ‘Hosted Services, Storage Accounts & CDN’ and then click on New Hosted Service. Enter a name for your service on the new window. We will call ours WorkoutsAzureApp. Enter workoutsazureapp on the URL Prefix textbox. Now click on the radio button to ‘Create or choose an affinity group’ and select the affinity group we created in the previous step. Under Development options, select ‘Do not deploy’, then hit OK.
Publishing Application
In visual studio, right click WorkoutsAzureApp and click Publish… Under Credentials, hit <Add…> .
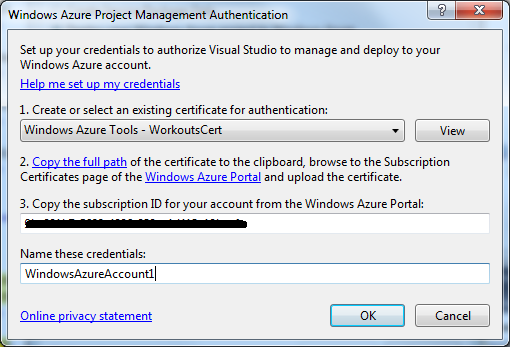
Now, on the new dialog, create a new certificate for authentication by clicking on the dropdown and selecting <Create…> . Enter a friendly name for the certificate. We will call ours WorkoutsCert. Click on ‘Copy the full path’ on the authentication window, then go back to the Management Portal and upload the certificate. To do this, click on Hosted Services, Storage Accounts & CDN. Then click on Management Certificates on the left hand menu, and click on Add a Certificate on the Ribbon.
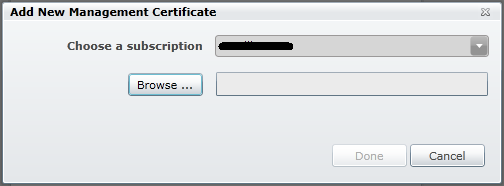
On the new dialog window, click browse, then paste the path currently on your clipboard onto the ‘File name’ textbox. Now click Open, then click Done.
Now, on the Management Portal, copy the subscription ID that shows up on the properties pane on the left. Then go back to Visual Studio and paste it on the textbox asking for the subscription ID on the Windows Azure Project Management Authentication textbox. Name the credentials ‘WindowsAzureAccount’ Click OK.
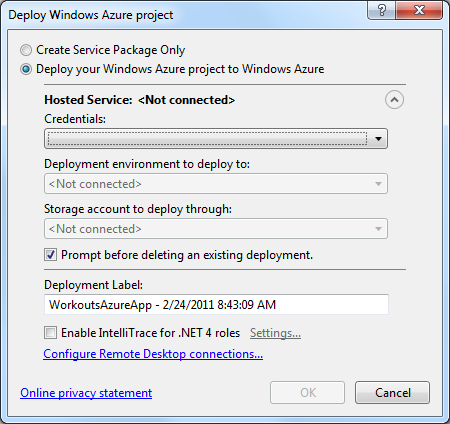
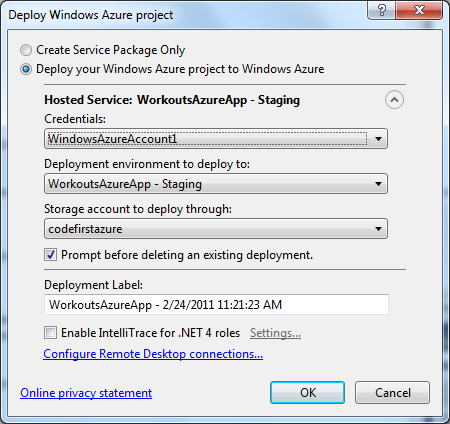
At this stage, the Deploy Windows Azure project should be all filled in. Click OK to begin deployment.
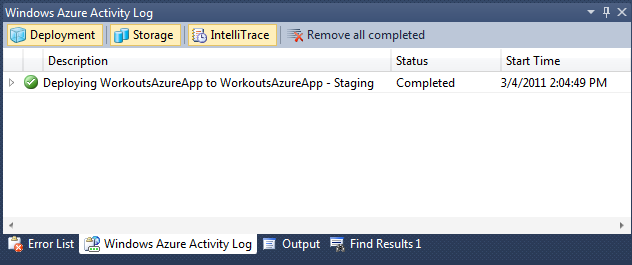
The app will begin deployment. You can see the progress on the Windows Azure Activity Log.
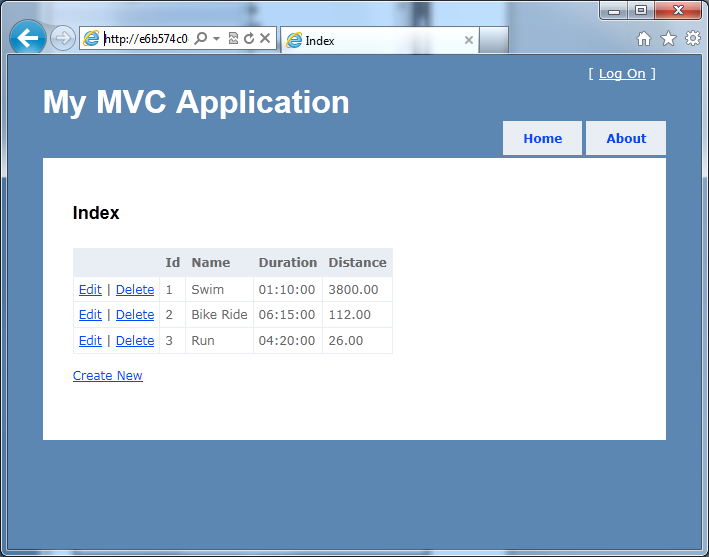
When deployment completes, go to the Windows Azure Portal and click on the Deployment node. Next, click on the link under DNS name. This will bring up our application:
Maintaining the App
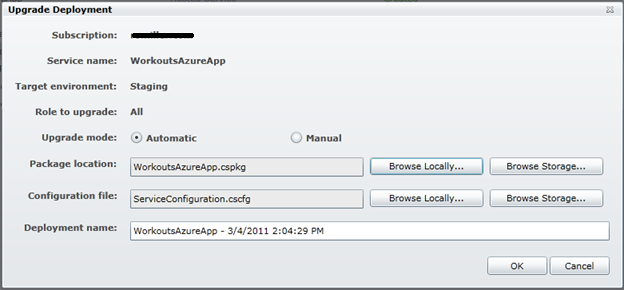
Development won’t stop after you deploy the first time. If you would like to make more changes to the application, the fastest way to do so is by upgrading the deployment, rather than redeploying from scratch. To do so, right click on WorkoutsAzureApp on Visual Studio and select Publish… . Now select ‘Create Service Package Only’ and click OK. A windows explorer window will open, showing you a file named ‘WorkoutsAzureApp.cspkg’ and another one named‘ServiceConfiguration.cscfg’. Now go back to the Management Portal, go to the ‘Hosted Services, Storage Accounts & CDN’ section, and then click on the Hosted services folder. Now select your deployment, and click Upgrade on the Ribbon. On the new pop-up, click Browse Locally… next to the Package location textbox, and browse to the location of the two files created by publishing. Select the WorkoutsAzureApp file, and then repeat this task for the Configuration file. With the two files selected, click OK and the deployment will begin. When it finishes, your application should be ready to be used again.
Conclusion
In this exercise, you have learned how to build an MVC Web App that is hosted in Windows and SQL Azure, using code first. We covered the basics of code first, and showed you the simplest way to deploy your applications to the cloud. At this point, you should be able to write and deploy your own apps to Azure from Visual studio. We hope that you find this article helpful. Please be sure to leave your feedback in the comments section.